









































How to Get Rid of Fleas in the House: A Full-Home Guide for Pet Owners
02.09.24 September 02, 2024 Health

How to Get Rid of Fleas in the House: A Full-Home Guide for Pet Owners

Fleas have a way of making themselves very much at home before you even know they have arrived, and by the time you spot the signs, the problem is rarely just your cat. This guide covers everything you need to know about how to remove cat fleas from your whole home, from understanding the flea life cycle to cleaning room by room, choosing the right treatments, and making sure they do not come back. Think of it as your practical plan from first signs to finally being flea-free. How to tell you’re dealing with fleas in the house If your cat has been scratching more than usual, the problem probably isn't confined to them. Cat fleas spread fast, and by the time you spot one, they've typically already settled into your carpets, claimed your sofa, and tucked themselves into the folds of your cat's favourite napping spot. The signs can be subtle to begin with. You might notice your cat grooming obsessively, or find small dark specks on their bedding that look a bit like ground pepper. That's flea dirt — essentially flea faeces made up of digested blood. To check, dab the specks with a damp piece of white tissue. If they turn reddish-brown, you've got fleas. It's worth looking beyond your pet, too. Run your fingers through carpet fibres in the warm, sunny patches near windows or beside the sofa — fleas are drawn to warmth and movement, so these are prime spots. Check along sofa seams and cushions, and anywhere your cat tends to curl up. Unexplained bites around your own ankles or lower legs are another reliable sign that fleas have moved well beyond your pet. Some people only realise they have an infestation when they return from holiday. The house has been quiet and still, so juvenile fleas have been waiting. The moment they sense vibration and warmth again, they hatch all at once. It's unpleasant timing, but it tells you something important about how fleas behave — which we cover in more detail in the next section. Getting on top of cat fleas properly means treating the whole home, not just your pet. This guide walks you through exactly that, room by room. If you'd also like a focused breakdown of in-home treatment steps, our guide on how to remove cat fleas from your home is a useful read alongside this one. Why fleas keep coming back: the flea life cycle explained If you've ever treated your cat and hoovered the house, only to spot fleas again a week later, the flea life cycle is almost certainly why. Understanding how fleas develop is the single most important part of tackling a home flea infestation, because it explains exactly why one round of cleaning rarely finishes the job. Eggs: Adult fleas lay their eggs directly on your cat, but those eggs don't stay there for long. They fall off into carpets, bedding, and soft furnishings within hours. A single female can lay up to 50 eggs a day, and flea eggs in carpet can survive for weeks, quietly waiting for the right conditions to hatch. Larvae: Once hatched, larvae burrow deep into carpet fibres, rugs, and the seams of pet bedding, feeding on debris and avoiding light. This stage can last anywhere from a few days to several weeks depending on your home environment. Pupae: Larvae spin sticky cocoons that cling to carpet and upholstery fibres. This is the most stubborn stage of all, and it can last for months. Adults: When a warm host passes nearby, adults emerge and jump straight onto your cat or, less pleasantly, you, and the whole cycle begins again. Worth knowing: Up to 95% of a flea infestation lives in your home environment as eggs, larvae, and pupae rather than on your pet. Treating your cat without treating the home leaves the vast majority of the problem completely untouched. The pupal stage is particularly resistant to sprays and hoovers. Pupae can sit dormant for months, then hatch in response to warmth and vibration, which is why fleas seem to reappear even after a thorough clean. It's not that you did it wrong. It's just that the life cycle isn't finished yet. That's why consistent, repeated home treatment matters as much as treating your cat. The Zero In Flea Killer Refill Kit is a practical option for targeting multiple life stages across the home, exactly the kind of approach that actually breaks the cycle rather than just interrupting it. The full-home flea clean: where to start room by room Tackling a flea infestation can feel overwhelming, but working through your home room by room makes the whole process far more manageable. The important thing to remember is that fleas spread well beyond your cat's favourite sleeping spot — flea eggs work their way into carpets, soft furnishings, and floor edges all over the house, often without you noticing. A methodical approach to home flea infestation treatment is genuinely the most effective way to get on top of it. Living room. This is usually ground zero, especially if your cat has claimed the sofa or a favourite armchair. Vacuum every inch of carpet, paying close attention to the edges along skirting boards and under furniture, where flea eggs in carpet tend to accumulate undisturbed. Pull sofa cushions off and vacuum underneath them too, then wash any throws or blankets your cat uses on a hot cycle. Bedrooms. If your cat sleeps on your bed — or sneaks in at night when you're not looking — your bedroom needs the same treatment as the living room. Strip the bed and wash all bedding at 60 degrees. Vacuum under the bed, along the base of wardrobes, and into corners where eggs and larvae can go unnoticed for weeks. Hallways and stairs. Easy to overlook, but cats move through these spaces constantly, shedding eggs as they go. Vacuum carefully along each stair edge, including the gap where carpet meets the riser. Run the vacuum along skirting boards throughout the hallway while you're at it. Your cat's sleeping and resting areas. Whether your cat has a dedicated bed or a favourite blanket draped over a chair, this area deserves extra attention when you're working out how to remove cat fleas effectively. Wash any bedding at the highest safe temperature, vacuum the surrounding floor thoroughly, and treat the area with a household flea spray once it's clean. Laundry and utility areas. Cats are drawn to warm corners near boilers and utility rooms, so don't skip these. Vacuum thoroughly, wash any fabric items your cat has had access to, and keep the area clear as part of your ongoing flea prevention for cats routine. Worth knowing: Flea eggs can make up around 50% of the total flea population in your home at any one time. Vacuuming daily for two weeks after treating helps remove newly hatched larvae before they develop further, which makes a real difference to how quickly the infestation clears. Treating every room at the same time gives you the best chance of breaking the flea life cycle before it restarts. That said, cleaning your home alone won't be enough — your cat needs proper treatment at exactly the same time, which we'll cover in the next section. Choosing the best household flea spray and other home treatments A good household flea spray can make a real difference, but it works best as part of a broader plan. Spraying your home without thoroughly cleaning first, or without treating your cat at the same time, will only get you so far. Think of it as one layer in a multi-step approach rather than a standalone fix. What to look for when choosing a household flea spray: Contains an IGR (insect growth regulator) — the key ingredient for tackling flea eggs in carpet and stopping larvae from developing into adults Clearly labelled as safe for homes with pets and children, with guidance on when it's safe to re-enter the room Offers residual action — ideally protecting treated surfaces for several months, which really matters during a home flea infestation treatment Compatible with your flooring and soft furnishings, including carpets, sofas, and pet bedding Comparing common home flea treatment formats: Format Ease of Use Coverage Pet-Friendly Suitability Spray High — targeted application Room by room Good, when used as directed Powder Moderate — requires vacuuming after Carpets and upholstery Good for carpeted areas Fogger/Flea Bomb Lower — requires leaving the home Whole room at once Variable — always check the label IGR — Insect Growth Regulator: A chemical that stops flea eggs and larvae from developing into adult fleas, breaking the life cycle before it can restart. Without it, any surviving eggs will simply hatch and you're back to square one. One thing worth repeating: treating your home without treating your pet at the same time means fleas will keep finding their way back onto freshly cleaned surfaces. For cat flea treatment and ongoing flea prevention for cats that works alongside your home treatment, the flea and worming range at Lords and Labradors is a good place to start. Getting both sorted together really is the only way to break the cycle for good. Treat your pets at the same time — and don’t skip the cat Cleaning every room in the house will only get you so far if your cat is still carrying fleas. They’ll hop straight back onto your pet, lay more eggs, and before long you’re dealing with the same problem all over again. If you’re working out how to remove cat fleas, the key is to treat your home and your cat at the same time, ideally on the same day. Cats are easy to miss in the flea picture. Because they groom so well, they can swallow or brush away visible fleas before you notice them. That means a cat can still be part of the problem even if you haven’t spotted live fleas. Choose a vet-approved cat flea treatment. Spot-on or oral treatments are usually much more reliable than shampoos or collars on their own. Your vet can help you pick the safest option for your cat’s age, size, and routine. Untreated cats keep dropping flea eggs into the home. Those eggs end up in carpet, bedding, and on the sofa, which is why flea eggs in carpet can keep hatching even after a big clean. Keep flea prevention for cats going all year. Fleas love warm homes, so they’re not just a summer issue. Regular prevention makes a big difference once the infestation is under control. Treat every pet in the house together. One untreated pet can undo all your hard work. Worth knowing: Fleas on your cat can lay up to 50 eggs a day, and those eggs quickly spread through soft furnishings and floors. That’s why home flea infestation treatment works best when pet treatment happens alongside it. For more help on how to get rid of fleas on cats, read our guide on how to care for a cat with fleas. If you’ve got dogs too, follow a separate dog-specific flea guide for their treatment, as products and dosing can differ. How long it takes to clear fleas and how to stop them returning Most people expect to deal with fleas for a week and move on. The reality is a little more patience-testing than that. A full home flea infestation treatment typically takes anywhere from three to twelve weeks to fully resolve, depending on how established things are and how consistently you keep up with cleaning and treatment. The reason it takes this long comes back to those flea eggs buried in your carpets and soft furnishings. Adult fleas are actually the easy part. It is the dormant stages — the eggs and pupae — that keep the cycle going. That is why vacuuming every two to three days, washing pet bedding weekly, and keeping your cat's flea protection topped up throughout this period all matter so much. One round of treatment rarely clears everything. The routine is what gets you there. A simple habit worth building into your week: vacuum, wash your cat's bedding, check your cat's flea prevention. That three-step rhythm, done consistently, is genuinely what separates a flea problem that keeps coming back from one that finally stays gone. Once you are through the other side, prevention is far simpler than cure. Keeping on top of regular cat flea treatment year-round is the single most effective thing you can do. Fleas do not take winters off, particularly in centrally heated homes, so monthly or quarterly treatment makes sense regardless of the season. You can browse flea and worming options at Lords and Labradors to find what suits your cat best. Knowing how to remove cat fleas properly is the hard bit. Keeping them away just takes consistency — and you have already done the hard work. Frequently Asked Questions What kills cat fleas in the house? A full-home approach works best: vacuum thoroughly, wash pet bedding and soft furnishings on a hot cycle, and use a household flea spray with an insect growth regulator (IGR). The key is treating your cat at the same time, because most fleas live in the home as eggs, larvae, and pupae. Do I need to treat my house if my cat has fleas? Yes, you do need to treat your house if your cat has fleas. Most of a flea infestation lives in the home rather than on your pet, with eggs, larvae, and pupae hidden in carpets, bedding, sofas, and skirting-board edges, ready to hatch and restart the cycle.

By Laura Rudd

Read more

Fleas have a way of making themselves very much at home before you even know they have arrived, and by the time you spot the signs, the problem is rarely just your cat. This guide covers everything you need to know about how to remove cat fleas from your whole home, from understanding the flea life cycle to cleaning room by room, choosing the right treatments, and making sure they do not come back. Think of it as your practical plan from first signs to finally being flea-free.

How to tell you’re dealing with fleas in the house

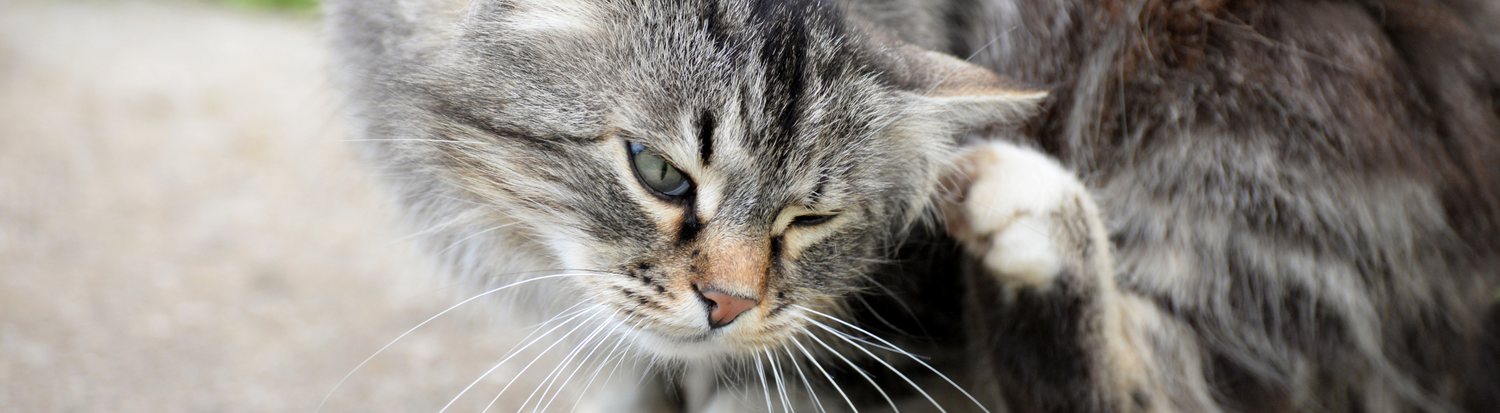
If your cat has been scratching more than usual, the problem probably isn't confined to them. Cat fleas spread fast, and by the time you spot one, they've typically already settled into your carpets, claimed your sofa, and tucked themselves into the folds of your cat's favourite napping spot.

The signs can be subtle to begin with. You might notice your cat grooming obsessively, or find small dark specks on their bedding that look a bit like ground pepper. That's flea dirt — essentially flea faeces made up of digested blood. To check, dab the specks with a damp piece of white tissue. If they turn reddish-brown, you've got fleas.

It's worth looking beyond your pet, too. Run your fingers through carpet fibres in the warm, sunny patches near windows or beside the sofa — fleas are drawn to warmth and movement, so these are prime spots. Check along sofa seams and cushions, and anywhere your cat tends to curl up. Unexplained bites around your own ankles or lower legs are another reliable sign that fleas have moved well beyond your pet.

Some people only realise they have an infestation when they return from holiday. The house has been quiet and still, so juvenile fleas have been waiting. The moment they sense vibration and warmth again, they hatch all at once. It's unpleasant timing, but it tells you something important about how fleas behave — which we cover in more detail in the next section.

Getting on top of cat fleas properly means treating the whole home, not just your pet. This guide walks you through exactly that, room by room. If you'd also like a focused breakdown of in-home treatment steps, our guide on how to remove cat fleas from your home is a useful read alongside this one.

Why fleas keep coming back: the flea life cycle explained

If you've ever treated your cat and hoovered the house, only to spot fleas again a week later, the flea life cycle is almost certainly why. Understanding how fleas develop is the single most important part of tackling a home flea infestation, because it explains exactly why one round of cleaning rarely finishes the job.

  • Eggs: Adult fleas lay their eggs directly on your cat, but those eggs don't stay there for long. They fall off into carpets, bedding, and soft furnishings within hours. A single female can lay up to 50 eggs a day, and flea eggs in carpet can survive for weeks, quietly waiting for the right conditions to hatch.
  • Larvae: Once hatched, larvae burrow deep into carpet fibres, rugs, and the seams of pet bedding, feeding on debris and avoiding light. This stage can last anywhere from a few days to several weeks depending on your home environment.
  • Pupae: Larvae spin sticky cocoons that cling to carpet and upholstery fibres. This is the most stubborn stage of all, and it can last for months.
  • Adults: When a warm host passes nearby, adults emerge and jump straight onto your cat or, less pleasantly, you, and the whole cycle begins again.

Worth knowing: Up to 95% of a flea infestation lives in your home environment as eggs, larvae, and pupae rather than on your pet. Treating your cat without treating the home leaves the vast majority of the problem completely untouched.

The pupal stage is particularly resistant to sprays and hoovers. Pupae can sit dormant for months, then hatch in response to warmth and vibration, which is why fleas seem to reappear even after a thorough clean. It's not that you did it wrong. It's just that the life cycle isn't finished yet.

That's why consistent, repeated home treatment matters as much as treating your cat. The Zero In Flea Killer Refill Kit is a practical option for targeting multiple life stages across the home, exactly the kind of approach that actually breaks the cycle rather than just interrupting it.

The full-home flea clean: where to start room by room

Tackling a flea infestation can feel overwhelming, but working through your home room by room makes the whole process far more manageable. The important thing to remember is that fleas spread well beyond your cat's favourite sleeping spot — flea eggs work their way into carpets, soft furnishings, and floor edges all over the house, often without you noticing. A methodical approach to home flea infestation treatment is genuinely the most effective way to get on top of it.

  1. Living room. This is usually ground zero, especially if your cat has claimed the sofa or a favourite armchair. Vacuum every inch of carpet, paying close attention to the edges along skirting boards and under furniture, where flea eggs in carpet tend to accumulate undisturbed. Pull sofa cushions off and vacuum underneath them too, then wash any throws or blankets your cat uses on a hot cycle.

  2. Bedrooms. If your cat sleeps on your bed — or sneaks in at night when you're not looking — your bedroom needs the same treatment as the living room. Strip the bed and wash all bedding at 60 degrees. Vacuum under the bed, along the base of wardrobes, and into corners where eggs and larvae can go unnoticed for weeks.

  3. Hallways and stairs. Easy to overlook, but cats move through these spaces constantly, shedding eggs as they go. Vacuum carefully along each stair edge, including the gap where carpet meets the riser. Run the vacuum along skirting boards throughout the hallway while you're at it.

  4. Your cat's sleeping and resting areas. Whether your cat has a dedicated bed or a favourite blanket draped over a chair, this area deserves extra attention when you're working out how to remove cat fleas effectively. Wash any bedding at the highest safe temperature, vacuum the surrounding floor thoroughly, and treat the area with a household flea spray once it's clean.

  5. Laundry and utility areas. Cats are drawn to warm corners near boilers and utility rooms, so don't skip these. Vacuum thoroughly, wash any fabric items your cat has had access to, and keep the area clear as part of your ongoing flea prevention for cats routine.


Worth knowing: Flea eggs can make up around 50% of the total flea population in your home at any one time. Vacuuming daily for two weeks after treating helps remove newly hatched larvae before they develop further, which makes a real difference to how quickly the infestation clears.


Treating every room at the same time gives you the best chance of breaking the flea life cycle before it restarts. That said, cleaning your home alone won't be enough — your cat needs proper treatment at exactly the same time, which we'll cover in the next section.

Choosing the best household flea spray and other home treatments

A good household flea spray can make a real difference, but it works best as part of a broader plan. Spraying your home without thoroughly cleaning first, or without treating your cat at the same time, will only get you so far. Think of it as one layer in a multi-step approach rather than a standalone fix.

What to look for when choosing a household flea spray:

  • Contains an IGR (insect growth regulator) — the key ingredient for tackling flea eggs in carpet and stopping larvae from developing into adults
  • Clearly labelled as safe for homes with pets and children, with guidance on when it's safe to re-enter the room
  • Offers residual action — ideally protecting treated surfaces for several months, which really matters during a home flea infestation treatment
  • Compatible with your flooring and soft furnishings, including carpets, sofas, and pet bedding

Comparing common home flea treatment formats:

Format Ease of Use Coverage Pet-Friendly Suitability
Spray High — targeted application Room by room Good, when used as directed
Powder Moderate — requires vacuuming after Carpets and upholstery Good for carpeted areas
Fogger/Flea Bomb Lower — requires leaving the home Whole room at once Variable — always check the label

IGR — Insect Growth Regulator: A chemical that stops flea eggs and larvae from developing into adult fleas, breaking the life cycle before it can restart. Without it, any surviving eggs will simply hatch and you're back to square one.

One thing worth repeating: treating your home without treating your pet at the same time means fleas will keep finding their way back onto freshly cleaned surfaces. For cat flea treatment and ongoing flea prevention for cats that works alongside your home treatment, the flea and worming range at Lords and Labradors is a good place to start. Getting both sorted together really is the only way to break the cycle for good.

Treat your pets at the same time — and don’t skip the cat

Cleaning every room in the house will only get you so far if your cat is still carrying fleas. They’ll hop straight back onto your pet, lay more eggs, and before long you’re dealing with the same problem all over again. If you’re working out how to remove cat fleas, the key is to treat your home and your cat at the same time, ideally on the same day.

  • Cats are easy to miss in the flea picture. Because they groom so well, they can swallow or brush away visible fleas before you notice them. That means a cat can still be part of the problem even if you haven’t spotted live fleas.
  • Choose a vet-approved cat flea treatment. Spot-on or oral treatments are usually much more reliable than shampoos or collars on their own. Your vet can help you pick the safest option for your cat’s age, size, and routine.
  • Untreated cats keep dropping flea eggs into the home. Those eggs end up in carpet, bedding, and on the sofa, which is why flea eggs in carpet can keep hatching even after a big clean.
  • Keep flea prevention for cats going all year. Fleas love warm homes, so they’re not just a summer issue. Regular prevention makes a big difference once the infestation is under control.
  • Treat every pet in the house together. One untreated pet can undo all your hard work.

Worth knowing: Fleas on your cat can lay up to 50 eggs a day, and those eggs quickly spread through soft furnishings and floors. That’s why home flea infestation treatment works best when pet treatment happens alongside it.

For more help on how to get rid of fleas on cats, read our guide on how to care for a cat with fleas. If you’ve got dogs too, follow a separate dog-specific flea guide for their treatment, as products and dosing can differ.

How long it takes to clear fleas and how to stop them returning

Most people expect to deal with fleas for a week and move on. The reality is a little more patience-testing than that. A full home flea infestation treatment typically takes anywhere from three to twelve weeks to fully resolve, depending on how established things are and how consistently you keep up with cleaning and treatment.

The reason it takes this long comes back to those flea eggs buried in your carpets and soft furnishings. Adult fleas are actually the easy part. It is the dormant stages — the eggs and pupae — that keep the cycle going. That is why vacuuming every two to three days, washing pet bedding weekly, and keeping your cat's flea protection topped up throughout this period all matter so much. One round of treatment rarely clears everything. The routine is what gets you there.

A simple habit worth building into your week: vacuum, wash your cat's bedding, check your cat's flea prevention. That three-step rhythm, done consistently, is genuinely what separates a flea problem that keeps coming back from one that finally stays gone.

Once you are through the other side, prevention is far simpler than cure. Keeping on top of regular cat flea treatment year-round is the single most effective thing you can do. Fleas do not take winters off, particularly in centrally heated homes, so monthly or quarterly treatment makes sense regardless of the season. You can browse flea and worming options at Lords and Labradors to find what suits your cat best.

Knowing how to remove cat fleas properly is the hard bit. Keeping them away just takes consistency — and you have already done the hard work.

Frequently Asked Questions

What kills cat fleas in the house?

A full-home approach works best: vacuum thoroughly, wash pet bedding and soft furnishings on a hot cycle, and use a household flea spray with an insect growth regulator (IGR). The key is treating your cat at the same time, because most fleas live in the home as eggs, larvae, and pupae.

Do I need to treat my house if my cat has fleas?

Yes, you do need to treat your house if your cat has fleas. Most of a flea infestation lives in the home rather than on your pet, with eggs, larvae, and pupae hidden in carpets, bedding, sofas, and skirting-board edges, ready to hatch and restart the cycle.

Related Products

Related Collections

Cat & Dog Flea & Worming Treatment

Keep your pets protected by keeping up to date with their Flea... 

Cat Brushes & Grooming Tools

Cat grooming and wellbeing products are essential for keeping our feline friends... 

Next Article
How To Care For Your Cat's Teeth

Related Articles

  • What to Do When Your Dog is Reverse Sneezing
    24.08.26 August 24, 2026 Health

    What to Do When Your Dog is Reverse Sneezing

    That sudden honking, snorting sound your dog makes out of nowhere is enough to stop any pet parent’s heart, but knowing what to do when your dog is reverse sneezing makes all the difference. In this guide, we’ll walk you through why it happens, how to keep both of you calm in the moment, and which signs are worth a call to the vet. We’ll also share some simple changes you can make at home to reduce how often it happens in the first place. What reverse sneezing looks and sounds like in dogs If you’ve ever watched your dog suddenly freeze, stretch their neck forward, and let out a loud, honking snort like they’re trying to inhale and sneeze at the same time, you’ve almost certainly witnessed a reverse sneeze. It sounds alarming. It looks alarming. And if you had no idea what you were watching, panicking is a completely natural response. The reassuring news? Reverse sneezing is usually harmless. It’s not a cough, not a seizure, and not a sign that something is lodged in their throat. Think of it as a reflex, much like a regular sneeze, just working in reverse. Instead of air rushing outward, your dog rapidly pulls air in through their nose, producing that distinctive snorting or honking sound that tends to stop everyone in the room. During an episode, most dogs stand still with their elbows splayed, neck outstretched, and eyes wide open. Some look genuinely distressed, which is hard to watch even when you know what’s happening. The episode itself usually lasts anywhere from a few seconds to around a minute, and the vast majority of dogs bounce back to their normal selves almost immediately. Paying attention to how your dog behaves before and after can tell you a lot. A dog that’s relaxed and happy on either side of the episode is generally nothing to worry about. Our guide to understanding your dog’s body language can help you get better at reading those subtle signals. Recognising what reverse sneezing looks and sounds like is honestly half the battle — because once you know, it’s so much easier to stay calm when it happens. Why dogs reverse sneeze in the first place Reverse sneezing is an involuntary reflex, and it usually comes down to something irritating the soft palate, throat, or nasal passages. Think of it like a sneeze in reverse — the body trying to clear an irritant rather than signal that something is seriously wrong. Most dogs will experience it at some point, and for the vast majority, it’s completely normal. Common triggers include: Nasal or throat irritation from dust, pollen, or mould Excitement or over-stimulation, like bounding over to greet you at the door Pulling on the lead, which puts pressure on the throat Eating or drinking too fast Strong scents, household sprays, or air fresheners Sudden changes in temperature or air quality Being a flat-faced (brachycephalic) breed, such as a Pug, French Bulldog, or Cavalier King Charles Spaniel — their shorter airways make them anatomically more prone to episodes Understanding the dog reverse sneezing causes behind an episode really does help in the moment. Once you recognise that the body is simply doing what it needs to do — the same way we might need to cough or clear our throat — it’s much easier to stay calm rather than panic. And calm is exactly what your dog needs from you. The good news is that most episodes pass within seconds to about a minute. One moment your dog is honking away, and the next they’re trotting off like nothing happened. That’s usually all there is to it. What to do in the moment when your dog is reverse sneezing If you’re wondering what to do when your dog is reverse sneezing, the first thing is simple: try not to panic. It can sound dramatic, especially the first time you hear it, but many episodes are brief and pass within 30 seconds to a minute. Your calm really helps. In the moment, focus on gentle comfort: Stay relaxed and speak softly. Your dog will pick up on your energy. A quiet, reassuring voice can help them settle while the episode passes. Gently stroke their throat or chest. Slow, light strokes may encourage a swallow, which can help the spasm ease naturally. Offer a tiny sip of water if they’re settled enough to take it. Not a full bowl, and don’t force it. Sometimes a small swallow is all that’s needed. Move them away from obvious triggers. If they’ve been sniffing dust, pulling on the lead, or sitting near strong smells like candles or cleaning sprays, guide them to a calmer spot with fresher air. A good rule of thumb with reverse sneezing in dogs treatment at home is to keep things quiet, gentle, and low-stress. Most of the time, your job is simply to comfort rather than intervene. What not to do: Don’t put your fingers in your dog’s mouth Don’t hold them down or restrain them forcefully Don’t fuss loudly or crowd them, even if you feel worried Once it’s over, many dogs go straight back to normal as if nothing happened. If your dog’s reverse sneezing symptoms seem to happen often, last longer than usual, or leave them distressed, that’s when it’s sensible to think about dog reverse sneezing causes and whether a vet check is the right next step. When reverse sneezing is worth a vet call Most of the time, reverse sneezing in dogs is completely harmless and passes within seconds. But if you start noticing that episodes are happening more often, or that your dog seems off afterwards, it’s worth paying closer attention. You know your dog better than anyone, so trust that instinct. These are the signs that deserve a vet conversation: Episodes happening multiple times a day, or lasting longer than a minute Your dog seeming distressed, panicked, or wiped out afterwards Nasal discharge, whether clear, cloudy, or discoloured A new cough appearing alongside the reverse sneezing Laboured or noisy breathing between episodes Gums that look pale or slightly blue Lethargy, low energy, or a noticeable dip in appetite An occasional isolated episode is rarely cause for concern. A recurring or worsening pattern is always worth getting checked. When to worry about dog reverse sneezing really comes down to that shift in pattern. A vet can look into common culprits like allergies, a low-grade infection, a foreign body in the nasal passage, or a structural issue affecting the airway. None of these are things you’d pick up at home, but all of them are very treatable when caught early. Even if everything turns out to be fine, you’ll come away with peace of mind, and that’s never wasted. How to reduce reverse sneezing triggers at home Once you understand what sets your dog off, a few small tweaks at home can make a real difference. If your dog tends to pull on the lead and reverse sneezes regularly, switching to a well-fitted harness is one of the easiest wins. Collar pressure on the throat is a surprisingly common trigger, and a harness removes it entirely. Inside, it’s worth thinking about air quality too. Dust little and often, skip the heavily scented candles or plug-in air fresheners, and if you use cleaning sprays, let the room air out before your dog wanders back in. Small habits, but they stack up. Fast eaters are also worth a closer look. Gulping food can irritate the throat and kick off an episode, so a slow feeder bowl or snuffle mat at mealtimes can genuinely help. Beyond that, it’s worth keeping a loose mental note of when episodes happen. After a walk during high pollen season? After a boisterous play session? Spotting a pattern gives you something real to work with, whether that’s adjusting walk times or winding down play more gradually. The reassuring truth is that most dogs live completely happily alongside the occasional reverse sneeze. Now that you know what it looks like, why it happens, and what to do in the moment, you’re already better placed to handle it calmly when it comes. Frequently Asked Questions How to calm down reverse sneezing in dogs? The best way to calm reverse sneezing is to stay relaxed and gently comfort your dog while it passes. Speak softly, stroke their throat or chest, offer a tiny sip of water if they’re settled enough, and move them away from dust, strong smells, or other obvious triggers. When to worry about reverse sneezing? Reverse sneezing is worth worrying about if it becomes frequent, lasts longer than a minute, or your dog seems unwell afterwards. Signs that need a vet call include distress, nasal discharge, a new cough, noisy breathing between episodes, pale or blue gums, lethargy, or a drop in appetite. What triggers reverse sneezing in dogs? Reverse sneezing is usually triggered by irritation in the throat or nasal passages. Common causes include dust, pollen, mould, strong household scents, excitement, pulling on the lead, eating or drinking too fast, temperature changes, and being a flat-faced breed with shorter airways. How long is too long for a dog to reverse a sneeze? Anything lasting longer than about a minute is a sensible point to call your vet. Most reverse sneezing episodes pass within a few seconds to around a minute, and dogs usually seem completely normal again straight afterwards.

    By Adele Busby

    Read more
  • How to Cut Dog Nails That Are Black
    19.08.26 August 19, 2026 Health

    How to Cut Dog Nails That Are Black

    Trimming black dog nails can feel like a guessing game, but it really does not have to be. This guide walks you through how to cut dog nails that are black with confidence, covering everything from spotting the quick before you snip to choosing the right tools, handling the odd nick along the way, and building a calmer routine over time. Whether you are starting from scratch or just looking to feel less uncertain with the clippers, there is something here to help you and your dog get through nail day in one piece. How to Tell Where the Quick Is on Black Dog Nails The quick is the living core of your dog’s nail. It contains blood vessels and nerves, so if you catch it with the clippers, it bleeds and stings — not ideal for anyone involved. With light-coloured nails, you can usually spot it as a soft pink shadow running through the centre, which makes the whole job much more straightforward. With black nails, that shadow disappears completely, and that’s exactly why so many pet parents feel stuck before they’ve even picked up the clippers. The good news? You don’t have to guess. You just need to slow down and read a few reliable clues. Start by shining a small torch or your phone’s flashlight through the nail from underneath. On finer nails, this can reveal the quick as a darker oval shape within the nail. It won’t work for every dog, but it takes about three seconds to try and it’s genuinely useful when it does. If the light doesn’t show much, nail texture becomes your next guide. Trim a tiny sliver from the tip and look at the cut surface. At first it’ll appear solid and chalky, white or grey all the way through. That’s safe ground. Keep taking small slivers, checking each time, and eventually the centre will shift. It might look darker, almost black, or you’ll notice a small grey dot appearing in the middle. That dot is your cue to stop. You’re getting close to the quick. Nail shape tells you something before you even make a cut, too. Most dog nails curve downward and taper toward the tip, and the quick follows that same curve. It typically sits further back than you’d expect, so if the nail has a definite hook at the end, trimming just that hooked portion is usually where you want to start. One last thing: a calm dog makes all of this much easier. When they’re tense and pulling away, it’s harder to look closely and work carefully. Keeping an eye on your dog’s body language throughout the trim helps you spot early signs of stress before things unravel. The Tools That Make Black Nail Trims Safer and Calmer Having the right tools ready before you start makes a real difference when you’re working with black nails. They help you make smaller, more controlled cuts, reduce the chance of catching the quick off guard, and keep the whole experience calmer for your dog from the very first snip. Sharp scissor-style or guillotine clippers. Blunt clippers crush rather than cut cleanly, which is uncomfortable for your dog and makes it much harder to read the cut surface. Sharp blades give you a clean edge — exactly what you need when taking black nails back little by little. A nail grinder. If clippers feel a bit too all-or-nothing, a grinder lets you remove nail gradually and gives you much finer control over how much you take off. Many dogs also find the sensation less startling than a sudden snap. A small flashlight or phone torch. Holding a light against the top of the nail can help you spot the quick’s shadow before you cut. It doesn’t work on every dog, but it takes seconds to try and is well worth doing. Styptic powder. Have this within arm’s reach before you begin. If you nick the quick, it works fast — and knowing it’s right there helps you stay calm rather than scrambling. High-value treats. Something your dog doesn’t get at any other time, like a small cube of cheese or a bit of cooked chicken, makes the session feel worthwhile for them and keeps their focus in the right place. A non-slip mat or towel. This gives your dog something to grip, helps them feel a little more settled, and means less wriggling for you to work around. What is styptic powder? It stops minor bleeding almost instantly if you nick the quick. It’s a staple in any dog nail trimming kit, so always have it to hand before you start. None of these are hard to find, and together they genuinely change how confident you feel tackling black nails at home. If you’re building out your grooming kit, you’ll find plenty of dog care essentials over at Lords and Labradors. Good preparation really is the best dog nail trimming tip there is — have everything ready before your dog sits down, and you’re already off to a better start. A Step-by-Step Way to Cut Black Dog Nails Without Hitting the Quick Once you understand how to read the nail, the actual cutting becomes far less daunting. Trimming black dog nails safely is really about slowing down, taking tiny slices, and trusting what you see rather than guessing where to stop. Settle your dog before you pick up the clippers. Sit on the floor together, offer a few treats, and let them sniff the clippers. A calm start makes everything that follows easier. Find a comfortable position for you both. Some dogs are happy lying on their side while you kneel beside them. Others prefer sitting upright with a paw gently lifted. Work with your dog rather than forcing a hold that makes them tense. Press the toe pad gently to extend one nail at a time. This gives you a clear view and keeps the paw steady without gripping so tight that your dog pulls away. Start with a small snip at a slight angle. Take just the very tip off. You’re not trying to do it all in one go — you’re just getting started. Check the cut surface before you snip again. Hold the nail up to the light and look at the cross-section. A chalky white or grey centre means you’re well away from the quick and safe to continue. Keep going in tiny increments, checking every time. As you get closer, the centre of the nail will start to shift. The moment you see a darker grey or black dot beginning to appear in the middle, stop on that nail. That dot is the quick showing itself, and one slice further could cause real discomfort. Reward your dog between nails, not just at the end. A treat after each one keeps things positive and gives your dog a natural moment to breathe and reset. Stop if your dog tells you they’ve had enough. Panting, pulling the paw away, or going rigid are all signs to pause — even if you’ve only done two nails. Pushing through rarely ends well. Split the session across days if that’s what your dog needs. Front paws today, back paws tomorrow. There’s no rule that says all twenty nails have to happen at once, and honestly, your dog will thank you for it. A note on the black dog nail quick: In lighter nails, the quick shows up as a visible pink line running through the centre. In black nails, you simply can’t see it from the outside, which is why reading the cross-section matters so much. A small dark dot or a soft pale ring appearing in the centre after a snip is your signal to stop. That’s the quick beginning to surface, and going any further risks pain and bleeding. The whole point of learning how to cut dog nails that are black is building confidence through small wins, not racing to finish. Three nails done calmly is genuinely better than twenty done with your dog stressed and wriggling. If your dog tends to find grooming difficult, it’s worth thinking about how you handle other anxious moments together — the same approach that helps keep dogs calm during stressful situations like fireworks applies just as well here. What to Do if You Nick the Quick Nicking the quick when you’re learning how to cut dog nails that are black happens to almost every pet parent at some point. It looks more dramatic than it is — a small dark red bleed from the tip of the nail — and it tends to startle you far more than it hurts your dog. Take a breath. You’ve got this. Here’s exactly what to do: Stop trimming and set the clippers down. Apply styptic powder or cornstarch directly to the nail tip. Hold gentle pressure with a clean cloth or your finger for 30 to 60 seconds. Keep your dog calm and still with a quiet voice and a soft, steady touch. Once the bleeding slows, check the nail before letting your dog wander off. Styptic powder is a clotting agent that stops bleeding quickly — and it’s the single most useful thing to have nearby during any nail trim. Purdue University’s veterinary guidance specifically recommends that you keep styptic powder available when clipping a pet’s nails to stop bleeding if you clip too short. Pick some up before your next session if you don’t already have it. For aftercare, keep the paw clean and dry for the rest of the day. Avoid rough-surface walks for 24 hours, and check back on the nail over the next day or so for any redness or swelling. If the bleeding hasn’t slowed within 5 to 10 minutes, or your dog seems to be in genuine pain rather than just briefly unsettled, call your vet. That’s the sensible thing to do — not a sign that anything has gone seriously wrong. How to Make Nail Trims Easier Next Time The biggest dog nail trimming tip anyone can give you? Trim more often. It sounds almost too simple, but when you’re working out how to cut dog nails that are black, consistency matters just as much as technique. Dogs who seem completely impossible to trim can surprise you once a calm routine clicks into place. Trim every 3 to 4 weeks. Regular sessions keep nails at a manageable length and make each one shorter and less stressful — for both of you. Reward after every single nail. Use something your dog genuinely loves, like a small piece of cheese or chicken, and give it the moment you finish each nail rather than saving it until the end. Handle paws between sessions. A minute or two of gentle paw touching while you’re watching TV or winding down costs nothing and builds real tolerance without any pressure attached. Take a little, more often. Small snips every few weeks feel far less daunting than trying to tackle seriously overgrown nails after a long gap — and you’ll stay well clear of the quick. Keep the setup consistent. Same spot, same time of day, same calm energy. Dogs read routine surprisingly well, and familiarity genuinely helps settle nerves. Start puppies early. Even pretend trims with no cutting involved help young dogs learn that paw handling is completely normal. Pro tip: Trimming a tiny amount every 2 to 3 weeks is far safer than waiting until nails are overgrown — especially when you’re navigating the black dog nail quick. Think of each session as a training opportunity rather than a chore to get through. Dogs who once wriggled, whined, or flatly refused can absolutely learn to sit calmly for a trim. It just takes consistency, patience, and a well-stocked treat supply. When to Ask a Groomer or Vet for Help Sometimes, the most caring thing you can do is hand the clippers to someone else. If you have worked through how to cut dog nails that are black and still feel uncertain, that is completely fine. Some dogs have nails that are genuinely thick, curved, or difficult to read, even for owners who have been doing this for years. Others simply will not settle, no matter how many treats you offer or how carefully you have set the scene. Professional groomers trim nails every single day. They know how to read the nail, position the dog, and work with a calm confidence that only comes with real experience. Booking a session or two is not admitting defeat. It is a smart way to watch someone skilled work up close, ask questions, and pick up the kind of practical knowledge that no article can fully replace. Your vet is equally worth considering, especially if your dog has unusually thick nails, any history of paw injuries, or anxiety that makes handling genuinely difficult. They can trim safely and point you toward ways to make future sessions less stressful for your dog and for you. The most important shift is this: professional help is a starting point, not a last resort. Once your dog has had a calm, positive experience with someone who knows exactly what they are doing, you will often find that the next trim at home feels a little easier too. Frequently Asked Questions How do you know where the quick is on black dog nails? You find the quick on black dog nails by trimming tiny slivers and checking the cut surface each time. A chalky white or grey centre is usually safe; when you start to see a darker dot or change in the middle, stop. A torch underneath the nail can sometimes help too. Can I trim my dog’s black nails? Yes, you can trim your dog’s black nails if you go slowly and take very small amounts at a time. The safest approach is to remove the hooked tip first, check the cut surface after every snip, and stop as soon as you see a darker centre appearing. How do you trim severely overgrown dog nails? Trim severely overgrown dog nails by taking off only a little at a time and spreading the work over multiple sessions if needed. Tiny, regular trims every 2 to 4 weeks are safer than one big cut, especially with black nails, because they help you avoid catching the quick.
    By Adele Busby

    Read more
  • Why Do Cats Like to Go in Boxes
    31.08.26 August 31, 2026 Owning a Cat

    Why Do Cats Like to Go in Boxes

    If you have ever watched a cat bypass a brand new bed to squeeze into a battered delivery box, you already know that cardboard holds a very particular power over them. This article gets into the real reasons why cats like to go in boxes, from the deep-rooted instincts behind it to the surprising science that explains why boxes can actually make cats feel calmer and more secure. You will also find practical tips for making box time safer at home, plus some cosy alternatives worth knowing about. Why do cats like to go in boxes? The short answer If you have ever set down an empty delivery box and watched your cat claim it within seconds, you already know that cats and cardboard share a very special relationship. But why do cats like to go in boxes so reliably — regardless of age, personality, or how many perfectly good beds they have completely ignored? The honest answer comes down to instinct. Cats are both predators and prey, which means they are hardwired to seek out small, enclosed spaces where they feel hidden, secure, and in control. A box delivers all of that at once. It is basically the feline version of a perfect afternoon. But there is more to it than simple survival instinct. Cardboard retains warmth, which cats are naturally drawn to. Boxes offer novelty, which keeps curious, intelligent animals happily occupied. And research has actually shown that access to a box can meaningfully lower stress levels in cats, especially when they are adjusting to a new or unsettling environment. So if your cat has commandeered every online delivery since you started shopping from home, they are not just being theatrical. They are following a deeply rooted urge that feels safe, satisfying, and entirely natural to them. This article unpacks all of it — from the science behind why cats are attracted to boxes to practical ways you can lean into the behaviour at home. And if you want to go a step further, you can explore our full range of cat essentials for even more ways to keep your cat comfortable and content. How boxes make cats feel safe, hidden, and in control One of the clearest answers to why cats like to go in boxes lies in how perfectly a box suits their dual nature as both predator and prey. Inside a box, a cat can watch everything happening in the room while staying completely hidden. That combination of visibility and cover is deeply wired into how cats experience the world. Reduced sensory overwhelm: Enclosed spaces filter out visual noise and movement, helping cats feel calmer in busier households. Monitoring without exposure: A cat in a box can track people, other pets, and sounds without putting itself in a vulnerable position. Ambush readiness: Even the most pampered indoor cat still carries those hunting instincts. A box keeps them poised and ready, even if the “prey” turns out to be a passing sock. A sense of boundary and control: Cats feel safest when they can define their own space. A box creates a clear perimeter that feels entirely theirs. Instinct, not stubbornness: That moment when your cat bypasses a plush bed to squeeze into the tiniest cardboard box in the room? That’s not cheek. That’s instinct telling them that smaller means safer. Enclosed spaces give cats something open rooms simply cannot: a genuine sense of control over their environment. If your cat gravitates toward boxes and tight corners, they’re not being awkward — they’re following instincts that go back thousands of years. Our High Wall Bouclé Cat Bed is built with exactly that in mind, with raised, defined sides that recreate the sheltered, secure feeling cats love about boxes — just a little more comfortable for everyone involved. What the Leiden University stress study found about boxes and feline stress There is some genuine science behind why cats like to go in boxes. A well-known study from Leiden University looked at newly arrived shelter cats and found that simple hiding boxes seemed to help them cope better with the stress of a big change. That matters because shelters are full of unfamiliar smells, sounds, and routines. For a cat, that can feel overwhelming. In the study, cats with access to a box generally showed lower stress scores and appeared to settle more quickly than cats without one. In other words, the box was not just somewhere to sit. It gave the cat a safe, contained space to retreat to while taking in a new environment. A few easy takeaways from the research: Cats with a hiding box appeared to adapt more quickly in a stressful setting A small, enclosed space may help cats feel safer and more in control Hiding can be a normal coping behaviour, not something “bad” that needs stopping The idea is useful beyond shelters too, especially for new kittens, house moves, or changes in routine The big lesson is simple: when cats can choose to tuck themselves away, they often feel more secure. That helps explain why cats like boxes so much in the first place. At home, that does not have to mean leaving delivery boxes all over the hallway, although many cats would be thrilled with that. A cardboard box, covered bed, or snug hideaway can all offer a similar sense of comfort. If your cat likes cosy places to curl up out of sight, our cat beds collection is a helpful place to start. Why cardboard boxes are so irresistible: texture, warmth, and novelty Part of understanding why cats like to go in boxes comes down to the material itself. Cardboard ticks several boxes at once (pun very much intended), offering a mix of sensory rewards that are genuinely hard to resist. It’s rarely just one thing pulling them in. Natural insulation: Cardboard traps body heat surprisingly well, creating a snug little pocket of warmth that feels immediately comforting to a cat settling in for a nap. Scratch-friendly texture: The surface is satisfying to knead and scratch, giving cats a natural outlet for an instinct they act on every single day. Novelty and mental stimulation: A new box arriving in the house is basically an event. Exploring it engages their curiosity and gives their brain a small but meaningful workout. Muffled acoustics: The walls absorb surrounding sound, softening the environment and helping cats feel calmer and less overstimulated. Familiar, neutral scent: Cardboard carries no strong or threatening smells, which makes it feel safe and approachable from the very first sniff. Put all of that together and it’s easy to see why cat behaviour in boxes makes so much sense. Warm, tactile, quiet, and interesting all at once — it’s a pretty compelling combination. If you want to make a box even more inviting, try tucking in one of our soft cat blankets to layer up the warmth and comfort your cat is already searching for. How to use boxes safely and keep the fun going at home Giving your cat a cardboard box to explore is one of the easiest wins in pet parenting, but a little prep goes a long way. Before you set one down, check it over properly. Remove any staples, packing tape, or sharp folded edges that could catch a paw or scratch a nose, and give it a quick sniff while you’re at it. Boxes that have held cleaning products or heavily scented goods are best left in the recycling. Once it passes the check, placement matters more than you might expect. Tuck it somewhere quiet, away from busy hallways or noisy appliances. Cats are drawn to boxes because they feel hidden and in control, so dropping one in the middle of a well-trafficked room rather misses the point. It’s also worth keeping an eye on chewing. Most cats will sniff, knead, and generally make themselves at home without much drama, but if yours is tearing off chunks and swallowing them, it’s time to swap things out for something safer. When you want a longer-lasting version of the same comfort, cat tunnels, enclosed hideaway beds, and soft-sided dens deliver everything a cardboard box does: warmth, shelter, and that deeply satisfying tucked-in feeling. They’re washable, sturdier, and far tidier to have around the house. The instinct behind why cats like to go in boxes stays exactly the same. You’re just giving it a proper home. Frequently Asked Questions Why does my cat prefer the box over the toy inside it? The box satisfies a stronger, more deeply rooted instinct: shelter and concealment than almost any toy can compete with. Is it bad for my cat to sleep in a box all the time? Not inherently, but make sure they still have access to fresh water, food, and a litter tray nearby, and that the box is clean, dry, and free of sharp edges or packaging debris. Do kittens like boxes too? Yes. Often, even more than adult cats, since boxes double as a place to play, pounce, and practise hiding behaviours from a very young age.

    By Adele Busby

    Read more
  • Why Do Cats Lick Each Other
    26.08.26 August 26, 2026 Owning a Cat

    Why Do Cats Lick Each Other

    Watching two cats curl up and wash each other is one of those small, lovely moments that makes a multi-cat home feel just right. This guide looks at why do cats lick each other, from the social bonds and shared scents behind allogrooming to the times when one-sided licking might be worth a closer look. You’ll also find practical tips on setting up your home so your cats can feel calm, comfortable, and genuinely at ease together. Why do cats lick each other? A quick look at cat grooming If you’ve ever caught your cats curled up together, giving each other a careful wash, it’s natural to wonder why do cats lick each other when they can groom themselves just fine. In most cases, it’s a lovely, normal part of cat grooming behavior called social grooming. When cats groom each other, they’re not just tidying up. They’re building trust, sharing comfort, and showing that they feel relaxed enough to be close. You’ll often notice them licking around the head, ears, or neck, which are tricky spots to clean alone. So yes, there’s a practical side, but the bigger message is usually affection and bonding. This starts early. Mother cats lick their kittens to clean them, soothe them, and help them feel secure. As cats grow, that same behaviour can carry into adult relationships, which helps explain why cats lick each other’s fur when they’ve formed a strong bond at home. So if your two cats take turns grooming on the sofa or after a nap in their favourite bed, it’s usually a reassuring sign. They likely see each other as part of the same social group. If you’re also helping cats and dogs live happily together, our guide on how to get your dog and cat to get along may help. What allogrooming means in a cat household If you’ve ever caught one cat carefully washing another’s ears and wondered why do cats lick each other so intently, you’re looking at allogrooming. It’s simply the name for one cat grooming another, and it’s a very normal part of life in many multi-cat homes. So, why do cats groom each other in the first place? Usually, it comes down to familiarity, comfort, and living closely together. It helps build bonds. Grooming can be a calming, rewarding social interaction for cats, so doing it regularly may help strengthen their connection over time. It creates a shared scent. When cats lick each other’s fur, they mix their scents together. That shared smell helps them recognise one another as part of the same social group. It helps with hard-to-reach areas. The top of the head, around the ears, and the neck are awkward spots for a cat to clean alone, so a friendly housemate can step in. It can keep the peace. In some pairs or groups, grooming seems to help smooth over small tensions and make everyone feel more settled. It shows trust. Cats are vulnerable when they’re being groomed, so allowing another cat close in that way is often one of the loveliest cat affection signs to spot at home. In a happy cat household, allogrooming often becomes part of the daily rhythm. It’s one of those little cat grooming behavior clues that can tell you your cats feel safe, familiar, and comfortable with each other. Is it about love, hierarchy, or both? The honest answer is that cat grooming behavior is rarely just one thing. When cats lick each other, it can absolutely be about affection, but it can also reflect who feels more confident, settled, or socially comfortable in the pair. So if you’ve ever wondered why do cats lick each other, the answer is often both love and social structure. Cats may groom one another to: strengthen a bond they already feel secure in calm things down after a brief wobble or disagreement share scent and reinforce a familiar group feeling at home show social confidence, especially when one cat usually starts the grooming comfort a companion they know well, including a sibling or long-time housemate That’s why cat grooming behavior can look very sweet on the surface while still telling you something about the relationship underneath. One cat licking the other’s head or neck, for example, may be gentle and affectionate, but it can also show which cat tends to take the lead socially. Worth knowing: one study on close-contact inter-cat interactions found that cats can show both affiliative and agonistic behaviors, so grooming may sit alongside tension rather than always meaning pure affection. In other words, why do cats groom each other is not always a simple romance story. In a calm, well-set-up home, with enough space and resources like a cat scratch post, you’re more likely to see the relaxed, easy kind of grooming most pet parents hope for. When one cat does all the licking: signs it may be stress, not just affection Mutual grooming is usually a lovely sign that your cats feel safe and bonded together. But it’s worth paying attention when one cat is always doing the licking and the other is simply putting up with it. That kind of one-sided pattern can sometimes point to stress, anxiety, or an uneven social dynamic rather than pure affection. Here are a few signs to watch for: The cat being groomed flattens their ears or pulls their head away They walk off mid-session looking relieved, not relaxed One cat always initiates grooming, never the other way around You notice thinning fur in certain spots from repeated, concentrated licking The licking looks frantic or repetitive rather than slow and settled The recipient shows tension during grooming — tail flicking, a low grumble, or a stiff body Compulsive grooming can be a response to environmental stress. Giving cats a positive outlet for restless energy really does help, and something like a wall climber or activity centre can make a surprising difference to anxious behaviour at home. A little one-sidedness is perfectly normal and nothing to worry about on its own. Most cats settle into their own grooming rhythms over time. But if you’re consistently noticing avoidance, tension, or licking that looks more compulsive than caring, it’s worth keeping a closer eye on things. A chat with your vet or a cat behaviourist can help you figure out what’s going on and how best to support both cats. How to support calm, comfortable cat relationships at home The good news is that most cats in the same household find their own rhythm over time. But there are things you can do to smooth the process along, especially if you have a newer pairing or a cat who seems a little unsettled. Start with space. Cats feel safest when they have somewhere to retreat to that is entirely their own. If your cats share every bed, bowl, and sunny windowsill, tension can quietly build even when everything looks fine on the surface. Giving each cat a dedicated resting spot makes a real difference — not just for their comfort, but for the overall mood of the household. A cosy, enclosed bed works especially well as a personal sanctuary, somewhere a cat can decompress without another wandering in uninvited. If you are looking for something that suits each cat’s individual personality, the Lords & Labradors cat bed collection is well worth a browse. Scratching posts are another simple win. Place them in a few different spots around the home and cats can mark their territory in a way that feels natural and low-conflict, which quietly helps keep the peace without anyone having to step in. When it comes to encouraging closeness, let the cats lead. Grooming and licking will happen on their terms, and that is exactly how it should be. Moving them together when they seem settled apart, or hovering over interactions, can create friction rather than ease it. Step back and trust them. Watching your cats groom each other and genuinely seem at ease together is one of the quiet joys of a multi-cat home. A little support from you goes a long way in helping them get there. Frequently Asked Questions What does it mean if cats lick each other? It usually means they feel comfortable and familiar with each other. Cats often lick one another as part of social grooming, or allogrooming, which helps with bonding, shared scent, and cleaning hard-to-reach spots like the head, ears, and neck. It can also reflect social confidence within the pair. Does the dominant cat groom the other? Sometimes, yes. When one cat regularly starts the grooming, it can show social confidence or that they tend to take the lead in the relationship, not just affection. The bigger picture matters though, as relaxed body language and calm, mutual interactions usually suggest the grooming is comfortable and positive. Is it good when a cat licks another cat? Yes, in most cases it’s a good sign. Cats licking each other is often a normal, reassuring part of social grooming that shows trust, comfort, and bonding. It’s only worth watching more closely if the licking looks frantic, one-sided, or seems to make the other cat tense or uneasy.

    By Adele Busby

    Read more

loyal customer in 17 countries

Why Shop With Us?

  • Free Delivery

    Orders over £75 qualify for free standard UK delivery. Orders under £75 will be calculated at the checkout.

  • Shopping Made Easy

    Gain exclusive access to sales and shop all your pets favourites on the go by downloading our app.

  • Designed in the UK

    Our own brand products are lovingly designed in our specialist UK workshop to our exacting standards.

  • We're Here For You

    Contact our Pet Experts on Chat or by email at sales@lordsandlabradors.co.uk