































Pros and Cons of Sending Your Dog Away for Training
28.08.26 August 28, 2026 Owning a Dog

Pros and Cons of Sending Your Dog Away for Training

Weighing up the pros and cons of sending your dog away for training is one of those decisions that feels bigger the longer you sit with it, especially if you’re already exhausted by problem behaviours and running low on ideas. This article walks you through what board and train actually involves, the real benefits and the genuine limitations, and how to tell whether it suits your dog and your life. You’ll also find practical guidance on choosing a reputable trainer and what to try if a residential programme isn’t the right fit. What sending your dog away for training actually means Board and train, residential training, dog training camp — there are plenty of names for it, but the idea is essentially the same. Your dog goes to live with a professional trainer for a set period, usually somewhere between one and four weeks, and they work through specific behaviours together during that time. If you’re in the thick of it with a dog who pulls on every walk, bounces off every visitor, or simply cannot seem to settle, the whole concept can sound almost too good to be true. And for some dogs and some families, it genuinely does make a real difference. During a typical stay, your dog will live in the trainer’s home or a dedicated facility and receive structured sessions throughout the day. The focus might be basic obedience, loose lead walking, recall, or working through reactivity and anxiety. The better programmes also build in time for everyday life skills — including learning to settle calmly in a crate. If that’s something you want your dog to get comfortable with, our introduction to dog crates is a helpful place to start. Sending your dog away for training tends to suit a few types of dogs in particular: puppies getting their foundations right, adolescents going through a chaotic phase, or adult dogs with deeply ingrained habits their owners haven’t been able to shift at home. What it isn’t, though, is a hands-off permanent fix. The trainer does the groundwork, but you’re still very much part of the equation once your dog comes home. Knowing what to expect from the outset makes the whole experience far more useful — and far less likely to end in frustration. That’s exactly what the rest of this article is here to help with. The upsides: when a training stay can really help There are real, meaningful advantages in the pros and cons of sending your dog away for training discussion. For the right dog, and with the right trainer, a board and train stay can give you a stronger starting point than trying to fit training around school runs, late meetings, and a dog who is already overexcited by teatime. Here are some of the biggest upsides: Intensive daily repetition: Dogs learn through practice. In a residential programme, your dog may get several short, focused sessions each day, which often helps new habits settle in faster than a weekly class or the odd five minutes at home. Faster progress on specific behaviours: If lead pulling, poor recall, barking at visitors, or jumping up has become an everyday frustration, that extra consistency can help shift things. It is not magic, but it can move you out of the stuck stage. Professional handling for dogs that need more structure: Some dogs are wonderfully clever but a bit all over the place. Others become reactive, overstimulated, or hard to settle. A skilled trainer can spot patterns early, manage triggers carefully, and keep sessions clear and calm. A simpler learning environment: Home is full of distractions. The post arrives, the children race through the hallway, the neighbour’s cat appears, and your training plan vanishes. A well-run training stay can strip some of that back so your dog can focus. A helpful reset for overwhelmed owners: Real life happens. A new baby, illness, moving house, or a rough patch at work can make consistency really hard. Sending dog away for training can help lay groundwork while you get back on track. Humane, reward-based work in experienced hands: This paper explains the wider conversation around training methods and notes that reward-based training methods are effective for helping manage or prevent behavioral problems in companion dogs. What matters in practice is choosing a trainer who is transparent, kind, and consistent in how they handle dogs day to day. That said, the board and train pros and cons are never one-size-fits-all. These benefits are strongest when the trainer is genuinely skilled and your dog suits the format. A sociable, adaptable dog may settle in beautifully. A very anxious or separation-sensitive dog may find the whole experience harder than helpful. Before you book anything, it is worth brushing up on your dog’s body language. It can help you judge whether your dog is coping confidently or quietly feeling overwhelmed, which is a big part of deciding whether dog board and train training is truly the right fit. The downsides: cost, stress, and why results can fade at home Board and train programmes can be genuinely transformative, but they come with real limitations worth understanding before you commit. Knowing the drawbacks isn’t about talking yourself out of it. It’s about going in with clear expectations so you can choose the right programme and actually get the most from it. The three main drawbacks to consider: The cost can be significant. Residential programmes typically run anywhere from £1,500 to £3,500 or more, depending on the trainer, location, and length of stay. That’s a serious investment, and it doesn’t always include follow-up sessions or owner coaching once your dog is back home. Some dogs find the separation genuinely hard. Not every dog settles easily into a new environment away from their family. Anxious breeds, dogs with attachment sensitivities, or those who haven’t spent much time away from home can find the experience stressful, regardless of how good the facility is. It’s worth being honest about your dog’s temperament before you book. Results can fade quickly without proper follow-through. This is probably the most overlooked downside of sending your dog away for training. If the programme doesn’t include structured handover coaching for you as the owner, the progress can unravel within weeks. Dogs learn behaviour in context, and a professional training environment is a world away from your living room, your routine, and the particular chaos of daily life with your family. Worth knowing: A dog can learn to sit reliably in a training facility and then appear to forget it completely once they’re home. That’s not a failure on the dog’s part. It’s what happens when the environment and the reinforcement change overnight. None of these drawbacks are reasons to rule out a board and train programme entirely. They’re reasons to ask better questions before you sign up. A reputable programme will include meaningful owner coaching at the end, not just a handover sheet and a wave goodbye. Because however well your dog has done, the training only sticks if you’re equipped to carry it forward once they’re back on the sofa with you. How to know if a board and train programme is the right fit Board and train isn’t a one-size-fits-all solution, and what works brilliantly for one dog can feel completely overwhelming for another. Age, temperament, the severity of the behaviour, and what your home life actually looks like all play a part when you’re weighing up the pros and cons of sending your dog away for training. Board and train may be a good fit if… Your dog has severe leash reactivity that needs consistent, immersive work beyond what weekly classes can offer Your schedule is genuinely hectic and daily training practice is hard to sustain Your dog is confident, sociable, and settles easily in new environments You’re dealing with a specific, complex behaviour that needs expert input quickly Your dog is a young adult with established problem behaviours that feel unmanageable at home It may not be the right choice if… Your dog is very young and still building trust and attachment with you You have a shy or anxious dog who finds being away from home deeply distressing The issue is rooted in your household dynamic, which a trainer working remotely simply can’t address Your dog has a history of trauma or multiple rehoming experiences You’re unlikely to follow through with the trainer’s plan once your dog is back home Worth knowing: A dog’s background shapes how they respond to intensive away-from-home training more than most people realise. Whether your dog came from a breeder or a rescue can influence their confidence, attachment style, and ability to adapt. Our guide to breeders vs. rescues is a useful starting point for understanding how your dog’s origins might shape their training needs. When in doubt, speak with a qualified trainer before committing. Advice tailored to your specific dog is always worth getting. What to look for in a trainer or training facility Choosing the right trainer matters just as much as choosing the right programme. A well-run facility with experienced, ethical trainers can make all the difference between lasting results and a stressful experience for everyone involved — so when you’re weighing up the pros and cons of sending your dog away for training, this part of the decision deserves just as much thought as the programme itself. Knowing what to look for puts you firmly in the driving seat. Here’s what to check before you commit: Recognised qualifications or accreditations. Look for trainers affiliated with bodies like the Animal Behaviour and Training Council (ABTC) or the Association of Pet Dog Trainers (APDT). These aren’t just letters after a name — they signal real accountability. Force-free, positive reinforcement methods. Any reputable trainer should be able to explain their approach clearly and confidently. Reward-based training is not only kinder, it tends to stick far better long-term. Transparent daily routines. Ask exactly how your dog will spend their day. Meal times, training sessions, rest periods, socialisation — a good facility will answer without hesitation. Safe, clean kennel environments. Your dog needs a comfortable, secure space to rest and decompress between sessions. If you’re unsure what a well-set-up kennel should look like, Lords & Labradors’ expert guide to dog cages is a genuinely useful reference. Regular updates throughout the stay. Photos, short videos, written progress notes — these aren’t extras, they’re a reasonable expectation. A good trainer wants you in the loop. A proper handover plan. Without one, results fade quickly. The best programmes include dedicated time to coach you on maintaining behaviours once your dog is home. The option to visit or ask questions before booking. A pre-visit or introductory call should always be available. Red flag: Any trainer who won’t let you see the facility or observe a session beforehand is worth walking away from. A reputable trainer will welcome your questions and invite your scrutiny — that openness is itself a mark of quality. Taking the time to vet your options properly is what separates a board and train experience worth every penny from one you’ll later wish you’d skipped. Safer alternatives: in-home training and what you can do next For many families, sending a dog away for training simply isn’t the right fit, and that’s completely fine. Private in-home training is often a far better match, especially when the behaviours you’re tackling happen at home: jumping on guests, counter-surfing, ignoring recall in the garden. Working with a trainer in your actual space means the lessons are built around your routines, your layout, and your dog’s real triggers, not a kennel environment that looks nothing like your living room. A good in-home trainer will observe how your dog behaves around you, spot the patterns you might not even notice, and show you exactly what to do in the moments that matter. You’re involved from day one, which means the skills are far more likely to stick. There’s no transfer gap to navigate, no trying to recreate what happened somewhere else. If you’re not quite ready to book a trainer, there’s still plenty you can do right now. Getting the basics in place, like a consistent daily routine, clear boundaries, and a comfortable space your dog genuinely wants to settle in, makes every training effort more effective. If crate training is part of that foundation, our guide to crate training instructions walks you through it in a way that feels kind and manageable rather than stressful. Small changes to your home setup can make a real difference too. A well-placed, cosy crate or a calm corner your dog can call their own gives them somewhere predictable to rest and decompress. That sense of security matters more than most people realise, especially when you’re building new habits together. Whether you go for board and train, in-home sessions, or a blend of both, the best next step is simply the one you’ll actually follow through on. Start there.

By Adele Busby

Read more

Weighing up the pros and cons of sending your dog away for training is one of those decisions that feels bigger the longer you sit with it, especially if you’re already exhausted by problem behaviours and running low on ideas. This article walks you through what board and train actually involves, the real benefits and the genuine limitations, and how to tell whether it suits your dog and your life. You’ll also find practical guidance on choosing a reputable trainer and what to try if a residential programme isn’t the right fit.

What sending your dog away for training actually means

Board and train, residential training, dog training camp — there are plenty of names for it, but the idea is essentially the same. Your dog goes to live with a professional trainer for a set period, usually somewhere between one and four weeks, and they work through specific behaviours together during that time.

If you’re in the thick of it with a dog who pulls on every walk, bounces off every visitor, or simply cannot seem to settle, the whole concept can sound almost too good to be true. And for some dogs and some families, it genuinely does make a real difference.

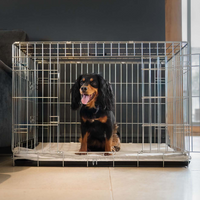
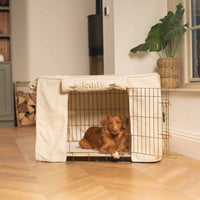
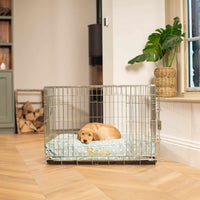
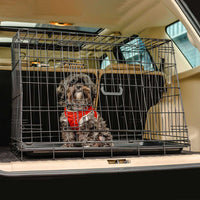
During a typical stay, your dog will live in the trainer’s home or a dedicated facility and receive structured sessions throughout the day. The focus might be basic obedience, loose lead walking, recall, or working through reactivity and anxiety. The better programmes also build in time for everyday life skills — including learning to settle calmly in a crate. If that’s something you want your dog to get comfortable with, our introduction to dog crates is a helpful place to start.

Sending your dog away for training tends to suit a few types of dogs in particular: puppies getting their foundations right, adolescents going through a chaotic phase, or adult dogs with deeply ingrained habits their owners haven’t been able to shift at home.

What it isn’t, though, is a hands-off permanent fix. The trainer does the groundwork, but you’re still very much part of the equation once your dog comes home. Knowing what to expect from the outset makes the whole experience far more useful — and far less likely to end in frustration. That’s exactly what the rest of this article is here to help with.

The upsides: when a training stay can really help

There are real, meaningful advantages in the pros and cons of sending your dog away for training discussion. For the right dog, and with the right trainer, a board and train stay can give you a stronger starting point than trying to fit training around school runs, late meetings, and a dog who is already overexcited by teatime.

Here are some of the biggest upsides:

  • Intensive daily repetition: Dogs learn through practice. In a residential programme, your dog may get several short, focused sessions each day, which often helps new habits settle in faster than a weekly class or the odd five minutes at home.
  • Faster progress on specific behaviours: If lead pulling, poor recall, barking at visitors, or jumping up has become an everyday frustration, that extra consistency can help shift things. It is not magic, but it can move you out of the stuck stage.
  • Professional handling for dogs that need more structure: Some dogs are wonderfully clever but a bit all over the place. Others become reactive, overstimulated, or hard to settle. A skilled trainer can spot patterns early, manage triggers carefully, and keep sessions clear and calm.
  • A simpler learning environment: Home is full of distractions. The post arrives, the children race through the hallway, the neighbour’s cat appears, and your training plan vanishes. A well-run training stay can strip some of that back so your dog can focus.
  • A helpful reset for overwhelmed owners: Real life happens. A new baby, illness, moving house, or a rough patch at work can make consistency really hard. Sending dog away for training can help lay groundwork while you get back on track.
  • Humane, reward-based work in experienced hands: This paper explains the wider conversation around training methods and notes that reward-based training methods are effective for helping manage or prevent behavioral problems in companion dogs. What matters in practice is choosing a trainer who is transparent, kind, and consistent in how they handle dogs day to day.

That said, the board and train pros and cons are never one-size-fits-all. These benefits are strongest when the trainer is genuinely skilled and your dog suits the format. A sociable, adaptable dog may settle in beautifully. A very anxious or separation-sensitive dog may find the whole experience harder than helpful.

Before you book anything, it is worth brushing up on your dog’s body language. It can help you judge whether your dog is coping confidently or quietly feeling overwhelmed, which is a big part of deciding whether dog board and train training is truly the right fit.

The downsides: cost, stress, and why results can fade at home

Board and train programmes can be genuinely transformative, but they come with real limitations worth understanding before you commit. Knowing the drawbacks isn’t about talking yourself out of it. It’s about going in with clear expectations so you can choose the right programme and actually get the most from it.

The three main drawbacks to consider:

  • The cost can be significant. Residential programmes typically run anywhere from £1,500 to £3,500 or more, depending on the trainer, location, and length of stay. That’s a serious investment, and it doesn’t always include follow-up sessions or owner coaching once your dog is back home.
  • Some dogs find the separation genuinely hard. Not every dog settles easily into a new environment away from their family. Anxious breeds, dogs with attachment sensitivities, or those who haven’t spent much time away from home can find the experience stressful, regardless of how good the facility is. It’s worth being honest about your dog’s temperament before you book.
  • Results can fade quickly without proper follow-through. This is probably the most overlooked downside of sending your dog away for training. If the programme doesn’t include structured handover coaching for you as the owner, the progress can unravel within weeks. Dogs learn behaviour in context, and a professional training environment is a world away from your living room, your routine, and the particular chaos of daily life with your family.

Worth knowing: A dog can learn to sit reliably in a training facility and then appear to forget it completely once they’re home. That’s not a failure on the dog’s part. It’s what happens when the environment and the reinforcement change overnight.


None of these drawbacks are reasons to rule out a board and train programme entirely. They’re reasons to ask better questions before you sign up. A reputable programme will include meaningful owner coaching at the end, not just a handover sheet and a wave goodbye. Because however well your dog has done, the training only sticks if you’re equipped to carry it forward once they’re back on the sofa with you.

How to know if a board and train programme is the right fit

Board and train isn’t a one-size-fits-all solution, and what works brilliantly for one dog can feel completely overwhelming for another. Age, temperament, the severity of the behaviour, and what your home life actually looks like all play a part when you’re weighing up the pros and cons of sending your dog away for training.

Board and train may be a good fit if…

  • Your dog has severe leash reactivity that needs consistent, immersive work beyond what weekly classes can offer
  • Your schedule is genuinely hectic and daily training practice is hard to sustain
  • Your dog is confident, sociable, and settles easily in new environments
  • You’re dealing with a specific, complex behaviour that needs expert input quickly
  • Your dog is a young adult with established problem behaviours that feel unmanageable at home

It may not be the right choice if…

  • Your dog is very young and still building trust and attachment with you
  • You have a shy or anxious dog who finds being away from home deeply distressing
  • The issue is rooted in your household dynamic, which a trainer working remotely simply can’t address
  • Your dog has a history of trauma or multiple rehoming experiences
  • You’re unlikely to follow through with the trainer’s plan once your dog is back home

Worth knowing: A dog’s background shapes how they respond to intensive away-from-home training more than most people realise. Whether your dog came from a breeder or a rescue can influence their confidence, attachment style, and ability to adapt. Our guide to breeders vs. rescues is a useful starting point for understanding how your dog’s origins might shape their training needs.

When in doubt, speak with a qualified trainer before committing. Advice tailored to your specific dog is always worth getting.

What to look for in a trainer or training facility

Choosing the right trainer matters just as much as choosing the right programme. A well-run facility with experienced, ethical trainers can make all the difference between lasting results and a stressful experience for everyone involved — so when you’re weighing up the pros and cons of sending your dog away for training, this part of the decision deserves just as much thought as the programme itself. Knowing what to look for puts you firmly in the driving seat.

Here’s what to check before you commit:

  • Recognised qualifications or accreditations. Look for trainers affiliated with bodies like the Animal Behaviour and Training Council (ABTC) or the Association of Pet Dog Trainers (APDT). These aren’t just letters after a name — they signal real accountability.
  • Force-free, positive reinforcement methods. Any reputable trainer should be able to explain their approach clearly and confidently. Reward-based training is not only kinder, it tends to stick far better long-term.
  • Transparent daily routines. Ask exactly how your dog will spend their day. Meal times, training sessions, rest periods, socialisation — a good facility will answer without hesitation.
  • Safe, clean kennel environments. Your dog needs a comfortable, secure space to rest and decompress between sessions. If you’re unsure what a well-set-up kennel should look like, Lords & Labradors’ expert guide to dog cages is a genuinely useful reference.
  • Regular updates throughout the stay. Photos, short videos, written progress notes — these aren’t extras, they’re a reasonable expectation. A good trainer wants you in the loop.
  • A proper handover plan. Without one, results fade quickly. The best programmes include dedicated time to coach you on maintaining behaviours once your dog is home.
  • The option to visit or ask questions before booking. A pre-visit or introductory call should always be available.

Red flag: Any trainer who won’t let you see the facility or observe a session beforehand is worth walking away from.

A reputable trainer will welcome your questions and invite your scrutiny — that openness is itself a mark of quality. Taking the time to vet your options properly is what separates a board and train experience worth every penny from one you’ll later wish you’d skipped.

Safer alternatives: in-home training and what you can do next

For many families, sending a dog away for training simply isn’t the right fit, and that’s completely fine. Private in-home training is often a far better match, especially when the behaviours you’re tackling happen at home: jumping on guests, counter-surfing, ignoring recall in the garden. Working with a trainer in your actual space means the lessons are built around your routines, your layout, and your dog’s real triggers, not a kennel environment that looks nothing like your living room.

A good in-home trainer will observe how your dog behaves around you, spot the patterns you might not even notice, and show you exactly what to do in the moments that matter. You’re involved from day one, which means the skills are far more likely to stick. There’s no transfer gap to navigate, no trying to recreate what happened somewhere else.

If you’re not quite ready to book a trainer, there’s still plenty you can do right now. Getting the basics in place, like a consistent daily routine, clear boundaries, and a comfortable space your dog genuinely wants to settle in, makes every training effort more effective. If crate training is part of that foundation, our guide to crate training instructions walks you through it in a way that feels kind and manageable rather than stressful.

Small changes to your home setup can make a real difference too. A well-placed, cosy crate or a calm corner your dog can call their own gives them somewhere predictable to rest and decompress. That sense of security matters more than most people realise, especially when you’re building new habits together.

Whether you go for board and train, in-home sessions, or a blend of both, the best next step is simply the one you’ll actually follow through on. Start there.

Related Products

Related Collections

Related Articles

  • How to Walk Your Dog Without a Leash
    25.08.26 August 25, 2026 Owning a Dog

    How to Walk Your Dog Without a Leash

    There is something genuinely lovely about watching a dog move freely, nose down, tail up, doing exactly what they were built to do. Learning how to walk your dog without a leash takes more than just unclipping the lead, though, and this guide covers everything from checking local rules and assessing your dog’s recall to choosing the right places and building confidence one step at a time. Whether you are just starting out or looking to make off-leash walks feel easier and more reliable, there is plenty here to help you get it right. Can you walk your dog without a leash? Start with the rules and the real-world check The idea of walking your dog without a leash sounds wonderfully freeing — and for the right dog in the right place, it genuinely is. But before you unclip that lead, two things are worth sorting out: what the rules say, and whether your dog is actually ready for that freedom. Start with your local leash laws, because they vary more than most people expect. Some parks allow leash-free dog walking in designated zones only, others require dogs to be on a lead at all times, and some areas have seasonal restrictions in place to protect wildlife. A quick search for your local council or park authority guidelines takes five minutes and could save you a fine or a very awkward conversation with a park warden. Once you know what’s legally allowed, shift your focus to the practical reality. Even in a fully off-leash area, not every dog is ready for that kind of walk. A dog who reliably comes back when called in a quiet garden might completely lose the plot the moment a squirrel, a cyclist, or another dog enters the picture. That is not a failure — it is just where they are in their training right now. A useful gut-check: if your dog spotted something exciting across a field and bolted toward it, would they come back when you called? If the answer is anything other than a confident yes, open-space off-leash walking is probably a step too soon. It also helps to tune into how your dog is feeling before the walk even starts. A dog who is already overstimulated or on edge needs more structure, not less. Getting good at reading those early signals makes a real difference, and our dog body language guide is a great place to start. Is your dog actually ready? The recall basics that matter most Before you even think about how to walk your dog without a leash, it’s worth asking a more honest question: has your dog actually earned that freedom? Most dogs are ready later than their owners assume, and the gap between “mostly listens” and “genuinely reliable off lead” is bigger than it looks on a quiet Sunday morning stroll. A solid recall means your dog comes back every single time — not just in the garden when nothing interesting is happening. It means they respond in an unfamiliar park, near other dogs, when a squirrel bolts across the path, and when a child drops a sandwich three metres away. In recall training for dogs, this is called “proofing”: practising the same cue across different places, distractions, and energy levels until the response becomes instinct rather than coincidence. Here’s how to tell whether your dog is genuinely there yet: Recalls reliably in at least three different outdoor environments, not just your usual route Returns to you even when distracted by other dogs, wildlife, or an irresistible smell Checks back in with you naturally during walks, without being prompted Disengages from other dogs or fast-moving distractions on a single calm cue Holds a sit or a wait briefly, even when the world around them is interesting Responds to cues outdoors at the same level they would indoors A clear word of caution: If your dog is reactive to other dogs, people, or traffic, has a prey drive that shuts out everything else once you’re outside, or regularly ignores cues the moment the lead comes off, they are not ready for leash-free walking yet. That is not a failure on anyone’s part. It simply means there’s more groundwork to do first, and doing it properly will make all the difference. Once your dog clears those checkpoints, the next step is finding the right environment to start practising. And if your dog tends to bark or react on walks, it’s worth reading why dogs bark when out walking before going any further — reactivity is one of the clearest signs that a dog needs more time on the lead before earning that extra freedom. Where off-leash walking makes sense — and where it doesn’t Knowing how to walk your dog without a leash is only half the picture. The environment you choose matters just as much as the training itself. Even a dog with a rock-solid recall can be caught off guard by an unexpected noise, an unfamiliar dog bounding over, or a squirrel appearing from nowhere. Getting the location right gives you both the best possible chance of a good experience. Good locations for off-leash walking Securely fenced fields hired specifically for dog exercise Quiet rural footpaths and bridleways where off-leash access is permitted Designated dog exercise areas within parks Large open spaces with good sightlines and low foot traffic Private land where you have the owner’s permission Places to avoid Busy pavements, roads, or anywhere near fast-moving traffic Crowded parks where your dog might bolt or become reactive Wildlife-heavy areas, especially during nesting or lambing season Beaches or open countryside with no natural boundaries Any space where signage requires dogs to be kept on a lead Always check local bylaws and any posted signs before letting your dog off the lead somewhere new. Rules vary a lot between locations, and what’s fine in one park may not be in the next. Starting in quiet, low-distraction spaces gives your dog room to make good choices and helps you build confidence as a handler too. Once those early sessions feel easy, you can begin introducing slightly busier environments. Choosing the right spaces also ties into your dog’s broader health and happiness — our guide on keeping your dog physically and mentally stimulated is a great place to explore that further. How to build confidence with gradual off-leash practice Building off-leash confidence is a gradual process, and rushing it is the most common mistake dog owners make. If you want to learn how to walk your dog without a leash in a way that genuinely sticks, the key is earning that freedom in small, deliberate steps rather than crossing your fingers in a wide-open field. Start with a long line. Attach a 20 to 50-foot long line and let your dog explore with real freedom while you keep a safety net in place. Government guidance on recall training recommends using a 20–50-foot long line, not a retractable leash, to work on prompt recall — and it genuinely makes a difference. Retractable leads create constant tension; long lines teach your dog to move freely and still tune in to you. Reward spontaneous check-ins. Every time your dog glances back at you or trots over without being called, mark it with a cheerful “yes” and a treat. You’re teaching them that keeping an eye on you is always worth their while — and that lesson carries a long way. Practise recall in low-distraction environments. An empty car park, a quiet garden, or a familiar field all work well. Keep sessions short, and always make coming back feel like the best decision your dog has made all day. Introduce distractions gradually. Once recall feels solid in calm spaces, add one layer of difficulty at a time — another dog in the distance, a jogger passing by, an interesting smell along the hedgerow. Off-leash dog training at this stage is about building reliability, not testing limits. Try short off-leash moments in safe, enclosed spaces. Drop the long line and give your dog a few minutes of genuine freedom. Watch their body language, and notice how quickly they respond when you call. Extend freedom only when responsiveness stays consistent. Teaching a dog to walk without a leash takes real patience. If focus starts to slip, step back without frustration — it’s not a setback, it’s just part of the process. Practical tip: Only move to the next stage when your dog is succeeding around 8 out of 10 times at the current one. That ratio is your green light, not the calendar. The progression mindset is everything here. A quality training lead is your best companion in those early stages, giving your dog room to roam while keeping you connected — and the patience you put in now is exactly what makes leash-free walking genuinely enjoyable for both of you later. What to bring for safer, happier leash-free walks Being prepared makes a real difference when you’re figuring out how to walk your dog without a leash. A little forward planning means fewer stressful moments and more time actually enjoying the freedom together — and honestly, it just becomes second nature once you’re in the habit. Here’s what’s worth bringing on every leash-free outing: An ID tag with current contact details — even the most reliable dog can have an off day, so make sure the tag is readable and your number is still correct A well-fitted collar or harness — something secure that won’t slip, even if your dog decides to roll in something deeply unpleasant High-value training treats — the good stuff, like small pieces of chicken or cheese, that your dog will actually work for A portable water bottle and travel bowl — longer, more relaxed walks mean your dog needs to stay hydrated, especially when the weather warms up A whistle — useful for recall training because the sound carries further than your voice and stays consistent whatever mood you’re in A long line as a safety backup — for dogs still building reliability, a longer lead lets them roam while keeping you connected. The Lords & Labradors Essentials Twill Dog Lead works well here, doubling up as a training lead for practising recall before you make the leap to fully off-leash Having the right kit genuinely helps you feel more confident out there, and dogs pick up on that energy. Even experienced off-leash walkers keep a lead tucked away. That’s not being overcautious — that’s just knowing your dog. Knowing when to keep the lead on Even the most committed off-leash walkers have days where the lead just stays on. And honestly? That is completely fine. Learning how to walk your dog without a leash is not about achieving some permanent state of freedom. It is about reading your dog honestly and making good calls in the moment. If they had a restless night, spent the morning losing their mind at squirrels through the window, or just are not tuning in to you today, that is useful information. The recall that holds beautifully on a quiet Tuesday morning may not be there on a busy Saturday afternoon near a packed farmers market, and that is worth knowing before you unclip. Watch for the signs. A dog drifting further than usual, ignoring their name, or locking onto something in the distance is communicating clearly. They need more support right now. That is not failure. It is just an honest moment in the process, and noticing it is part of good recall training for dogs. The same thinking applies when your environment shifts unexpectedly. A new location, a sudden crowd, or an unfamiliar dog appearing out of nowhere can change everything in seconds. Clipping the lead back on is not a step backwards. It is exactly what responsible leash-free dog walking looks like in practice. It is always worth keeping a reliable lead on you, even on your most confident off-leash days. Our Essentials Twill Dog Lead is a solid everyday choice — sturdy when you need it, comfortable enough to forget it is in your hand. The more honest your judgment calls, the more freedom your dog earns over time. Frequently Asked Questions How do I get my dog to walk without a leash? You build up to it gradually, starting with a long line rather than unclipping straight away. Practise recall in quiet places, reward check-ins, add distractions slowly, and only give more freedom when your dog responds reliably in different environments and around real-world temptations. Is it okay to walk your dog without a leash? Yes, if it’s legal where you are and your dog is genuinely ready for it. Check local leash rules first, then be honest about recall, reactivity, and the environment. If your dog won’t reliably come back or the setting feels unsafe, keep the lead on.

    By Adele Busby

    Read more
  • What to Do When Your Dog is Reverse Sneezing
    24.08.26 August 24, 2026 Health

    What to Do When Your Dog is Reverse Sneezing

    That sudden honking, snorting sound your dog makes out of nowhere is enough to stop any pet parent’s heart, but knowing what to do when your dog is reverse sneezing makes all the difference. In this guide, we’ll walk you through why it happens, how to keep both of you calm in the moment, and which signs are worth a call to the vet. We’ll also share some simple changes you can make at home to reduce how often it happens in the first place. What reverse sneezing looks and sounds like in dogs If you’ve ever watched your dog suddenly freeze, stretch their neck forward, and let out a loud, honking snort like they’re trying to inhale and sneeze at the same time, you’ve almost certainly witnessed a reverse sneeze. It sounds alarming. It looks alarming. And if you had no idea what you were watching, panicking is a completely natural response. The reassuring news? Reverse sneezing is usually harmless. It’s not a cough, not a seizure, and not a sign that something is lodged in their throat. Think of it as a reflex, much like a regular sneeze, just working in reverse. Instead of air rushing outward, your dog rapidly pulls air in through their nose, producing that distinctive snorting or honking sound that tends to stop everyone in the room. During an episode, most dogs stand still with their elbows splayed, neck outstretched, and eyes wide open. Some look genuinely distressed, which is hard to watch even when you know what’s happening. The episode itself usually lasts anywhere from a few seconds to around a minute, and the vast majority of dogs bounce back to their normal selves almost immediately. Paying attention to how your dog behaves before and after can tell you a lot. A dog that’s relaxed and happy on either side of the episode is generally nothing to worry about. Our guide to understanding your dog’s body language can help you get better at reading those subtle signals. Recognising what reverse sneezing looks and sounds like is honestly half the battle — because once you know, it’s so much easier to stay calm when it happens. Why dogs reverse sneeze in the first place Reverse sneezing is an involuntary reflex, and it usually comes down to something irritating the soft palate, throat, or nasal passages. Think of it like a sneeze in reverse — the body trying to clear an irritant rather than signal that something is seriously wrong. Most dogs will experience it at some point, and for the vast majority, it’s completely normal. Common triggers include: Nasal or throat irritation from dust, pollen, or mould Excitement or over-stimulation, like bounding over to greet you at the door Pulling on the lead, which puts pressure on the throat Eating or drinking too fast Strong scents, household sprays, or air fresheners Sudden changes in temperature or air quality Being a flat-faced (brachycephalic) breed, such as a Pug, French Bulldog, or Cavalier King Charles Spaniel — their shorter airways make them anatomically more prone to episodes Understanding the dog reverse sneezing causes behind an episode really does help in the moment. Once you recognise that the body is simply doing what it needs to do — the same way we might need to cough or clear our throat — it’s much easier to stay calm rather than panic. And calm is exactly what your dog needs from you. The good news is that most episodes pass within seconds to about a minute. One moment your dog is honking away, and the next they’re trotting off like nothing happened. That’s usually all there is to it. What to do in the moment when your dog is reverse sneezing If you’re wondering what to do when your dog is reverse sneezing, the first thing is simple: try not to panic. It can sound dramatic, especially the first time you hear it, but many episodes are brief and pass within 30 seconds to a minute. Your calm really helps. In the moment, focus on gentle comfort: Stay relaxed and speak softly. Your dog will pick up on your energy. A quiet, reassuring voice can help them settle while the episode passes. Gently stroke their throat or chest. Slow, light strokes may encourage a swallow, which can help the spasm ease naturally. Offer a tiny sip of water if they’re settled enough to take it. Not a full bowl, and don’t force it. Sometimes a small swallow is all that’s needed. Move them away from obvious triggers. If they’ve been sniffing dust, pulling on the lead, or sitting near strong smells like candles or cleaning sprays, guide them to a calmer spot with fresher air. A good rule of thumb with reverse sneezing in dogs treatment at home is to keep things quiet, gentle, and low-stress. Most of the time, your job is simply to comfort rather than intervene. What not to do: Don’t put your fingers in your dog’s mouth Don’t hold them down or restrain them forcefully Don’t fuss loudly or crowd them, even if you feel worried Once it’s over, many dogs go straight back to normal as if nothing happened. If your dog’s reverse sneezing symptoms seem to happen often, last longer than usual, or leave them distressed, that’s when it’s sensible to think about dog reverse sneezing causes and whether a vet check is the right next step. When reverse sneezing is worth a vet call Most of the time, reverse sneezing in dogs is completely harmless and passes within seconds. But if you start noticing that episodes are happening more often, or that your dog seems off afterwards, it’s worth paying closer attention. You know your dog better than anyone, so trust that instinct. These are the signs that deserve a vet conversation: Episodes happening multiple times a day, or lasting longer than a minute Your dog seeming distressed, panicked, or wiped out afterwards Nasal discharge, whether clear, cloudy, or discoloured A new cough appearing alongside the reverse sneezing Laboured or noisy breathing between episodes Gums that look pale or slightly blue Lethargy, low energy, or a noticeable dip in appetite An occasional isolated episode is rarely cause for concern. A recurring or worsening pattern is always worth getting checked. When to worry about dog reverse sneezing really comes down to that shift in pattern. A vet can look into common culprits like allergies, a low-grade infection, a foreign body in the nasal passage, or a structural issue affecting the airway. None of these are things you’d pick up at home, but all of them are very treatable when caught early. Even if everything turns out to be fine, you’ll come away with peace of mind, and that’s never wasted. How to reduce reverse sneezing triggers at home Once you understand what sets your dog off, a few small tweaks at home can make a real difference. If your dog tends to pull on the lead and reverse sneezes regularly, switching to a well-fitted harness is one of the easiest wins. Collar pressure on the throat is a surprisingly common trigger, and a harness removes it entirely. Inside, it’s worth thinking about air quality too. Dust little and often, skip the heavily scented candles or plug-in air fresheners, and if you use cleaning sprays, let the room air out before your dog wanders back in. Small habits, but they stack up. Fast eaters are also worth a closer look. Gulping food can irritate the throat and kick off an episode, so a slow feeder bowl or snuffle mat at mealtimes can genuinely help. Beyond that, it’s worth keeping a loose mental note of when episodes happen. After a walk during high pollen season? After a boisterous play session? Spotting a pattern gives you something real to work with, whether that’s adjusting walk times or winding down play more gradually. The reassuring truth is that most dogs live completely happily alongside the occasional reverse sneeze. Now that you know what it looks like, why it happens, and what to do in the moment, you’re already better placed to handle it calmly when it comes. Frequently Asked Questions How to calm down reverse sneezing in dogs? The best way to calm reverse sneezing is to stay relaxed and gently comfort your dog while it passes. Speak softly, stroke their throat or chest, offer a tiny sip of water if they’re settled enough, and move them away from dust, strong smells, or other obvious triggers. When to worry about reverse sneezing? Reverse sneezing is worth worrying about if it becomes frequent, lasts longer than a minute, or your dog seems unwell afterwards. Signs that need a vet call include distress, nasal discharge, a new cough, noisy breathing between episodes, pale or blue gums, lethargy, or a drop in appetite. What triggers reverse sneezing in dogs? Reverse sneezing is usually triggered by irritation in the throat or nasal passages. Common causes include dust, pollen, mould, strong household scents, excitement, pulling on the lead, eating or drinking too fast, temperature changes, and being a flat-faced breed with shorter airways. How long is too long for a dog to reverse a sneeze? Anything lasting longer than about a minute is a sensible point to call your vet. Most reverse sneezing episodes pass within a few seconds to around a minute, and dogs usually seem completely normal again straight afterwards.

    By Adele Busby

    Read more
  • How to Cut Dog Nails That Are Black
    19.08.26 August 19, 2026 Health

    How to Cut Dog Nails That Are Black

    Trimming black dog nails can feel like a guessing game, but it really does not have to be. This guide walks you through how to cut dog nails that are black with confidence, covering everything from spotting the quick before you snip to choosing the right tools, handling the odd nick along the way, and building a calmer routine over time. Whether you are starting from scratch or just looking to feel less uncertain with the clippers, there is something here to help you and your dog get through nail day in one piece. How to Tell Where the Quick Is on Black Dog Nails The quick is the living core of your dog’s nail. It contains blood vessels and nerves, so if you catch it with the clippers, it bleeds and stings — not ideal for anyone involved. With light-coloured nails, you can usually spot it as a soft pink shadow running through the centre, which makes the whole job much more straightforward. With black nails, that shadow disappears completely, and that’s exactly why so many pet parents feel stuck before they’ve even picked up the clippers. The good news? You don’t have to guess. You just need to slow down and read a few reliable clues. Start by shining a small torch or your phone’s flashlight through the nail from underneath. On finer nails, this can reveal the quick as a darker oval shape within the nail. It won’t work for every dog, but it takes about three seconds to try and it’s genuinely useful when it does. If the light doesn’t show much, nail texture becomes your next guide. Trim a tiny sliver from the tip and look at the cut surface. At first it’ll appear solid and chalky, white or grey all the way through. That’s safe ground. Keep taking small slivers, checking each time, and eventually the centre will shift. It might look darker, almost black, or you’ll notice a small grey dot appearing in the middle. That dot is your cue to stop. You’re getting close to the quick. Nail shape tells you something before you even make a cut, too. Most dog nails curve downward and taper toward the tip, and the quick follows that same curve. It typically sits further back than you’d expect, so if the nail has a definite hook at the end, trimming just that hooked portion is usually where you want to start. One last thing: a calm dog makes all of this much easier. When they’re tense and pulling away, it’s harder to look closely and work carefully. Keeping an eye on your dog’s body language throughout the trim helps you spot early signs of stress before things unravel. The Tools That Make Black Nail Trims Safer and Calmer Having the right tools ready before you start makes a real difference when you’re working with black nails. They help you make smaller, more controlled cuts, reduce the chance of catching the quick off guard, and keep the whole experience calmer for your dog from the very first snip. Sharp scissor-style or guillotine clippers. Blunt clippers crush rather than cut cleanly, which is uncomfortable for your dog and makes it much harder to read the cut surface. Sharp blades give you a clean edge — exactly what you need when taking black nails back little by little. A nail grinder. If clippers feel a bit too all-or-nothing, a grinder lets you remove nail gradually and gives you much finer control over how much you take off. Many dogs also find the sensation less startling than a sudden snap. A small flashlight or phone torch. Holding a light against the top of the nail can help you spot the quick’s shadow before you cut. It doesn’t work on every dog, but it takes seconds to try and is well worth doing. Styptic powder. Have this within arm’s reach before you begin. If you nick the quick, it works fast — and knowing it’s right there helps you stay calm rather than scrambling. High-value treats. Something your dog doesn’t get at any other time, like a small cube of cheese or a bit of cooked chicken, makes the session feel worthwhile for them and keeps their focus in the right place. A non-slip mat or towel. This gives your dog something to grip, helps them feel a little more settled, and means less wriggling for you to work around. What is styptic powder? It stops minor bleeding almost instantly if you nick the quick. It’s a staple in any dog nail trimming kit, so always have it to hand before you start. None of these are hard to find, and together they genuinely change how confident you feel tackling black nails at home. If you’re building out your grooming kit, you’ll find plenty of dog care essentials over at Lords and Labradors. Good preparation really is the best dog nail trimming tip there is — have everything ready before your dog sits down, and you’re already off to a better start. A Step-by-Step Way to Cut Black Dog Nails Without Hitting the Quick Once you understand how to read the nail, the actual cutting becomes far less daunting. Trimming black dog nails safely is really about slowing down, taking tiny slices, and trusting what you see rather than guessing where to stop. Settle your dog before you pick up the clippers. Sit on the floor together, offer a few treats, and let them sniff the clippers. A calm start makes everything that follows easier. Find a comfortable position for you both. Some dogs are happy lying on their side while you kneel beside them. Others prefer sitting upright with a paw gently lifted. Work with your dog rather than forcing a hold that makes them tense. Press the toe pad gently to extend one nail at a time. This gives you a clear view and keeps the paw steady without gripping so tight that your dog pulls away. Start with a small snip at a slight angle. Take just the very tip off. You’re not trying to do it all in one go — you’re just getting started. Check the cut surface before you snip again. Hold the nail up to the light and look at the cross-section. A chalky white or grey centre means you’re well away from the quick and safe to continue. Keep going in tiny increments, checking every time. As you get closer, the centre of the nail will start to shift. The moment you see a darker grey or black dot beginning to appear in the middle, stop on that nail. That dot is the quick showing itself, and one slice further could cause real discomfort. Reward your dog between nails, not just at the end. A treat after each one keeps things positive and gives your dog a natural moment to breathe and reset. Stop if your dog tells you they’ve had enough. Panting, pulling the paw away, or going rigid are all signs to pause — even if you’ve only done two nails. Pushing through rarely ends well. Split the session across days if that’s what your dog needs. Front paws today, back paws tomorrow. There’s no rule that says all twenty nails have to happen at once, and honestly, your dog will thank you for it. A note on the black dog nail quick: In lighter nails, the quick shows up as a visible pink line running through the centre. In black nails, you simply can’t see it from the outside, which is why reading the cross-section matters so much. A small dark dot or a soft pale ring appearing in the centre after a snip is your signal to stop. That’s the quick beginning to surface, and going any further risks pain and bleeding. The whole point of learning how to cut dog nails that are black is building confidence through small wins, not racing to finish. Three nails done calmly is genuinely better than twenty done with your dog stressed and wriggling. If your dog tends to find grooming difficult, it’s worth thinking about how you handle other anxious moments together — the same approach that helps keep dogs calm during stressful situations like fireworks applies just as well here. What to Do if You Nick the Quick Nicking the quick when you’re learning how to cut dog nails that are black happens to almost every pet parent at some point. It looks more dramatic than it is — a small dark red bleed from the tip of the nail — and it tends to startle you far more than it hurts your dog. Take a breath. You’ve got this. Here’s exactly what to do: Stop trimming and set the clippers down. Apply styptic powder or cornstarch directly to the nail tip. Hold gentle pressure with a clean cloth or your finger for 30 to 60 seconds. Keep your dog calm and still with a quiet voice and a soft, steady touch. Once the bleeding slows, check the nail before letting your dog wander off. Styptic powder is a clotting agent that stops bleeding quickly — and it’s the single most useful thing to have nearby during any nail trim. Purdue University’s veterinary guidance specifically recommends that you keep styptic powder available when clipping a pet’s nails to stop bleeding if you clip too short. Pick some up before your next session if you don’t already have it. For aftercare, keep the paw clean and dry for the rest of the day. Avoid rough-surface walks for 24 hours, and check back on the nail over the next day or so for any redness or swelling. If the bleeding hasn’t slowed within 5 to 10 minutes, or your dog seems to be in genuine pain rather than just briefly unsettled, call your vet. That’s the sensible thing to do — not a sign that anything has gone seriously wrong. How to Make Nail Trims Easier Next Time The biggest dog nail trimming tip anyone can give you? Trim more often. It sounds almost too simple, but when you’re working out how to cut dog nails that are black, consistency matters just as much as technique. Dogs who seem completely impossible to trim can surprise you once a calm routine clicks into place. Trim every 3 to 4 weeks. Regular sessions keep nails at a manageable length and make each one shorter and less stressful — for both of you. Reward after every single nail. Use something your dog genuinely loves, like a small piece of cheese or chicken, and give it the moment you finish each nail rather than saving it until the end. Handle paws between sessions. A minute or two of gentle paw touching while you’re watching TV or winding down costs nothing and builds real tolerance without any pressure attached. Take a little, more often. Small snips every few weeks feel far less daunting than trying to tackle seriously overgrown nails after a long gap — and you’ll stay well clear of the quick. Keep the setup consistent. Same spot, same time of day, same calm energy. Dogs read routine surprisingly well, and familiarity genuinely helps settle nerves. Start puppies early. Even pretend trims with no cutting involved help young dogs learn that paw handling is completely normal. Pro tip: Trimming a tiny amount every 2 to 3 weeks is far safer than waiting until nails are overgrown — especially when you’re navigating the black dog nail quick. Think of each session as a training opportunity rather than a chore to get through. Dogs who once wriggled, whined, or flatly refused can absolutely learn to sit calmly for a trim. It just takes consistency, patience, and a well-stocked treat supply. When to Ask a Groomer or Vet for Help Sometimes, the most caring thing you can do is hand the clippers to someone else. If you have worked through how to cut dog nails that are black and still feel uncertain, that is completely fine. Some dogs have nails that are genuinely thick, curved, or difficult to read, even for owners who have been doing this for years. Others simply will not settle, no matter how many treats you offer or how carefully you have set the scene. Professional groomers trim nails every single day. They know how to read the nail, position the dog, and work with a calm confidence that only comes with real experience. Booking a session or two is not admitting defeat. It is a smart way to watch someone skilled work up close, ask questions, and pick up the kind of practical knowledge that no article can fully replace. Your vet is equally worth considering, especially if your dog has unusually thick nails, any history of paw injuries, or anxiety that makes handling genuinely difficult. They can trim safely and point you toward ways to make future sessions less stressful for your dog and for you. The most important shift is this: professional help is a starting point, not a last resort. Once your dog has had a calm, positive experience with someone who knows exactly what they are doing, you will often find that the next trim at home feels a little easier too. Frequently Asked Questions How do you know where the quick is on black dog nails? You find the quick on black dog nails by trimming tiny slivers and checking the cut surface each time. A chalky white or grey centre is usually safe; when you start to see a darker dot or change in the middle, stop. A torch underneath the nail can sometimes help too. Can I trim my dog’s black nails? Yes, you can trim your dog’s black nails if you go slowly and take very small amounts at a time. The safest approach is to remove the hooked tip first, check the cut surface after every snip, and stop as soon as you see a darker centre appearing. How do you trim severely overgrown dog nails? Trim severely overgrown dog nails by taking off only a little at a time and spreading the work over multiple sessions if needed. Tiny, regular trims every 2 to 4 weeks are safer than one big cut, especially with black nails, because they help you avoid catching the quick.

    By Adele Busby

    Read more
  • Why Do Some Dogs Watch TV and Others Don't
    18.08.26 August 18, 2026 Owning a Dog

    Why Do Some Dogs Watch TV and Others Don't

    If you’ve ever wondered why some dogs watch TV and others don’t even glance at the screen, you’re not alone. The answer sits at the intersection of how dogs actually see and hear the world, what their individual personalities bring to the equation, and what their body language is quietly telling you while they watch. This piece covers all of it, plus some simple ways to make TV time a genuinely calm and comfortable habit if your dog happens to love it. Why some dogs seem glued to the TV while others barely glance at it You’ve settled in for a quiet evening on the sofa, and there’s your dog — eyes fixed on the screen, following every flicker of movement. Meanwhile, your friend’s dog has never so much as glanced at the telly. Same species, completely different reaction. It’s one of those small, everyday moments that makes you wonder what’s really going on inside their head. The short answer is that why some dogs watch TV and others don’t comes down to a mix of biology, personality, and what naturally holds their attention. Some dogs are wired to track movement — it’s almost instinctive. Others rely far more on scent and sound to make sense of the world, and a glowing rectangle on the wall just doesn’t register as interesting. Some are simply more curious by nature than others. What’s actually on screen plays a role too. Research from Northeastern University shows that animals can sense moving images on screens, and high-pitched, frenzied sounds help attract their attention — which is why a nature documentary full of darting birds tends to get a much stronger reaction than a slow-paced drama. None of this is random. There’s quite a lot happening beneath the surface, and understanding what your dog actually sees and hears when they look at a screen can tell you something real about how they experience the world. It can even help you notice when their body language is signalling something worth paying attention to. How dogs actually see a television screen Dogs can genuinely see what’s on your television screen, but their visual experience is quite different from yours. And that difference goes a long way towards explaining why some dogs watch TV and others don’t even glance up. The way a dog’s eyes process light, movement, and colour all shape whether the telly grabs their attention or gets completely ignored. Here’s what’s actually happening visually when your dog watches the screen: Motion detection: Dogs are far more sensitive to movement than we are. A bird darting across the screen or a ball bouncing past can trigger the same instinct as spotting something shift in the garden. Flicker rate perception: Older CRT televisions flickered at a rate dogs could easily detect, making the image look choppy and unappealing. Modern HD screens refresh quickly enough that most dogs now see something much smoother and easier to follow. Colour vision: Dogs are dichromats, meaning they see blues and yellows well but can’t easily distinguish reds and greens. High-contrast images land much more clearly than busy, colourful scenes. Animal-shaped or fast-moving images: These are particularly likely to catch a dog’s eye, tapping into deep-rooted prey and social instincts that no amount of sofa time fully switches off. Quick fact: Dogs have a higher flicker fusion rate than humans, which makes them especially sensitive to on-screen movement, including subtle motion you might barely register yourself. Dogs with strong motion-detection instincts or naturally higher visual sensitivity are simply more likely to engage with what’s on. If yours reacts to animals on screen or fixates on fast movement, they’re often wired to be highly play-driven too. Interactive dog toys can be a brilliant outlet for exactly that kind of energy. What makes one dog watch and another ignore the screen Every dog is different, and why some dogs watch TV while others couldn’t care less comes down to a mix of biology, personality, and daily life rather than any one thing. What completely captivates one dog might not even register for another, and that’s entirely normal. Here are the key factors that shape whether your dog becomes a devoted telly fan: Breed tendencies. Herding and sight breeds like Border Collies and Greyhounds are naturally wired to track movement, making them far more likely to fixate on a screen than scent-driven breeds like Beagles, who’d rather follow their nose than watch television. Age and vision. Younger dogs tend to engage more readily. Older dogs may have reduced vision that makes the screen harder to process, so they’re more likely to tune it out. Temperament. Curious, alert dogs will often investigate whatever’s on. More laid-back personalities may simply decide it’s not worth their energy. Sensory sensitivity. Dogs that are highly responsive to sound and movement can react strongly to animal noises or fast action on screen — even if they seemed settled moments before. Training history. Dogs that have been encouraged to pay attention to their environment tend to notice on-screen activity more readily. Daily enrichment. A well-stimulated dog may ignore the TV completely. One looking for something to do is far more likely to seek it out. It’s also worth noting that dogs who react strongly to what they see or hear on screen often respond just as intensely to triggers outside the home. If your dog gets worked up rather than settled during TV time, this piece on why dogs bark when out walking might help you understand what’s going on. Ultimately, knowing your dog’s individual sensory profile and personality is the best way to understand whether the telly will ever genuinely hold their interest. When TV watching is harmless—and when it might mean something else For most dogs, a bit of screen time is completely harmless. Whether a dog watches TV or ignores it entirely often comes down to individual temperament, and a dog who glances at the screen, tilts their head at a curious sound, then wanders off to nap is simply being a dog. It’s the more intense reactions that deserve a closer look. Signs it’s all perfectly normal: Settling near the TV for background noise and company The occasional head tilt at animal sounds or movement on screen Brief curiosity that quickly gives way to a snooze Relaxed, easy body language throughout Signs worth keeping an eye on: Intense, unblinking fixation on the screen Barking, lunging, or pawing at the television Pacing or whining in response to certain sounds Visible tension, panting, or an inability to settle Some dogs who react strongly to fast-moving visuals or high-pitched audio are showing early signs of sensory sensitivity or underlying anxiety — and it rarely stays contained to the living room. A dog who struggles with the TV may also find loud or unpredictable environments genuinely stressful. Knowing how to help them stay calm during those moments is well worth having in your back pocket. If your dog’s TV reactions feel disproportionate or leave them visibly unsettled, a conversation with your vet or a certified behaviourist is always a good idea. If your dog loves the telly, how to make it a calm, positive habit If your dog has claimed the sofa spot closest to the screen, a few small tweaks can make that habit even more enjoyable — for both of you. Start with what’s on. Calmer content tends to work much better than fast-paced action or sport. Nature documentaries, slow wildlife footage, or dedicated dog TV channels are all solid choices. The gentler the visuals and audio, the less chance your dog ends up overstimulated or fixated on every movement. Volume matters more than you might think. Dogs hear far better than we do, so what sounds perfectly comfortable to you can feel surprisingly intense to them. If your dog seems restless or quietly slopes off when something loud comes on, it’s worth turning it down a little and seeing if they settle. It also helps to give them a proper place to land. A dog who feels genuinely comfortable is far more likely to watch TV in a relaxed, drowsy way rather than reacting to every sound. Tucking a cosy bed nearby makes a real difference — something like our Cosy Calming Puppy Crate Bed, which gives dogs a snug, secure spot to curl up and truly switch off. A favourite chew or enrichment toy alongside the TV adds another layer of calm, too. Get the setup right, and screen time can become a genuinely lovely part of your dog’s daily routine.

    By Adele Busby

    Read more

loyal customer in 17 countries

Why Shop With Us?

  • Free Delivery

    Orders over £75 qualify for free standard UK delivery. Orders under £75 will be calculated at the checkout.

  • Shopping Made Easy

    Gain exclusive access to sales and shop all your pets favourites on the go by downloading our app.

  • Designed in the UK

    Our own brand products are lovingly designed in our specialist UK workshop to our exacting standards.

  • We're Here For You

    Contact our Pet Experts on Chat or by email at sales@lordsandlabradors.co.uk