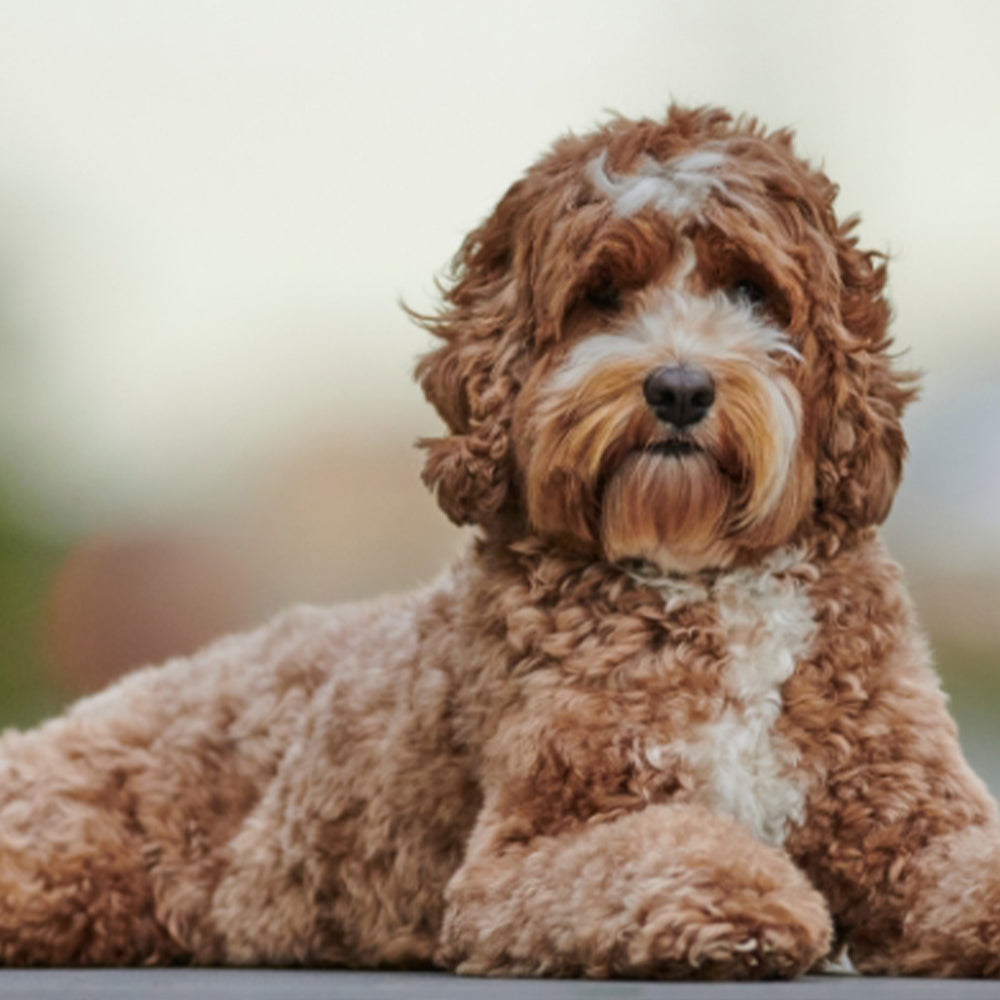
The Labradoodle is a delightful crossbreed between a Labrador Retriever and a Poodle, known for its friendly disposition and hypoallergenic coat. With a mix of intelligence and a loving nature, Labradoodles make wonderful family pets and are highly adaptable to various living situations.
The Labradoodle is becoming more and more popular with people looking for a loyal and loving pet. The Poodle x Labrador retriever mix was originally bred to encourage hypoallergenic fur and a loving nature. As with all crossbreeds though, their traits can vary somewhat as the puppies will inherit some genes and not others from the pool of their parents. This means not all puppies will be hypoallergenic and sizes will vary. Shopping for a Labradoodle can therefore be more tricky than buying for a pedigree puppy as you can’t always be sure what personality your pup will have. Here we will discuss the items we’d suggest and the things to consider when choosing your Labradoodle puppy’s shopping list.
The basics:
All dogs need pretty much the same basics. Use this checklist to make sure you have all the essentials covered:
1. Dog bowls for food and water
2. Dog Food - ask your breeder what food they’ve been fed as a puppy and continue the same diet for the first few months. Any changes to diet should be made slowly over a week or so.
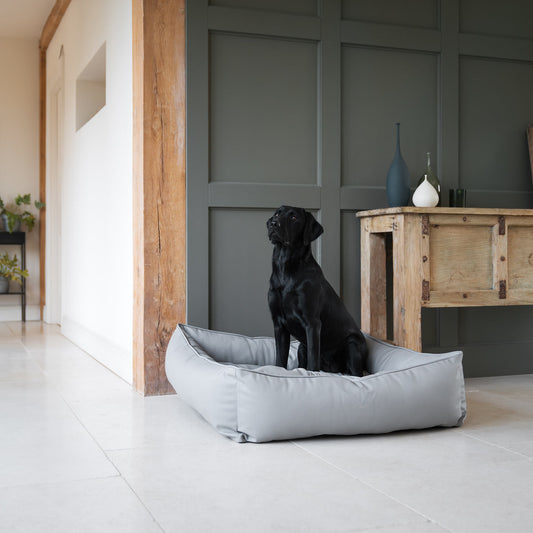
3. Puppy Bed - we’d suggest a small puppy bed to put inside your crate for the first few weeks. Puppy beds are soft and washable so any accidents can be cleaned easily. You can then upgrade to a full size bed once they are fully toilet trained and have grown in size. You’ll have a better idea of how big they are going to be as an adult.
Labradoodle Dog Crate and Bedding
The size of the puppies can vary depending on the poodle parent and whether they are a standard, miniature or toy breed. No breeder will be able to tell exactly how big the puppies will grow, but they can discuss the puppies lineage to gauge a good estimate. With this in mind the size of crate you will need will depend on this. If your pup’s parent was a miniature poodle a large 36” crate is likely to be a good size, but if the parent was a standard poodle then a 42” will probably be best.
The same goes for the dog bed you choose. Speak to your breeder and find out about the size of the parents to try to help judge how big the pup will grow.
Labradoodle Grooming Products
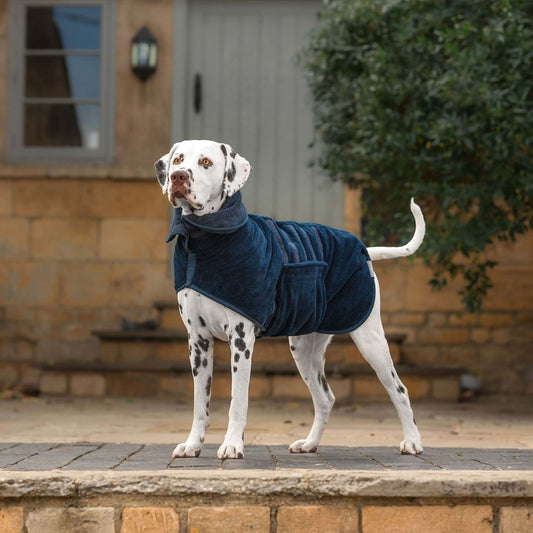
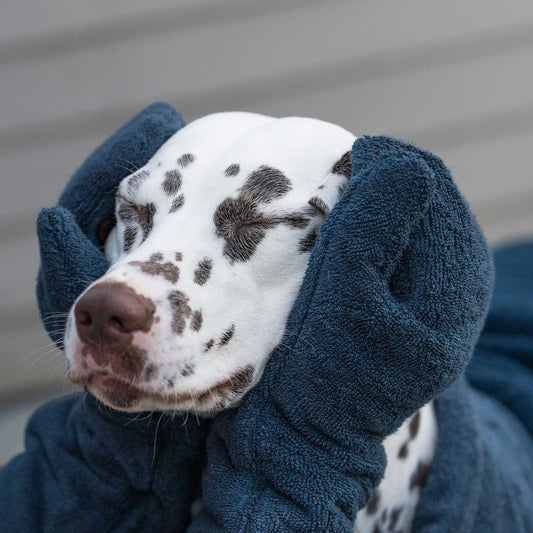
There are three coat types associated with Labradoodles: straight coats shed the most and are less desirable; silky wavy coats are low shedding; and curly coats are dense, thick and non-shedding. When you know what kind of fur your pup has, you can choose a suitable shampoo for bath time as well as a series of combs for grooming time. A drying coat in a suitable size will also be great for drying after bath time, and also trips out to the beach! Shorter coats will only need a brush twice a week, whilst longer coats may need more regular brushing and a trim every six weeks.
Walking Accessories
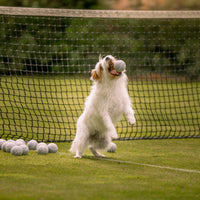
Labradoodles tend be intelligent dogs and need a fair amount of activity to keep their brains occupied. A harness and lead is great for training your pup as the harness is comfortable for little pup’s and allows for greater control. It’s best to measure your pup (or get your breeder to do so) to get the perfect fit. It’s important the harness fits snuggly so they don’t wriggle out of it - you may need to size up as they grow. We love the Front Range harness and lead set by Ruffwear - a super durable, premium quality set designed to last.
Toys For a Labradoodle
Poodles are considered the second most intelligent dog breed and Labradors are renowned for their learning skills, so these are traits your Labradoodle will likely inherit. Keeping your dog entertained even when at home will be important and offering a variety of toys will keep their minds active. Buy a selection and rotate them so they don’t get bored and make sure to have all different types including chew toys, soft toys and interactive toys.
We hope our guide was helpful. Remember to speak to your breeder when selecting your pup to best gauge the traits your particular puppy is likely to have.
If you have any questions about our article, please do get in touch. We always love to hear from you. Send us your pictures too - we can't get enough of your pets!!
If you’re anything like us you’ll want your furry friend to look their best, we know that grooming is an essential part in achieving that. Frequent dog grooming helps to keep your dog looking nice, as well as improving their overall health and wellbeing. But you may be wondering how often you should groom your dog. In this week’s blog post, we’re covering everything you need to know about dog grooming.
What Is Dog Grooming
Before we look at how often you should be grooming your dog, let’s look at what dog grooming is. If you’re a first-time dog owner or new to dog grooming we know that keeping on top of your dog’s grooming can be overwhelming which is why we’re here to help.
Dog grooming refers to maintaining your dog’s physical coat and hygiene, which includes everything you do to maintain your dog’s coat, skin, nails and ears, from bathing & brushing to cutting and clipping. For a more detail guide on ‘what dog grooming is’, check out this article from our Information Hub - it looks at everything from what is involved in dog grooming, why it’s important and how long it takes. It’s a great place to start if you’re new to dog grooming or need a refresher.
How Often Should A Dog Be Groomed
Understanding your dog’s coat type is the first step in knowing how often to groom your dog and what the best products to use are. How often to groom a dog, in our experience, will depend on things like hair length, texture, and density of your dog’s coat.
The main types of dog coats are: Short or smooth-haired, Long Haired, Double Coated, Curly and Hairless. In this guide, we break down exactly how often each type of coat needs grooming, as well as give you our top tips for looking after their coat and our favourite products.
How Often Should A Long-Haired Dog Be Groomed?
Long-Haired Dogs include breeds such as Lhasa Apso, German Shepherd, Long-Haired Chihuahuas, Dachshunds & Shih Tzus.
Long Hair coats need regular grooming to prevent matting and tangles, daily brushing will help with this and will remove any debris. If you’ve got a long-haired puppy it’s a good idea to get them used to being brushed from the day you bring them home so they’re desensitised to it from a young age.
When it comes to bathing your long-haired dog, it’s important to keep them clean but also not strip their coat from any natural oils that are keeping it shiny and healthy. In our experience bathing your long-haired dog every 6-8 weeks helps keep their coat in tip-top shape. You can either do this at home or take them to a professional groomer for a bath.
When it comes to cutting your long-haired dog it will depend on your personal taste, lifestyle and season. How short you will want to keep your long-haired dog’s coat will depend on your taste and lifestyle, the typical long-haired cuts you’ll see at Crufts are usually what is considered ‘breed standard’. But if you’re not planning on showing your dog in the show ring any time soon, maybe a shorter more practical cut might suit them more. We’d recommend visiting your groomers for a trim every 2 - 3 months, however, they will advise exactly how often they recommend for your particular lang-haired breed.
For long-haired dogs, we recommend the PetPlex Dirt Defeater collection and a slicker brush. The PetPlex Dirt Defeater collection includes a shampoo, conditioner, and cologne so is perfect for removing any tangles and keeping your dog smelling fresh.
How Often Should A Short-Haired Dog Be Groomed?
Short-Haired dogs include Beagles, Boxers, Dalmatians, Great Danes, Pugs & Rhodesian Ridgebacks.
Short-Haired dog breeds typically need less grooming than their long-haired cousins. In our experience brushing their coats once a week is plenty to help keep them healthy and free of debris.
Short-haired dogs will only need occasional baths, every 4-6 weeks or after a particularly mucky walk.
Short-haired dogs likely won’t need regular haircuts with a professional groomer, although some breeds may still need their undercoat stripped away. Contrary to popular belief, short-haired dogs can shed a lot, particularly when the seasons change. Some groomers will offer a specific short-haired dog package which will include a bath and a deshed which will help remove some of that excess hair and keep your short-haired dog’s coat in top shape.
For short-haired dogs we recommend using a gentle shampoo like the PetPlex Dirt Defeater Collection and a good brush, we like the Rosewood 2-in-1 Bath & Groom Brush as you can put shampoo in the top to dispense at bath time making grooming your dog super easy.
How Often Should A Double Coated Dog Be Groomed?
Double dog breeds include wire-haired breeds such as Border Terriers, Brussels Griffons, Jack Russel Terriers, and Schnauzers, as well as breeds such as Golden Retrievers, Labrador, Pomeranians, and Border Collies.
A double coat on a dog is simply a coat that has two layers, they have an undercoat of dense short hairs and then a top coat of longer hairs or guard hairs. The double coat is great for keeping your dog’s temperature regulated and repelling moisture and dirt.
Double-coated breeds shed a lot, especially in Spring and Fall. Although regular grooming won’t stop this it will certainly help minimise it and keep their coats looking healthy. We recommend brushing double-coated dogs 2-3 times a week - this will help remove debris, any mats or tangles, as well as help to remove some of that excess dead hair that may be irritating them.
A common misconception is that shaving your double-coated dog will help keep them cooler in the summer, however, the opposite is actually true. A double-coated dog is insulated in the follicles rather than by the hair, so when you cut their hair all the insulation is still there, and when the hair grows back quite often 10-14 hairs will grow in the place of each follicle rather than the 5-7 that was there before, which can change the texture of their hair and cause bald patches.
We recommend bathing your double-coated dog roughly every 8-12 weeks. Bathing them more frequently in the summer is a good idea as they will be shedding more and it will help to get rid of some of that excess hair.
When it comes to how often you should be taking your double-coat, it can vary depending on if they’re a short, medium, or long-haired double-coated dog but typically we’d recommend at least four times a year to help de-shed all that dead hair. Your local professional groomer will be able to advise the best length of time for your specific breed of dog.
For your double-coated dog, we recommend a good brush to help them shed that bottom coat, both a slicker brush or an undercoat rake work well.
How Often Should You Groom Your Wavy Or Curly-Haired Dog
Wavy or Curly Haired dogs include a lot of the popular poodle cross breeds such as Labradoodles, Cockapoos, Cavapoo & Cavapoochons, as well as breeds such as Bichon Frise, Spanish Waterdogs, Bedlington Terriers, and Poodles.
Although curly coat breeds are typically low shedding they still require maintenance. The curly texture can be prone to matting and tangling so daily brushing will help keep on top of this, especially after a particularly muddy or wet walk.
When it comes to bathing your curly-haired dogs, you want to avoid doing it too often so that their natural essential oils don’t get stripped from their skin and fur. On average, we recommend at most once a month but ideally every 6 weeks or so, the Dexas Mudbuster is perfect for keeping your curly-haired dog’s paws clean between baths.
Curly-haired dogs are more likely to need a regular trim than other breeds, for this, we recommend taking them to a professional groomer every 6 weeks to keep on top of it.
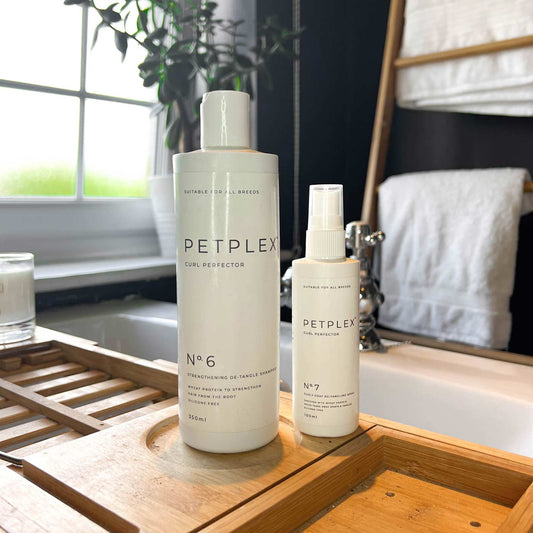
If you want to bathe your dog at home the PetPlex Curl Perfector Shampoo and Detangling Spray work amazingly on both curly and wavy-haired dogs. The shampoo has been specially formulated for dogs with curly coats and has added wheat protein which will strengthen your dog's hair from the root and give instant voluminous results. A detangling spray can either be used on hair wash day or to help freshen up between full grooms, and it will just help to gently tease away knots and tangles. Other grooming kit essentials for a curly-haired dog include a slicker brush and some thinning scissors to help keep the hair round their eyes neat and tidy between trims.
How Often To Groom A Hairless Dog
Hairless Dog Breeds include Chinese Crested Dogs, Hairless Chihuahuas, American Hairless Terriers, and Xoloitzcuintli.
Needless to say, hairless dogs won’t need brushing or trimming like other coat types but they will still need regular baths and it’s a good idea to brush through any patches of hair they may have. With hairless dogs typically an oily film will form after a couple of weeks, this is a good indication that they’re ready to be bathed.
We recommend a really gentle shampoo to bathe your hairless dog with, like PetPlex Derma Doctor which is fragrance-free and full of mild ingredients so it perfect for hairless dogs
How often you should groom your dog will depend on their breed and coat type. Regular grooming at home is essential for all coat types to help their coats in top shape. If you would like a little bit more information on how to groom a dog why not check out our recent Information Hub article? It’s a simple guide explaining everything you need to know to groom your dog at home.
Some of the questions we are most frequently asked are related to crate training new puppies; Do I need to crate train my puppy? What size dog crate do I need for my new puppy? Are dog crates cruel?...
This guide is for those who have asked any one of those questions, or any other question related to crate training. Our guide will cover all the reasons to strongly consider crating your puppy; what size crate you might need depending on your puppy’s breed; and how to make the crate an inviting place for your puppy.
What To Use A Dog Crate For
There are a number of benefits to crate training:
Crates offer a safe, quiet place for nervous pups in their new environment.
Crates help with toilet training.
Crates help teach your pup their bedtime routine quickly and efficiently.
Crates make a great bed and private space for adult dogs, mimicking the “den” like home their canine ancestors would have lived in.
When you first your new puppy home, they will likely be nervous of everything. Whilst they probably came in to contact with all sorts of noises from birth, everything will seem new again when you bring them home. Crates, when used correctly, will offer your pup a calm safe space of their own. It should become their little den where they can go to relax, as well as when you need to contain them for a short time. The crate will also help get them into a routine, helping teach them when it’s time for bed. As your puppy grows into an adult dog, the crate will become their quiet spot – somewhere for them to enjoy some quiet time and a nap… and maybe a chew on their favourite dog toy!
What NOT to use crates for: Punishment and long-term confinement. This may seem obvious, but crates should never be used as a form of punishment. Rather, they should be seen as a safe space that they can retreat to when they want to relax and get away from the rest of the household. Then if you do need to close your puppy inside for a short time, they will feel relaxed and probably just go to sleep! The last thing you want is for your pup to be nervous of the crate which could lead to destructive behaviour due to stress.
Different Kinds Of Crate
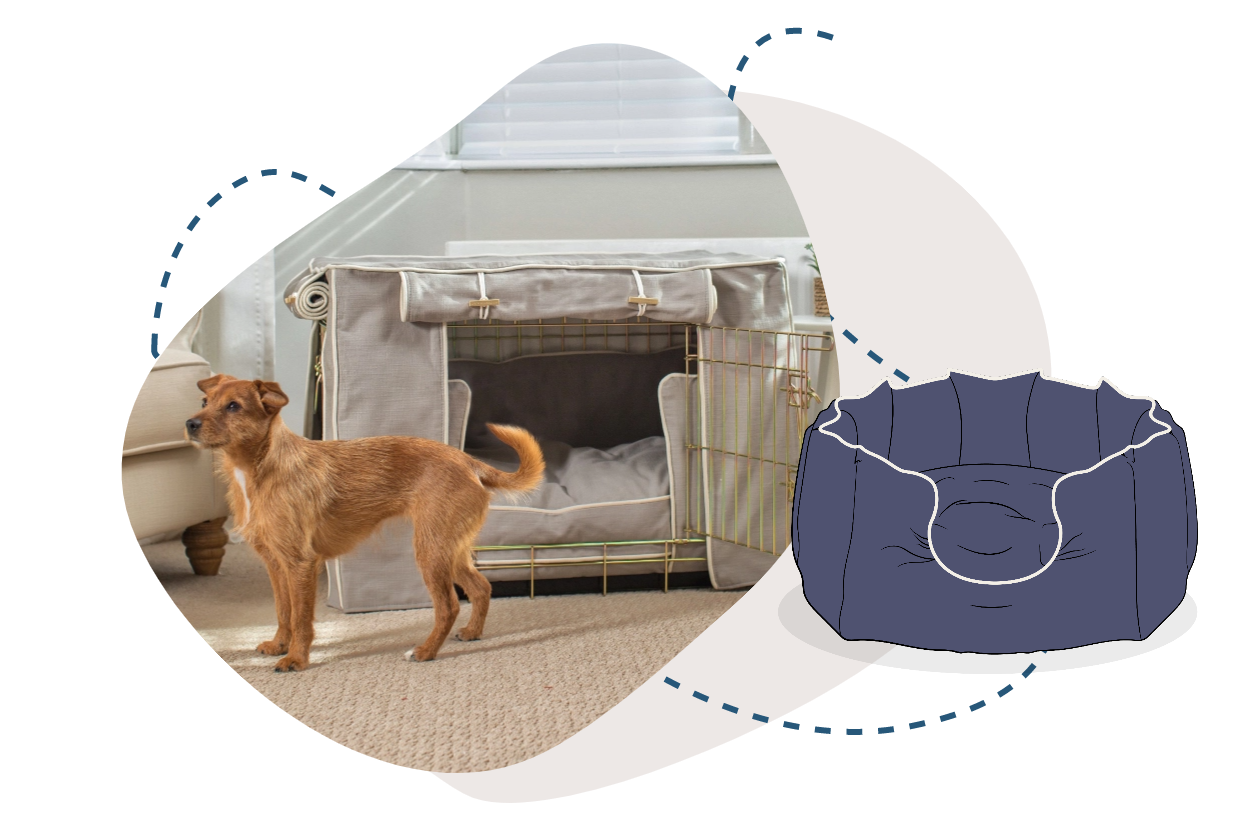
Dog crates fall into three main categories; Metal crates, wooden crates and travel crates.
Metal Crates
[product]
The most popular type of crate as they are less expensive than wooden crates and can easily be folded flat for practical storage when not in use. Some may not like the look of the somewhat cage-like metal crates, but when teamed with a fabric cover and bedding set, they become a really cosy den for your dog. We have both traditional metal crates and our new sliding door crate which is perfect for saving space.
Wooden Crates
[product]
For those looking for something more substantial, our wooden crates are perfect. They are great if you’re looking for a dual-purpose piece of furniture as they suit a range of interior décor styles and make lovely end tables.
Travel Crate
Travel safety is of utmost importance and restraining your dog when travelling in the car is now a legal requirement. A travel crate is a really practical option for most people as they sit simply in the boot and can fold flat when not in use. They are also needed for travel by sea and air – again, another reason to train your pup in a crate whilst young.
How To Find The Perfect Size Dog Crate
Are you wondering what size dog crate to get? We always suggest choosing a big enough crate for your puppy to grow into as an adult dog. This means you won’t have the expense of upgrading to a larger size later on and your dog won’t have to part with the den that has been their favourite private place for as long as they can remember! When they are fully grown, they should have plenty of head room in the crate - about 3-4” of space, as well as be able to move and turn around freely. The worst thing would be for your dog to be cramped inside.
Dog crates come in a number of different sizes, the most common being 24”, 30”, 36”, 42” and 48” in length. Different brands may vary slightly, but most will offer these most common size options. These are our size recommendations for each size of crate*:
24" Crate (S)
Chihuahua, Jack Russell, Shih Tzu, Yorkshire Terrier and similar breeds
30" Crate (M)
Westie, Beagle, Standard and Miniature Dachshunds, French Bulldog, Border Terrier and similar
36" Crate (L)
Cockapoo, Springer Spaniel, Bulldog and similar breeds
42" Crate (XL)
Labrador, Dalmatian, Labradoodle, English Bull Terrier and similar breeds
48" Crate (XXL)
Golden Retrievers, Greyhounds, Bernese Mountain Dogs and similar breeds
*These are our general breed size recommendations. When selecting your crate speak to your breeder to find out what crate size they think will be most suitable. Not every dog of a particular breed is the same size. You might have or be expecting a particularly large Frenchie or a very dainty Cockapoo – use our recommendations as a guide and use this with your breeder’s knowledge of the litter for a more accurate size recommendation.
How To Make A Dog Crate More Comfortable
Crates in their purest form are not the most enticing looking things. One of the first things you will want to do is make the dog crate look inviting. When your puppy is young, you’ll probably add a cosy puppy bed and a blanket as well as a cover to help make it feel more private and comfortable. As your pup grows up a full-size crate cushion is the ideal choice.
Our own brand crate bedding has been designed to make your dog’s crate the most comfortable den ever. We make cushions, bumpers and covers in a whole variety of fabrics to suit every taste. Cushions – Our crate cushions are deeply filled with hollow fibre filling to ensure supreme comfort. The handmade covers are detachable and washable making them super practical. There is also a removable waterproof liner so accidents won’t permeate the inner cushion. Bumpers – Our bumpers have been designed to create a cosy wall of softness to the inside of your dog’s crate. Sitting around the edge of the cushion, they are perfect for dogs and puppies who like to snuggle up in the corner of their crate. They also look beautiful too! Covers – Our crate covers are practical and stylish. Our crate covers are handmade in our workshop and turn your bare, draughty crate into a beautiful pet den. They come in a range of fabric choices and feature roll-up doors to help get your pup in their bedtime routine.
How To Make The Perfect Puppy Crate
The crate set-up will be slightly different for a puppy to the crate set-up for an adult dog. If you buy a size suitable for your pup as an adult as we recommend, we’d then suggest the following items to use inside:
Puppy Bed
Vet Bed
Puppy pad
Water bowls
Crate Cover
Blanket/Snuggle Toy
Chew Toy
Our preferred layout is to pop a piece of Vetbed on the base of the crate then a puppy bed on top in one half; then pop a puppy pad in the other half. Your puppy won’t be able to hold themselves in the first couple of weeks that they’re home so a puppy pad will ensure accidents are easily cleaned. Remember to add in a bowl for water for when your pup is closed inside and a chew toy to help prevent them from nibbling their bed!
When your puppy grows and is fully toilet trained you can swap out the puppy essentials for a full crate set; a cushion, bumper and cover. Our crate sets offer optimum den comfort whilst looking super stylish too! Explore our crate bedding range.
Bringing home a new kitten or helping an older cat adjust to a litter tray can be a bit of a challenge, but don’t worry – with the right approach, your feline friend will get the hang of it in no time! Whether you're wondering how to train kittens to use the litter tray or need help encouraging your cat to use the litter box, this guide will take you through litter tray training step by step.
Why Litter Tray Training is Important
Cats are naturally clean animals, and in most cases, they'll instinctively know where to do their business. However, some cats need a little encouragement—especially if they're kittens or have never used an indoor litter tray before. Proper litter training ensures a hygienic, stress-free home for both you and your cat.
Step-by-Step Guide to Litter Tray Training
1. Choose the Right Litter Tray
Not all litter trays are created equal! The right tray makes a big difference in how to train a cat for the litter box. Here’s what to consider:
Size – Kittens need a shallow litter tray, while larger cats prefer a roomy one.
Covered vs. Open – Some cats like privacy with a hooded litter tray, while others prefer an open top litter tray.
Entry Style – Older cats or small kittens may struggle with high-sided trays.
It may be a little bit of trial and error to find the right litter tray for your cat but here at Lords & Labradors our team of pet experts are on hand to help. Shop our range of cat litter trays here.
2. Pick the Best Cat Litter
The type of litter you choose can make or break litter training. Cats have strong preferences, so be prepared to experiment!
Clumping vs. Non-Clumping – Clumping litter makes scooping easier, while non-clumping may be better for kittens.
Scented vs. Unscented – Some cats dislike strong scents, so unscented is often the safest bet.
Texture – Some cats prefer fine, sand-like litter, while others like larger pellets.
Lords & Labradors offers a range of high-quality cat litters to suit every feline’s preference.
3. Place the Litter Tray in the Right Spot
Location is everything when it comes to litter tray training. Here’s what to keep in mind:
Quiet & Private – Choose a calm area away from noise and foot traffic.
Accessible – Make sure your cat can easily reach the litter tray at all times.
Away from Food & Water – Cats won’t go near their litter if it’s too close to their meals.
Number of cats If you have multiple cats, provide one litter tray per cat, plus an extra one to prevent territorial disputes.
4. Introduce Your Cat to the Litter Tray
Once you’ve set everything up, it’s time to introduce your cat to their new bathroom!
For kittens: Place them in the tray after meals and naps, and gently scratch their paws in the litter to show them how it works.
For adult cats: If they’re hesitant, try placing them in the tray and letting them explore at their own pace. Reward them with praise or a small treat when they use it successfully.
5. Keep the Litter Tray Clean
A dirty litter tray is one of the top reasons cats refuse to use it. To keep your cat happy:
Scoop out waste daily
Fully clean the tray weekly with mild soap and water
Replace litter regularly to keep it fresh
Cats have sensitive noses and may refuse to use the litter tray if it’s too smelly or dirty!
Troubleshooting Litter Tray Problems
If your cat isn’t using the litter tray, don’t panic! Here are some common problems and how to fix them:
My Cat is Avoiding the Litter Tray
Possible causes: The litter type is uncomfortable for them The tray is in a noisy or hard-to-reach spot It’s too dirty or has a strong scent
Solution: Try changing the litter, moving the tray, or cleaning it more often. Also positive reinforcement can be a powerful tool, try giving your cat a treat every time they go near or in their litter tray to help build those positive associations.
My Cat is Using the Floor Instead
Possible causes: The litter tray is too small medical issues like urinary tract infections Stress or anxiety
Solution: Upgrade to a larger litter tray, consult a vet if needed, and reduce stress by keeping their environment calm.
My Cat is Digging Excessively
Possible causes: They’re playing instead of using the tray They don’t like the litter texture
Solution: Offer a different type of litter or provide a separate play area with toys. Try redirecting your cat to a toy if you see them playing in their litter tray.
Final Tips on How to Encourage Your Cat to Use the Litter Tray
Be patient – Some cats take longer to learn than others.
Use positive reinforcement – Praise and treats work better than punishment.
Stick to a routine – Consistency helps cats form good habits.
With the right approach, your cat will master their litter tray in no time! And don’t forget – Lords & Labradors has everything you need for stress-free litter training, from premium litter trays to top-quality cat litter. Explore our range today and make litter training a breeze!
Have you ever watched your feline friend gazing longingly out the window and wondered if they'd enjoy the great outdoors? The good news is, with the right approach, you can safely introduce your cat to the outside world with a cat harness and lead. Harness training a cat takes patience and a little know-how, but the rewards are worth it!
In this guide, we’ll walk you through everything you need to know about how to harness train a cat, from choosing the right gear to helping your furry companion feel comfortable strutting their stuff outdoors.
Why Harness Train Your Cat?
Whether you have a curious kitten or a cautious older cat, harness training provides numerous benefits:
Safe Outdoor Exploration: Your cat can enjoy fresh air and exercise without the risks associated with free roaming.
Mental Stimulation: Exploring new sights, smells, and sounds keeps your cat's mind sharp and engaged.
Bonding Time: Walks can strengthen your bond and provide quality time together.
Now, let’s dive into the steps to get your cat comfortable with their harness.
Step 1: Choose the Right Harness and Lead
Before you start training, selecting the right gear is crucial. Look for:
A Well-Fitted Cat Harness: A harness that fits snugly but allows movement is essential. Consider adjustable options, especially for kittens.
Comfortable Materials: Soft, breathable fabrics like mesh or padded harnesses will keep your cat comfy.
A Sturdy Cat Lead for Walking: A lightweight, flexible leash gives your cat freedom without compromising control.
Tip: Avoid using collars for outdoor walks—cats can easily slip out of them!
Step 2: Introduce the Harness Indoors
Once you've got your gear, it's time to introduce it in a non-threatening way. Follow these tips:
Let Your Cat Sniff and Explore: Place the harness near their favourite lounging spot so they can investigate at their own pace.
Reward Positive Interactions: Offer treats and praise when they show interest. We love The Innocent Cat treats for training our cats as they have a high meat content and a hint of catnip in so are perfect for keeping your cat engaged.
Practice Gentle Handling: Slowly touch them with the harness to familiarise them with its feel.
Patience is key—some cats may take a few days to get used to it!
Step 3: Try the Harness On
Once your cat seems comfortable, it’s time to try it on:
Start with Short Sessions: Gently secure the harness and let them wear it for a few minutes at a time indoors.
Monitor Their Reaction: Some cats may freeze or flop over—this is normal! Encourage movement with treats and play.
Gradually Increase Time: Over a few days, extend the time your cat wears the harness indoors.
Step 4: Attach the Lead
Now that your cat is harness-comfortable, introduce the lead:
Let Them Drag It Around: Attach the lead and allow them to walk around indoors freely.
Guide Gently: Hold the lead lightly and let them lead while offering encouragement.
Practice Indoors: Walk them through different rooms to simulate outdoor experiences.
Step 5: The First Outdoor Adventure
Once your cat is confident indoors, it’s time for their first outdoor adventure!
Choose a Quiet Spot: Start in a calm, enclosed area like a garden or patio.
Stay Close: Walk with them and allow them to explore at their own pace.
Keep It Short: 5-10 minutes is plenty for the first few trips.
Tip: Be prepared for your cat to crouch low and take things slowly—everything outside is new and exciting!
Step 6: Gradually Expand Their Horizons
Over time, your cat will build confidence. Slowly introduce new areas and experiences, ensuring they feel safe. Always watch their body language and retreat indoors if they seem overwhelmed.
Can You Harness Train an Older Cat?
Absolutely! While kittens may adapt more quickly, older cats can also learn to enjoy walks with patience and positive reinforcement. Just take it slow and adjust to their comfort level.
Common Challenges and Solutions
"My cat refuses to move in the harness!"
This is common—use treats, toys, and gentle encouragement to help them take their first steps.
"They try to wriggle out!"
Ensure the harness fits snugly and isn't too loose.
"My cat is scared of the outdoors."
Start with short sessions and let them observe from a safe space before exploring further.
Final Tips for Success
Always use positive reinforcement with treats and praise.
Never force your cat into situations they’re not ready for.
Be patient—every cat learns at their own pace.
Get Started with the Right Gear
Ready to embark on an adventure with your cat? Ensure you have all the travel essentials like high-quality walking equipment, and treats for encouragement. Check out our collection of cat essentials at Lords & Labradors to make harness training a breeze! Happy walking!
Ever wondered why your feline friend has those long, delicate whiskers framing their adorable face? Cat whiskers, or "kitty whiskers," aren't just for show—they're an essential part of a cat's sensory system, helping them navigate the world with precision and grace. In this blog, we'll explore the fascinating purpose of cat whiskers, why they're found on different parts of their body, and how to care for them properly.
The Purpose of Cat Whiskers
Cat whiskers, scientifically known as vibrissae, are much more than just charming accessories on your cat's face. These specialised hairs are deeply embedded in the skin and connected to sensitive nerve endings, allowing cats to detect even the slightest changes in their surroundings. Here are a few reasons why cats have whiskers:
Navigation Aid: Cats use their whiskers to measure gaps and spaces, ensuring they can squeeze through tight spots without getting stuck.
Hunting Assistance: Whiskers help detect movement in low-light conditions, making them invaluable for stalking prey.
Emotional Barometer: The position of your cat's whiskers can reveal their mood—forward-facing whiskers indicate curiosity, while whiskers pinned back suggest fear or aggression.
Spatial Awareness: Whiskers on the legs, known as carpal whiskers, help cats judge distances and land gracefully after a jump.
Cat Whiskers Aren't Just on Their Face!
While cat face whiskers are the most noticeable, did you know that cats have whiskers in other places too? They can be found:
Above Their Eyes: These "cat eye whiskers" act as an early warning system to protect their eyes from debris and obstacles.
On Their Legs: Leg whiskers help detect objects in their path while climbing or hunting.
Near Their Paws: Aiding in tactile sensitivity when walking on unfamiliar surfaces.
What Happens If a Cat Loses Whiskers?
It’s natural for a cat to shed whiskers occasionally, just like regular fur. However, excessive whisker loss could signal underlying health concerns such as stress, allergies, or infections. If you notice your cat losing whiskers more frequently than usual, it's best to consult your vet.
Signs to Watch For:
Bald patches where whiskers used to be
Reluctance to explore or jump
Increased clumsiness
Should You Trim Cat Whiskers?
No, trimming cat whiskers is a big no-no! Whiskers are crucial for a cat's well-being, and cutting them can disorient your furry friend, affecting their ability to navigate and sense their environment. If you notice damaged or broken whiskers, let them fall out naturally—they will grow back in due time.
Whisker Stress: Some cats experience "whisker fatigue" or "whisker stress" when their sensitive whiskers touch the sides of food and water bowls. Using specially designed cat saucers can help reduce discomfort and ensure stress-free mealtimes.
How to Care for Your Cat's Whiskers
Taking care of your cat's whiskers is simple yet essential to their overall happiness. Here are a few tips:
Choose the Right Bowls: Avoid deep, narrow bowls that can cause whisker stress. Opt for shallow cat saucers like the Tarhong cat saucers which come in a fun range of patterns and colours!
Gentle Grooming: Avoid touching or pulling whiskers unnecessarily.
Stress-Free Environment: Provide a calm and whisker-friendly home setup to prevent over-stimulation.
Final Thoughts
Cat whiskers are an incredible feature that helps our feline friends explore the world confidently and safely. From aiding in navigation to expressing emotions, they play an important role in your cat's daily life. Be sure to keep those whiskers happy with the right care, and check out Lords & Labradors' range of cat saucers to prevent whisker stress and keep mealtimes comfortable.
Explore our collection of cat essentials at Lords & Labradors and give your furry friend the luxury they deserve!
Ensuring your feline friend enjoys a healthy diet is one of the most important aspects of cat ownership. Whether you have a playful kitten, an active adult, or a serene senior, providing a balanced diet for cats is key to their overall health and happiness. But with so many options available, how do you choose the best food for your cat? Let's break it down and help you create a nutritious plan for your furry companion.
Understanding a Balanced Diet for Cats
Cats are obligate carnivores, which means their bodies are naturally designed to thrive on a meat-based diet. A healthy cat diet should include:
High-Quality Protein: Essential for muscle growth and repair. Look for foods with real meat like chicken, turkey, or fish.
Healthy Fats: Provide energy and support skin and coat health.
Essential Vitamins and Minerals: Taurine, vitamin A, and fatty acids are crucial for eye health, heart function, and overall well-being.
Hydration: Cats often get their moisture from their food, making hydration a key component of their diet.
Wet vs. Dry Food: Which is Best?
Choosing between wet vs. dry food for cats can be tricky, but both have their benefits:
Wet Food: Higher moisture content, which can help keep your cat hydrated. It's often more palatable and can be a good option for picky eaters.
Dry Food: Convenient and helps maintain dental health by reducing plaque buildup. It's great for free-feeding but should be balanced with water intake.
Many cat owners find that a combination of wet and dry food provides the perfect balance of taste, texture, and nutrition.
Healthy Food for Cats at Different Life Stages
Each stage of your cat's life comes with different nutritional needs.
Kittens
Growing kittens need a diet rich in protein and fat to support their rapid development. Healthy kitten food should contain DHA for brain development and plenty of calories to fuel their playful energy. Look for specially formulated kitten food to ensure they get the right nutrients. Shop our range of nutritious kitten food to support your kitten's development here.
Adult Cats
An adult cat's diet should focus on maintaining a healthy weight and providing sustained energy. Cat food low in calories can be beneficial for less active cats to prevent weight gain, while active cats may need higher protein levels to support their lifestyle. For higher protein cat foods look at brands like Acana and Orijen which have high levels of real meat content in their food and for low-calorie options look at our weight control cat food collection.
Senior Cats
Older cats require a diet that supports joint health and digestion. Foods rich in omega-3 fatty acids and easily digestible proteins can help maintain their quality of life. Shop our senior cat food collection here.
Healthy Cat Snacks and Treats
While it's tempting to spoil your cat with treats, it's important to ensure they are part of a healthy cat diet. Opt for healthy cat snacks that offer added benefits such as dental health support or hairball control. Avoid treats high in artificial fillers and instead choose options rich in protein and natural ingredients. We love The Innocent Cat treats for cat treats which are full of good ingredients for your cat.
Signs Your Cat Might Need a Diet Change
If you notice any of the following signs, it might be time to reassess your cat's diet:
Weight gain or loss
Dull coat or excessive shedding
Lack of energy or changes in behaviour
Digestive issues such as vomiting or diarrhoea
Consulting your vet and adjusting their diet accordingly can help keep your cat in tip-top shape.
Choosing the Right Cat Food
A balanced diet for cats is essential for their overall health, longevity, and happiness. Whether you're choosing between wet or dry food, selecting the right treats, or adjusting their diet as they age, making informed choices will help your cat thrive.
When selecting food, always look for high-quality ingredients and avoid artificial additives or excessive fillers. At Lords & Labradors, we offer a range of premium cat food options designed to meet your pet's specific dietary needs. From cat food low in calories to nutritious healthy kitten food, we have everything you need to support your cat's well-being from all the best-selling cat food brands.
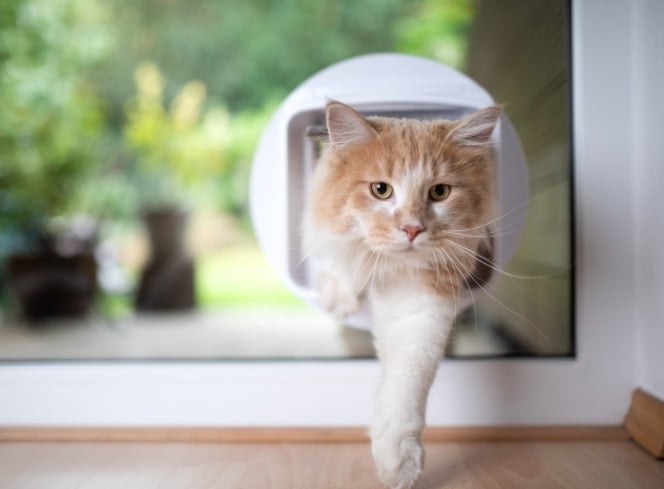
Introducing a cat flap to your feline friend can be a game-changer, offering them the freedom to explore the great outdoors (or just your garden) at their leisure. However, some cats may be hesitant at first, requiring a little encouragement and training. In this guide, we’ll take you through the best methods to train your cat to use a cat flap with ease.
Why Should You Train Your Cat to Use a Cat Flap?
A cat flap provides several benefits for both you and your cat:
Independence: Your cat can come and go as they please without relying on you to open the door.
Exercise: Encourages your cat to explore and stay active.
Reduced Stress: Allows your cat to retreat to their safe space indoors whenever they want.
Now, let's dive into how to get a cat to use a cat flap effectively.
Step-by-Step Guide to Cat Flap Training
Choose the Right Cat Flap - Before starting the training process, ensure you have the right cat flap. Consider factors such as size, placement, and whether you prefer a manual or microchip-activated flap. A well-fitted flap that suits your cat’s size and needs will make training much smoother.
Get Your Cat Familiar with the Cat Flap - Start by leaving the cat flap open so your cat can investigate it at their own pace. Cats are naturally curious creatures, so allowing them to sniff and inspect the flap without pressure helps build confidence.Top Tip: Use their favourite treats or toys to create a positive association with the flap.
Encourage Exploration with Rewards - Once your cat seems comfortable around the flap, encourage them to move through it by placing treats on the other side. Stand on the opposite side and call their name in a friendly tone to entice them through.Pro Tip: Try using high-value treats like chicken or their favourite snack to motivate them.
Gradual Introductions - If your cat is hesitant, start by gently pushing the flap open for them. Encourage them to step through by rewarding every small progress. Be patient and consistent—some cats may take a few days to get used to it.
Practice Both Directions - It’s essential to teach your cat to use the cat flap both ways. Some cats find entering easier than exiting, or vice versa. Repeat the reward-based method to reinforce both directions.
Use Scent Familiarisation - Cats rely heavily on scent for comfort. Try rubbing a cloth on your cat’s face and then on the flap to transfer their scent. This helps your cat feel more comfortable using it.
Gradually Reduce Assistance - Once your cat starts using the flap with encouragement, begin reducing your involvement. Let them explore it independently while keeping a watchful eye to ensure they’re adapting.
Consider Timing and Environment - Training works best when your cat is calm and receptive. Avoid training during stressful times, such as meal times or when loud noises are present.
Troubleshooting Common Issues
Even with patience, some cats might still be reluctant. Here’s how to tackle common cat flap training challenges:
Fear of the Flap: Some cats may be startled by the flap’s movement. Hold it open initially and gradually lower it to build confidence.
Noise Sensitivity: If the flap makes noise, try adding felt padding to soften the sound.
Avoiding the Flap: Place their food bowl near the flap (without blocking access) to create positive associations.
Reinforce Good Behaviour
Cats respond well to positive reinforcement, so always reward them when they successfully use the flap. A few tasty cat treats or extra playtime can go a long way in reinforcing good behaviour.
When to Seek Help
If your cat consistently refuses to use the cat flap despite following all the training steps, consider seeking advice from a vet or feline behaviourist. There may be underlying fears or health issues affecting their willingness.
Final Thoughts
Training your cat to use a cat flap requires patience, consistency, and lots of encouragement. By taking gradual steps and using rewards wisely, you’ll soon have a confident feline who enjoys their newfound freedom.
For more tips on training your cat, check out our blog on training your cat to learn new tricks.
Explore Our Cat Essentials
At Lords & Labradors, we offer a wide range of cat products to make your pet’s life comfortable and enjoyable. From cat trees and scratching posts to premium cat food and cosy beds, we have everything your feline friend needs. Shop our collection today and create the perfect environment for your cat!
By following these steps and staying patient, you’ll help your cat embrace their independence in no time!
Cat pregnancy is an exciting yet delicate time, and understanding the different stages can help you provide the best care for your expecting feline. Whether you're a first-time cat owner or have experience with cat pregnancies, knowing what to expect can ensure a healthy journey for both the mother and her kittens.
How Long is a Cat Pregnancy?
Many cat owners wonder, "cat pregnancy how long does it last?" A cat’s gestation period typically lasts 63 to 67 days, or roughly 9 weeks. However, some pregnancies may be as short as 58 days or as long as 72 days, depending on the individual cat.
Early Signs a Cat is Pregnant
If you're wondering about the early signs a cat is pregnant, look for subtle changes in her behaviour and appearance. Some common early pregnancy signs include:
Increased appetite – Your cat may show a greater interest in food.
Morning sickness – Some cats experience occasional vomiting.
Nipple changes – Known as "pinking up," the nipples become larger and pinker.
Increased affection – Pregnant cats often become more loving and seek more attention.
Weight gain – A gradual increase in weight, particularly around the abdomen.
If you notice these signs, it’s best to visit your vet to confirm the pregnancy.
Cat Pregnancy Stages
A cat pregnancy can be divided into three key stages, each with specific developments and care needs.
Stage 1: Early Pregnancy (Weeks 1-3)
During the first few weeks of pregnancy, the embryos begin to develop inside the uterus. Your cat may not show obvious signs during this period, but internal changes are underway.
What to expect:
Hormonal changes may make your cat more affectionate or, conversely, more withdrawn.
A slight increase in appetite may be observed.
Subtle weight gain may start, but it won't be very noticeable yet.
Care tips:
Provide a balanced diet with high-quality cat food to support early development.
Avoid unnecessary stress and disturbances.
Schedule a vet check-up to confirm pregnancy.
Stage 2: Mid Pregnancy (Weeks 4-6)
By the fourth week, your cat’s pregnancy will become more evident. This is when the kittens begin to grow rapidly.
What to expect:
Visible belly enlargement as kittens develop.
Increased appetite and need for more frequent meals.
Behavioural changes such as nesting behaviour and seeking comfortable resting spots.
Care tips:
Transition to a high-protein diet, such as kitten food, to meet nutritional demands. Check with your vet for their recommendations for the best food to feed your pregnant cat.
Set up a quiet, comfortable nesting area using soft bedding and a cosy cat tree.
Keep an eye out for any unusual signs, such as loss of appetite or lethargy.
Stage 3: Late Pregnancy (Weeks 7-9)
The final stage of pregnancy is the most demanding as the kittens are almost fully developed and preparing for birth.
What to expect:
Significant weight gain and a very round belly.
Decreased appetite due to the pressure of the growing kittens.
Nesting instincts will become stronger; your cat may seek out secluded spaces.
A drop in body temperature, indicating labour is approaching.
Care tips:
Provide a quiet birthing area with essentials like a nesting box and cosy bedding.
Keep fresh water and high-protein food readily available.
Monitor for labour signs such as restlessness, pacing, and vocalisation.
The Pregnant Cat Timeline at a Glance
Here's a quick look at the pregnant cat timeline:
Weeks 1-3: Early pregnancy signs and embryo development.
Weeks 4-6: Belly growth, increased appetite, and nesting behaviour.
Weeks 7-9: Final preparations for birth, decreased appetite, and nesting instincts.
Preparing for the Arrival of Kittens
As your cat approaches labour, it's essential to have all the necessary supplies ready. Lords & Labradors offers a range of cat essentials, including comfortable cat beds, and nutritious food to help keep your cat comfortable throughout her pregnancy. Check out our cat essentials here.
Final Thoughts
Understanding the different stages of cat pregnancy can help you provide the best care for your feline friend. From early signs to the final preparations, knowing what to expect allows you to support your cat through this wonderful journey. If you suspect your cat is pregnant, consult your veterinarian for proper guidance and enjoy the process of welcoming adorable new kittens into your home!
Hairball Treatment for Cats: Everything You Need to Know
If you’re a cat owner, you’ve likely encountered the unpleasant surprise of a hairball on your carpet. While it’s a common occurrence for cats, particularly those who groom themselves frequently, hairballs can sometimes indicate the need for additional care or adjustments to their routine. In this guide, we’ll explore effective hairball treatments for cats, remedies for furball issues, and the role of grooming and nutrition in keeping your feline friend comfortable.
Why Do Cats Get Hairballs?
Hairballs form when your cat grooms itself by licking its fur. Their rough tongue collects loose hairs, which are then swallowed. Most of this hair passes through the digestive system without issue, but sometimes it accumulates in the stomach, forming a hairball. Cats then regurgitate the hairball as a natural way of expelling it.
Hairballs are most common in long-haired breeds like Maine Coons and Persians but can affect any cat. While occasional hairballs are normal, frequent or severe occurrences may signal a problem, such as excessive grooming or an underlying health issue.
Signs Your Cat May Be Struggling With Hairballs
While hairballs are typically harmless, it’s important to know when they might require intervention. Here are some signs to watch out for:
Frequent retching or gagging without producing a hairball.
Constipation or difficulty passing stools.
Lack of appetite or lethargy.
Persistent coughing or vomiting.
If your cat exhibits these symptoms, consult your vet to rule out any serious conditions.
Best Hairball Remedies for Cats
1. Regular Grooming
One of the most effective ways to reduce hairballs is by grooming your cat regularly. Brushing your cat’s fur helps remove loose hairs, preventing them from being swallowed during grooming. Long-haired cats may benefit from daily brushing, while short-haired cats can be groomed a few times a week.
Explore our cat grooming tools to find brushes, combs, and deshedding tools tailored to your cat’s coat type.
2. Hairball Control Cat Food
Diet plays a crucial role in managing hairballs. Specially formulated hairball control cat foods contain added fibre to help hair move through the digestive system more easily. High-quality options not only reduce hairballs but also support your cat’s overall health.
The Purina One Adult Cat Coat & Hairball Chicken Dry Food is one of the best cat food for hairballs. It is a complete nutritional solution that has been proven to maintain healthy skin and coat. It contains high-quality protein, vitamins, and essential fatty acids, as well as highly digestible ingredients, to help minimise hairball formation and limit excess shedding. Shop Purina One Adult Cat Coat & Hairball Chicken Dry Food now to keep them pesky hairballs at bay.
3. Hairball Remedies and Supplements
Lubricating gels and natural remedies can help hairballs pass through your cat’s digestive system more comfortably. These remedies often contain ingredients like petroleum jelly or vegetable oil to coat the hair, aiding its journey through the gut.When choosing a product, look for options labelled as the best hairball remedy for cats to ensure you’re providing safe and effective relief.
4. Hydration
Encourage your cat to drink more water, as hydration aids digestion and helps prevent hair from forming clumps in the stomach. Adding a cat fountain or providing fresh water daily can make a big difference.
5. Encourage Play and Activity
Engaging your cat in regular play reduces boredom, which can sometimes lead to overgrooming. A good scratching post or a sturdy cat tree provides a fun outlet for activity while keeping your cat’s claws healthy.
Cats and Hairballs: Long-Term Prevention
Taking proactive steps can significantly reduce the frequency of hairballs:
Regular Vet Checkups: Ensure your cat’s overall health is monitored, especially if hairballs become frequent.
Consistent Grooming: Establish a grooming routine to manage loose fur effectively.
Balanced Diet: Opt for high-quality, fibre-rich foods designed for hairball control.
Environmental Enrichment: Prevent overgrooming by providing stimulating toys and activities.
Explore Our Cat Essentials
At Lords & Labradors, we understand the importance of keeping your feline friend healthy and happy. From grooming tools and cat trees to hairball control cat food, we have everything you need to care for your cat.
Shop our range of cat grooming tools, cat food, and cat trees to give your furry companion the best care possible.
By addressing your cat’s grooming and dietary needs, you can minimise the occurrence of hairballs and ensure your pet stays content and comfortable. Remember, a little prevention goes a long way in keeping those furballs under control.
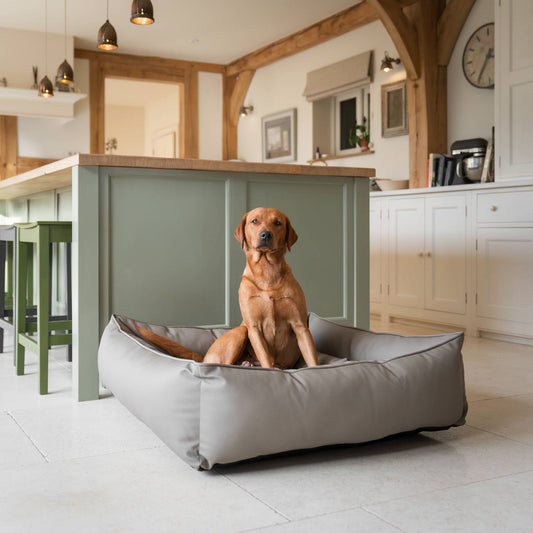
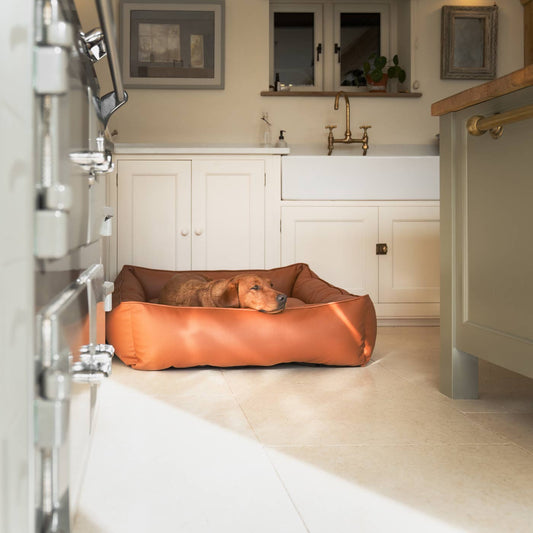
At Lords & Labradors, we specialise in dog crate bedding and accessories. Our dog crate cover and bed sets are available in a stylish choice of fabrics and come in a variety of sizes. These sets create the ultimate comfort spot for your puppy or adult dog. Luxury dog crates...
Read more
At Lords & Labradors, we specialise in dog crate bedding and accessories. Our dog crate cover and bed sets are available in a stylish choice of fabrics and come in a variety of sizes. These sets create the ultimate comfort spot for your puppy or adult dog.
Luxury dog crates
All our deluxe dog crates are made from pet-safe metal and feature removable trays to make them practical and super easy to clean. With sizes ranging from small to XXL, there’s a dog crate set to suit all breeds. Crates are essential when it comes to house training your new puppy. We always suggest buying a larger size dog crate and bed for your puppy so they can grow into it, saving you from having to purchase a new crate when they’re older.
Luxury crate bedding
Our luxury bedding is hand-crafted and designed to the highest quality, appearing both practical and stylish. Bumpers sit around the edge of the crate cushion to provide a super-soft wall of comfort for your pooch. All our bumpers and cushions feature waterproof linings in case of any accidents. It’s recommended to choose a dog crate with a cover – they’ll provide your draughty, bare cage with a fresh new look and offer some privacy for your dog too. They’re particularly great for helping young puppies settle into their night-time routines and offer nervous dogs an extra feeling of security.
Purchase your dog crate set online today
Treat your four-legged friend to one of our stylish dog crate, cover, bedding and bumper sets by browsing our online range today. If you’re struggling to decide which one would be perfect for your pooch, contact our team today who will be more than happy to help. You’ll have 28 days to return your product if you’re unhappy with it for any reason. Our Lords & Labradors items also come with a 365-day quality guarantee, so it’s easy to see why we’ve received so many positive reviews. We also offer free delivery on all orders over £75. Browse the range and order your dog crate set today.
Read less
Top
Choosing a selection results in a full page refresh.