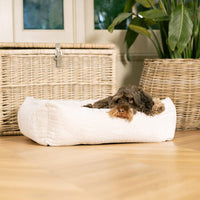
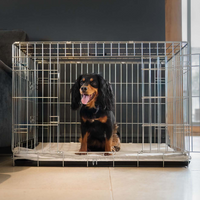
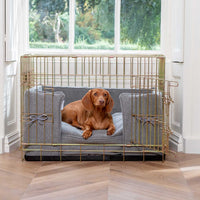
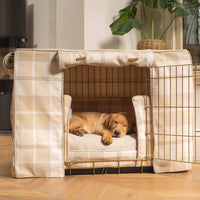
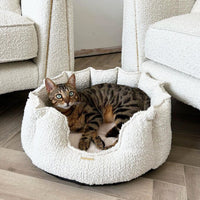
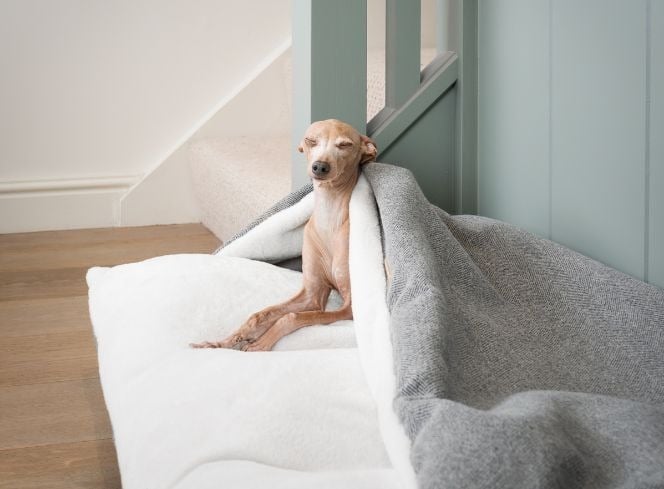
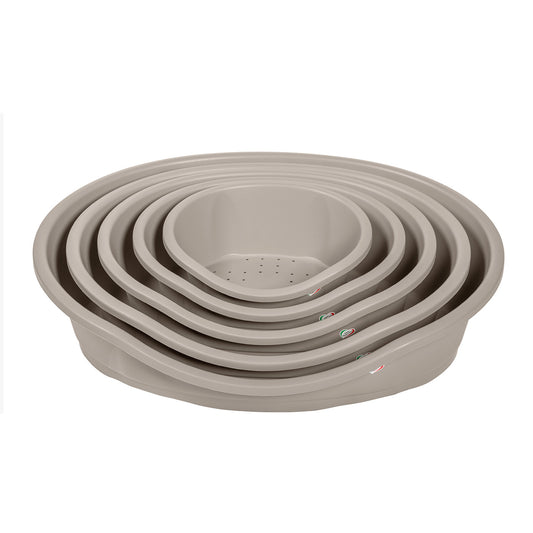
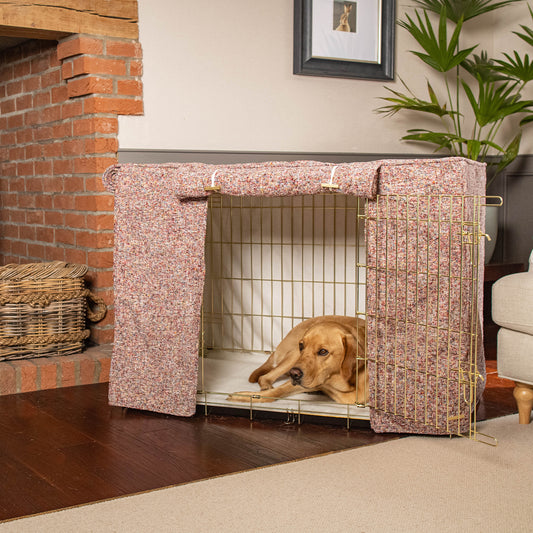
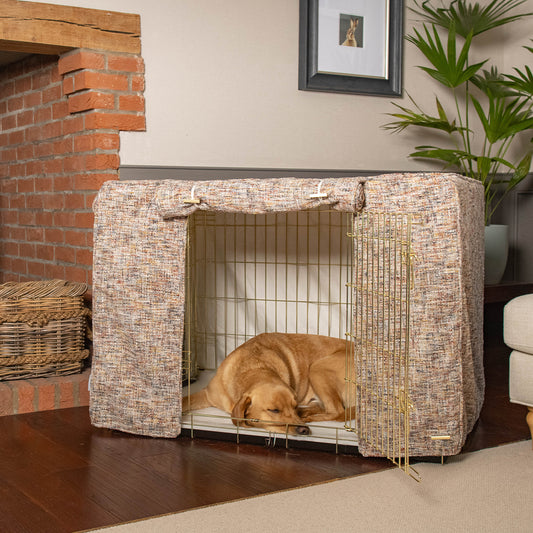
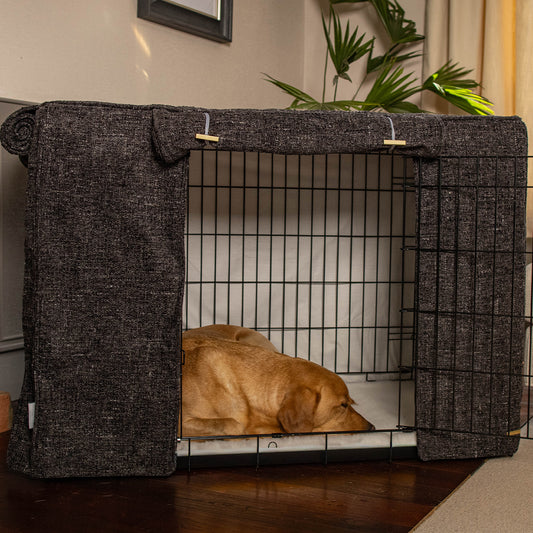
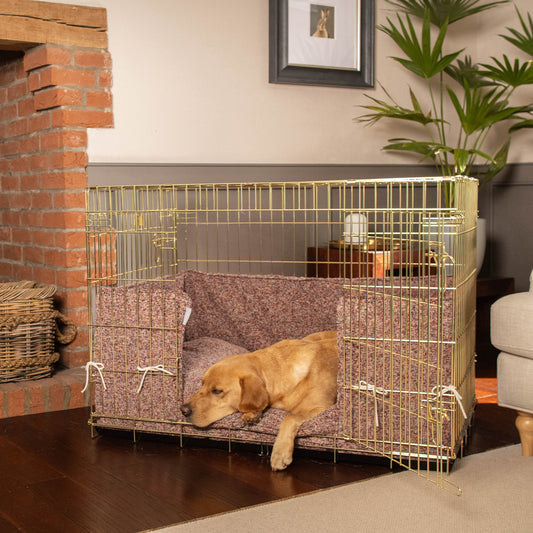
Did you know dogs spend 12 to 14 hours a day sleeping? That's a lot of time in bed so it's no surprise that their bed might be looking a little worse for wear. Dogs are creatures of comfort so making sure they have a a clean and supportive bed is essential for their overall well-being. In this guide, our Pet Experts explore the signs that indicate it's time to change your dog's bed and share expert tips on how to care for your canine's cherished sleeping spot.
How Often Should You Replace Your Dog’s Bed?
Determining how often to replace your dog's bed depends on several factors including the quality of the bed, your dog's size and activity level, and any specific health considerations. As a general guideline, it's advisable to replace your dog's bed every 1 to 3 years, or sooner if signs of wear and tear become noticeable.
Signs It's Time to Change Your Dog's Bed:
Visible Wear and Tear: Over time, your dog's bed may start showing signs of wear and tear, such as flattened cushions, lumps, or torn fabric. If you notice any significant damage, it's a clear indication that it's time to consider a replacement.
Lingering Odours: Despite regular cleaning, dog beds can accumulate odours over time, especially if your furry friend enjoys outdoor adventures or has accidents indoors. Lingering smells that persist even after washing could signal the need for a new bed.
Loss of Support: Just like humans, dogs require proper support for their joints and muscles, especially as they age or if they have existing health conditions. If your dog's bed no longer provides adequate support or has become too soft, it's time to invest in a new one to ensure their comfort and well-being. It might be worth investing in an orthopaedic dog bed if your dog’s breed is prone to joint issues.
Allergies and Skin Irritations: Dogs can develop allergies or skin irritations from prolonged exposure to dust mites, pet dander, or other allergens that accumulate in their beds over time. If you notice your dog scratching more than usual or experiencing skin issues, a new bed with hypoallergenic materials may offer relief.
Preference for Alternative Sleeping Spots: Dogs are creatures of habit, and if you notice your furry friend opting for alternative sleeping spots around the house instead of their bed, it could indicate that they're no longer comfortable or satisfied with their current sleeping arrangements. It’s worth looking at how your dog likes to sleep so you can get the best bed shape to suit their sleeping style, our Information Hub has a guide on how to choose the perfect dog bed for your dog.
Top Ways to Care for Your Dog's Bed:
Regular Washing: Establish a routine for washing your dog's bed to remove dirt, hair, and odour-causing bacteria. Most of our Lords & Labradors dog beds are machine washable, we have a handy guide on how to wash your dog’s bed here.
Use a Removable Cover: Opt for dog beds with removable, machine-washable covers for easy cleaning. Having a spare cover on hand allows you to swap them out while one is being laundered, ensuring your pup always has a fresh and clean place to sleep. We also sell bamboo bed covers which are great for popping over your dog’s bed to help keep them clean especially after a muddy dog walk, they will act as an additional layer of defence against moisture and stains, extending the life of the bed!
Vacuum and Spot Clean: In between washings, use a handheld vacuum or lint roller to remove hair and debris from the surface of the bed. Spot clean any stains or spills promptly to prevent them from setting into the fabric.
Rotate and Fluff: Just like flipping a mattress, periodically rotate your dog's bed to distribute wear evenly and prevent premature sagging. Fluffing the bed's filling helps maintain its loft and support over time.
Sun and Air Dry: On sunny days, take advantage of natural sunlight by airing out your dog's bed outdoors. Sunlight helps eliminate odours and kills bacteria, leaving the bed feeling fresh and revitalised.
Inspect Regularly: Take time to inspect your dog's bed for any signs of damage, loose seams, or worn-out stuffing. Promptly address any issues to prevent further deterioration and ensure your pup's safety and comfort.
By recognising the signs that it's time to change your dog's bed and implementing proper care and maintenance techniques, you can provide your furry friend with a clean, comfortable, and supportive sleeping environment. Remember, a happy and well-rested pup makes for a happier pet parent too!
If you’re looking to upgrade your dog’s bed why not check out our collection of luxury dog beds? Bedding is our speciality, we design and craft all of our bedding here in our Lincolnshire workshop so you can be sure your dog will be getting the best sleep possible in one of our luxury dog beds.
The Importance Of Correct Nutrition For Dogs And Cats!
Ensuring optimal nutrition for our beloved pets is paramount for their overall health and well-being. As responsible pet owners, it is crucial to understand the significance of providing nutritionally complete and balanced meals to our furry friends. In this comprehensive guide, we will delve into the world of dog and cat nutrition, exploring the importance of the right food choices, nutritionally complete homemade recipes, and the best commercial options available.
Understanding Dog and Cat Nutrition
Your pet's nutrition plays a pivotal role in their vitality and longevity. Just like humans, dogs and cats require a balanced diet that fulfils their specific dietary needs. A well-rounded diet supports their immune system, maintains a healthy weight, and promotes optimal organ function. Pet food ranges from being more processed to being raw and rich in natural ingredients, finding the right fit for your pet is important!
Dog Food Nutrition
Choosing the right dog food is a key aspect of canine care. With an abundance of options available, it's essential to prioritise nutritionally complete choices. To make an informed decision, consider using a dog food nutrition calculator and comparing different products. Look for the best nutritional dog food that meets your pet's unique requirements, taking into account factors such as breed, size, and age. Our favourite nutritionally rich dog foods are Orijen, Carnilove and Acana, they are all designed with your dogs nutrition in mind.
Dog Nutrition Facts and Guide
Understanding dog nutrition facts is imperative for providing the best care. Refer to a dog food nutrition guide to navigate through the plethora of choices available in the market. Learn about your dog's daily nutritional requirements and make informed decisions that contribute to their overall health and happiness.
Cat Food Nutrition
Cats, being obligate carnivores, have unique nutritional requirements. The best cat food for nutrition considers their need for high-quality protein and essential nutrients. Explore dry cat food nutrition labels to ensure your feline friend receives a balanced diet that supports their specific dietary needs. For a cat food which is high in protein and great for fussy felines we love Carnilove, they all have at least 80% wild origin meat content and contain No grains, potatoes, GMO, soy, sugar, preservatives or colourants.
Daily Nutritional Requirements for Cats
Cats require a carefully balanced diet to thrive. Knowing the daily nutritional requirements for cats is essential for choosing the right cat food. Consult with your vet to understand the specific needs of your cat, such as the importance of taurine and other essential nutrients crucial for their health.
In conclusion, the importance of correct nutrition for dogs and cats cannot be overstated. Whether choosing commercial options or crafting homemade recipes, prioritising nutritionally complete meals is key to ensuring your pet's health and happiness. Stay informed about dog and cat nutrition, consult with professionals, and make choices that align with your pet's unique requirements. By providing the best nutritional dog food or cat food, you contribute to a longer, healthier life for your furry companions. Here at Lords & Labradors we have a large range of both cat and dog food so you can pick the best option for you and your pet
Crate training is an important part of settling in a new puppy. A crate provides a safe, quiet space for your pup and will help them to get used to their nighttime routine and with toilet training. A dog crate can be made into a cosy den that will be loved by your new four-legged friend for a lifetime. In this article we will explain the best crate set-up for puppies, how to change the set-up as they grow up and also how to look after your crate and crate bedding.
How To Make The Perfect Crate Set-Up For A Puppy
Crate training your puppy will have lots of advantages, helping them to settle and feel safe in their home as well getting them into a consistent bedtime routine. The perfect crate for a puppy will feel safe, warm and cosy. It’s important that it’s inviting so that they feel compelled to use it.
With this in mind we’d suggest the following items:
Crate Cover
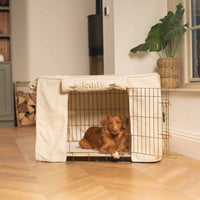
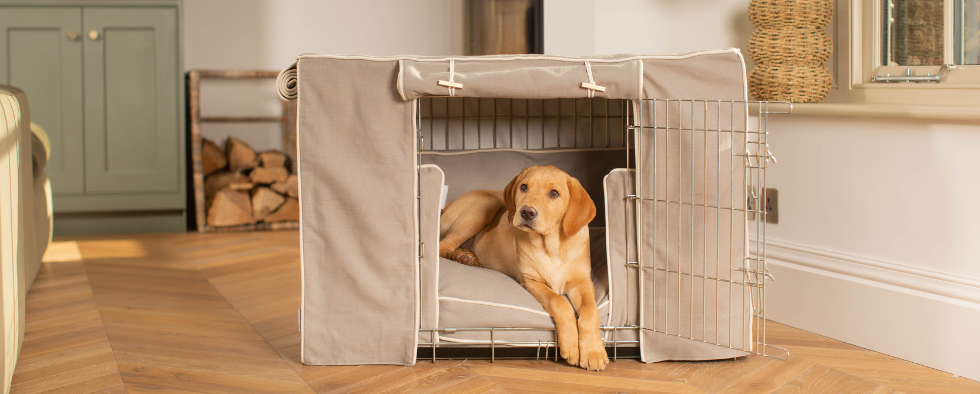
[product]Crates in their basic form can be rather draughty and a little bit unsightly! A crate cover will not only make the crate look stylish, but it will make the crate feel cosy inside. Our crate covers feature roll down doors which can be lowered when it’s time for bed. Puppy will soon learn when they should be sleeping (doors rolled down) and when it’s time to get up (doors rolled up). Our crate covers come in a range of fabrics which have been designed to match your home and they're all machine washable, making them brilliant for puppies!
Cosy & Calming Puppy Crate Bed
[product]
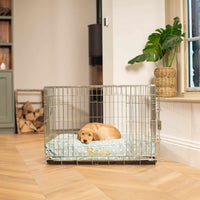
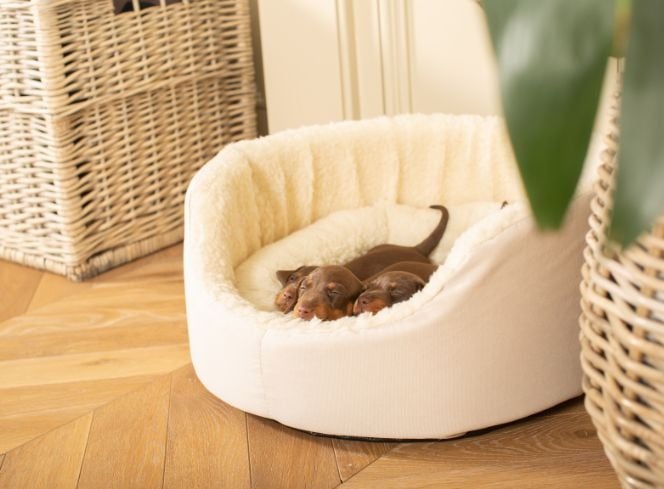
Our cosy and calming beds have been designed with crate training in mind. Each size is made to fill exactly one half of the corresponding crate size. So if you have a small crate for a Chihuahua for example, the small bed will fit in exactly one half of the crate. This then leaves room for a puppy pad in the other half along with a bowl for water. They come in a range of our printed cotton fabrics and feature a reversible cushion pad inside - one side covered in super plush sherpa!
Puppy Pads
Whilst we don’t want to encourage puppies to pee in the crate, it’s also important to note that they can’t hold themselves for very long at all. Whilst you will be able to take them outside at regular intervals during the day, this may not be the case at night. When you put them to bed, putting a puppy pad in one half of the crate will help to stop any accidents from dirtying their bed or crate tray.
Crate Bowls
Puppies will need access to water at all times and a crate bowl is a brilliant accessory as it can be fastened to the crate walls. This will ensure it doesn’t get tipped over or knocked like a standard bowl might.
The Perfect Crate Set-Up For An Adult Dog
As your dog becomes toilet trained and they begin to need the full space of the crate for their bed, you will need to consider swapping out the puppy accessories for their proper adult bed. At Lords & Labradors we specialise in crate bedding that will make your dog’s den look stunning as well as super comfortable inside.
Crate Cushion
Our crate cushions are designed to fit our crates perfectly. They come in a range of fabulous fabric designs from luxurious tweeds to printed cottons. There really is something to suit every taste and home.
Crate Bumper
Crate walls aren’t the most comfortable things to snuggle up to, and if your dog likes to curl in the corner of their bed, they will need something other than metal bars! That’s where our fabulous bumpers come in. They sit around the edge of the crate cushion and create a spongey layer of warmth around the walls. Perfect for snuggling up in the corner when nap time calls!
Crate Cover
Our crate covers are perfect for setting a routine with your dog, when the doors are rolled down it will signal to them it's time to sleep. Our crate covers are fully lined to help keep light out and come in matching fabrics to our bumpers and cushions to you can be sure crate will look stylish!
Crate Set Aftercare and How To Clean A Crate
With a little love and care your crate set will last a long time. Here we detail how to look after your crate set:
The Crate - The crate is made of sturdy metal and is really easy to keep clean. Our crates are easy to wipe clean and the tray is removable so you can get into the corners properly. It’s really important to make sure the crate is completely dry before setting back up and allowing your pet back in, we recommend drying your crate to avoid any rusting.
Lords & Labradors Cushion & Bumper Covers - For our bedding from our core collection you will be able to remove the covers on the cushions and bumpers. Turn the cover inside out and machine wash on a 20 degree gentle cycle. Allow the covers to air dry (do not tumble dry). Once dry return the inner cushion to the cover.
Essentials Plush Collection Bumpers & Cushions - Our bumpers and cushions from the Essentials Plush Collection don't have removable covers, we recommend spot washing your essentials plush bumpers and cushions.
Lords & Labradors Crate Covers - Our crate covers are all machine washable on a 20 degree gentle cycle, apart from our oil cloth crate covers. After washing, we recommend air drying your crate cover over your crate to help keep it in shape and to make sure it doesn't shrink. A cool iron on the reverse of the cotton fabrics is fine if necessary, but often they won’t even need that. Our tweeds and Savanna fabrics are super fast drying and they will come out of the spin almost dry. Just give them an air and they’ll be ready to use again in no time at all!
Cushion and bumper inners - The cushion and bumper inners are protected by waterproof interlinings, so won’t need washing. This will preserve the inner fillings. The waterproof liners are wipe clean. If they become soiled, simply wipe down with a mild pet-safe detergent and they’ll be as good as new again.
Cosy and Calm Puppy Bed - Our puppy beds are fully machine washable. You can put the whole bed in the machine and wash on a 20° cycle. When removed, simply shake and plump the cushion back into shape and leave to air dry.
Follow these simple steps and your crate sets will last and look stunning for years to come!
We’re getting to that time of year again where we’re travelling more with our pets to the beach, staycations and even trips to a different location for a long walk. No matter how long the journey - even if it’s a trip to the local vets - you should ensure your dog is properly restrained and safe to travel. Here in the UK it’s the law when travelling by car your dog needs to be restrained. In this blog, we breakdown how to travel safely with your pet.
What Is The Law With Dogs In Cars?
The Highway Code states in their Rules about Animals, when in a vehicle, dogs are to be suitably restrained so they cannot distract you while you’re driving or injure you, or themselves, if you should need to stop quickly. If you were in an accident caused by your dog distracting you whilst you were driving, this could be considered as ‘dangerous driving’. It’s also good to check your insurance policy, as car insurance providers may require you to restrain your pet.
Is It The Law To Restrain A Dog In A Car?
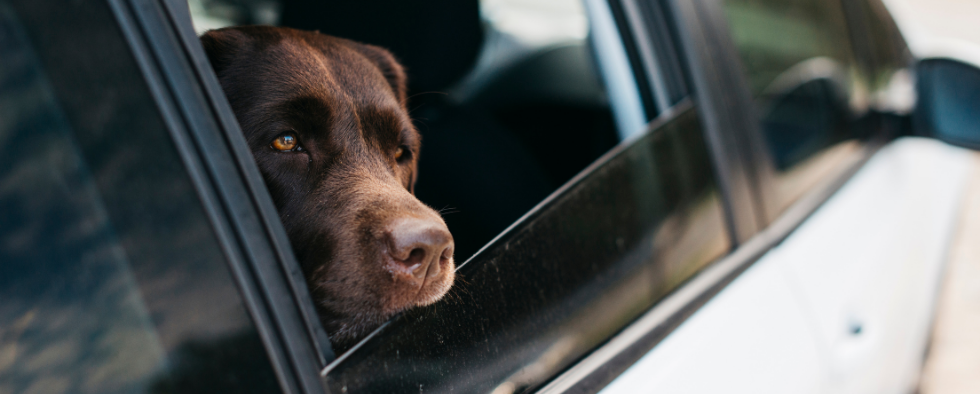
It is the law to restrain your dog when travelling in your car. So as fun as it is for your pooch to sit with their head out of the window, they must be suitably restrained so they cannot distract you and potentially hurt either you or themselves. When it comes to where your dog should be when travelling, although there are no laws against your dog travelling in the footwell of the car, unfortunately they would not be properly restrained and if you did have an accident, you may be prosecuted for ‘dangerous driving’.
When choosing where your dog should be properly restrained, no matter what method you choose, your dog should not sit in the front seat - securing them in the boot or back seat behind a front seat is considered a safer option.
How To Secure A Dog In The Car
There are many safety products you can choose from, which can help with travelling safely in the car. It’s most important you choose a solution that’s suitable and comfortable for your pooch, and it has been installed and executed correctly to ensure the safety of your pet. Here at Lords & Labradors, we’d recommend the following for safe travel.
Dog Carriers
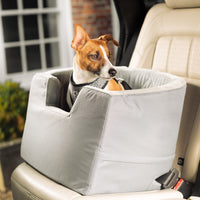
Our pet carriers come in different sizes and weights which will vary for the suitability for you and your dog. It’s a lighter option to our metal crates and are easily packed away if you’re staying away from home. Carriers are great when travelling by car and when taking your dog from the car into a safe place to let them out and stretch their legs. They keep your pooch safe and settled whilst travelling.
Travel Harnesses
Our pet-friendly harnesses come in a variety of sizes, suitable to your dogs breed and size. Travel harnesses are easy to fit onto your dog and it’s quick to clip them into place. They’re specially designed to prevent your dog from moving around whilst in the car, all whilst keeping your pet safe and comfortably restrained.
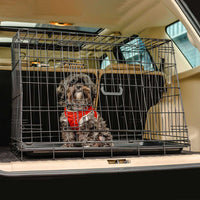
Travel Crates
Crating your dog keeps them safe & secure - using a crate to transport your pet has the added benefit if they’re already used to being crated at home. If your dog is used to being crated, often when travelling they’ll feel safer and their surroundings will reduce any anxiety your dog may have around travelling.
How Long Can A Dog Travel In A Car
Being stuck in the car can be hard for your dog! Not only will your dog need regular toilet breaks, they’ll also need to stretch their legs and get some of their energy out. When stopping for your dog to toilet and stretch their legs, you could also give them some food and water to avoid any spillages whilst travelling. Ideally you should try to keep to your dogs routine where possible (even when travelling) - every 2 to 4 hours for about 15 to 30 minutes is a good guide to follow, however you’ll know what is best for your dog and how they travel. If you’re planning a lengthy trip, try to go on few shorter journeys to see how your dog is likely to react.
You may be preparing for the all important ‘Gotcha Day’, the day celebrated by all dog parents as the day you brought your pup home. Taking your puppy home for the first time is exciting, especially if you have prepared for their arrival. Puppy shopping can be so much fun, but also overwhelming if you’re a new pet parent, or if you’ve not had a puppy for a few years. There will be some things you do need to buy for necessity and some things that are worth buying for your new pup. Here at Lords & Labradors we’ve put together the 10 puppy essentials you’ll need to get your new puppy settled.
Our Top 10 Items To Buy For Your New Puppy
1) What crate to buy?
Firstly, if you’ve decided to crate train your puppy, you’ll need a crate that will see you through from puppyhood to adulthood. You’ll need a crate the appropriate size so you can fit a puppy bed at one end and a puppy training pad the other incase they need to toilet when left in their crate. It also gives your pup enough room to stretch, play and sleep if crated during the daytime. Depending on your training methods, you may want to place the crate somewhere the puppy can be near to you, but also not directly in a high traffic area of your home. Remember the crate is your puppy’s den, so discourage any children from climbing inside.
2) Where should my puppy sleep?
We recommend a puppy bed that’s easy for your pup to get in and gives them enough support and comfort whilst they sleep. Our Cosy & Calm Puppy Box Beds have been carefully designed with your puppy in mind. The beds are super squishy and soft, and have the most comfortable sides for your pup to snuggle right into. If you have chosen to crate train your pup, our vet bed is really popular, as it’s cosy, comfortable, robust and relatively puppy proof - it’s easily washed and dried too. It can be used with or without our Cosy & Calm puppy box bed.
3) What will my new puppy eat?
It’s recommended you initially use the same food that your puppy comes home with, in order to avoid any tummy upset during their first few days with you. Once your puppy has settled, you can gradually introduce a new food to their diet. It’s good to check the food guidelines of the food you choose to feed your pup, as often they’ll give you the correct guidelines on how to introduce the new food to your pup.
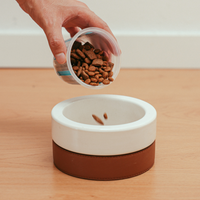
Make sure you have a clean bowl for water and a clean bowl for food, you can opt for a slanted water bowl if you have a spaniel breed to reduce your dogs ears from getting soaked in their water.
4) Puppy Toilet Training
Top of your list should be a reliable pack of puppy training pads, not only are they great for training your young pup, but they are invaluable when travelling (pop in the bottom of their carrier/crate to catch any travel sickness or accidental toilet trips). You can also use them to absorb muddy, wet paws after your pup has had a play in puddles!
5) How to settle my new puppy at night
When settling your new puppy at night, our heart beat sheep will be your puppy's new best friend. The heart beat sheep features a beating heart inside that mimics the beat of Mum's heart. They're designed to offer comfort and calm to new puppies who may feel nervous in their new home; they help to stop separation anxiety too. Alongside the heart beat sheep, you could pop in a heat pad under your dogs bed/cushion to keep them warm and to mimic the feeling of having siblings/mum near. Both the heat and the heart beat sheep will provide comfort for your puppy, especially whilst they are settling in and adjusting overnight.
6) How to keep your new puppy entertained
Toys will provide something to chew on for your pup, which you’ll find are essential if you want to avoid your puppy chewing on your furniture. Choose a variety of textures, styles and sizes to keep your puppy engaged and interested. You may want to keep a toy box so your pup can choose what they’d like to play with, or keep a few toys in rotation so your puppy doesn’t get bored with them.
You can also buy toys you can fill with treats or their food. If you want/need to leave your puppy - remember to build this up slowly, and don’t leave your new puppy for a long period of time - you could try freezing a peanut butter filled KONG (remember to use doggy/puppy friendly peanut butter). Freezing the toy will take them longer to work through and will give some relief to their sore teething gums and teeth.
7) Does my new puppy need a collar?
You may want to purchase your dogs collar before they arrive home with you, however it’s advised to purchase the correct size collar for your puppy, which you may have to wait until they’re here to measure them properly. It is a legal requirement to have a tag with your details on incase your puppy gets lost or strays away, but it’s advised not to add your puppy’s name to the tag.
8) How will I get my new puppy home?
Collecting your puppy to take them home is really exciting, but it’s best to be prepared. Make sure you have a suitable carrier/crate to store them in safely for the journey. It’s important your dog is restrained as it is the law to keep your puppy properly restrained whilst driving. In your carrier, you may want to pop in a blanket that smells like home and a scent blanket that smells like their mum and litter mates. It’s also good to have some puppy training pads to hand incase of any car sickness or accidental toilet trips.
9) When to start training my new puppy?
You can start with bonding and training your puppy almost straight away, get some high quality, puppy training treats (make sure to check the guidelines), and enjoy teaching them new tricks - you’ll be amazed at how quick they learn!
10) When do I start grooming my puppy?
It’s recommend that even if your pup won’t require grooming at first, you should regularly brush them to get them used to being groomed and handled. Choose a simple, soft brush and/or comb for the first couple of months. There will be a time you will need to wash your puppy, make sure you’re not using human shampoo as this will upset your puppy's PH levels and may not be compatible with your puppy flea treatment. It’s best to invest in a puppy shampoo that you can use when and if you need to bathe your puppy. We have our own puppy grooming set in our Petplex collection called the 'Puppy Purifier' it has a shampoo and a cologne to help keep your puppy smelling fresh.
A stuffed dog bed is one of those things that absolutely needs regular washing and also one of those things that can go spectacularly wrong if you approach it without a plan. Too much heat and the filling shrinks into a sorry little lump. Too much agitation and the seams give way mid-cycle. Too little rinsing and you're left with a stiff, detergent-laden bed that your dog will probably refuse to sleep on anyway. The good news is that once you know the right method for your specific bed, the whole process becomes surprisingly straightforward. Here's everything you need to get it right from start to finish, without the soggy, misshapen disaster that puts so many pet parents off washing day altogether.
How to wash a dog bed with stuffing without ruining the shape
Washing a stuffed dog bed doesn't have to mean ending up with a lumpy, misshapen mess that takes forever to dry. With the right approach, you can get your pup's favorite sleeping spot clean and fresh while keeping that cozy, supportive shape they love.
The secret is understanding what you're working with before you dive in. Every dog bed comes with a care label that tells you exactly how it wants to be treated, but many of us skip this crucial first step. Some beds handle a spin in the washing machine beautifully, while others need gentler hand washing or strategic spot cleaning to avoid turning into a soggy disaster.
Start by checking the care label and figuring out what type of filling you're dealing with. Memory foam behaves completely differently than polyester fiberfill or down alternative when it gets wet. Then there's the cover situation—removable zip covers are an absolute game-changer, but plenty of beds come as one piece that needs special handling.
Your cleaning method depends on three key factors: what the manufacturer recommends, what your washing machine can handle, and how dirty the bed actually is. A lightly soiled bed with a removable cover calls for a totally different strategy than tackling a non-removable cover that's survived muddy paws, drool, and that mysterious smell only dogs seem capable of creating.
Once you've done this quick assessment, you can confidently choose your approach. Machine washing works brilliantly when conditions are right and saves you loads of time. Hand washing gives you complete control over delicate fillings that might fall apart in the machine. Spot cleaning handles quick touch-ups between deep cleans without the full production.
Each method has its sweet spot, and picking the right one means your dog gets back to their clean, comfortable bed while you avoid wrestling with a waterlogged mess that refuses to dry properly.
Check the label, zip covers and filling before anything goes in the wash
Before you toss that muddy dog bed into the washing machine, take five minutes to give it a proper once-over. This quick inspection will save you from discovering a washing machine full of soggy stuffing or pulling out a misshapen mess that your pup will never want to sleep on again.
Start with your pre-wash detective work:
Hunt down the care label first - Those little washing symbols tell you everything you need to know about maximum temperature and whether machine washing is even safe. Some beds can only handle cool water, while others are perfectly happy with a warm wash.
Test all zippers and look for removable covers - If there's a zippered cover, see if it comes off easily. Many beds have removable outer covers that wash beautifully on their own, leaving you with just the inner cushion to tackle separately.
Feel around for waterproof liners or barriers - Some beds have plastic or waterproof layers tucked inside that can melt or warp in hot water. You'll definitely want to know about these before choosing your wash settings.
Run your hands along every seam - Check for loose threads, small tears, or worn spots that might split open mid-cycle. Nothing worse than fishing polyester filling out of your washing machine drain.
Figure out what's actually inside - Give the bed a good squeeze to identify whether you're dealing with loose polyester stuffing, memory foam chunks, or a solid foam core. Each type needs different handling.
What should never see the inside of your washing machine: Solid memory foam inserts (they'll crumble), beds with broken zippers that might burst open, or anything with significant tears in the fabric.
Yes, this inspection phase might feel tedious when you're staring at a bed that frankly smells like eau de wet dog. But it's the difference between a successfully refreshed bed and pulling out what looks like a deflated pillow that's lost all hope of being comfortable again.
The easiest way to machine wash a dog bed with stuffing
When you know how to wash a dog bed with stuffing in the machine, you'll save hours compared to hand washing while getting far better results against the dirt, hair, and that distinctive doggy smell that builds up over time. Machine washing reaches deep into the filling to tackle allergens and bacteria that surface cleaning simply can't touch.
Shake off loose debris and hair outside or in your garden. Give the bed a proper shake from all angles, then tackle stubborn fur patches with a lint roller or vacuum. Trust me, this step prevents your washing machine from turning into a hair-clogged disaster zone.
Pre-treat stains and smelly spots with a pet-safe enzyme cleaner or make a paste from baking soda and water. Pay attention to corners where your dog's head rests and any obvious mud streaks or little accident marks. Let the treatment work for 10-15 minutes before washing.
Choose a gentle, fragrance-free detergent and use half the usual amount. Strong scents can bother sensitive dog noses, while too much soap creates residue that's nearly impossible to rinse from thick stuffing. Skip fabric softeners completely—they actually reduce the filling's natural fluffiness.
Stick to cool or warm water (30-40°C maximum) to prevent shrinkage and color fading. Hot water might feel more thorough, but it breaks down stuffing structure and can set protein-based stains like drool or muddy paw prints permanently.
Balance your washing machine load by tossing in clean towels if you're only washing one small bed. This stops the bed from clumping to one side during the spin cycle, which can damage both the bed's shape and your machine's drum.
Use the gentlest cycle available and always add an extra rinse. That second rinse removes lingering detergent residue that would otherwise attract fresh dirt and leave the bed feeling stiff and unwelcoming.
Reshape while damp once the cycle finishes. Gently fluff any flattened areas while the stuffing is still pliable—it's much easier now than after everything's dried solid.
Machine washing every two to three weeks keeps your dog's sleeping space genuinely fresh and hygienic. Your pup gets a clean, comfortable bed that actually smells pleasant, and you get the satisfaction of knowing you've conquered those mystery stains and persistent odors without spending your weekend scrubbing by hand.
How to hand wash or spot clean a stuffed dog bed when the machine isn’t the best option
When your dog's bed is too large for your washing machine, made from delicate materials, or carries a "hand wash only" label, you'll need to roll up your sleeves for a gentler approach. Those enormous orthopedic beds that barely fit through the bedroom door definitely won't squeeze into your washer, and vintage-style beds with delicate fabrics deserve the careful touch that only hand washing can provide.
Hand washing your stuffed dog bed:
Set up your washing station in the bathtub, utility sink, or grab a large basin if you're working outdoors. First, remove as much loose fur and debris as possible with a lint roller or your vacuum's brush attachment.
Prepare your cleaning solution with cool water and a small amount of gentle detergent or pet-safe enzyme cleaner. Skip the hot water — it sets stains deeper and can break down certain filling materials over time.
Submerge and work the bed gently, pressing it down into the water rather than wringing or twisting. Pay extra attention to those heavily soiled spots where your pup loves to rest their head by gently kneading the fabric and letting the cleaning solution penetrate the stuffing slowly.
Rinse until the water runs clear with cool, clean water. You'll likely need several rinse cycles before no soap bubbles appear when you press the bed, but thorough rinsing prevents skin irritation later.
Remove excess water carefully by laying the bed flat and gently pressing down, or rolling it between clean towels. Resist the urge to wring or twist — that's how you end up with permanently lumpy filling.
Quick spot cleaning between washes:
Blot fresh accidents immediately with paper towels, then treat with pet enzyme cleaner and a clean cloth
Sprinkle baking soda over the entire surface, let it sit for 30 minutes, then vacuum away odors
Use pet-safe fabric freshener spray for quick refreshes
Wait for muddy paw prints to dry completely, then tackle them with a damp cloth and mild soap
Hand-washed beds need a full 24 to 48 hours to dry completely, so plan ahead. If you find yourself avoiding wash day because the process feels overwhelming, consider upgrading to a bed with a removable, washable cover — your future self will thank you.
Drying a dog bed properly so it stays fresh, fluffy and safe to sleep on
Proper drying makes all the difference between a fresh, comfortable bed your dog will love and a damp, smelly mess that breeds bacteria. When stuffed dog beds don't dry completely, the filling clumps into hard lumps, moisture gets trapped in the centre creating that musty smell we all dread, and your pup ends up with an uneven surface that's anything but cozy.
Step-by-Step Drying Process:
Check the care label first to see if tumble drying is safe. Most polyester-filled beds can handle low heat, but memory foam or specialty fillings often need air-drying only.
For machine drying, use the lowest heat setting and toss in two clean tennis balls or wool dryer balls. These bounce around breaking up clumps while keeping the stuffing fluffy throughout the cycle.
Stop every 30 minutes to remove the bed and fluff it by hand, redistributing any stuffing that's bunched up in corners. It might feel like overkill, but this step prevents those frustrating hard spots.
For air-drying, lay the bed flat on a clean surface in direct sunlight if possible. Sunlight naturally kills bacteria and speeds things up considerably.
Flip the bed every 2-3 hours and give it a good shake to prevent the filling from settling on one side. Think of it like turning a roast – even exposure is everything.
Press different areas gently to check for cool or damp spots, paying special attention to thick seams and corners where moisture loves to hide.
Signs Your Bed Is Fully Dry:
- No cool spots when you press firmly into the thickest areas
- Stuffing moves freely and springs back when squeezed
- No musty or damp smell anywhere on the bed
Patience really pays off here. Rushing the drying process undermines all your washing efforts and creates the perfect environment for mold. Once you've mastered this routine, the whole process of how to wash a dog bed with stuffing becomes wonderfully manageable, and your dog gets to enjoy that perfect combination of clean and comfortable every time.
How often to wash your dog’s bed and when it’s time for a new one
How often you wash your dog's bed really depends on your furry friend's lifestyle and habits. If you have a muddy adventure pup who loves rolling in grass and splashing through puddles, you'll probably find yourself tackling their bed weekly. Indoor dogs with shorter coats might only need a fortnightly wash, while senior dogs who spend most of their time snoozing indoors can often go three to four weeks between washes.
Trust your nose here. When you catch that unmistakable "dog bed" scent from across the room, it's definitely time for a wash. Puppies and dogs who drool heavily, shed loads, or have skin conditions will need more frequent cleaning to keep things fresh and hygienic.
Even with the best care, there comes a point when washing a dog bed with stuffing becomes more trouble than it's worth. If the filling has gone permanently flat and lumpy despite gentle washing, or if odours linger even after a thorough clean, your dog deserves something better. Visible wear like torn seams, exposed stuffing, or fabric that feels rough against your hand means it's time to move on.
This is exactly why many pet parents are switching to beds with removable, washable covers and high-quality filling that bounces back wash after wash. We've designed our dog beds with busy families in mind – covers that zip off easily for machine washing, paired with inner cushions that maintain their shape and support through countless cleaning cycles. Your dog gets the comfort they deserve, and you get genuinely easy care bedding that actually stays fresh and supportive long-term.
Foam dog beds and accidents are an inevitable combination. Especially if you share your home with a puppy, a senior dog, or simply a pup who got caught short. The good news is that foam, even the premium memory foam kind, is far more forgiving than it looks. The difference between a bed that comes out fresh and one that's permanently ruined almost always comes down to those crucial first few minutes and knowing which steps to take in which order. Here's exactly how to handle it — from the moment you discover the accident all the way through to a fully clean, dry, odor-free bed your dog will be happy to curl up on again.
How to clean urine from a foam dog bed without ruining the filling
With the right approach, you can absolutely save that bed and have it smell fresh again, even if it's a beloved memory foam mattress that sets you back considerably.
The secret to cleaning urine from a foam dog bed successfully lies in staying methodical rather than panicking and dousing everything with whatever cleaning products you have under the sink. Foam handles proper care beautifully, but it does need a gentler touch since you can't simply toss the whole thing in the washing machine like a regular cushion.
This guide covers everything you need: your immediate game plan when you spot that dreaded wet patch, deep-cleaning the foam insert itself, eliminating stubborn odours that signal "toilet" to your pup instead of "cosy bed," and ensuring thorough drying to prevent mold taking hold. Memory foam dog beds get special attention here—these premium fills need extra care but respond wonderfully when treated right.
We'll also help you recognise when it's time to retire a bed rather than wage an endless cleaning battle. Sometimes, particularly with older foam or repeated heavy soiling, starting fresh becomes the healthier choice for your dog.
Here's the encouraging truth: most accidents are completely salvageable with patience and proper technique. Whether you're dealing with a one-off puppy mishap or your senior dog's occasional leak, that favourite napping spot can be restored to its former glory.
What to do first when you find pee on the bed
Finding pee on your dog's beloved foam bed can feel overwhelming, but taking the right first steps makes all the difference between a successful clean-up and a lingering mess that haunts you for weeks. Acting quickly and methodically prevents urine from soaking deeper into the foam, where it becomes nearly impossible to remove completely.
Here's exactly what to do the moment you discover the accident:
Strip everything immediately - Remove any removable covers, blankets, or washable outer layers from the bed. Speed matters here because urine continues spreading through fabric and foam every second it sits.
Blot, don't rub - Using clean paper towels or old towels, press firmly into any wet spots to absorb as much liquid as possible. Resist the urge to scrub or wipe, which only pushes urine deeper into the foam's tiny air pockets.
Separate washable from non-washable parts - Set aside covers and removable pieces that can go in your washing machine. Keep the foam insert separate since most foam requires different cleaning methods.
Check care labels before doing anything else - Some memory foam breaks down with certain cleaners or too much water. A quick label check now saves you from accidentally destroying an expensive bed.
Key mistake to avoid: Never immediately soak or saturate the foam with water or cleaning solutions. This drives urine deeper into the material and creates perfect conditions for mold and mildew.
I learned this the hard way when my Labrador Max had an overnight accident on his memory foam bed. I panicked and doused the whole thing with water, thinking I was diluting the mess. Instead, I created a soggy disaster that took days to dry and still smelled faintly of pee weeks later.
Now that you've contained the situation and separated your materials, you're ready to tackle the actual cleaning process. The specific method depends on whether the foam itself got wet, but these first steps give you the best foundation for whatever comes next.
How to clean urine from the foam itself step by step
Cleaning foam inserts requires a gentle touch because too much moisture can break down the structure, trap odors deep inside, and create the perfect breeding ground for mold. Memory foam is particularly vulnerable since it's designed to absorb and hold its shape—which unfortunately means it can also absorb and hold those unwanted smells. The key is removing the urine without drowning the foam completely.
Blot up fresh urine immediately using paper towels or clean cloths. Press firmly and repeatedly to pull as much liquid as possible from the foam before it soaks deeper. Think of it like pressing water out of a sponge—you want to work quickly while the accident is still surface-level.
Check both sides of the foam insert to locate the full affected area. Urine has a sneaky way of seeping straight through, so you'll likely need to treat the entire contaminated section, not just where you can see the stain.
Mix your cleaning solution using one part white vinegar to two parts water, or combine a few drops of enzyme cleaner with water in a spray bottle. Skip harsh chemicals that could irritate your dog's skin later—they'll be sleeping on this bed, after all.
Spray lightly on the soiled area without creating a soggy mess. You want the solution to penetrate where the urine went, but over-wetting will make drying nearly impossible and could damage the foam's structure permanently.
Work the solution in gently using your fingers or a soft cloth. Press and massage the cleaning solution into the foam, focusing on the most heavily soiled spots. You're trying to break up the urine so you can lift it out.
Blot with clean, damp cloths to remove the cleaning solution and dissolved urine. This step prevents soap residue from attracting more dirt and odors down the line—trust me, you don't want to create a magnet for future messes.
Extract as much moisture as possible by pressing dry towels into the foam. For thick inserts, don't be shy about applying pressure or even standing on the towels. You might need several rounds of this.
Do the sniff test once the area is slightly drier. If you still catch a whiff of urine, repeat steps 3-7 before moving on to drying.
Memory Foam Alert: Never oversaturate memory foam—it can take days to dry completely and may never bounce back to its original shape. Use minimal liquid and focus on thorough moisture extraction. A fan helps speed things along, but avoid direct heat which can crack or damage the foam.
Most accidents clean up beautifully with patience and this method. If the foam still smells strongly after a complete clean and dry, or feels permanently different, replacement might be your kindest option for your dog's comfort.
How to get rid of lingering urine smell and stains
Once you've tackled the initial mess, it's time to move on to the next challenge: making sure there's no lingering smell or pesky yellow stain on your dog's foam bed. Even when you think you've cleaned it thoroughly, urine crystals might still be hiding deep within the material. Dogs have a nose for these things, so let's ensure they have their comfy spot back odor-free.
Here's a step-by-step guide on how to clean urine from a foam dog bed effectively, focusing on neutralizing those odors and stains:
Apply enzyme cleaner liberally on the affected area, using your hands to work it into the foam. These specialized cleaners break down the uric acid crystals responsible for that familiar, persistent smell.
Give the cleaner around 10-15 minutes to work. This wait time is crucial, so don't rush through it. Allowing the enzymes to do their job can save you from having to clean the same spot over and over again.
Sprinkle baking soda over the damp area. This not only helps absorb any remaining moisture but also tackles odors as it dries.
Leave it for 2-3 hours, then vacuum thoroughly to remove all traces of the baking soda from the foam surface.
Spritz with clean water using a spray bottle, and then gently blot the area with clean towels. This step helps eliminate any remaining cleaner residue.
Pro tip: Opt for enzyme cleaners specifically made for pet urine. They contain a blend of bacteria and enzymes that completely break down uric acid crystals, unlike general household cleaners that merely mask the smell temporarily.
When using cleaning products, avoid mixing them—particularly vinegar with enzyme cleaners or bleach with ammonia-based products, as these can neutralize each other or even create hazardous fumes. Lastly, ensure the foam dries completely before letting your dog use the bed again. Damp foam can encourage mold growth and exacerbate those unwanted urine odors instead of getting rid of them.
For more tips on maintaining your dog's bed, check out our guide on dog bed care.
Drying the bed properly so mould and smells do not come back
After you've tackled the cleaning process, proper drying becomes absolutely critical to your success. Even the most thorough cleaning job falls flat if moisture gets trapped inside the foam, creating the perfect breeding ground for mold and bacteria that will bring those unpleasant smells right back. Think of drying as the final step that locks in all your hard work.
Here's how to dry your foam dog bed completely:
Position the foam in a well-ventilated area with good air circulation—ideally outdoors on a covered porch or near open windows if weather permits.
Place clean towels underneath and on top of the foam initially to absorb excess moisture, replacing them when they become saturated.
Ensure airflow reaches both sides by propping the foam on a drying rack, clean outdoor furniture, or rotating it every few hours.
Use fans or a dehumidifier to speed the process, especially in humid conditions or during winter months.
Allow 24-48 hours for complete drying, depending on foam thickness and weather conditions.
Avoid direct sunlight or heat sources like radiators, which can break down foam structure over time.
Quick Drying Test: Squeeze the center of the foam gently. If it feels cool, heavy, or releases any moisture, it needs more time. Completely dry foam should feel light and spring back immediately.
While your bed dries, set up a temporary sleeping area using spare blankets or a backup bed. Your dog won't mind the temporary arrangement, and you'll thank yourself for the patience later. Many pet parents find that waterproof mattress protectors under the regular cover make future cleanups much easier. This waiting period might feel long, but rushing back to a damp bed will undo all your efforts and potentially create bigger problems down the road.
When to replace the bed and how to make the next clean-up easier
Sometimes even the most thorough cleaning can't bring a foam dog bed back to life. If your pup has had multiple accidents on the same bed, or the foam has started breaking down into crumbly pieces, it's time to say goodbye. Persistent odours that return even after deep cleaning usually mean urine has penetrated too deeply into the foam's structure to ever fully eliminate.
You'll also want to replace beds where the foam has lost its shape or developed permanent staining that won't budge. Memory foam beds are particularly tricky since their dense structure traps odours more stubbornly than regular foam. If you're dealing with an elderly dog or a puppy still learning house training, a bed that's weathered several accidents might simply become unhygienic to keep.
Making future clean-ups easier starts with choosing the right bed design. Look for beds with removable, machine-washable covers that zip off completely. Waterproof liners between the cover and foam create an extra barrier against accidents—think of them as insurance for your sanity. Some pet parents swear by placing a waterproof mattress protector under the entire bed for added peace of mind.
When shopping for your next bed, consider how you'll clean urine from the foam dog bed before you even bring it home. Beds with memory foam inserts that can be removed entirely make the whole process much simpler. Multiple cover options mean you can rotate them during washing, so your pup always has a clean, dry spot to curl up.
The key is being proactive rather than reactive. A little prevention goes a long way toward keeping both you and your dog happy when accidents happen. Because let's be honest. If you have a dog long enough, they absolutely will happen.
Whether your dog sleeps like a pretzel or sprawls like they own the entire bed, their bedtime habits are telling a story worth paying attention to. Dogs communicate so much through body language when they're awake. It turns out, they keep right on communicating even when they're snoozing. From the tight little donut curl to the full belly-up flop, each position is a small window into how your pup is truly feeling. Here's what the most common dog sleeping positions actually reveal and what simple changes you can make to help your dog sleep even better.
Why Dog Sleeping Positions Matter More Than You Might Think
Most of us have caught our dogs in some pretty amusing sleep positions—sprawled like starfish across the entire sofa, curled up so tight they look like furry donuts, or somehow managing to sleep upside down with their legs dangling off the couch. But here's something that might surprise you: those quirky dog sleeping positions actually reveal quite a bit about what's going on in your pup's world.
The way your dog chooses to settle down for a snooze often reflects how they're feeling in that moment. Are they warm enough? Do they feel safe and secure? How deeply are they planning to rest? A dog who flops onto their back with all four paws in the air is essentially saying "I feel completely safe here"—after all, exposing that vulnerable belly takes serious confidence. Meanwhile, a dog curled into a tight little ball might be conserving body heat or seeking that cozy, protected feeling we all crave sometimes.
Learning to read these sleeping cues can help you better understand your dog's comfort levels and make thoughtful tweaks to their sleep setup when needed. Just remember that dog sleeping behavior is more like a helpful hint than a definitive diagnosis. If your usually sprawling Lab suddenly prefers tight curls, it could signal something worth noting—or they might have simply discovered that smaller positions feel extra cozy on chilly nights.
Common Dog Sleeping Positions and What They Usually Mean
Every dog has their favorite way to settle down for a snooze, and these dog sleeping positions offer fascinating glimpses into how your furry friend is feeling. While every pup is unique, certain sleep styles often reflect similar needs for comfort, security, or temperature control. Think of these patterns as gentle clues about your dog's inner world rather than absolute rules.
The Curled Up Ball: Your dog tucks their paws under their body and wraps their tail around themselves, creating a cozy circle. This classic position helps conserve body heat and protects vital organs, suggesting your pup might be feeling chilly or seeking extra security. You'll see this one especially often with smaller dogs or during cooler weather.
The Side Sleeper: Lying on their side with legs extended signals a relaxed, comfortable dog. This position shows real trust in their environment since it leaves their belly completely exposed. Dogs who regularly choose this sleep style tend to feel secure and settled in their home.
The Sphinx Pose: Your dog lies on their belly with front paws stretched forward and head up or resting on their paws. This position allows for quick movement if needed, so it often means your dog wants to rest but stay somewhat alert to their surroundings. Perfect for the family guardian who's always on duty.
The Superman: Sprawled flat on their belly with all four legs stretched out makes your pup look like they're flying through dreamland. This position helps dogs cool down quickly and is especially popular with energetic breeds who want to be ready to spring back into action at a moment's notice.
The Back Sleeper: A dog sleeping on their back with belly exposed demonstrates ultimate trust and confidence. This vulnerable position also provides maximum cooling, so you'll often spot it during warmer weather or after particularly active play sessions. Not all dogs feel comfortable enough to sleep this way.
The Burrower: Some dogs love tunneling under blankets, pillows, or even your laundry pile. This cozy habit usually indicates a desire for warmth and security, creating their own little den where they feel completely protected from the world.
The Cuddle Bug: Dogs who press against you, other pets, or furniture while sleeping are seeking comfort through physical contact. This bonding behavior shows deep affection and often means your dog finds the most security when close to their favorite family members.
Your dog's sleeping habits will naturally shift based on the season, their age, and daily activities. The most valuable insights come from noticing your individual dog's patterns over time rather than analyzing any single sleep session.
What Your Dog’s Sleep Style Can Tell You About Comfort, Temperature, And Routine
While your dog's sleeping position might seem like pure preference, it's actually shaped by practical factors like their age, breed, and daily environment. Understanding these influences helps you create the perfect sleep setup that truly works for your pup.
Several key factors determine how your dog chooses to rest:
Age and joint comfort: Senior dogs with arthritis often curl up tightly for joint support and warmth, while puppies sprawl everywhere without a care. If your older Labrador suddenly starts sleeping stretched out instead of curled up, they might be telling you that tight positions now feel uncomfortable on stiff joints.
Coat type and temperature regulation: Thick-coated breeds like Golden Retrievers frequently sleep belly-up or sprawled on cool floors during warmer months, while thin-coated dogs like Whippets burrow under blankets or curl into tight balls to stay warm.
Room temperature and seasonal changes: Your dog's positions shift naturally with the weather. That same pup who sleeps belly-up on kitchen tiles in July might switch to curling against your legs when January rolls around.
Bed placement and household activity: Dogs sleeping in busy family areas often choose alert positions like lying on their side with ears perked, while those in quiet bedrooms feel secure enough for deep sleep on their backs with legs in the air.
Exercise and daily routine: Well-exercised dogs typically sleep more soundly in relaxed positions, while under-stimulated pups might sleep lightly, ready to spring into action at any sound.
Pay attention to your dog's patterns throughout different seasons and life stages. Simple adjustments like adding a heated bed for creaky joints or moving their sleeping spot away from drafty hallways can transform their comfort. These dog sleeping positions reveal genuine comfort needs rather than just adorable quirks.
When a Change in Sleeping Position Is Worth Paying Attention
Most dogs naturally shift between different sleeping positions based on comfort, temperature, and mood, but some changes in sleeping behavior deserve a closer look. While occasional variation is perfectly normal, persistent shifts in how or where your dog sleeps can sometimes signal underlying discomfort or stress.
Here are specific warning signs to watch for in your dog's sleeping behavior:
Sudden restlessness or inability to settle into any position for more than a few minutes
Reluctance to lie down or frequent repositioning throughout the night
Unusual stiffness or difficulty getting up from their sleeping spot
Seeking isolated hiding spots for sleep when they normally enjoy being near the family
Sleeping in uncharacteristic locations, like choosing hard floors when they typically prefer their cozy bed
Panting, whining, or showing signs of discomfort while trying to settle
These changes in dog sleeping positions may indicate pain, joint discomfort, anxiety, or other health concerns. If you notice these behaviors persisting for more than a few days, or if they're accompanied by other symptoms like changes in appetite or energy levels, it's worth having a conversation with your vet.
Keep in mind that not every position change signals trouble. Your dog might simply be adjusting to seasonal temperature shifts or responding to household changes like a new baby or recent move. The key is paying attention to patterns and trusting your instincts about what feels normal for your particular pup. You know your dog better than anyone.
How To Help Your Dog Sleep Well In The Position That Suits Them Best
Understanding dog sleeping positions gives you a wonderful starting point for creating the perfect sleep setup for your furry friend. The key is observing what your dog naturally gravitates toward, then making small adjustments to support their preferences.
Start with the basics: a quality bed that matches their sleeping style. Dogs who love to stretch out need plenty of space, while those who curl up tight often prefer smaller, cosier spots with raised edges for that den-like feeling. If your dog sleeps on their back, they're telling you they feel completely secure and tend to run warm, so focus on breathable materials rather than thick padding.
Temperature makes a real difference too. Notice where your dog chooses to sleep throughout the seasons. That summer floor-sleeper might appreciate a cooling mat, while your winter cuddler often benefits from a warmer, more insulated bed.
Location matters just as much as the bed itself. Some dogs sleep best right in the heart of family activity, while others need a quiet corner away from the hustle and bustle. Watch whether your dog seeks out the same spot consistently or moves around based on household rhythms and the time of day.
Keep an eye on any sudden changes in sleeping behavior, as these can sometimes signal discomfort or health shifts worth discussing with your vet. Most importantly, let your dog's natural preferences guide your choices rather than trying to change what already works perfectly for them.
If you’ve ever found yourself staring at your cat and wondering, “Who’s really in charge here?” then you’re not alone. From ignoring commands to opening doors and outsmarting the treat tin, cats have an uncanny knack for making us feel like the daft ones in the relationship.
So, are our feline companions secretly geniuses in fur coats, or are we just a bit too easily impressed by their antics? Let’s find out whether your cat might just be smarter than you think (and possibly smarter than you).
How Smart Are Cats, Really?
Cats are clever, there’s no doubt about that. While they might not do your taxes or fetch your slippers (they’d argue they have people for that), cats are masters of observation, memory, and problem-solving.
Research has shown that cats have complex cognitive abilities similar to those of young children. They can learn routines, recognise words, and even manipulate humans to get what they want (we see you, breakfast-at-5-a.m. crowd).
In short, cats are less about obedience and more about strategy. They’re not trying to impress you, they’re working out the quickest route to what they want.
Smarter Than You Think: Signs of Feline Intelligence
So how do you know if your cat’s secretly running mental rings around you? Here are a few tell-tale signs that your moggy’s mind might be sharper than expected:
They’ve Trained You, Not the Other Way Around: Does your cat meow in a certain way and you immediately respond with food, a cuddle, or by opening a door? Congratulations, you’ve been trained. Cats are expert behaviourists who quickly learn what gets them results. You think you’re in control, but they’ve been conducting a long-term psychology experiment, and you’re the subject.
They Solve Problems (Especially Food-Related Ones): Whether it’s nudging open cupboards, jumping on worktops, or working out how to knock the treat jar off the shelf, cats have impressive problem-solving skills. Studies show they can learn through observation, meaning they watch us perform tasks and then replicate them. That explains how they somehow open doors you swore were cat-proof.
They Remember Everything (Especially the Important Stuff): Your cat might appear aloof, but their memory is surprisingly sharp. They can recall people, places, and experiences for years, particularly if food or comfort is involved. So yes, they definitely remember that time you were late with dinner… and they’re still judging you for it.
They Communicate Intentionally: Cats meow primarily to humans, not to each other. Each meow, trill, or chirrup has meaning, and they quickly learn which sounds get the biggest reaction. In essence, they’ve built a custom language just for you. If that’s not intelligent adaptation, what is?
They Know How to Get What They Want (and When): From sitting on your laptop mid-email to knocking objects off the table until you pay attention, cats are experts at controlling human behaviour. They’ve learned through trial and error exactly how to push our buttons, sometimes literally.
Cat Intelligence vs. Human Intelligence
It’s unfair to directly compare cat and human intelligence, after all, we’ve evolved to be good at very different things. But when it comes to certain types of smarts, cats could give us a run for our money.
Cats excel in instinctive intelligence, they can hunt, problem-solve, and navigate their environment with ease. Their emotional intelligence is also underrated; many cats can sense their owner’s mood and adjust their behaviour accordingly. Ever noticed your cat curling up with you when you’re unwell or stressed? That’s empathy at work.
In other words, while you might be smarter at paying bills, your cat’s definitely cleverer at manipulating emotions and maximising comfort, which arguably makes them the true genius of the household.
Are Some Cat Breeds Smarter Than Others?
Some breeds are particularly known for their brainpower. If your cat’s a bit of a mastermind, they might belong to one of these sharp-minded groups:
Siamese: Chatty, curious, and quick to learn tricks, these cats love mental stimulation.
Bengal: Adventurous and athletic, with the brains to match.
Abyssinian: One of the oldest and most intelligent breeds; they learn by watching.
Maine Coon: Gentle giants with a problem-solving streak.
Sphynx: Exceptionally social and observant, they read humans like a book.
Of course, every cat is unique. Even your laid-back British Shorthair can surprise you with a moment of sheer genius (usually when you least expect it).
Can You Make Your Cat Even Smarter?
Absolutely! Cats thrive on mental stimulation, and just like us, they need to exercise their minds. Here are some ways to encourage their inner Einstein:
Interactive Play: Toys that move, rattle, or hide treats tap into your cat’s hunting instincts and keep their brain buzzing.
Puzzle Feeders: These make mealtimes a mental workout, challenging your cat to think before they eat.
Training & Tricks: Believe it or not, cats can learn tricks just like dogs, you just need patience (and a lot of treats).
Try starting with our guide: Train Your Cat: Top Tricks for Clever Cats.
New Experiences: Rotate toys, rearrange play areas, and give them safe access to different views, a sunny windowsill, a cat tree, or a secure garden enclosure.
The more variety you add, the more your cat’s intelligence will shine through. And who knows, they might even start teaching you a few tricks.
So… Is My Cat Smarter Than Me?
In their own way, yes probably! Cats may not understand quantum physics, but they’ve mastered the art of getting what they want with minimal effort. They’re observant, emotionally intuitive, and endlessly resourceful.
So next time your cat outsmarts you, don’t take it personally, just admire their brilliance (and maybe offer them a treat for their trouble).
Keep Their Brilliant Minds Busy
From interactive toys and cat trees to treats and puzzle feeders, Lords & Labradors has everything you need to keep your clever kitty mentally stimulated and endlessly entertained.
Because if your cat is smarter than you, the least you can do is keep them happy about it!
Can You Flush Your Dog and Cat’s Poo Down the Toilet? The Truth About Pet Waste Disposal in the UK
If you’re a pet owner, you’ll know that clearing up after your furry friend isn’t the most glamorous part of the job. Whether you’re scooping cat litter or bagging up after a dog walk, you’ve probably wondered at some point: can you just flush it down the toilet and save yourself the hassle?
It sounds quick, clean, and even eco-friendly. But before you send that little parcel swirling away, let’s bust the myth once and for all. Flushing pet poo, whether it’s from your dog or cat, is not the answer, and it could cause more harm than good.
Here’s why flushing pet waste isn’t as simple as it seems, and what you should do instead to dispose of it safely and sustainably.
Myth #1: “It’s just like human waste, so it’s fine to flush.”
If only! While it might seem logical that pet and human waste can go down the same route, the truth is a little murkier.
Dog and cat poo can carry parasites, bacteria, and pathogens that human sewage systems aren’t designed to treat. The most well-known is Toxoplasma gondii, a parasite found in cat faeces that can survive traditional sewage treatment. Once it reaches waterways, it can harm marine wildlife and even pose risks to human health.
So while it may vanish from sight, it doesn’t vanish from the world, flushing pet poo simply moves the problem elsewhere.
Myth #2: “Flushing is better for the environment than using poo bags.”
Many eco-conscious pet owners in the UK want to reduce plastic use, which is fantastic, but flushing animal waste isn’t the greener option it appears to be.
Most UK water treatment plants aren’t built to process animal waste, meaning harmful microorganisms can slip through filtration systems and contaminate rivers and coastal waters. Over time, this disrupts delicate ecosystems and affects aquatic life.
A better alternative? Biodegradable or compostable poo bags. They break down much faster than traditional plastic and can be safely disposed of in general waste bins.
Myth #3: “Flushing pet waste every now and then won’t hurt.”
Unfortunately, even the odd flush can lead to unpleasant consequences. Pet waste can clump, swell, and block pipes, especially when mixed with cat litter or pet hair. This can cause slow drains, nasty smells, or even full-blown plumbing disasters.
So, even if you only do it occasionally, flushing pet poo is a risk that’s just not worth taking, particularly in older UK plumbing systems that aren’t designed for it.
Myth #4: “Flushable cat litter makes it okay.”
Flushable litters might sound like the perfect solution, but they come with a catch. Even those labelled “flushable” may not fully break down in water. Many are made from biodegradable materials like corn, paper, or wood that absorb moisture and expand, risking pipe blockages or build-up over time.
What’s more, UK water companies, including Thames Water and Severn Trent, strongly advise against flushing any kind of cat litter, even if the packaging says otherwise. So while flushable litter sounds handy, it’s best to play it safe and bin it instead.
Myth #5: “Flushing helps keep the house smelling fresh.”
We get it, when you’re trying to keep your home smelling lovely, sending the smell down the drain feels like the fastest fix. But there are much better ways to stay fresh without risking your plumbing.
For cat owners, try using high-quality odour-control litter and scoop trays daily. For dog owners, bag and bin waste straight away during walks and use eco-friendly sprays or wipes at home.
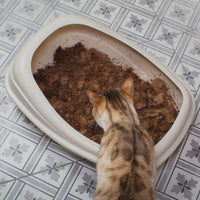
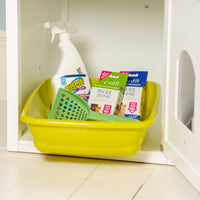
And if you want to level up your clean-up routine, Lords & Labradors offers a range of stylish litter trays, cleaning sprays, and accessories designed to make pet parent life a little more elegant (and a lot less smelly).
So, How Should You Dispose of Dog and Cat Poo Safely?
Here’s what UK pet owners should do instead:
🐾 Dog waste: Always bag it, ideally in a biodegradable or compostable bag, and place it in general waste or designated dog waste bins. Never flush it, even if the bag claims to be “flushable.”
🐾 Cat waste: Scoop the litter daily and dispose of waste in the household rubbish. For hygiene, use a liner or small biodegradable bag and wash your hands thoroughly afterwards.
If you’re aiming for a more sustainable setup, you can look into pet waste composting systems, though remember, compost made from animal waste should never be used on edible plants.
The Final Flush: Don’t Do It!
So, can you flush cat poo or dog poo down the toilet?
In short, no!
It might seem convenient, but flushing pet waste can cause plumbing issues, environmental harm, and even health risks. Stick to tried-and-tested disposal methods instead: bag it, bin it, and keep it out of the loo.
Your drains (and the UK’s waterways) will thank you for it.
Keep Your Home Fresh and Planet-Friendly
Dealing with pet mess doesn’t have to be unpleasant. From eco-friendly poo bags and litter trays to pet-safe cleaning products, Lords & Labradors has everything you need to keep your home fresh, hygienic, and stylish, without flushing your way into trouble.
Because when it comes to your pets, the only thing that should go down the toilet is… toilet paper! 🐾
SIGN UP FOR USEFUL TIPS & GUIDES STRAIGHT TO YOUR INBOX
13.10.25October 13, 2025Owning a DogFeatured
Top Dog Beds for Puppies, Seniors, and Every Stage In Between
Finding the perfect bed for your dog is more than a matter of comfort, it’s about supporting their growth, health, and wellbeing at every stage of life. From wriggly pups to graceful seniors, each phase brings new needs when it comes to sleep and rest. Investing in the right bed will keep your dog comfortable, secure, and supported, no matter their age.
In this guide, we’ll walk you through the best options for puppy dog beds, adult dogs in their prime, and dog beds for older dogs, helping you choose a style that matches your pet’s lifestyle and personality.
Puppy Beds: Comfort and Security for Growing Dogs
Puppies sleep up to 18–20 hours a day, so their first bed is one of the most important purchases you’ll make. A puppy dog bed should provide warmth, reassurance, and a safe space they can call their own.
Size and shape: Opt for a smaller, snug design that makes your puppy feel secure. Donut-style beds or cushioned bolsters work brilliantly, as the raised edges provide a sense of enclosure.
Durability: Puppies love to chew and scratch, so look for a bed made with sturdy fabrics and washable covers. Waterproof liners are especially helpful during the house-training stage.
Softness: Gentle padding supports their growing joints without being too firm. Cosy fleece or plush interiors mimic the warmth of the litter, helping pups settle more quickly.
A good puppy bed not only aids restful sleep but also plays a role in training, teaching your pup where their designated “quiet zone” is.
Adult Dogs: Style, Support, and Everyday Comfort
As dogs move into adulthood, their needs shift towards durability and support. By this stage, you’ll know your dog’s sleeping style – whether they sprawl out, curl into a ball, or stretch across the sofa – and their bed should match.
For sprawlers: A large cushion or mattress-style bed gives them plenty of room to stretch.
For curlers: Nest or bolster beds remain popular, especially with smaller breeds who like to tuck themselves in.
For heavy chewers: Consider chew-resistant fabrics and removable covers for easy cleaning.
For active dogs: Orthopaedic foam beds provide joint support, even in young adults, helping to prevent issues later in life.
This is the stage when many owners upgrade to a more stylish, long-term bed that complements their home décor, while still meeting their dog’s comfort needs.
Senior Dogs: Orthopaedic Support and Accessibility
As dogs age, their bodies need extra care. Dog beds for older dogs are designed to relieve pressure, soothe aching joints, and make rest easier. Choosing the right bed can dramatically improve your senior dog’s quality of life.
Orthopaedic foam or memory foam: Provides cushioning and distributes weight evenly, reducing pressure on hips and elbows.
Low entry points: Senior dogs often struggle to climb into high beds, so a low-profile mattress is ideal.
Extra warmth: Older dogs lose heat more quickly, so cosy fabrics or self-warming materials keep them comfortable.
Washability: Accidents are more common in later years, so removable, machine-washable covers are a must.
If your dog suffers from arthritis or mobility issues, an orthopaedic or memory foam bed can provide daily relief and support restful sleep.
Special Considerations
While age is the biggest factor in choosing the right bed, there are other considerations to keep in mind:
Breed size: Giant breeds benefit from extra-thick mattresses to support their weight, while toy breeds often prefer snug nest beds.
Lifestyle: Dogs who love the outdoors may need a waterproof, easy-clean option, while indoor loungers might prefer something ultra-plush.
Multiple pets: If you have more than one dog, ensure each has their own bed – sharing might be cute, but it doesn’t always guarantee restful sleep!
Final Thoughts
Your dog’s bed is more than just a piece of furniture – it’s their sanctuary. From the snug reassurance of a puppy dog bed to the joint-soothing support of dog beds for older dogs, investing in the right option at each stage of life will keep your pet happy, healthy, and well-rested.
At Lords & Labradors, we offer a wide range of dog beds designed for every age and breed, from cosy nests to orthopaedic mattresses. Explore our dog bed collection to find the perfect fit for your pup, whether they’re just starting their journey or enjoying their golden years.
When it comes to giving our dogs the very best in comfort and care, their bed is one of the most important investments we can make. While any soft cushion might seem like enough, for certain dogs, especially seniors or breeds prone to joint issues an orthopaedic dog bed can make a world of difference. But are they really worth it? Let’s explore the benefits, the dogs who need them most, and what to look for in the best dog bed for arthritis and joint support.
What Is an Orthopaedic Dog Bed?
An orthopaedic dog bed is designed with supportive materials such as memory foam or high-density foam, which contour to your dog’s body. Unlike traditional beds, these don’t simply flatten under pressure. Instead, they distribute your dog’s weight evenly, reducing strain on sensitive joints, hips, and muscles.
For dogs with arthritis, hip dysplasia, or recovering from surgery, this type of support can be invaluable. But many younger and active dogs benefit too, as it helps prevent wear and tear over time.
Benefits of Orthopaedic Dog Beds
Pain Relief for Senior Dogs - As dogs age, their joints naturally become stiffer. Arthritis is particularly common in older dogs, and getting up and down from hard or unsupportive surfaces can become uncomfortable. An orthopaedic dog bed cushions their joints, making resting and rising easier.
Support for Breeds Prone to Joint Problems - Certain breeds are genetically more likely to develop joint issues. Large dogs such as Labradors, German Shepherds, and Golden Retrievers are especially prone to hip dysplasia and arthritis. For these breeds, an orthopaedic dog bed isn’t just a luxury, it’s a proactive step to support their health.
Improved Sleep Quality - Just like humans, dogs need deep, restorative sleep. When their body is properly supported, they are less likely to toss and turn. A well-rested dog is a happier, healthier dog.
Prevention of Pressure Sores - Dogs that lie for long periods whether due to age, illness, or limited mobility, can develop pressure sores on hard surfaces. Orthopaedic foam reduces this risk by spreading weight evenly and minimising pressure points.
Long-Term Investment - Although an orthopaedic dog bed is usually more expensive than a standard cushion, its durability and health benefits make it a cost-effective choice. Quality foam won’t sag or flatten quickly, meaning you won’t need to replace it as often.
Orthopaedic vs. Standard Dog Beds: What’s the Difference?
To help decide whether an orthopaedic dog bed is worth the investment, here’s a side-by-side look:
Feature
Standard Dog Bed
Orthopaedic Dog Bed
Filling
Polyester stuffing, fibre, or basic foam
Memory foam or high-density foam layers
Support
Can flatten over time, offering uneven support
Even weight distribution, contours to body
Joint Care
Minimal – may aggravate arthritis or joint pain
Reduces pressure on joints, ideal for arthritis
Durability
May lose shape quickly
Designed to last longer without sagging
Price
Lower initial cost
Higher cost but long-term value
Best For
Young, healthy dogs with no mobility issues
Senior dogs, large breeds, or those with arthritis
This comparison shows that while standard beds are suitable for many younger, healthy dogs, orthopaedic beds are the clear winner when it comes to comfort, joint care, and longevity.
What Materials Are Used in Orthopaedic Dog Beds?
The best orthopaedic dog beds are made from memory foam, which adapts to your dog’s shape and returns to its original form after use. High-density foam layers are often combined with memory foam to provide extra firmness and stability.
Other features to look for include:
Removable, washable covers – essential for hygiene.
Water-resistant liners – to protect against accidents or spills.
Raised edges or bolsters – perfect for dogs who like to rest their heads while still supporting their joints.
Is an Orthopaedic Dog Bed Worth It?
For dogs with arthritis, joint problems, or in their golden years, the answer is almost always yes. These beds can significantly improve comfort and quality of life, helping your dog stay mobile and pain-free for longer.
Even if your dog is still young and sprightly, investing in a supportive bed now can help protect their joints as they age. Think of it as preventative care, just as you’d choose a supportive mattress for yourself.
Choosing the Best Dog Bed for Arthritis
When shopping for the best dog bed for arthritis, consider the following:
Size: Ensure your dog can stretch out fully without hanging off the edges.
Thickness: The thicker the foam, the better the support—ideally at least 4 inches.
Ease of cleaning: Removable covers make life much easier.
Design: Flat beds are best for dogs with severe mobility issues, while bolstered beds suit those who like extra head support.
At Lords & Labradors, we offer a range of orthopaedic dog beds crafted with comfort, support, and style in mind, so you don’t have to compromise between practicality and luxury.
An orthopaedic dog bed is more than just a comfy place for your pet to snooze. For senior dogs, those with arthritis, and breeds prone to joint problems, it’s a vital part of their care. The right bed can ease pain, improve sleep quality, and protect long-term joint health, making it a truly worthwhile investment.
Frequently Asked Questions
Are orthopaedic dog beds firm?
Orthopaedic dog beds are designed to be supportive rather than simply soft. Most use memory foam or high-density foam, which provides a firm yet comfortable base that contours to your dog's body. This means the bed won't sink or collapse under your dog's weight the way a standard cushion might. The result is a surface that feels gently firm — enough to support joints and distribute pressure evenly, but with enough give to remain comfortable for extended rest. Think of it like a good mattress for humans: firm enough to support, cushioned enough to sleep well.
What are the disadvantages of orthopaedic beds?
While orthopaedic dog beds offer many benefits, there are a few considerations to keep in mind. The most notable is cost — they are typically more expensive upfront than standard dog beds. They can also be heavier and bulkier, which may make them harder to move around or transport. Some orthopaedic beds may retain heat more than thinner alternatives, which could be uncomfortable for dogs who run warm. Additionally, if the cover isn't removable or the foam isn't waterproof-lined, cleaning can be more challenging. That said, choosing a quality orthopaedic bed with a washable cover and a water-resistant liner addresses most of these concerns.
Do senior dogs like orthopaedic beds?
Most senior dogs take very well to orthopaedic beds, especially once their joints begin to stiffen with age. Older dogs with arthritis or hip dysplasia often find it painful to rise from hard or unsupportive surfaces, so the extra cushioning and joint relief an orthopaedic bed provides can make a noticeable difference to their comfort and mobility. That said, some dogs are creatures of habit and may need a little time to adjust to a new bed. Placing the orthopaedic bed in their favourite spot and making it familiar with a blanket or toy they already love can help ease the transition. Once they feel the difference, most senior dogs are happy to make it their own.
Dog Crate Training 101: Tips for a Happy, Calm Pup
For many dog owners, the idea of putting their beloved pup in a crate can feel a little daunting. But when introduced correctly, a crate is not a punishment, it’s a safe haven. Dogs are den animals by nature, and the right crate can become their personal sanctuary: a cosy, secure space to rest, sleep, and relax.
In this guide, we’ll explore how to crate train a dog step by step, share essential crate training tips, and highlight a few accessories that can make the process smoother and more comfortable for your four-legged friend.
Why Crate Training Matters
Crate training offers countless benefits, both for you and your pup:
Safety & Security: Keeps your dog safe when you can’t supervise them.
House Training: Encourages bladder control and helps prevent accidents indoors.
Travel-Friendly: A crate-trained dog feels calmer on journeys, whether in the car or at the vet.
Personal Space: Gives your dog somewhere quiet to retreat when they need downtime.
When approached positively, a crate becomes a comforting place your dog chooses voluntarily, not a space they associate with being locked away.
Choosing the Right Crate
Before diving into training, selecting the right crate is essential.
Size Matters: Your dog should be able to stand up, turn around, and lie down comfortably. Too small is restrictive; too large can encourage toileting accidents.
Material Choices: Wire crates are durable and well-ventilated, plastic crates feel cosy and enclosed, and fabric crates are lightweight for travel.
Add Comfort: A soft crate mat, plush bedding, or an orthopaedic insert makes the crate more inviting. Crate covers can also help reduce stimulation and create a calm, den-like environment.
How to Crate Train a Dog: Step-by-Step
Step 1: Introduce the Crate Slowly
Place the crate in a busy but calm area of the home, such as the living room. Keep the door open and allow your pup to explore at their own pace. Toss in a few treats or toys to create positive associations.
Step 2: Build Positive Associations
Feed your dog meals in the crate, gradually encouraging them to spend more time inside. A special chew or favourite toy reserved just for crate time can work wonders.
Step 3: Short Sessions First
Begin with just a few minutes of crate time while you’re at home. Gradually increase the duration as your dog becomes more comfortable. Always reward calm behaviour with praise or treats.
Step 4: Extend Time Gradually
Work up to leaving your pup crated while you step out briefly. Avoid making departures or arrivals too dramatic—this helps prevent anxiety.
Step 5: Crating Overnight
Once your dog is comfortable during the day, you can try crating overnight. Many puppies prefer having the crate in your bedroom at first to feel reassured.
Crate Training Tips for Success
Never Use the Crate as Punishment: It should be a happy place, never a “time-out zone.”
Patience is Key: Some dogs adapt quickly, others take weeks. Go at your pup’s pace.
Exercise First: A tired dog settles more easily, so ensure they’ve had a walk or play before crate time.
Use Cue Words: Teach a command like “bed” or “crate” to help them associate the word with going inside.
Consistency Matters: Stick to a routine so your pup knows what to expect.
Common Challenges (and Fixes)
Whining or Barking: If your pup cries, resist rushing to them immediately. Wait until they’re calm before opening the door, so they don’t learn that whining equals freedom.
Chewing the Crate: Provide a safe chew toy to keep them occupied.
Reluctance to Enter: Make the crate more inviting, try a cosy blanket, familiar scent, or a treat-dispensing toy.
Making the Crate a Home
Accessories can turn a crate from a metal box into a proper haven:
Crate Mats & Bedding: Provide cushioning for joints and a snug sleeping surface.
Crate Covers: Help block out light and noise, creating a calm den-like retreat.
Toys & Chews: Keep your dog occupied and happy during crate time.
These little additions make a big difference in helping your dog view the crate as their safe, comfortable space.
Final Thoughts
Learning how to crate train a dog takes patience, consistency, and lots of positivity, but the payoff is enormous. A crate-trained pup is calmer, happier, and more adaptable in everyday life. With the right crate training tips, and the addition of soft mats, cosy covers, and comforting accessories, you can turn your dog’s crate into a cherished den they’ll love to spend time in.
At Lords & Labradors, we stock a wide range of luxury dog crates, crate mats, and accessories to help you on your training journey. Explore our collection and give your pup the perfect combination of security and comfort.
As a loving cat owner, ensuring your feline friend's safety extends beyond just food and care. One crucial aspect often overlooked is the presence of plants and flowers in your home and garden. Many common plants are toxic to cats, and ingestion can lead to severe health issues or even be fatal. In this comprehensive guide, we’ll explore which plants are poisonous to cats, helping you create a safe environment for your beloved pet.
Understanding the danger of plants to cats
Cats are naturally curious creatures, and their instinct to nibble on plants can put them at risk. While some plants cause mild irritation, others can lead to significant health complications. Being informed about these hazardous plants is the first step in protecting your cat.
Common Indoor Plants that are Poisonous to Cats
Indoor plants can add beauty and freshness to your home, but many are not safe for cats. Here are some common indoor plants that are toxic to cats:
Lilies (Lilium species) - All parts of lilies, including the leaves, petals, pollen, and even water from the vase, are extremely toxic to cats. Ingestion can cause severe kidney failure.
Aloe Vera - While beneficial for humans, aloe vera contains saponins and anthraquinones that can cause vomiting, diarrhoea, and lethargy in cats.
Philodendron - This popular houseplant contains calcium oxalate crystals, which can irritate a cat’s mouth, throat, and stomach.
Pothos (Devil’s Ivy) - Another common houseplant, pothos, can cause oral irritation, vomiting, and difficulty swallowing.
Outdoor Plants and Flowers Dangerous to Cats
Outdoor plants can also pose a threat. Here are some that should be kept away from your feline friend:
Azaleas and Rhododendrons - These flowering shrubs contain grayanotoxins, which can lead to vomiting, diarrhoea, and drooling,
Daffodils - The whole of the daffodil is toxic to your cat, however, the bulbs of daffodils are especially dangerous, causing severe vomiting, diarrhoea, abdominal pain, and potential heart issues.
Sago Palm - All parts of the sago palm are toxic, with the seeds being the most potent. Ingestion can result in liver failure and death.
Oleander - This plant is highly toxic and can cause severe cardiac issues, vomiting, and death.
Lesser-Known Toxic Plants for Cats
Some plants are not as commonly known to be toxic but can still pose significant risks:
Chrysanthemums - These flowers contain pyrethrins which can cause gastrointestinal upset and loss of coordination.
Cyclamen - The tubers of cyclamen are especially toxic, causing severe gastrointestinal distress and potential heart problems.
Kalanchoe - This plant can cause vomiting, diarrhoea, and in severe cases, abnormal heart rhythms.
Creating a Safe Environment for your cat
To ensure your home and garden are safe for your cat, consider the following tips:
Identify and Remove Hazardous Plants - Go through your home and garden to identify any plants that are toxic to cats and remove them or place them out of reach.
Opt for Cat-Safe Plants - Choose plants that are non-toxic to cats, such as spider plants, bamboo, and cat grass, which are safe and even enjoyable for your feline friend.
Educate Household Members and Visitors - Ensure everyone in the household is aware of the dangers certain plants pose to cats. Guests should also be mindful if they bring flowers or plants into your home.
Use Plant Deterrents - If removing the plant is not an option, consider using deterrents like citrus sprays, which can discourage cats from chewing on plants.
What to Do If Your Cat Ingests a Toxic Plant
If you suspect your cat has ingested a toxic plant, it's crucial to act quickly:
Identify the Plant - If possible, identify the plant your cat has ingested to provide accurate information to your vet.
Contact Your Vet Immediately - Call your vet right away. Provide details about the plant and any symptoms your cat is exhibiting.
Observe and Follow Professional Advice - Monitor your cat closely and follow any instructions given by the veterinarian. Symptoms of plant poisoning can vary widely and may include vomiting, diarrhoea, lethargy, and more severe signs like seizures or difficulty breathing.
Conclusion
By being aware of which plants are poisonous to cats and taking proactive steps to prevent exposure, you can help ensure your cat lives a healthy and safe life. Always keep a list of toxic plants handy and regularly check your home and garden for any hazardous plants. Your cat’s health and safety are worth the effort.
Here at Lords & Labradors we are a luxury online pet department store, we have spent lots of time carefully designed, curating and hand-selecting all the best products for your cat - shop here.
Your Puppy’s First Vet Visit: Everything You Need to Know and Bring
Bringing home a new puppy is a joyful experience full of cuddles, playful tumbles, and plenty of learning opportunities. One of the most important early steps in ensuring a long, healthy life for your little furry friend is scheduling that very first vet appointment.
Here, we will walk you through everything you need to know—from choosing the right vet to packing essential items—so you can confidently make your puppy’s debut clinic visit a positive, stress-free experience.
When to Schedule the First Vet Visit
Making a timely vet appointment is crucial to kickstart your puppy’s healthcare routine. Most puppies should visit a vet within the first week or two of arriving home, particularly if you have limited information about their vaccination or medical history.
This ensures:
A thorough health check
A clear vaccination schedule
Early detection of any existing health concerns
A chance to address fleas, worms, or other parasites right away
Even if your breeder or rescue provided initial records, scheduling a vet consult soon after you bring your puppy home guarantees you stay on track with recommended treatments and helps your new pup settle confidently into their forever home.
Choosing the Right Veterinary Practice
Finding the right vet is about more than simply picking the nearest clinic. You’ll want a team that resonates with your approach to pet care, offers comprehensive services, and is conveniently located. Here are a few considerations:
1. Recommendations and Reviews
Ask friends, family, or local pet communities about their experiences.
Research online reviews to see what other pet owners say about the clinic’s staff and services.
2. Location and Accessibility
Close proximity to your home can be crucial during emergencies or for regular checkups.
Check if the clinic has easy parking or access to public transport.
3. Clinic Environment
Does the clinic have separate waiting areas for dogs and cats?
Is the staff friendly and accommodating when you phone or visit?
4. Additional Services
Some practices also offer grooming, training, or boarding—bonus points if you’d like one-stop convenience.
We recommend asking plenty of questions beforehand. A good vet will welcome your curiosity and ensure you feel well informed about their protocols and expertise.
Preparing Your Puppy for the Vet
Your puppy’s first vet visit can be a big event, and the best way to ensure it goes smoothly is by acclimating them beforehand. Our team of pet experts suggests the following to help set your puppy up for success:
Practice Being Handled
Gently handle your puppy’s paws, ears, and mouth at home to build their comfort with touch.
Get them used to being lifted onto low tables or countertops (safely) so the vet’s exam table won’t feel too foreign.
Desensitise Through Short Trips
Take quick car rides or walk your puppy past the vet clinic so they can experience these environments without any medical procedures involved.
Reward them with treats and praise during these “practice runs” to create positive associations.
Positive Reinforcement
Reinforce calm behaviour with gentle praise and occasional treats.
If your puppy seems anxious, remain calm and reassuring—your demeanour sets the tone for how they interpret new situations.
What to Bring on Vet Day
Being well-prepared helps make the experience smooth for both you and your pup. A few essentials include:
Medical Records or Documentation - Bring any paperwork from breeders, rescues, or previous owners detailing vaccines and treatments.
Comfortable Carrier or Bed - Our Easy Traveller Bed is perfect for a cosy, secure ride. It’s designed to help your puppy feel snug and calm on the go.
Treats and Toys - Small, tasty treats will help with positive reinforcement, while a familiar toy can offer comfort in unfamiliar surroundings. Stock up on tasty training treats here
Lead and Harness - Always secure your puppy, even if you have a carrier. This ensures you can safely guide them around the waiting area.
Stool Sample (If Requested) - Check if your vet wants a fresh sample for parasite testing. If so, collect it just before the appointment.
Travelling to the Vet
Safety First
Secure your puppy in a travel crate, carrier, or on a harness fastened in the car. This prevents distractions and keeps them safe during the journey.
A bed like the Easy Traveller Bed can be buckled in or placed in a stable spot so your pup feels at ease.
Short Familiarisation Drives
If your puppy is new to car rides, start with short, fun trips around the block or to a local park.
Gradually increase the distance and reward calm behaviour along the way.
Keep the Atmosphere Calm
Use a soft tone of voice and, if possible, a quiet environment in the car (lower radio volume, for instance).
Avoid sudden stops or erratic driving—gentle, steady driving helps your puppy remain relaxed.
Handling the Waiting Room
Vet waiting rooms can be bustling places, filled with unfamiliar scents and animals. Here’s how to keep the experience positive:
Stay Close - Keep your puppy on a short lead or in their carrier to prevent unwanted interactions with other pets. If they haven’t been vaccinated yet we’d recommend keeping them in their carrier or sat on your lap to minimise infection risk.
Pick a Calm Spot - Some clinics separate dogs and cats—choose the dog-friendly side if it’s less hectic.
Offer Comfort - Speak reassuringly, stroke your puppy gently, and provide a treat for good behaviour.
What to Expect During the Exam
Once called in, the vet will likely perform a thorough check to assess your puppy’s overall health. This involves examining the ears, eyes, nose, mouth, heart, and lungs. Making your pup feel comfortable on the exam table is crucial:
Place a familiar toy or blanket on the table to ease any nerves. A lot vets will also provide your puppy with treats during the exam to help reassure them and build trust
Stay relaxed and speak soothingly; puppies pick up on your energy.
Reward calm behaviour with gentle praise—or a small treat if the vet allows.
Key Procedures at the First Vet Visit
Your puppy’s inaugural appointment often covers a few foundational treatments and discussions:
Physical Examination - A nose-to-tail check ensures your puppy has no underlying medical issues that need attention.
Vaccinations - Puppies typically start their core vaccinations around 6–8 weeks old, with boosters scheduled in the following weeks or months. Your vet will clarify the exact timeline.
Microchipping - If your puppy isn’t already chipped, the vet can usually do it on site. This quick, relatively painless procedure provides your pet with permanent identification.
Flea & Worm Prevention - Young puppies can be prone to parasites. Your vet will recommend treatments to guard against fleas, ticks, and worms, and outline an ongoing preventative routine.
Nutritional & Behavioural Advice - Vets can guide you on puppy-appropriate foods, treats, and basic training tips. Don’t hesitate to ask questions!
Essential Tips in a Nutshell
Book Early: Schedule a vet appointment soon after bringing your puppy home.
Practice Handling: Get them used to gentle touches and being lifted.
Travel Prep: Use a comfortable, secure carrier or bed like our Easy Traveller Bed.
Waiting Room Strategy: Keep them on a lead or in a carrier, choose a quiet corner, and reassure them with a calm voice.
Follow Vet Guidance: Stick to the recommended vaccination, microchipping, and parasite prevention schedules.
Final Thoughts
Your puppy’s first vet visit lays the groundwork for a lifetime of good health. By choosing a reputable veterinarian, preparing your pup with gentle handling, and bringing the right essentials—from carriers to treats—you can make this inaugural trip a positive milestone rather than a stressful one. We at Lords & Labradors believe every puppy deserves a great start in life, and our team of pet experts are always here to support you with advice, products, and resources.
Remember, the better the experience at this early stage, the more likely your puppy will feel comfortable during future checkups. A little preparation today goes a long way toward ensuring a lifetime of wagging tails and happy vet visits in the years to come!
Shop all the puppy essentials you will need for your pups first vet visit and beyond at Lords & Labradors.