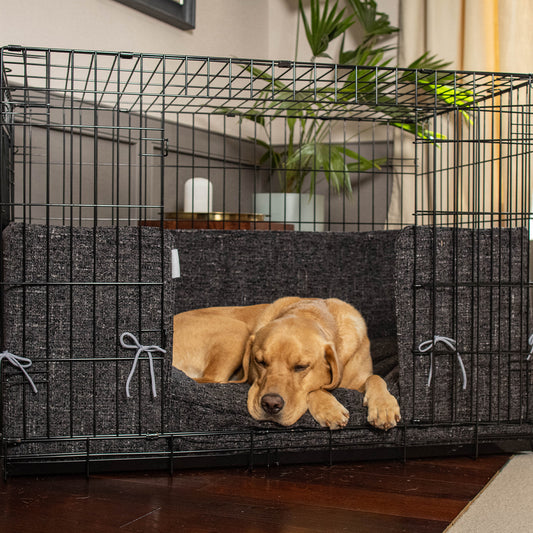
Dog Crate Size Guide: Find the Perfect Fit for Your Breed
Choosing the right crate for your dog is more than just picking the right size, it’s about creating a safe, comfortable space your pet can call their own. Whether you're crate training a new puppy, helping your adult dog settle into a routine, or providing a calm retreat for an anxious pooch, the size and type of crate matters.
In this UK dog crate size guide, we’ll help you determine what size dog crate your breed needs, how to measure for the perfect fit, and what features to look out for. Let’s make crate shopping simple and stress-free!
Why Crate Size Matters
A crate that’s too small can feel cramped and uncomfortable. On the other hand, a crate that’s too large might make your dog feel insecure, especially during training, when you want to discourage accidents and help them settle.
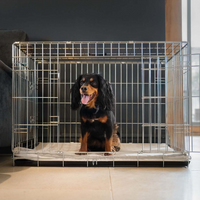
Here’s what the perfect crate should allow your dog to do:
Stand up without crouching
Turn around comfortably
Lie down and stretch out fully
For growing puppies, it’s often best to buy a larger crate, so they can grow into the space!
How to Measure Your Dog for a Crate
Before browsing crates, grab a tape measure and note the following:
Length: Measure from the tip of the nose to the base of the tail (not the tip).
Height: Measure from the ground to the top of your dog’s head (or ears if upright).
Width: This generally follows suit, but ensure there’s room for your dog to turn and stretch.
Add 5–10cm to each measurement to ensure a comfortable fit, especially for puppies or breeds prone to stretching out.
Dog Crate Size Chart (UK)
Below is a general crate size guide, with approximate measurements and breed examples to help you find the right fit.
Tip: Always consider your dog’s individual size and build, as not all dogs of the same breed are identical, especially if they are a cross breed.
Breed-by-Breed Crate Size Recommendations
Here’s a quick-reference list for popular UK dog breeds:
Cockapoo – Large
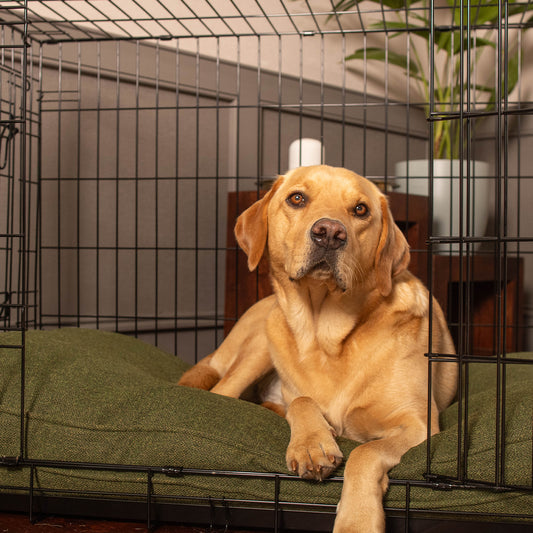
Labrador Retriever – X Large
French Bulldog – Medium
Border Terrier – Medium
Cavapoo – Medium
Golden Retriever – Extra Extra Large
Springer Spaniel – Large
Miniature Dachshund – Medium
Staffordshire Bull Terrier – Large
German Shepherd – Extra Extra Large
Remember: if you’re still unsure, go one size up. It’s always better to have more space than less!
Crate Types & Features to Consider
Once you’ve settled on the right size, think about the type of crate and extra features that might suit your lifestyle:
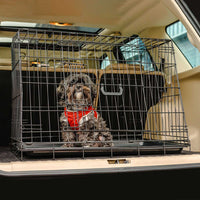
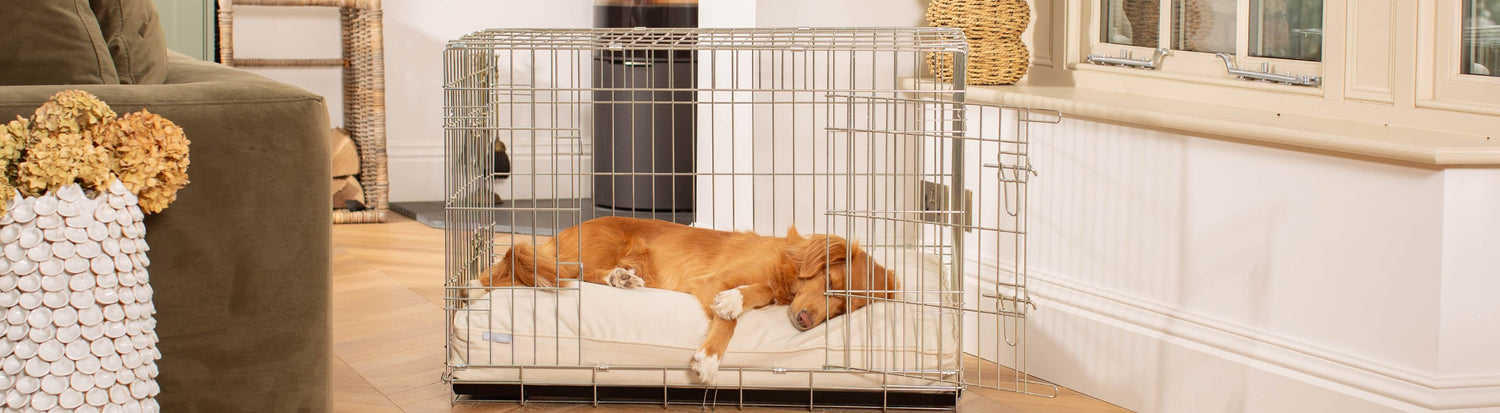
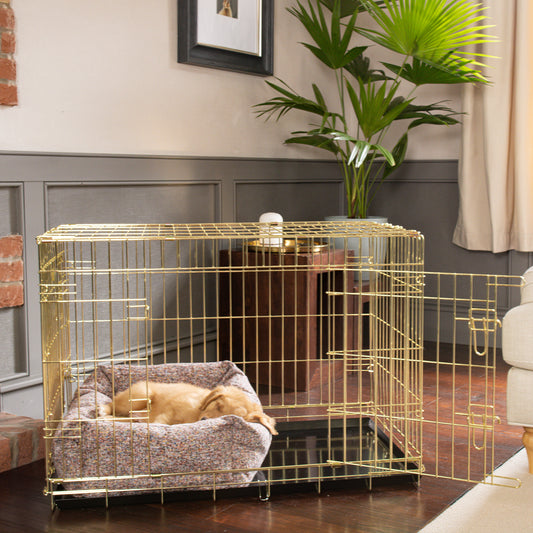
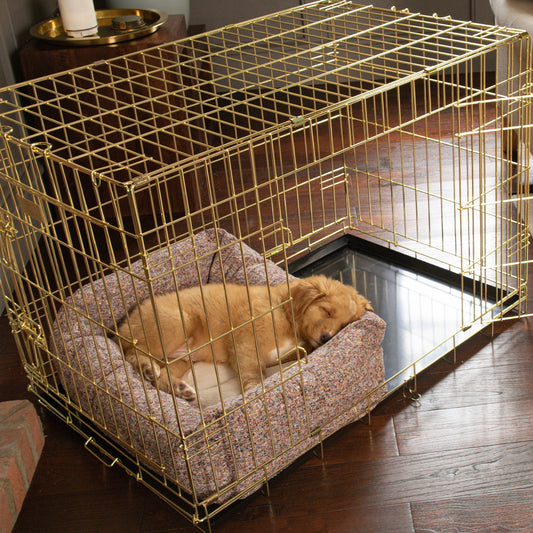
Metal wire crates: Great for ventilation and visibility; ideal for indoor use and training.
Plastic travel crates: Better for travel, especially by car or plane.
Soft fabric crates: Lightweight and foldable, but not ideal for chewers or crate training.
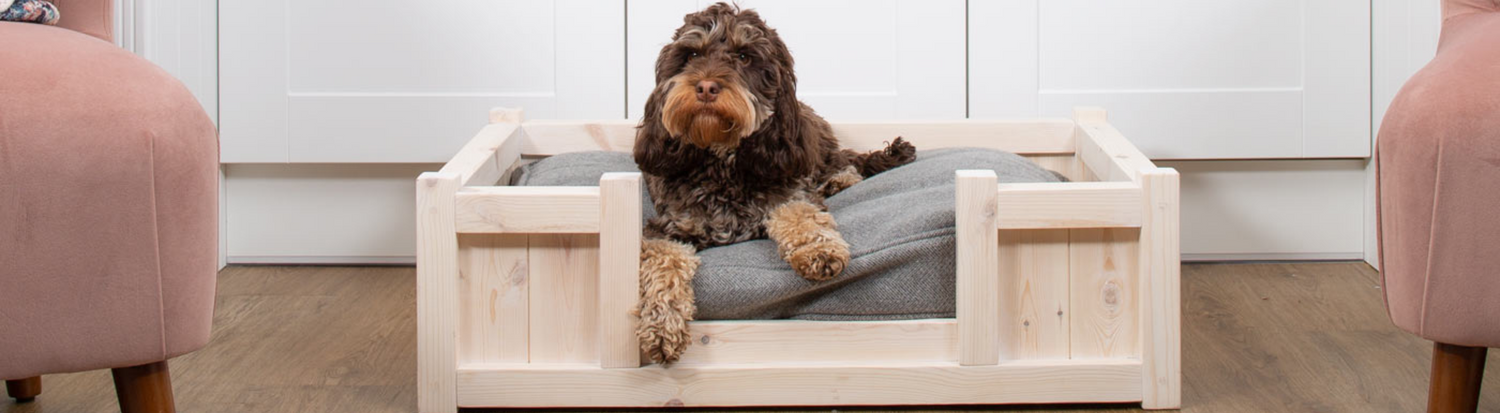
Furniture-style Wooden Dog Crates: Blend into home décor and double as stylish side tables.
Look for crates with:
Removable trays for easy cleaning
Multiple doors for flexible placement
Soft crate mats or beds for comfort
Crating Comfortably: Bedding Matters
Even the perfect size crate needs the right bedding. A soft crate liner or supportive dog bed makes all the difference — especially for puppies, seniors, or dogs recovering from injury. Consider temperature too: fleece mats for winter, or breathable cotton covers for warmer months.
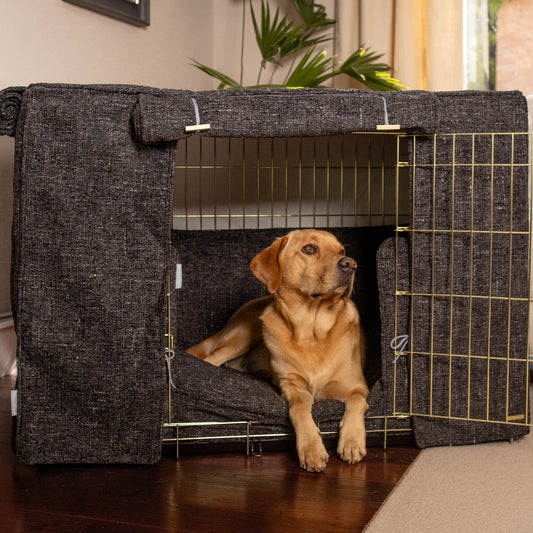
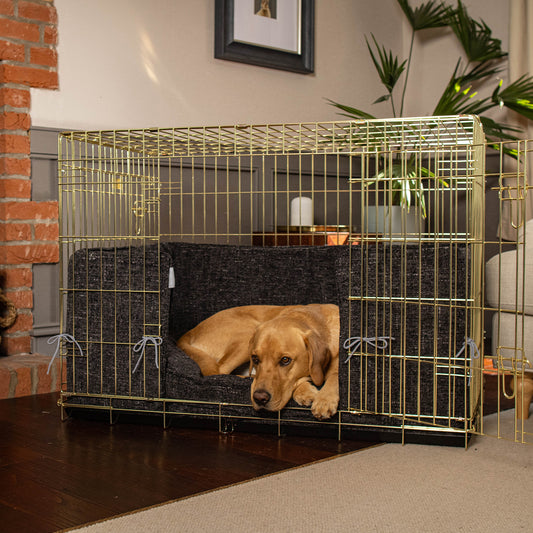
At Lords & Labradors, our handpicked selection of crate cushions, mats, and bedding options are tailored to fit our luxury dog crates beautifully — so your pup sleeps like royalty, wherever they are.
Final Tips: What Size Dog Crate Is Best?
Measure first – use your dog’s size, not just their breed. This is key!
Think ahead – allow room for growth in puppies
Comfort is key – soft bedding and security go hand-in-hand
Don’t forget lifestyle – if you travel often, look for crates suited to transport
Create the Perfect Crate Setup with Lords & Labradors
Ready to find the perfect crate for your pooch? Explore our beautifully crafted dog crates, crate bedding, and crate accessories, all designed with both luxury and practicality in mind.
Whether you’ve got a teeny Terrier or a gentle giant, we’ve got everything you need to create a safe, stylish space they’ll adore.
Choosing the right crate for your dog is more than just picking the right size, it’s about creating a safe, comfortable space your pet can call their own. Whether you're crate training a new puppy, helping your adult dog settle into a routine, or providing a calm retreat for an anxious pooch, the size and type of crate matters.
In this UK dog crate size guide, we’ll help you determine what size dog crate your breed needs, how to measure for the perfect fit, and what features to look out for. Let’s make crate shopping simple and stress-free!
Why Crate Size Matters
A crate that’s too small can feel cramped and uncomfortable. On the other hand, a crate that’s too large might make your dog feel insecure, especially during training, when you want to discourage accidents and help them settle.
Here’s what the perfect crate should allow your dog to do:
Stand up without crouching
Turn around comfortably
Lie down and stretch out fully
For growing puppies, it’s often best to buy a larger crate, so they can grow into the space!
How to Measure Your Dog for a Crate
Before browsing crates, grab a tape measure and note the following:
Length: Measure from the tip of the nose to the base of the tail (not the tip).
Height: Measure from the ground to the top of your dog’s head (or ears if upright).
Width: This generally follows suit, but ensure there’s room for your dog to turn and stretch.
Add 5–10cm to each measurement to ensure a comfortable fit, especially for puppies or breeds prone to stretching out.
Dog Crate Size Chart (UK)
Below is a general crate size guide, with approximate measurements and breed examples to help you find the right fit.
Tip: Always consider your dog’s individual size and build, as not all dogs of the same breed are identical, especially if they are a cross breed.
Breed-by-Breed Crate Size Recommendations
Here’s a quick-reference list for popular UK dog breeds:
Cockapoo – Large
Labrador Retriever – X Large
French Bulldog – Medium
Border Terrier – Medium
Cavapoo – Medium
Golden Retriever – Extra Extra Large
Springer Spaniel – Large
Miniature Dachshund – Medium
Staffordshire Bull Terrier – Large
German Shepherd – Extra Extra Large
Remember: if you’re still unsure, go one size up. It’s always better to have more space than less!
Crate Types & Features to Consider
Once you’ve settled on the right size, think about the type of crate and extra features that might suit your lifestyle:
Metal wire crates: Great for ventilation and visibility; ideal for indoor use and training.
Even the perfect size crate needs the right bedding. A soft crate liner or supportive dog bed makes all the difference — especially for puppies, seniors, or dogs recovering from injury. Consider temperature too: fleece mats for winter, or breathable cotton covers for warmer months.
At Lords & Labradors, our handpicked selection of crate cushions, mats, and bedding options are tailored to fit our luxury dog crates beautifully — so your pup sleeps like royalty, wherever they are.
Final Tips: What Size Dog Crate Is Best?
Measure first – use your dog’s size, not just their breed. This is key!
Think ahead – allow room for growth in puppies
Comfort is key – soft bedding and security go hand-in-hand
Don’t forget lifestyle – if you travel often, look for crates suited to transport
Create the Perfect Crate Setup with Lords & Labradors
Ready to find the perfect crate for your pooch? Explore our beautifully crafted dog crates, crate bedding, and crate accessories, all designed with both luxury and practicality in mind.
Whether you’ve got a teeny Terrier or a gentle giant, we’ve got everything you need to create a safe, stylish space they’ll adore.
SIGN UP FOR USEFUL TIPS & GUIDES STRAIGHT TO YOUR INBOX
Your Puppy’s First Vet Visit: Everything You Need to Know and Bring
Related Articles
29.10.26October 29, 2026Owning a Dog
Slip Leads: How to Use One and Are They Cruel?
Slip leads spark a lot of questions, and most of them come down to the same thing: are they kind, and am I using one right? This guide walks you through how to use a slip lead properly, how to fit one so it actually works, and how to decide whether it is the right choice for your dog at all. Whether you are brand new to slip leads or just want to feel more confident with one in your hand, you will find honest, practical answers here.
What a slip lead is and why people use one
A slip lead is one of those pieces of kit that looks deceptively simple but comes with a lot of questions once you start looking into it. At its most basic, it’s a single loop of rope, leather, or webbing that acts as both a lead and a collar in one. No buckle, no clip, no separate collar needed. You create a loop, slip it over your dog’s head, and the lead tightens or loosens depending on how much tension is on the line.
That self-adjusting fit is exactly why so many professionals reach for one without a second thought. Vets use slip leads to guide dogs safely around a clinic without fiddling with unfamiliar collars. Groomers use them to keep dogs secure during a wash or trim. Rescue centres rely on them when a new dog arrives with no collar at all, or when a nervous dog needs to be moved with as little fuss as possible. Trainers often use them for specific exercises where a well-fitted, responsive lead communicates more clearly than a standard collar and lead setup.
For a lot of pet parents, the first proper encounter with a slip lead is at the vet or a rescue centre — watching someone loop one over their dog’s head in a single fluid movement and thinking, oh, so that’s how it works. That ease of use is a big part of the appeal.
What really determines whether a slip lead is comfortable and effective, or uncomfortable and counterproductive, comes down to how you use it. Fit and handling matter far more than most people realise, which is why this guide walks through both in detail. If you’re also thinking about your wider walking setup, our dog lead guide is a great place to compare your options.
How to use a slip lead properly, step by step
If you’re wondering how to use a slip lead without making walks feel stressful, the biggest things are fit, position and a light hand. Used thoughtfully, a slip lead should feel clear and controlled, not harsh.
Make the loop first.
Thread the rope through the metal ring to create the loop. Before it goes on your dog, check that it slides smoothly and doesn’t catch. If it sticks, it won’t loosen as easily when you want it to.
Place it high on the neck.
When learning how to fit a slip lead, this is the bit that matters most. Slip the loop over your dog’s head and move it up so it sits just behind the ears and under the jaw. That higher position usually gives you a bit more guidance with less risk of the lead dropping low and pressing on the softer part of the throat.
Check which way it sits.
A properly fitted slip lead should loosen easily when tension is released. For many dogs, that works best when the ring sits near the top of the neck rather than hanging underneath. Give it a quick test with your hands before you set off so you can see that it tightens and releases smoothly.
Use the stopper.
Most slip leads have a small rubber or leather stopper. Slide it into place so the loop can’t keep tightening beyond a comfortable point. It’s easy to overlook when you’re rushing out the door, but it makes a real difference to day-to-day handling.
Check the fit.
Once the stopper is set, the lead should feel snug but not tight. You should be able to slip two fingers underneath comfortably. Too loose, and it may slide down or even slip off. Too tight, and your dog is likely to feel uncomfortable straight away.
Keep your handling soft.
If you’re using a dog slip lead on a walk, think gentle guidance rather than steady pressure. Ask for a little movement, then soften the lead again as soon as your dog responds. In real life, that might look like a small reminder as your dog forges ahead, followed by a loose lead the moment they come back beside you.
Common mistakes to avoid:
Letting the lead drift down the neck
Forgetting to set the stopper
Keeping constant tension on the lead
Using a loop that’s so loose it can slip off
If you’re just starting out with lead manners, our puppy lead training essentials can help you build calm, confident walking habits from the beginning.
When a slip lead can help and when it is not the right choice
Slip leads are genuinely useful in the right situations, but they are not a one-size-fits-all solution for every dog or every walk. Knowing when to reach for one and when to leave it on the hook matters just as much as knowing how to fit it correctly.
When a slip lead can work well
Vet or grooming visits where you need quick, fuss-free control
Short training sessions focused on loose-lead walking or responsiveness
Working dog contexts where experienced handlers use them as a standard tool
Emergency backup if a collar clip fails mid-walk
Moving dogs calmly between areas, such as from the car to a field gate
When another option may suit your dog better
Longer daily walks where sustained pressure on the neck is a concern
Dogs that pull consistently, since a slip lead tightening repeatedly can cause real discomfort
Puppies still finding their feet and learning what walking on a lead even feels like
Dogs with any history of neck, throat, or tracheal sensitivity
Anxious or reactive dogs that feel noticeably more settled and secure in a well-fitted harness
If your dog fits into any of those second situations, a harness is often the kinder choice for everyday walks. It spreads pressure more evenly across the body, takes any strain off the neck, and gives many dogs a calmer, more comfortable walking experience overall. If you are not sure where to start, our guide on how to choose a dog harness covers what to look for based on your dog’s size, shape, and walking style.
Knowing how to use a slip lead well also means recognising when something else will serve your dog better. That kind of honest, flexible thinking is what good dog handling actually looks like in practice.
Are slip leads cruel? The honest welfare answer
The question of whether slip leads are cruel comes up a lot, and honestly, it is a fair thing to wonder. The short answer is that it is not really about the tool itself — it is about how you use it. In the right hands, with the right dog, a slip lead is a safe and practical piece of kit. Used carelessly or in the wrong situation, it can cause real discomfort.
A few key factors decide which side of that line you end up on:
Fit and positioning. The loop needs to sit high on the neck, just behind the ears. If it drops down toward the throat, it puts pressure on the windpipe and other delicate structures.
Handler technique and timing. A light, well-timed guide is very different from a sustained pull. The lead should release the moment your dog stops pulling — not a second later.
Your dog’s temperament and training level. A dog that already walks fairly well on a lead will respond very differently to a slip lead than one that is reactive, easily startled, or prone to lunging.
Duration of use. Slip leads suit short, purposeful outings well. They are not designed to be worn for hours at a stretch.
Active supervision. A slip lead should never be left on an unsupervised dog or one that is off exploring on their own.
When slip leads are misused, the risks are genuine. Persistent neck pressure, poor positioning, or using one on a dog that is not quite ready for it can cause physical discomfort and stress. Knowing how to use a slip lead correctly is the real deciding factor here — not whether the lead itself is inherently good or bad.
In practice, correct use looks like this: the loop sits high behind the ears, loosens immediately when your dog relaxes, and comes off as soon as the walk is done. It is always an active, hands-on setup — never a passive one.
Getting that right is very achievable with a bit of guidance, and the sections ahead will walk you through exactly that.
How to choose the right lead or collar for your dog
There’s no single perfect lead setup that works for every dog. What suits a calm Spaniel on a quiet country lane might feel completely wrong for a boisterous young Labrador in a busy park — and that’s completely fine. Finding the right everyday option really comes down to your individual dog and how you actually walk together.
Here are the key things worth thinking through:
Size and strength — larger, stronger dogs need a setup that gives you genuine control without putting unnecessary pressure on the neck
Coat type — thick or heavy-coated breeds like Bernese Mountain Dogs or Chow Chows may find a slip lead sits awkwardly and shifts around too much to stay in the right position
Age and neck sensitivity — puppies and senior dogs have more delicate necks, so anything that tightens under tension deserves extra care
Temperament and reactivity — a nervous or reactive dog that lunges without warning isn’t a good candidate for a slip lead on everyday walks
Walking environment — a quiet rural route is a very different proposition from a busy street with unpredictable triggers at every turn
When it comes to comparing your options, harnesses tend to work well for dogs that pull consistently, brachycephalic breeds like Bulldogs or Pugs, and any dog where neck pressure is a genuine concern. Flat collars are a solid, dependable choice for calm, well-trained dogs who walk nicely on a loose lead. Slip leads are generally best reserved for specific training moments, or used by experienced handlers who know exactly how to fit and hold them correctly.
Not sure which collar style suits your dog? Our guide to choosing the right collar walks you through all the options in one place.
Whatever you land on, the goal is always the same: your dog feels comfortable, stays secure, and is easy for you to handle on the walks you actually do.
Using a slip lead with confidence and care
Knowing how to use a slip lead well comes down to three things: fit, timing, and paying attention to your dog. Get those right and it can be a genuinely useful tool. Get them wrong, and good intentions alone won’t prevent discomfort.
The basics are straightforward. Position the loop high on the neck, just behind the ears, and check it sits loose enough to slide two fingers underneath when your dog is relaxed. Make sure the stopper is set so the loop can’t tighten beyond a safe point. Move off calmly, reward your dog for walking close, and keep early sessions short — they’re still figuring out what you’re asking of them.
Keep watching your dog as you go. Repeated pulling, coughing, or reluctance to move are all worth taking seriously. A relaxed dog who checks in with you is telling you the setup is working. A tense or anxious dog is telling you something different, and there’s absolutely no shame in switching to a padded collar or a well-fitted harness instead. The whole point is a dog who actually enjoys their walk.
If you’re working on loose lead walking more generally, it’s worth taking a step back and looking at the broader picture — our guide to common puppy training mistakes covers some of the habits that can quietly undermine even the best efforts.
And whatever equipment you land on, choose it because it suits your dog — not because it’s what someone else at the park is using. That’s the most confident, caring choice you can make.
Frequently Asked Questions
Do vets recommend slip leads?
Yes, vets do use and recommend slip leads in some situations because they’re quick, simple, and help guide dogs safely without fiddling with an unfamiliar collar. That said, they’re best used thoughtfully and for the right dog, rather than treated as the best everyday walking option for every pet.
Are slip leads bad for dogs?
No, slip leads aren’t automatically bad for dogs, but they can be uncomfortable if they’re used poorly or on the wrong dog. Fit, positioning, gentle handling, and keeping pressure off the throat matter most, and many dogs are better suited to a harness for everyday walks.
Do slip leads help with pulling?
They can help in short, focused training sessions, but they’re not the best fix for a dog that pulls consistently. If a slip lead keeps tightening as your dog leans into it, that can cause real discomfort, so many dogs are kinder and more comfortable in a well-fitted harness.
Homemade dog food recipes: vet guidance and easy recipes
Making homemade dog food is one of the most loving things you can do for your dog, but getting it right takes a little more than good intentions and a well-stocked fridge. In this guide, you will find everything from what a nutritionally balanced bowl actually needs, to which ingredients to use or skip, to easy recipes you can realistically cook on a weeknight. We will also cover how to portion, store, and transition meals safely, and when it is worth looping in your vet before you make the switch.
Why make homemade dog food in the first place?
Most pet parents who start making homemade dog food do so because something shifted. Maybe their dog started turning their nose up at the same old kibble. Maybe a vet flagged a sensitivity and suddenly the ingredient list on every bag felt overwhelming. Or maybe they simply noticed their dog seemed brighter, more excited at mealtimes, when something fresh hit the bowl.
Whatever brought you here, you’re not alone in wondering whether a home-cooked meal might suit your dog better.
The good news is that homemade dog food can absolutely work well — dogs can genuinely thrive on it. But there’s a real difference between throwing together whatever’s in the fridge and building a meal that meets your dog’s nutritional needs. That gap is exactly what this guide is here to close.
We’ll walk you through what a balanced homemade meal actually looks like, which ingredients earn a place in the bowl and which to leave well alone, and how to make the switch without upsetting your dog’s digestion along the way. You’ll also find some easy, vet-informed recipes you can realistically cook on a weeknight — no slow Sunday afternoon required.
If you’re thinking more broadly about your dog’s diet and what healthy eating looks like day to day, our guide to healthy dog food and sustainability is well worth a read alongside this one.
The goal here isn’t perfection. It’s helping you feel confident, informed, and genuinely good about what you’re putting in your dog’s bowl. Because when you get homemade dog food right, it shows. And your dog will almost certainly let you know the moment you pick up the pan.
What a healthy homemade dog meal needs to include
A balanced bowl of homemade dog food needs a bit more than cooked meat and whatever veg happens to be in the fridge. Most of us have reached for something simple like chicken and rice at some point, especially after an upset tummy, but a healthy everyday meal needs a wider mix of nutrients. If you are building meals at home, it helps to start with the basics of correct nutrition for dogs, then make sure each bowl covers the key building blocks.
Here’s what that looks like in practice:
Protein: This is the main part of the meal and helps support muscles, tissue repair, immune health, and day-to-day energy. Good choices include chicken, turkey, beef, lamb, eggs, and fish.
Carbohydrates: Dogs do not need huge amounts of carbs, but the right ones can provide steady energy and helpful fibre. Brown rice, oats, quinoa, and sweet potato are all common options in homemade dog food recipes.
Vegetables: Veg bring extra fibre, vitamins, and antioxidants that meat alone will not cover. Cooked carrots, green beans, courgette, broccoli, and spinach are all easy additions for homemade dog food for dogs of many ages.
Healthy fats: Fats matter for skin, coat, brain function, and overall health. Oily fish, sardines, salmon oil, and small amounts of dog-safe oils can all help round out a meal.
Vitamins and minerals: This is the bit many well-meaning pet parents accidentally miss. Dogs need nutrients like calcium, phosphorus, zinc, iodine, and B vitamins in the right balance. That often means including organ meat, bone meal or another calcium source, and sometimes a vet-recommended supplement.
One of the biggest mistakes with DIY dog food is assuming that if the ingredients look wholesome, the meal must be complete. Unfortunately, that is not always the case.
Why chicken and rice isn’t enough: It can be useful for a day or two when your dog has a sensitive stomach, but it is not a complete long-term diet. Feed it every day and your dog can miss out on calcium, essential fatty acids, and other key nutrients.
In short, the best healthy dog food recipes are not just fresh, they are balanced too. That balance is what makes homemade dog food a good long-term option rather than just a kind idea.
Vet guidance: ingredients to use, limit, and avoid
Knowing what goes into your dog’s bowl matters just as much as how you cook it. When vets talk about homemade dog food, ingredient safety is one of the first things they mention, because plenty of everyday foods in a family kitchen are fine for us but not so good for dogs. Once you know the basics, making homemade dog food for dogs feels much more straightforward.
✅ Safe to include
Lean proteins such as chicken, turkey, beef, white fish, and eggs
Carbohydrates like brown rice, oats, and plain cooked pasta
Dog-safe vegetables including carrots, courgette, peas, green beans, and sweet potato
Plain cooked pumpkin or butternut squash
Small amounts of fruit like blueberries or seedless watermelon as occasional extras
⚠️ Feed in moderation
Liver and other organ meats, which are nutritious but very rich and easy to overdo
Spinach, which is fine now and then but best not served all the time
Dairy such as plain yoghurt or cottage cheese, since some dogs tolerate it well and others get an upset tummy
Salmon, which should always be cooked, not raw
Avocado flesh, which is best limited or skipped because it is high in fat; the pit, skin, and leaves should be kept away completely
❌ Always avoid
Grapes and raisins, which can cause sudden kidney problems
Onions, garlic, leeks, and chives in any form
Macadamia nuts and xylitol, often found in some nut butters and sugar-free snacks
Chocolate and cooked bones
A quick word of caution: puppies, senior dogs, and dogs with conditions like kidney disease, diabetes, pancreatitis, or allergies often need more tailored nutrition than standard homemade dog food recipes can offer. If that sounds like your dog, it’s well worth checking in with your vet before you change their meals. A little care at this stage makes healthy dog food recipes much safer and easier to get right.
Easy homemade dog food recipes to try at home
These homemade dog food recipes are meant to be practical starting points: simple enough for a midweek dinner rush, and easy to batch-cook for the freezer. They give you a sensible mix of protein, carbohydrate, and veg, but it’s worth saying clearly that homemade dog food is not automatically nutritionally complete just because it looks wholesome in the bowl. If you plan to feed homemade dog food for dogs regularly, ask your vet or a qualified canine nutritionist to help you balance the diet properly and decide whether you need a supplement. And if life gets busy, a trusted option from our dog food range can make the routine feel much more manageable.
Chicken, Rice, and Veggie Bowl
300g cooked chicken breast, shredded
150g cooked brown rice
100g steamed carrots, diced
50g cooked peas
Let everything cool, then mix well so your dog doesn’t just pick out the chicken and leave the veg behind. This makes a handy everyday meal idea and works well for batch prep. As a rough guide, a 10kg dog may eat around 250–300g per meal, so this batch gives you roughly two to three servings depending on appetite, age, and activity.
Beef and Sweet Potato Mash
250g lean minced beef, browned and drained
200g cooked sweet potato, mashed
100g cooked green beans, chopped
1 tbsp plain, unsweetened Greek yogurt (optional)
Cook the mince thoroughly and drain away excess fat before stirring everything together. The sweet potato gives it a soft texture that many dogs love, especially those who inhale their food in seconds. This batch makes about two generous portions for a medium dog of around 15kg. If your dog is sensitive to dairy, simply skip the yogurt.
Salmon and Oat Supper
200g cooked salmon fillet, flaked with all bones removed
100g cooked rolled oats
100g cooked courgette, diced
1 tsp flaxseed oil (optional)
Flake the salmon carefully and mix through the oats and courgette once cooled. If you use flaxseed oil, keep it to a small amount and treat it as an optional extra rather than a shortcut to a “complete” meal. This recipe makes one to two portions for a smaller dog under 10kg, or a single meal for a larger dog as part of a mixed feeding routine.
Rotating homemade dog food recipes can help add variety across the week, but variety alone does not guarantee balance. Think of these as easy homemade dog food ideas you can use now and then, or build on with professional guidance if you want to feed this way long term. Keep portions realistic for your own dog, store leftovers safely, and if you’re unsure whether a recipe suits their age, health, or breed, it’s always wise to check with your vet first.
How to portion, store, and switch your dog over safely
Getting the practical side right matters just as much as choosing good homemade dog food recipes. Even well-balanced homemade dog food can cause tummy trouble if portions are too generous, meals are stored carelessly, or the change happens too fast.
Start with your vet’s suggested daily calorie intake, then weigh out your dog’s full day of food rather than guessing by eye. From there, split it into however many meals your dog normally has. For example, if your dog eats twice a day, divide the daily amount into two equal portions. It also helps to keep an eye on body condition over the next few weeks. If your dog starts looking a little rounder or leaner than usual, adjust gently and check in with your vet if you’re unsure.
How to transition over 7–10 days:
Days 1–2: 25% homemade food, 75% current food
Days 3–4: 50% homemade, 50% current food
Days 5–6: 75% homemade, 25% current food
Days 7–10: fully switch to homemade meals
If stools go loose or appetite dips, pause and slow the change down
Storage at a glance:
Fridge: keep homemade dog food in an airtight container for 3–4 days
Freezer: freeze meal-sized portions for up to 3 months
Tip: label each container with the date so nothing gets lost at the back
One simple habit makes life easier: portion meals before chilling or freezing. It turns busy evenings into a quick grab-and-serve job.
If you’d like more step-by-step help, our guide to switching your dog’s food safely is a handy next read.
When homemade dog food works well — and when to ask for help
Homemade dog food can be a genuinely wonderful choice — for the right dog, in the right hands. If your dog is a healthy adult, you enjoy cooking, and you’re happy to do a little planning, it can be one of the most nourishing and rewarding ways to feed them.
It tends to work especially well for dogs with food sensitivities, picky eaters who’ve turned their nose up at commercial food, or pet parents who simply want to know exactly what’s going into the bowl. When meals are properly balanced and varied, most dogs absolutely thrive on it.
Some dogs, though, need a little more support. Puppies, seniors, pregnant or nursing dogs, and those managing health conditions like kidney disease, diabetes, or allergies all have specific nutritional needs that are genuinely difficult to meet without professional input. If your dog falls into any of these groups, it’s worth speaking with your vet before you start — or asking for a referral to a qualified canine nutritionist. They’re not there to talk you out of it; they’re there to help you do it well.
And if you notice any changes after switching — loose stools, low energy, a dull coat, unexpected weight shifts — pay attention. Your dog is telling you something needs tweaking.
Homemade dog food, done well, is an act of love. Just make sure that love comes with a little expert backup when it counts.
Frequently Asked Questions
What are the best ingredients to use for homemade dog food?
The best ingredients for homemade dog food are a balanced mix of protein, dog-safe carbohydrates, vegetables, healthy fats, and the right vitamins and minerals. Good staples include chicken, turkey, beef, eggs, fish, brown rice, oats, sweet potato, carrots, green beans, and courgette, with calcium and other nutrients properly covered too.
What are common mistakes in homemade dog food?
Common mistakes include feeding meals that look wholesome but are not actually balanced, relying on chicken and rice long term, missing key nutrients like calcium and essential fatty acids, overdoing rich ingredients like organ meat, using unsafe foods, and switching too quickly, which can upset your dog’s digestion.
What are some good homemade foods for dogs?
Good homemade foods for dogs include simple cooked meals built around lean protein, a gentle carbohydrate, and dog-safe vegetables. Practical options include chicken with brown rice and carrots, beef with sweet potato and green beans, or cooked salmon with oats and courgette, as long as meals are balanced overall.
Can dog and cat fleas live on humans? What owners need to know
Finding a flea on your sofa or waking up with itchy bites on your ankles is enough to send any pet parent into a spiral, and the question of whether dog fleas can live on humans is usually the first thing that comes to mind. The honest answer is reassuring, but there is still plenty worth knowing about what those bites mean, why fleas behave the way they do around people, and what actually needs to happen to sort things out properly. This guide covers all of it, from spotting flea bites on humans to treating your pets and home together so you’re not dealing with the same problem again in a few months.
Can dog fleas live on humans? Here’s the short answer
If you’ve spotted a flea jumping across your sofa or woken up with a small, itchy bite on your ankle, it’s completely understandable to wonder whether you’ve become the new host. The good news? You haven’t.
Dog and cat fleas can bite humans, and those bites are genuinely irritating, but they cannot live on humans the way they live on your pet. Fleas need fur. Dense, warm fur gives them somewhere to hide, feed repeatedly, and lay their eggs undisturbed. Human skin and hair simply don’t offer the right conditions for them to settle and breed. So while a flea might take an opportunistic bite when it lands on you, it won’t be sticking around.
Worth knowing: cat fleas, despite the name, are actually the most common species found on both cats and dogs in the UK. And around people, they behave exactly the same way — your pet will always be their preferred host.
In practice, flea bites on humans are almost always a sign that an infestation is happening somewhere else — on your pet, in your soft furnishings, or across your home — rather than on you directly. Think of finding a flea on yourself less as a personal problem and more as a useful early warning. It’s your cue to act quickly and tackle things at the source before they get worse.
If you’ve already spotted the signs, our guide on how to get rid of fleas on your dog is a great place to start.
What flea bites on people usually look and feel like
Flea bites on humans are usually pretty easy to spot once you know what you’re looking for, and the reassuring thing is they tend to follow a fairly predictable pattern. Whether you’re dealing with cat fleas or asking whether dog fleas can bite humans, what shows up on skin looks much the same either way.
Here’s what to look out for:
Small, red spots with a tiny central puncture point, often ringed by a slightly raised halo
Intense itching that kicks in quickly, sometimes within minutes
Bites in clusters or short lines rather than single, isolated marks
Common locations: ankles, lower legs, and around the waist — anywhere clothing sits close to the skin and warmth accumulates
Reactions do vary quite a bit from person to person, which can make things confusing if you’ve got a whole household reacting differently. Some people develop noticeable swelling and redness, particularly with repeated exposure, while others barely register a bite. Children and those with more sensitive skin tend to have stronger reactions, so the same infestation can look completely different depending on who it’s affecting.
If your pet is the likely source, that’s where to focus your attention first. Our roundup of insect-repelling and soothing products for pets is a good place to start.
Why fleas stay with pets instead of humans
Fleas can and do land on people, but they don’t choose us as long-term hosts. Dogs and cats are simply far better suited to support a flea’s entire life cycle, which is why a flea bite on your ankle is usually a sign your pet has fleas rather than fleas trying to settle on you.
Here’s why pets make such ideal hosts:
Dense fur gives fleas somewhere to grip, hide, and move around undisturbed — something bare human skin just can’t offer.
Consistent body warmth keeps fleas comfortable and active. Pets maintain the steady temperatures fleas need to thrive, and we simply don’t hold that heat in the same way.
Easy, repeated feeding is possible because a flea nestled in fur can feed multiple times a day without being spotted or dislodged.
Better egg-laying conditions mean fleas on a pet can drop eggs directly into the coat, which then fall into bedding, carpets, and soft furnishings nearby.
Less grooming interference gives fleas on a dog or cat far less disruption than they’d face on a human who notices them quickly.
A single female flea can lay up to 50 eggs a day. On a pet, that adds up fast — which is exactly why infestations escalate so quickly once they take hold.
So if you’ve spotted a flea on the sofa or felt a bite on your leg, it’s not looking to live on you. It’s a signal of a wider problem involving your pet and your home. Treating your pet is essential, but it’s only half the job. Our guide on how to remove cat fleas from your home walks you through the rest.
What to do if you’ve found a flea in the house
Finding a flea in the house can feel horrible at first, especially if you are also wondering whether can dog fleas live on humans. The reassuring bit is that while dog and cat fleas can bite people, they usually want to stay with your pets rather than live on you.
Here is a calm, practical plan:
Check every pet with a flea comb. Go slowly through the coat, especially around the neck, belly, and base of the tail. You are looking for live fleas or tiny black specks of flea dirt.
Vacuum thoroughly. Focus on carpets, rugs, skirting boards, sofas, pet beds, and the spaces under furniture where eggs and larvae can collect.
Wash pet bedding and soft covers. Use the warmest wash the care label allows, then dry everything fully before it goes back down.
Treat all pets in the home together if you can. Even pets who seem fine may still be carrying fleas, so it helps to follow your flea treatment plan consistently and check the product guidance or your vet’s advice.
Freshen pet areas with pet-safe cleaning products. A pet-safe home spray or bedding wash can be useful as part of your usual cleaning routine, especially in the places your dog or cat sleeps most.
Keep going for the next few days. Repeat vacuuming and keep checking coats, because fleas often show up in stages.
A quick note: the fleas you spot are often only part of the picture. Eggs can sit quietly in soft furnishings and hatch later, which is why steady cleaning matters so much. A flea comb, regular bedding washes, and a simple pet-safe routine go a long way in preventing more flea bites on humans and pets.
When flea bites need extra attention and how to keep them from coming back
Most flea bites are a temporary irritation that settle down within a few days, especially once you’ve tackled the root cause. That said, keep an eye on any bites that seem to be getting worse rather than better. If one becomes increasingly swollen, painful, or surrounded by spreading redness, it’s worth a quick chat with a pharmacist — they can point you towards the right antihistamine or topical cream. If a bite looks infected or you’re feeling unwell alongside the itching, don’t wait it out; see your GP.
On the pet side, if you’ve already treated your dog or cat and you’re still spotting fleas a few weeks on, or your pet is scratching constantly and losing fur, loop in your vet. Persistent infestations sometimes need prescription-strength treatment, and a vet can also rule out any skin reactions that need separate attention.
The bigger takeaway here is a simple one: flea bites on humans are really a symptom of a wider problem. Fixing it properly means treating your pets and your home at the same time, not one without the other. That’s where so many owners get stuck, and end up starting from scratch months later. Once you’ve cleared things up, regular prevention is what keeps it that way. Browsing trusted options like Frontline through Lords and Labradors is a good place to start making monthly treatment part of your routine.
Frequently Asked Questions
How long will dog fleas stay on a human?
Not for long — dog and cat fleas may bite a person, but they don’t stay and live on humans. They prefer pets because fur gives them the warmth, cover, and feeding conditions they need, while human skin and hair don’t let them settle or breed properly.
Can fleas live in a bed?
Yes, fleas can be in a bed, especially in bedding and other soft furnishings around your home. They don’t live on humans, but eggs and developing fleas can collect in places like pet beds, sofas, carpets, and covers, which is why washing and thorough vacuuming matter so much.
How likely are you to get fleas from your dog?
It’s very possible to get bitten if your dog has fleas, but the fleas are still far more likely to stay with your pet than live on you. If you’re finding bites or spotting fleas in the house, it usually points to a wider infestation in your dog, bedding, or soft furnishings.
How often should you worm your dog or cat? A complete worming guide
Worms are one of those topics most pet parents only think about when something seems off, but knowing how often to worm a dog or cat before that happens makes everything so much simpler. This guide covers the worms most likely to affect your pet, how a worming schedule changes from puppyhood through to the senior years, and what your pet’s lifestyle tells you about how often they really need treating. By the end, you’ll have a clear, practical routine you can actually stick to.
How often should you worm a dog or cat? Start with the basics
Worming your pet is one of those things that’s easy to put off — until you find yourself Googling “how to tell if a dog has worms” at 11pm because your dog has been scooting across the carpet. Sound familiar? Once you understand the basics, though, it really is straightforward to stay on top of.
So, how often should you worm a dog or cat? The honest answer is: it depends on their age, lifestyle, and where they spend their time. As a starting point, most adult dogs and cats need worming every three months. Puppies and kittens need it far more frequently — sometimes as often as every two weeks in those earliest weeks of life. We’ll get into all of that further down.
What worming treatments actually do is target internal parasites that can quietly take up residence in your pet’s gut, or occasionally other organs, without any obvious signs. Some pets show clear clues: weight loss, a rounded belly, or worms visible in their stool. Others seem perfectly fine. That’s exactly why a regular schedule beats a reactive one every time.
Dogs and cats also have slightly different needs. Dogs tend to pick up worms through scavenging, eating grass, or contact with other dogs on walks. Cats, especially those who hunt, face their own set of risks. A good routine accounts for how your pet actually lives, not just the textbook version of their species.
This guide covers everything: which worms to know about, how a dog worming schedule shifts with age, what factors change how often you should treat, and how to build a habit that genuinely sticks. You can also browse our flea and worming treatments if you want to get sorted while you read.
Which worms are we talking about, and how do pets pick them up?
Most dogs and cats will pick up worms at some point in their lives — it’s just part of being a curious, sniff-everything, roll-in-anything kind of animal. Knowing which worms to look out for, and how pets actually come into contact with them, makes it so much easier to build a worming routine that sticks.
The main worms to know about:
Roundworm — the most common type, especially in puppies and kittens. These live in the gut and can cause a pot-bellied appearance, vomiting, and poor growth.
Tapeworm — flat, segmented worms that attach to the gut lining. You might spot small white segments around your pet’s bottom or in their bedding.
Hookworm — less common, but worth knowing about. These latch onto the intestinal wall and feed on blood, which can cause anaemia in younger or smaller animals.
Whipworm — more of a dog problem than a cat one. They live in the large intestine and can cause bloody diarrhoea and gradual weight loss.
How do pets pick them up?
Sniffing or accidentally swallowing infected faeces on walks or in the garden
Hunting or scavenging — eating birds, rodents, or other small animals
Fleas — swallowing an infected flea during grooming is one of the most common routes for tapeworm
Sharing outdoor spaces with other dogs, cats, or wildlife
Mother-to-puppy or mother-to-kitten transmission, either during birth or through nursing
That last point matters more than most people realise. Puppies and kittens arrive in the world already vulnerable, which is why those early weeks call for extra care. Good puppy flea and worming treatments can make a real difference right from the start.
How often to worm a dog or cat comes down to age, lifestyle, and risk level — and we’ll work through all of that next.
The usual worming schedule by age: puppies, kittens, adults and seniors
Worming frequency shifts quite a bit depending on where your pet is in life, so treat the schedule below as a practical starting point rather than a fixed rule. The exact timing will always come down to the product you’re using and how your pet actually spends their days.
Life Stage
Recommended Frequency
Key Reason
Puppies
Every 2 weeks until 12 weeks old, then monthly until 6 months
Worm burdens are high in young pups, and maternal transmission is common
Kittens
Every 2 weeks until 12 weeks old, then monthly until 6 months
Kittens are particularly vulnerable and often pick up worms through their mother’s milk
Adult Dogs
Every 3 months as a minimum
Keeps protection consistent against roundworms and tapeworms throughout the year
Senior Dogs
Every 3 months, reviewed with your vet
Older pets may have weaker immune systems, and changing health needs can affect what treatment works best
Once your dog or cat reaches adulthood, a quarterly routine covers most households well. That said, some pets genuinely need worming more often, and it’s worth thinking this through before you settle on a schedule.
You might want to worm more frequently if your pet:
Spends a lot of time outdoors, rooting through grass, puddles, or woodland
Hunts or scavenges, even now and then
Mixes regularly with other dogs, cats, or animals at parks, kennels, or training classes
Lives with young children, who are more vulnerable to certain worm infections
For example, a Labrador who swims in every pond he passes and lives for a good rummage in the undergrowth is a different case to a greyhound who sticks to pavement walks and rarely meets other dogs. Same species, very different risk.
If you have a large adult dog and want a reliable treatment to keep on hand, our worming tablets for large adult dogs slot neatly into a quarterly routine. Whatever product you choose, always follow the guidance closely, and if your pet’s lifestyle puts them in a higher-risk category, a quick chat with your vet will help you get the timing right.
What changes the answer? Lifestyle, risk and the way your pet lives
Standard worming schedules give you a solid starting point, but they don’t tell the whole story. Every pet lives a different life, and some lifestyles genuinely put dogs and cats at greater risk of picking up worms more often. Working out how often to worm a dog really comes down to understanding what your pet actually gets up to day to day.
Here are the key factors that can push the risk higher:
Raw feeding. Raw meat, particularly offal, can carry worm larvae. Dogs and cats on a raw diet are more exposed than those eating cooked or commercial food.
Hunting or catching prey. Cats that bring home birds or mice, or dogs that snap at rabbits on walks, are repeatedly exposed to intermediate hosts that carry worms.
Scavenging on walks. If your dog is the type to hoover up anything they find on the ground, their risk goes up every single time you leave the house.
Homes with young children. Children play close to pets and often put their hands in their mouths, which raises the stakes around roundworm transmission in particular.
Multi-pet households. More animals sharing a space means more opportunity for reinfection, especially if one pet picks something up outdoors and brings it home.
Frequent boarding or daycare. Regular contact with lots of other dogs increases exposure. It’s that simple.
Inconsistent flea treatment. Fleas and worms are more closely linked than many owners realise. Gaps in flea cover can leave your pet more vulnerable than you’d expect.
The more of these factors that apply to your pet, the more likely they are to need worming more frequently than the standard schedule suggests.
That last point about fleas is worth pausing on. Fleas can transmit tapeworms directly, which makes the two genuinely inseparable. Keeping on top of both isn’t doubling your workload — it’s just good sense. If you want to review what you’re using, our flea and worming treatments are a good place to start.
How to worm your pet safely without the guesswork
Getting worming right feels complicated at first, but once you’ve done it a couple of times, it genuinely isn’t. Whether you’re figuring out how often to worm a dog for the first time or just trying to be more consistent, a few simple habits make it easy to stay on top of.
Choose a species-appropriate product. Always use a wormer made specifically for dogs or cats. They are not interchangeable — and using the wrong one can cause serious harm.
Dose by weight, not by guesswork. Weigh your pet before each treatment and follow the label closely. Too little won’t work; too much creates unnecessary risk.
Set a recurring reminder. Tying your dog worming schedule to something you already remember — the first of the month, a pet’s birthday, a regular vet visit — means it becomes habit rather than something you have to think about.
Don’t double dose if you miss one. Simply treat as soon as you remember and reset your schedule from there. No need to compensate.
Never use a dog product on a cat. Some ingredients that are perfectly safe for dogs are toxic to cats. This one really matters.
When to speak to a vet first:
Pregnant or nursing pets
Very young animals (a vet can give you a tailored plan if you’re unsure how often to deworm a puppy in those early weeks)
Pets with existing health conditions or on other medications
It’s also worth staying alert to the signs your dog has worms between treatments — things like changes in appetite, a bloated belly, or visible worms in their stool. Caught early, it’s rarely a big deal. And if you want trusted support between vet visits, our vet-approved wellbeing range is a good place to explore.
Building a routine that’s easy to stick to
Once you know how often to worm a dog or cat, the real challenge is turning that knowledge into a habit you’ll actually keep. The good news? A little planning upfront makes it almost effortless to maintain.
The simplest approach is to tie worming into something you already do. If you apply flea treatment on the first of the month, add worming to the same date. Some products cover both, which makes things even easier. A sticky note on the fridge, a recurring phone reminder, or a note in your pet’s health file all do the job — whatever suits the way your brain works is the right system.
It also helps to keep treatments in stock so you’re never caught short. Running out mid-schedule is one of the most common reasons routines slip, and it matters most with puppies and kittens who need worming every two weeks.
If you share care of your pet with a partner or family member, agree on who’s responsible. It sounds obvious, but a quick “did you worm them this month?” conversation avoids a surprising amount of confusion.
It’s also worth thinking seasonally. Autumn walks bring more mud, more wildlife contact, and more opportunities for a dog to sniff out something they shouldn’t — all of which can increase worm risk. Our autumn pet care guide covers everything you need to keep your dog or cat healthy as the seasons change.
The routine doesn’t need to be complicated. Consistent and simple is genuinely all it takes.
Frequently Asked Questions
Can you overworm a dog?
Yes, giving more wormer than the label recommends creates unnecessary risk. The safest approach is to use a dog-specific product, weigh your dog before each treatment, and follow the dosing instructions closely. If you miss a dose, treat when you remember rather than doubling up to compensate.
What are the signs that a dog needs worming?
Common signs include weight loss, a bloated or rounded belly, changes in appetite, vomiting, scooting, and visible worms or white tapeworm segments in your dog’s stool or around their bottom. Some dogs show no obvious signs at all, which is why a regular worming routine matters.
Can I deworm my dog again after 2 weeks?
Yes, in some cases worming again after 2 weeks is part of a normal schedule, especially for puppies in their earliest weeks. For adult dogs, timing depends on the product and your dog’s lifestyle, so follow the label carefully rather than repeating doses early without a reason.
Is one round of dewormer enough?
No, one round of dewormer usually isn’t enough as a long-term plan. Most adult dogs need worming every 3 months as a minimum, while puppies need it much more often at first. A regular schedule works better than only treating once or waiting until you spot signs.