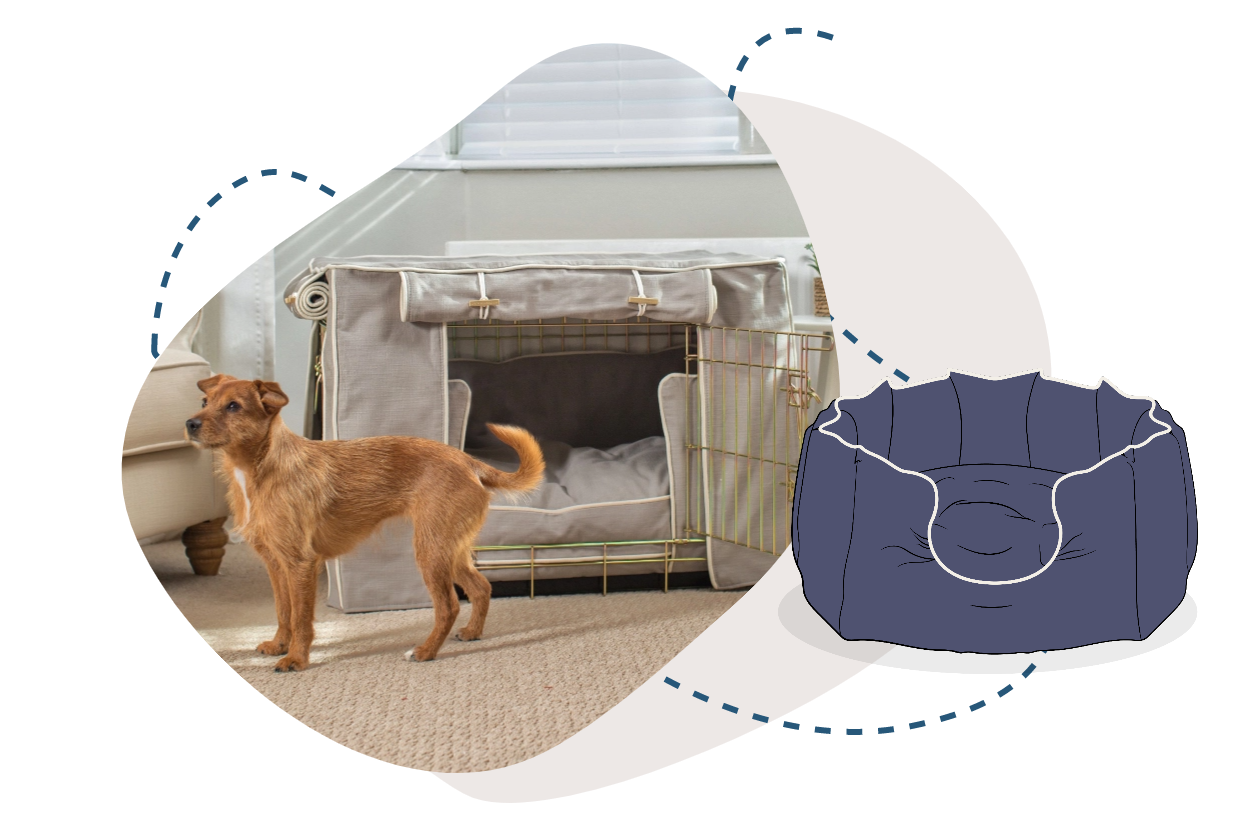
This pointed-eared and small-sized dog breed is known for it's diminuative stature and big personality. Chihuahuas are characterized by their alert expression, large round eyes, and distinctive apple-shaped head. Despite their small size, they often project their confidence and spirituality. Their loyalty, affection and form strong bonds with their owners, making them botth companions and the ideal lap dog.
Chihuahua’s have a lot of character, and they are some of the sweetest dogs in the world. They may be small, but they are full of character and energy, which makes them perfect pets for anyone – including families.
Of course, before you bring your new addition home, you have to make sure you are properly prepared with everything that they will need. That’s where we come in with this quick and helpful guide to the ultimate Chihuahua starter pack.
Chihuahua Food and Water Dishes
Every dog needs food and water bowls, and you should always ensure that they are nice and robust so that they do not break easily if dropped. Their water bowls should be full at all times to keep them hydrated, and if they are a messy drinker, we recommend buying placemats to prevent damage to your floor.
A stainless steel bowl is a good option to go for if you are looking for a set of bowls that are sturdy and practical, but also won’t break the bank. Look for a non-slip, so they won’t slide around your kitchen floor, we'd recommend a smaller size bowl for your new Chihuahua.
Chihuahua Bedding
Every dog needs a comfortable place to sleep, and your Chihuahua is no exception. One of the beds that we recommend is our Cosy & Calming Crate Beds which, if you select the small size, is perfect for your Chihuahua pup. With soft faux fur, this is the perfect snuggle bed for your new addition to cuddle up and sleep the night (and most of the day) in.
If this isn’t quite what you are looking for, then you may want to consider a dog blanket instead. A very portable form of bedding, a blanket is perfect for placing on the floor, and even the furniture, so that your Chihuahua has a comfortable place to sleep. Fleecy and warm, your dog is guaranteed a comfortable and restful sleep when they snuggle up with this.
Chihuahua Toys
Every dog, regardless of age, needs a few toys to play with and chew on. It’s great mental and physical stimulation, but also allows them to develop a deeper bond with you. Firm favourites are small chew toys for teething pups as well as something snuggly to cuddle up to at bedtime!
Other things for Chihuahuas
Our booster seats are the ideal option for transporting your dog safely in the car. We know that many dogs love looking out of the window when you are driving, but for small breeds like Chihuahua’s, this is impossible when they are sat on the seats. Booster seats provide them with an elevated seat that they are safely secured into with a harness and buckle. They're not only deep and comfortable so that they can lay down, but it also lets them watch the world – which is what they love most.
Hopefully, this guide has given you a good idea of what you need to make your new Chihuahua really feel at home. With these basic essentials, you will be well on the way to providing your pooch with the best possible life. Dog ownership is so exciting, and your Chihuahua is sure to love its new life with you.
As a first-time dog owner, one of the essential items you'll need is a dog lead. It's important to choose the right type of dog lead for your furry friend, as well as understanding the laws and regulations that govern the use of dog leads in public spaces.
In this blog post, we'll cover everything you need to know about dog leads, including the different types of dog leads, UK dog laws and regulations, how to choose a dog lead, and training tips for using a dog lead effectively.
What Are The Best Dog Leashes?
There are several types of dog leads to choose from, each with its own advantages and disadvantages depending on your lifestyle and type of dog. Here are the most common types of dog leads and what we recommend each one for:
Extendable Dog Leads
These leads allow your dog to explore further while still remaining under your control. They have a retractable cord that can extend to several meters and are perfect for walks in open spaces. However, they’re not the best choice for training your dog to walk on the lead without pulling. Extendable leads usually have a metal clip on the bottom which you can attach on to either your dog’s harness or collar. We love the Flexi dog leads, they come in two lengths and have an ergonomically designed handle making them comfortable to hold. They come in 5 colours so there’s sure to be one that you and your pooch will love.
Short Dog Leads
[product]
These leads are typically 1-2 meters long and are suitable for walking in busy areas or when training your dog. They provide more control over your dog and can prevent them from pulling or running away. Short dog leads come in a range of materials from rope which is great for stronger dogs, leather which is a good durable option, as well as nylon which are often in stylish patterns and print. Short dog leads will usually have a looped handle to either hold or put round your wrist. Similarly to extendable leads, short dog leads will have either a metal clip or a carabiner on the end so they easily fasten on to your dog’s collar or harness. Our Essentials Walking Collection has a range of short leads in both our Twill and Herdwick fabrics. They are handcrafted in Italy using the finest leather for the handles and either a durable canvas or woven fabric for the strap, finished off with silver hardware - perfect for stylish walkies.
Slip Dog Leads
These leads are made of a loop of material that goes around your dog's neck and tightens when pulled. They’re great for if your dog walks off lead a lot because as the name suggests they’re easy to slip on and off as needed. Because slip leads tighten around the neck when the dog pulls, they may not be the most suitable option for training dogs, especially those that pull on the lead. The tightening of the lead round the dog’s neck can cause them to choke, leading to negative associations with being on the lead and increased anxiety. We recommend these for dogs who already walk well on the lead and if the dog will be off the lead for the majority of their walk. The slip lead we recommend is the Dogs & Horses Rolled Leather Slip Lead, the buttery soft leather is rolled which helps protect your dogs coat from knots. They’re made using cord which is designed for use by yachtsmen so they’re strong and won’t rot if they get wet, this is then wrapped in the softest Italian leather which is hand stitched in their cosy London workshop- these leads have been crafted to last. Available in almost every colour of the rainbow, there’s sure to be one of these gorgeous leads to suit every pup.
Training Line Leads
Training line leads, also known as long lines, are another type of dog lead. These leads are typically longer than standard leads, often 10 meters or more, and can be useful for training purposes, such as recall training or teaching your dog to walk off lead. They provide your dog with more freedom to roam, while still giving you control over their movements. When using a training line lead, it's important to ensure that the line is not too long, as this can lead to your dog getting tangled or running away. Always supervise your dog when using a training line lead, and use a sturdy and durable lead that can withstand the wear and tear of training activities. We love the Ancol Outside Training Line, it comes in two lengths and is perfect for allowing your dog freedom whilst still being in control.
Hands-Free Dog Leads
Hands-free dog leads are designed to allow you to walk your dog while keeping your hands free. These leads are a great choice if you’re planning to run or hike with your dogs. Hands-free leads typically have a waistband or belt that you can fasten around your waist, leaving your hands free to use poles or run without having to hold onto a lead. They can also be useful for people with mobility issues or for those who need to carry bags or other items, whilst being out with their dog. When using a hands-free lead, it's important to ensure that your dog is well-trained and obedient, as they will have more freedom to move around. We love the Ruffwear roamer leash, it can be looped round your waist or can be handheld if needed. The lead has a bungee strap which cushions and stretches as you and your dog speed up or slow down, helping to reduce any impact on both yours and your dog’s joints.
What Are The UK Laws and Regulations For Dog Leads?
In the UK, there are laws and regulations that govern the use of dog leads in public spaces. Section 27 of the Road Traffic Act requires that dogs must be on a lead on designated roads, and if not, the owner could face a fine. What is classed as a designated road is decided by your local authority, so it's always best to check with them.
Similarly, the Countryside Code recommends that dogs should always be under control in public spaces to prevent them from disturbing wildlife or livestock. They recommend keeping your dog on a lead or in sight to ensure they stay away from wildlife, livestock, horses and other people. If you're unsure there are usually signs with that areas rules in, so it's always best to check.
Some areas may also have Public Spaces Protection Orders (PSPOs) that require dogs to be on leads in certain places. It's important to be aware of these laws and regulations to avoid fines and keep your dog and others safe. We recommend checking with your local authority if you’re unsure of the rules in your area.
Choosing A Dog Lead
When choosing a dog lead, there are several factors to consider, including the size and breed of your dog, your dog's behaviour, and your lifestyle. Here are some tips to help you choose the right dog lead:
Consider the size and breed of your dog: Larger or stronger dogs may require a more robust lead, while smaller dogs may do well with a lighter lead.
Think about your dog's behaviour: If your dog pulls or is difficult to control, a shorter lead may be more suitable. If your dog is well-behaved and obedient, an extendable lead may be a good option.
Consider your lifestyle: If you're an active dog owner, a hands-free lead may be more convenient. If you mainly walk your dog in busy areas, a shorter lead may be more suitable.
How To Train A Dog On A Lead
Using a dog lead effectively requires training and patience. Here are out pet experts top tips on training a dog to walk on a lead:
Start with a short lead and a comfortable collar or harness for your dog, and slowly introduce them to the lead by letting them sniff it and rewarding them with treats.
Once they’re comfortable with the lead, attach it the collar or harness. You’ll want to start by walking your dog in a quiet, low-distraction environment to help them get used to the lead and build their confidence. This could even be round your garden or in your house before their vaccinations, to help make that first outside walk less daunting.
If your dog pulls on the lead, stop walking and wait for them to come back to you. Reward them with treats when they do.
To teach your dog to heel, start by walking them on your left side, holding some treats in your left hand. Hold the lead in your right hand and keep it short but loose.
Give your dog the "heel" command and start walking. If your dog starts to pull or veer off course, stop walking and bring them back to your left side.
Reward your dog with treats and praise when they walk calmly by your side, they will begin to associate walking next to you with getting treats and being a positive action. Gradually increase the length of your walks and the level of distraction. As they start walking by your side more consistently you can reduce how frequently you are giving them treats and just reward them with a ‘good boy’ or ‘good girl’ and fuss. Eventually, once the habit has formed, they will consistently walk by your side with no reassurance needed.
For dogs that have a strong tendency to pull, consider using a front-clip harness like the Ruffwear Front Range harness which allows you to clip the lead on to both the front and back of the harness.
Teaching your dog to heel can be a challenge, but with patience and consistency, it's a skill that can be learned by any dog. Heel training can help prevent your dog from pulling on the lead and make walks more enjoyable for both you and your dog. If your dog has recently started pulling we recommend going back to basics and stopping walking every time they pull and giving them a treat every time they walk by your side, even if you don’t get very far for your first few walks your dog will quickly learn to stop pulling on the lead and walk time will become more enjoyable. If your dog pulls a lot try wearing your dog out in the garden with a game of fetch or tug of war, it may help them to relax on the walk as they have less excess energy.
How To Teach A Dog To Walk Off The Lead
Once your dog is well-trained on the lead, you can start to teach them to walk off lead. You will likely have been practising recall with your puppy at home and this will come in handy when walking your dog off the lead. To teach your dog to walk off lead, start by practicing in a secure, enclosed area. There are now a lot of dedicated enclosed dog fields which you can book that are perfect for practising recall and off lead walking in a safe environment. Start by using a long line lead to give your dog some freedom, but still keep them under control. Use a consistent command, such as "free," to signal to your dog that they can walk off lead and using your ‘heel’ command and recall to get them to walk next to you. As your dog becomes more obedient, you can begin practicing off lead walks in open spaces. It's important to be aware of any potential hazards, such as roads or livestock, and always keep your dog under control.
In conclusion, choosing the right dog lead is essential for both your dog's safety and your own peace of mind. Consider your dog's breed, behaviour, and your lifestyle when choosing a lead, and be aware of UK dog laws and regulations.
Training your dog to walk on a lead requires patience and consistency, but with time, you and your furry friend can enjoy stress-free walks. Teach your dog to walk on a loose lead and use the heel command to prevent pulling. And remember to only walk your dog off lead in safe areas and when they are well-trained and obedient.
Bathing your dog is an essential part of their overall grooming routine. Not only does it keep their coat clean and shiny, but it also helps maintain their overall hygiene. However, as a dog owner, you may find yourself wondering, "How often should I bathe my dog?" and "What's the best way to bathe them?" Well, fear not! In this comprehensive guide, we'll answer all your questions and provide you with helpful tips to make bath time an easy experience for both you and your beloved canine companion.
How Often Should You Bathe a Dog?
One of the most common queries among dog owners is how frequently they should bathe their furry pals. The answer varies depending on several factors, such as your dog's breed, coat type, and lifestyle. In general, most dogs benefit from a bath every 4-6 weeks. However, certain breeds with specific coat types may require more frequent bathing, while others may need it less often. Our pet experts have written an in-depth guide on how often you should groom your breed of dog which is definitely worth checking out.
Can I Bathe My Dog Once a Week?
While regular bathing is important for maintaining cleanliness, it's generally not recommended to bathe your dog more than once a week. Frequent bathing can strip their coat of natural oils, leading to dry skin and irritation. However, certain situations, such as skin allergies or medical conditions, may require more frequent bathing depending on your vet’s advice.
What Do I Need To Bath My Dog At Home?
Dog Specific Shampoo - We recommend PetPlex, they have shampoos suitable for different coat types, ages and skin conditions so there’s sure to be something for your dog.
Dog Specific Conditioner - pamper your pooch with a conditioner, this will help keep their coat looking shiny and silky.
Detangling Spray - A Detangling Spray is good for curly haired or long haired dogs before their bath to help remove any knots or matts, this will help make the bathing process as easy as possible
A Brush or Comb - there are lots of different types of brushes and the best one for your dog will depend on their coat type. Explore our range of brushes to find the best one for your furry friend.
Drying Coat, mitts or towel - You’ll have a soggy doggy after a bath and having something you can dry your dog off with will come in handy. An old towel works or our favourite-fuss free way to dry your dog off is with a drying coat. They simply slip on over your dog’s head and fasten under their belly. Alternatively our drying mats are one size fits all and making drying your dog quick and easy
Treats or a licki mat - you want your dog to associate bath time as a fun positive experience and a rewards based training method is our favourite way to do this. Having plenty of treats to hand and praising your dog throughout the process will help them form positive associations with the process. The anti-anxiety bath ducks are great for distracting nervous dogs, they stick to the wall and you can put wet food or peanut butter on there for your dog to lick off whilst you bathe them. Licking is actually anxiety reducing for dogs as it releases calming hormones so is perfect for nervous dogs. If you do have a nervous pup on your hands why not check out our blog on how to desensitise your dog to grooming, it has our pet experts top tips and tricks on how to make grooming your dog a calmer experience for you both.
How To Bathe A Dog At Home:
Now that you know the ideal frequency and the essentials you’ll need, let's dive into the step-by-step process of how to bathe your dog:
Gather Your Supplies:
Have all the items we listed above to hand, making sure they’re in reaching distance will make bath time easier for you and your dog
Prep the Bathing Area:
Choose a suitable location for the bath, preferably a bathtub or a large wet room. You can place a non-slip mat at the bottom to provide your dog with a secure footing, this is a good idea if your dog doesn’t love bath time and likes to move around.
Brush Your Dog:
We recommend brushing your dog's coat thoroughly before bathing them to remove any loose fur or tangles, especially if they have a long or curly hair coat. This will prevent matting and will mean it’s easier to make sure your dog’s coat is fully clean.
Test The Temperature
You’ll want the water to be lukewarm, not too hot or cold. You can either run a bath or use the shower to wash your dog, whichever works best for you and your dog.
Rinse Your Dog’s Coat
Work from the neck down with either a jug of water or the shower head to pour water over your dog’s coat. You’ll want to make sure their coat is nice and wet
Shampooing Your Dog
You’ll want to either put a small amount of shampoo in your hand and massage it into your dog’s coat making sure it lathers up, or you can use a shampoo brush like this Rosewood brush, which allows you to put shampoo in the top and dispenses it as you brush your dog’s coat. Be careful of their eyes and ears and focus on their body and paws. Once you’ve shampooed your dog’s body you’ll want to rinse them off with lukewarm water to remove the suds, making sure no product remains in their coat.
Conditioning Your Dog
Once you’ve shampooed your dog, you’ll want to apply a conditioner. This will help keep their coats shiny by adding moisture back in after shampooing them. Massage into your dog’s coat and then leave for a couple of minutes before rinsing
Wash Your Dog’s Face
Whilst your conditioner is soaking into your dog’s coat it’s a good time to wash their face. We recommend using a cloth or a flannel with some clean water to wipe their face clean, you want to avoid getting any shampoo in their eyes or ears.
How To Dry A Dog After The Bath:
After rinsing, use a large towel, drying mitts or a drying coat to gently dry your dog's coat. If your dog is comfortable with a blow dryer on a low heat setting, you can use it to speed up the drying process. Make sure to keep it at a safe distance from their skin. Gradually dry their coat, keeping the dryer moving to avoid overheating any particular area.
Brushing Your Dog
Once your dog's coat is mostly dry, use a brush or comb appropriate for their coat type to remove any remaining tangles or mats.
Reward Your Pup
After bath time make sure to give your pup plenty of fuss and reward them for being a good boy or girl during bath time.
Our Pet Experts Tips To A Successful Bathing Experience:
To make bath time enjoyable for both you and your furry friend, our pet experts have put together their top tips:
Introduce Bathing Gradually: If your dog is not accustomed to baths, introduce the process gradually. Start by getting them comfortable with water by offering treats or toys near the bath area. Gradually progress to wetting their paws, then their entire body. This is a great thing to do with them right from the get-go as a puppy as it helps to desensitise them from a young age
Positive Reinforcement: Use positive reinforcement throughout the bathing process. Reward your dog with treats, praise, and gentle strokes to make them associate bath time with positive experiences.
Ear Care: During bathing, be cautious not to let water enter your dog's ears, as it can cause infection. Use cotton balls to plug their ears or consider using a specialised ear cleaning solution after the bath to keep their ears clean and dry.
Nail Trimming: Bath time can also be an opportunity to trim your dog's nails if needed. However, if you're unsure or uncomfortable doing so, it's best to consult a professional groomer or veterinarian. We’ve got a handy guide on cutting your dog’s claws.
Double Shampoo: Our pet experts recommend shampooing your dog twice, as long as they don’t have sensitive skin. This will help make sure they’re squeaky clean
Drying Your Dog: Avoid rubbing your dog when towel or mitt drying them, this could cause matts or tangles in their coat. Instead gently pat them dry.
Bathing your dog is an important part of their overall hygiene routine. By following the tips and guidelines provided in this guide, you can ensure a pleasant and effective bathing experience for your furry companion. Remember to consider your dog's breed, coat type, and lifestyle when determining the ideal bathing frequency. With patience, positive reinforcement, and proper care, bath time can become a bonding experience that leaves your dog feeling clean, healthy, and happy.
How to choose the best dog food: dry, wet, raw and fresh compared
Picking the best dog food in the UK feels simple until you’re standing in front of a wall of options wondering whether kibble, pouches, raw chunks or freshly cooked trays is the right call for your dog. This guide cuts through the noise and compares all four types honestly, covering what they actually cost, how they fit into a real daily routine, and what to look for beyond the marketing on the front of the pack. By the end, you’ll have a clear sense of what works for your dog and what works for your life.
What’s the difference between dry, wet, raw and fresh dog food — and why it matters
Walk into any pet shop or scroll through an online store, and the sheer range of dog food can feel genuinely overwhelming. Dry kibble, pouches, raw chunks, freshly prepared trays — it’s a lot to take in, especially when all you want is to feed your dog something they’ll love that’s actually good for them.
So here’s a plain-English breakdown of what each type really means.
Dry dog food (kibble) is the most widely used option in the UK. It’s shelf-stable, simple to portion, and usually the most budget-friendly. Most of the best dry dog food UK brands formulate it as a complete, everyday diet, so there’s nothing extra to add.
Wet dog food comes in tins, trays or pouches and has a much higher moisture content, which makes it more aromatic and palatable. If you have a fussy eater or a senior dog who’s lost some enthusiasm for mealtimes, wet food can be a game-changer — either on its own or mixed in with kibble. For a deeper look at how the two compare, this wet vs dry dog food guide is a good place to start.
Raw dog food means minimally processed meat, bone and offal — closer to what dogs would naturally eat. Many owners swear by the difference they see in coat condition and digestion, though raw does require careful handling and a bit more planning around storage.
Fresh dog food sits somewhere between raw and traditional wet food: gently cooked, made with whole ingredients you’d actually recognise, and usually sold refrigerated or frozen.
Every type has real strengths. The right fit depends on your dog’s age, size and health — but also on your budget, your fridge space, and honestly, how much headspace you have on a Tuesday morning.
Which type works best for your everyday routine?
The right food type often comes down to your actual daily life, not just what looks best on paper. Fridge space, work hours, travel habits, and whether you’re feeding one dog or four all shape what’s genuinely manageable long-term. There’s no single best dog food UK-wide, but there is one that fits your household better than the rest.
Food Type
Storage Needs
Prep Time
Travel-Friendly
Best for Fussy Eaters
Dry
Minimal
None
Yes
Sometimes
Wet
Needs fridge once open
None
Manageable
Often yes
Raw
Freezer space required
Defrost needed
Not ideal
Usually yes
Fresh
Needs fridge
None
Less convenient
Yes
A few practical things worth knowing before you decide:
Dry food suits busy households brilliantly. Measure, store in an airtight container, done. Good dog food storage keeps kibble fresh and pests out — something most people only think about after an incident with a chewed bag.
Wet food is a genuine win for fussy eaters or dogs who need extra hydration, though opened tins need refrigerating and using up within a day or two.
Raw feeding delivers real results for many dogs, but it asks something of you — freezer space, forward planning, and confident handling. Rewarding, not effortless.
Fresh food hits a sweet spot for palatability and ease, though it needs consistent fridge access and doesn’t travel as well as dry.
Mixed feeding — typically dry plus wet — suits dogs who thrive on variety without the full commitment of raw, and it’s more flexible for busy weeks.
Keep reading for honest picks across the best dry, wet, raw, and fresh dog food in the UK.
How much should you expect to spend on the best dog food in the UK?
When you’re comparing the best dog food in the UK, the price on the pack only tells part of the story. What really matters is cost per day, how much your dog actually needs to eat, and how practical that food is for your home and routine.
Food Type
Approx. Monthly Cost (Medium Dog)
Key Cost Factors
Value for Money
Dry food
£20–£50
Portion size, ingredient quality, calorie density
★★★★
Wet food
£40–£80
Higher cost per serving, more packaging
★★
Raw food
£50–£120
Sourcing, freezer space, prep time
★★★
Fresh food
£60–£150
Subscription cost, fridge space, short shelf life
★★★
Dry food is often the most budget-friendly starting point, especially if you choose a nutritionally dense recipe that feeds well in smaller portions. That’s why many pet parents looking for the best dry dog food UK options focus on feeding guidelines, not just bag price.
Wet food can be brilliant for fussy eaters, but it usually works out pricier per meal. Raw and fresh can feel more premium, and for some dogs they suit beautifully, but you do need to factor in storage space, defrosting, and waste if portions aren’t used quickly enough.
A few hidden costs are easy to miss:
freezer or fridge space for raw and fresh food
delivery fees on some fresh food subscriptions
larger portion sizes with less calorie-dense foods
extra packaging, especially with wet food
In real life, the best dog food for dogs UK isn’t always the cheapest or the most expensive. It’s the one that suits your dog, keeps mealtimes straightforward, and feels sustainable for your budget month after month. If you’re planning the wider costs of dog ownership too, our guide to the full cost of owning a dog is a useful next step.
What to look for on the label before you buy
Knowing how to read a dog food label makes choosing the best dog food UK options much less overwhelming. Whether you’re comparing kibble, tins, raw meals or fresh subscriptions, a few simple checks will help you separate genuinely good recipes from clever packaging.
Named animal protein first
Start with the first ingredient. You want something clear, like “chicken”, “turkey” or “salmon”, not vague phrases such as “meat and animal derivatives”. Specific ingredients give you a much better idea of what your dog is actually eating.
A sensible, transparent ingredient list
Don’t worry if you spot added vitamins, minerals or a few technical names, that’s completely normal in a balanced food. What matters more is that the list feels clear and honest, without lots of fuzzy wording or ingredients that make it hard to tell where the nutrition is really coming from.
Life-stage suitability is easy to spot
Check that the food is clearly labelled for your dog’s stage of life, such as puppy, adult or senior. A lively Labrador puppy and a slower-paced older dog need very different nutrition, so this is worth checking every time you switch foods.
A FEDIAF or AAFCO complete-and-balanced statement
This is one of the big ones. It tells you the recipe is formulated to meet recognised nutritional standards for that life stage, rather than just sounding healthy on the front of the pack.
Clear nutritional analysis
Protein, fat, fibre and moisture should all be listed as percentages. That makes it much easier to compare the best dry dog food UK picks with the best wet dog food UK choices on something more useful than marketing claims.
Be wary of product names
“With chicken” can legally mean as little as 4% chicken. So always turn the pack over.
If you’d like a deeper look, our guide to healthy dog food and sustainability is a helpful next read.
How to tell if your dog will actually enjoy and thrive on it
Choosing the best dog food for your dog isn’t just about what’s on the label — it’s about how they actually respond once they’re eating it. The good news? Signs of a good fit usually show up within two to four weeks of switching, so you won’t be waiting long to know if you’re heading in the right direction.
Here’s what to watch for:
Consistent energy levels — alert and lively, but not bouncing off the walls or crashing after meals
Firm, regular stools — not too loose, not too hard, and easy to pick up (yes, we’re going there, because it genuinely matters)
A shiny, low-shed coat — good nutrition tends to show up in the fur faster than you’d expect
Clear, bright eyes — no excessive discharge or dullness
Healthy, itch-free skin — fewer scratching sessions is always a win
Good hydration — worth keeping an eye on if you’re switching to a dry food, since wet, raw and fresh options naturally contain much more moisture
Enthusiastic mealtime behaviour — trotting over happily rather than sniffing and wandering off
Stable, healthy weight — no unexplained gain or loss
Worth remembering: The best dog food in the UK looks different for every dog. What works brilliantly for a small terrier may fall well short for a large, boisterous puppy or a sensitive older dog. It’s always worth reassessing as your dog moves through different life stages.
Keep a loose mental note of how your dog looks, feels and behaves over those first few weeks after any change. If you notice persistent digestive upsets, low energy or coat issues that don’t settle, it may be worth exploring vet-formulated support through the Lords & Labradors vet’s best dog wellbeing range before drawing any conclusions about the food itself.
So, which dog food is best for you?
There’s no single best dog food for every dog, and honestly, that’s a good thing. It means you get to choose what actually works for your life.
If you want simplicity and value, a quality dry food does the job well for most dogs. If your dog is a picky eater or struggles to stay hydrated, mixing in some wet food can make a real difference. Raw feeding suits owners who enjoy a bit of meal prep and have the freezer space to commit. Fresh food sits nicely in the middle — real ingredients, minimal faff.
And if none of those feel quite right on their own? Mix it up. Plenty of dog owners pair dry kibble with a wet or fresh topper, and their dogs are absolutely delighted about it.
The best dog food in the UK is the one your dog genuinely thrives on and that you can realistically keep up — week in, week out. A brilliant food you dread preparing isn’t going to last, and that’s okay to admit.
Start with what feels manageable. Watch how your dog responds over a few weeks: their energy, their coat, their digestion. Adjust from there. You know your dog better than any packaging ever will.
Browse the full range at Lords and Labradors and find something that suits you both.
Best flea treatment for dogs: what works fastest and lasts longest
Finding the best flea treatment for dogs gets overwhelming fast, especially when every product promises to be the strongest, quickest, or most long-lasting option on the shelf. This guide cuts through that noise by looking at how quickly different treatments actually work, how long they last between doses, and which formats are genuinely easiest to use in real life. By the end, you’ll have a clear sense of what suits your dog’s age, size, and routine, without the second-guessing.
What flea treatment actually needs to do when you’ve spotted the first itch
Spotting your dog scratching more than usual tends to trigger that same panic in every pet parent: what’s going on, and how do I fix it fast?
Here’s the thing — a single flea is rarely just one flea. By the time you notice the itch, eggs may already be dropping into your carpet, bedding, and sofa cushions. So the best flea treatment for dogs needs to do more than kill the adults you can see. It also needs to tackle eggs and larvae before they hatch, then keep working long enough to stop new fleas hitching a ride after walks, park visits, or a playdate with a friend’s dog.
That’s why it’s worth understanding what each product type actually does before you buy.
Spot-ons are applied directly to the skin at the back of the neck, absorbing into the coat and skin oils to kill fleas on contact. Chewable tablets work through the bloodstream and tend to act quickly, making them a go-to when you need the fastest flea treatment for dogs. Collars release active ingredients steadily over weeks or months, so they’re well suited to long-lasting flea and tick treatment with minimal effort. Sprays are more targeted and handy for a top-up between doses, or if your dog simply won’t tolerate tablets or pipettes.
Before settling on one, think honestly about how your dog handles different application methods, how often you can realistically re-treat, and whether you’re fighting an active infestation or trying to stay ahead of one. If it’s the former, our guide on how to get rid of fleas on your dog is a brilliant place to start.
If you need fast relief, which flea treatment works quickest?
When your dog is already scratching, “fastest” matters, but it isn’t the same for every type of flea treatment for dogs. The key thing to know is that timings vary by active ingredient and brand, so it’s better to treat these as typical patterns rather than fixed rules.
Format
Typical start time
What to know
Best for
Oral tablet
Often within hours
Some products begin killing fleas very quickly, but timing depends on the tablet
Fast relief when fleas are already causing real irritation
Spot-on
Usually within several hours to around a day
Needs time to spread across the skin and coat
Good all-round option for treatment plus ongoing cover
Spray
Varies widely by product
Can be useful for direct, targeted use, but may need more hands-on application
Small areas or dogs who need a more local approach
Collar
Usually slower to fully protect
Better at ongoing prevention than immediate relief
Longer-term flea and tick support
Worth knowing: If your priority is the fastest flea treatment for dogs, oral options are often the quickest to start working, but always check the label for the specific product you’re considering.
In real life, that means a miserable, constantly scratching dog may need a different choice from one who just needs steady monthly protection. A collar can be brilliant for prevention, but it usually wouldn’t be my first pick for urgent relief. Spot-ons sit somewhere in the middle: not usually the fastest option, but often a practical balance of ease and longer-lasting cover.
If that’s what you’re after, Frontline Plus for small dogs is a helpful example of a spot-on to compare when you’re weighing up convenience, monthly protection, and whether it feels like the best flea treatment for dogs for your routine.
Which flea treatment lasts longest between doses?
If you’ve ever come home from a weekend away and quietly panicked trying to remember whether you treated your dog before you left, you already know why duration matters. Finding a long-lasting flea treatment for dogs can genuinely take one more thing off your mental load, whether you’re out on muddy woodland walks every Saturday or heading off somewhere with your dog in tow.
Treatment Type
Typical Duration
Best For
Convenience Rating
Spot-ons
Up to 4 weeks
Most dog owners, easy monthly routine
4/5
Tablets
24 hours to 3 months (varies by product)
Dogs who hate topical treatments
3/5
Collars
Up to 8 months
Owners wanting long-term, hands-off protection
5/5
Sprays
Days to a few weeks
Top-up coverage or treating the environment
2/5
Worth knowing: Spot-ons like Frontline Plus offer up to four weeks of flea and tick protection from a single application. Set a monthly reminder, apply it, and you’re done.
Longer-lasting formats make missed doses far less likely, and that’s no small thing when life gets busy. For most pet parents, the best flea treatment for dogs isn’t necessarily the most advanced one on the market — it’s the one that slots into your existing routine without you having to think too hard about it. A good dog flea and tick treatment should just quietly get on with the job, leaving you free to enjoy the walk rather than worry about what might be lurking in the long grass.
What’s easiest to give your dog: spot-on, tablet, collar or spray?
The best flea treatment for dogs isn’t just about what kills fleas fastest. It’s also about what your dog will actually tolerate, and what fits into your life without becoming a whole production. A treatment that sits unopened in the cupboard because your dog bolts the moment you reach for it isn’t helping anyone.
Format
Best For
Watch Out For
Spot-on
Dogs who are easy to handle and don’t swim or bathe frequently
Can feel greasy; needs to absorb fully before contact with other pets
Tablet
Fussy handlers or multi-dog households where cross-contact is a concern
Determined fussy eaters will find it, even inside a pill pocket
Collar
Set-and-forget households wanting long-term coverage
Fit matters; some dogs find them uncomfortable or chew them off
Spray
On-demand use between treatments or for lighter coverage
Needs applying thoroughly; some dogs dislike the sensation
Before you decide, it’s worth thinking through a few practical questions:
Does your dog swim or get bathed regularly? Both can affect how well spot-ons and collars hold up.
Are they a dedicated fussy eater who sniffs out tablets no matter how well you hide them?
Do you have multiple dogs where a freshly applied spot-on could transfer during a cuddle?
Would you rather apply once and forget about it, or do you prefer the flexibility to treat as needed?
Does your dog get anxious around handling, aerosol sounds, or anything fastened near their neck?
No single format suits every dog, which is why lifestyle fit matters just as much as efficacy. If you want something flexible to use between treatments, our dog sprays are a low-fuss option worth keeping in the cupboard for when you actually need them.
How to choose the safest option for your dog’s age, size and lifestyle
The best flea treatment for dogs isn’t always the one making the boldest promises on the box. It’s the one that actually fits your dog — their age, their size, their skin, and how they spend their days. Getting that match right is what separates a treatment that works from one that quietly disappoints.
Before you buy, run through these checks:
Minimum age: Many treatments aren’t suitable for puppies under eight or twelve weeks. Always check the label before using anything on a young dog.
Weight band accuracy: Flea treatments are dosed by weight, so using the wrong band can mean under-dosing or, more seriously, giving too much. Weigh your dog before you buy.
Skin sensitivity: If your dog has reacted to topical treatments before, a tablet-based option may suit them better.
Other medications or health conditions: Some ingredients interact with existing treatments. If your dog is on medication, a quick call to your vet is worth it.
Swimming and bathing habits: Spot-ons can lose their effectiveness faster on dogs that swim regularly or get bathed weekly. A collar or tablet tends to hold up better in those cases.
Puppy-safe formulas differ significantly from adult treatments — always check the minimum age on the label before applying anything.
There are plenty of long-lasting and fast-acting dog flea and tick treatment options available, but they only do their job properly when they’re right for the individual dog. If you have a puppy or a younger dog joining the family, our puppy flea and worming treatments are a good place to start.
How to make the final choice without overthinking it
If you’ve made it through this guide and you’re still not quite sure which way to go, here’s a simple way to think about it.
If your dog is already scratching and miserable, speed is what matters right now. Find a fast-acting flea treatment for dogs that starts working within hours, and figure out the longer-term routine once the immediate discomfort is sorted.
If you’re someone who forgets monthly doses, honestly, you’re in good company — pick the longest-lasting option you can find. A treatment that covers three months gives you far more breathing room than one you need to remember every four weeks like a recurring alarm you keep snoozing.
And if your dog is the type who clamps their jaw shut the second anything remotely medicinal appears, go with whatever format they’ll actually tolerate. A spot-on they barely notice beats a chew they spit out across the kitchen floor every single time.
Once you know which of those three things matters most, the best flea treatment for dogs for your situation becomes a lot easier to land on. It really does come down to your dog, your routine, and your life — not some universal right answer.
To compare options across all three priorities, take a look at the Lords and Labradors Frontline flea and worming range and find something that actually works for both of you.
Choosing the best kitten food is one of those decisions that feels straightforward until you’re actually doing it, and suddenly every shelf and search result pulls you in a different direction. This guide cuts through that noise with practical advice on wet versus dry food, how to read a label properly, how much to feed at every stage, and what to do when your kitten has opinions of their own. Whether you’re setting up for day one or adjusting as your kitten grows, you’ll find everything you need to feed with confidence right here.
What actually counts as the best kitten food for your new arrival?
Finding the best kitten food feels simple enough — until you’re actually standing in front of a shelf stacked floor to ceiling with options. Pouches, tins, biscuits, raw, grain-free, sensitive, indoor. It’s a lot, especially when you just want to do right by a tiny cat who depends entirely on you.
The most useful thing to know upfront: kitten food and adult cat food are genuinely different, and that difference really matters. Kittens grow at a remarkable rate, and they need more protein, more fat, more calories, and higher levels of specific nutrients like calcium, phosphorus, and taurine than an adult cat requires. Feed an adult formula too early and your kitten may simply not get the building blocks they need to grow well. It’s not a minor tweak — it’s a fundamentally different nutritional brief.
When you pick up any pack, look for the words “complete and balanced for kittens” or “all life stages.” That phrasing means the food has been formulated to meet your kitten’s full nutritional needs on its own, with nothing extra required. If a food says “complementary,” it’s designed to sit alongside something else — not replace it. That’s the single most important label check you’ll make, so it’s worth getting comfortable with it early.
Beyond that, the best food for kittens is one they’ll actually eat, fits your daily routine, and that you can buy consistently without the stress of it going out of stock. The Lords and Labradors kitten food collection is a good place to see what well-formulated options actually look like. The rest of this guide will help you narrow things down from there.
Wet food, dry food, or both: what works best in real life?
There’s no single rule that makes one format the best kitten food for every household — and most experienced cat owners will tell you they’ve landed somewhere in the middle. Wet and dry food each bring something genuinely useful to the bowl, and understanding those differences makes the whole decision a lot simpler.
Factor
Wet Food
Dry Food
Hydration
High moisture content, great for keeping kittens well hydrated
Low moisture, so fresh water alongside is essential
Texture appeal
Soft and easy to chew, ideal for younger kittens
Crunchy texture some kittens love, though not all take to it straight away
Convenience
Best served fresh, so less practical if you’re out all day
Easy to portion, stays in the bowl longer, great for measured feeding
Cost
Typically costs more per serving
Usually more economical over time
Shelf life
Short once opened, usually 24 hours refrigerated
Long shelf life, simple to store
Combining both is a sensible approach that many vets are happy with, and it works well in practice. Wet kitten food at set mealtimes supports hydration in a really natural way, which matters more than you might think — kittens are notoriously poor water drinkers. Dry food then gives you flexibility around a busy day without worrying about what’s been sitting in the bowl since breakfast. If you’re looking for quality options to build into your kitten’s routine, the wet cat food range is a good place to start.
A few practical things to help you find your balance:
Offer wet food at set mealtimes and use dry as a flexible top-up during the day
Watch how your kitten eats — enthusiasm tells you a lot about what format they prefer
If they rarely touch their water bowl, lean further towards wet food
Start simple, then adjust as you both settle into a routine
How to spot a proper complete kitten food on the label
Picking up a bag or pouch that says “kitten” on the front feels reassuring — but that label alone doesn’t guarantee the food is nutritionally complete. Reading a little further takes about thirty seconds and makes a real difference to what ends up in your kitten’s bowl.
Look for the word “complete”. You’ll usually find it on the front or back of the pack. That single word confirms the food meets all of your kitten’s nutritional needs on its own, every day.
Check the life-stage wording. The label should say “for kittens,” “for growth,” or “for all life stages.” If it only says “for adult cats,” put it back.
Find a named animal protein as the first ingredient. Chicken, salmon, or turkey listed first means animal protein leads the recipe, not cereals or vague fillers.
Look for an AAFCO or FEDIAF nutritional adequacy statement. This confirms the food has been formulated to meet recognised standards for growing cats, not just cats in general.
Think about caloric density. Kittens need significantly more calories per gram of bodyweight than adults do, so food made specifically for growth will reflect this in its nutritional values.
Complete vs. complementary, simply put: A complete food provides everything your kitten needs as a standalone meal. A complementary food is designed to be fed alongside something else and can’t do the job alone.
Once you know what to look for, spotting the right food takes seconds. The Lords and Labradors cat food range is a solid place to start browsing options that have already done the hard work for you.
Feeding amounts, meal frequency, and when to change as they grow
Kittens have tiny stomachs and very big appetites for life, so feeding little and often usually works best. Getting the balance right helps support steady growth, a healthy weight, and fewer tummy upsets too.
Kitten Feeding Guide by Age
Age
Meals Per Day
General Portion Guidance
8–12 weeks
4–5
Offer small meals and use the feeding guide on your chosen kitten wet food, kitten dry food, or mixed-feeding plan as your starting point
3–6 months
3–4
Increase the total daily amount gradually as your kitten grows, then split it across meals based on the label guidance
6–12 months
2–3
Keep adjusting portions with growth and body condition as your kitten moves towards an adult routine
If you feed both wet and dry, remember the daily amount needs balancing across both, not adding a full day’s serving of each. That’s one of the easiest ways to overfeed without meaning to.
Practical tips to get it right:
Start with the pack guidelines for your kitten’s age and weight, then tweak based on body condition and appetite
Weigh your kitten regularly, especially in the first few months when they seem to change overnight
Move to fewer meals gradually rather than dropping from four to two in one go
Measured dry food is usually easier to manage than topping up the bowl throughout the day
If your kitten constantly leaves food, or finishes every meal and still seems hungry, it’s worth reviewing portions
If you want a more detailed breakdown, our full kitten feeding guide goes into more detail by age and weight.
Even the best kitten food still needs the right portion size. A little attention now makes feeding feel much simpler as your kitten grows.
Ingredients, sensitivities, and choosing food your kitten will actually eat
Even the most nutritionally complete kitten food is useless if your kitten sniffs it twice and walks off in disgust. Ingredient quality and texture matter — especially for young digestive systems still finding their feet — so it pays to be a little selective from the start.
Here’s what to look for in practice:
Named meat first. Chicken, salmon, or turkey should sit at the top of the ingredient list. Vague terms like “meat derivatives” usually mean the recipe is cutting corners.
Go easy on fillers. Some carbohydrate content is fine, but cereals and plant proteins shouldn’t dominate — particularly in those early months when your kitten is growing fast.
Spot the green flags. Firm stools, steady weight gain, a glossy coat, and genuine excitement at mealtimes are all signs a food is genuinely working.
Take red flags seriously. Loose stools, bloating, or consistent refusal aren’t things to push through. They’re worth acting on.
Respect texture preferences. Some kittens go wild for pâté-style wet food; others want chunks or kitten dry food. Many do well on a mix of both. Follow their lead.
Transition slowly. When switching foods, mix old and new over seven to ten days to keep digestive upsets at bay.
If your kitten shows recurring signs of sensitivity — loose stools, skin reactions, persistent fussiness — it’s worth exploring sensitive and hypoallergenic cat food formulated for more delicate systems.
Finding the right match can take a little trial and error. The best food for kittens is simply the one your individual kitten genuinely thrives on.
Which kitten food should you choose? A simple way to decide
There’s no single best kitten food that works for every cat and every household — and honestly, accepting that makes the whole decision much easier. What you’re really looking for is something complete and balanced, made with decent ingredients, that your kitten actually wants to eat.
Start by thinking practically. Out of the house most of the day? Dry kitten food earns its place because it won’t spoil sitting in the bowl. If your kitten seems lukewarm about food or you want to boost their fluid intake, wet food is a brilliant option — most kittens find it far more tempting. Plenty of cat parents naturally settle into a mix of both over time, and it genuinely works well.
From there, it’s fairly straightforward. Choose a food labelled complete for kittens, check that a named protein — chicken, salmon, turkey — sits at the top of the ingredients list, and pick a texture your kitten responds to. Then give it a proper chance before switching. Chopping and changing too soon is one of the most common mistakes new kitten parents make, and it can unsettle a young cat’s digestion faster than almost anything else.
If you’re still finding your feet with the basics, our guide on how to prepare for your new kitten is a great place to start. The right food is out there. You don’t need to have it all figured out on day one — you just need to begin.
Best flea treatment for cats: spot ons, tablets and collars compared
Finding the best flea treatments for cats gets a lot simpler once you know what you’re actually comparing. This guide breaks down spot-ons, tablets and collars side by side, covering how each one works, which suits different cat personalities, and what to check before you buy. Whether you’re dealing with a live infestation right now or just want to stay on top of prevention, you’ll find a straightforward answer here.
Fleas on your cat: what you need to decide before you buy
Spotting your cat scratching more than usual, finding tiny black specks in their fur, or catching a live flea mid-jump is one of those moments where you just want a straight answer. What do I buy, and will it actually work?
The best flea treatments for cats fall into three clear categories: spot-ons, tablets, and collars. Each works differently, suits different cats, and brings its own level of convenience. The right one for your cat comes down to a few honest questions you can answer right now.
How quickly do you need results? If you’ve spotted a live flea today, you need something fast, and that usually means a spot-on or tablet rather than a collar. What’s your cat like to handle? Some cats will happily take a tablet tucked into a treat and barely notice. Others will turn a spot-on application into a full ordeal. Collars are low-effort once they’re on, but they’re not always realistic for cats who lose a collar before the week is out.
It’s also worth thinking about your cat’s age and weight before you buy anything. Flea treatment for kittens is a different category entirely, with strict restrictions that rule out several popular options. Senior cats can have sensitivities too, so it’s always worth checking the label before you commit.
If you’re already dealing with an active infestation, our guide to caring for a cat with fleas is a good place to start alongside any treatment you choose.
Get those basics clear, and the right choice becomes much more straightforward.
Spot-ons, tablets or collars: how each flea treatment actually works
Knowing which of the best flea treatments for cats will suit your home often comes down to a very real question: what can you actually get onto, or into, your cat without turning it into a wrestling match? Here’s a simple look at how each type works in everyday life.
Treatment Type
How It Works
Best For
Spot-on flea treatment for cats
A small pipette of liquid applied to the skin, usually at the back of the neck. Depending on the product, it spreads through the oils on the skin or works after being absorbed
Cats who’ll tolerate brief handling and owners who want a quick routine
Cat flea tablets
A tablet given by mouth, either directly or hidden in food. Depending on the product, it may start working after being swallowed and absorbed
Cats who dislike anything being put on their coat, or homes where topical treatments aren’t ideal
Flea collars for cats
A collar worn all the time that releases active ingredients slowly over the coat and skin
Cats who hate monthly treatments and owners who want something lower-maintenance
Spot-ons
Usually the easiest option for a wriggly cat, because you only need a few seconds at the back of the neck. They’re popular for a reason. The downside is that some cats dislike the feel of the liquid at first, and you’ll need to follow the label on drying time and when your cat can get wet.
Cat flea tablets
These can be a handy choice if your cat gets stressed by sprays, pipettes or anything on their fur. There’s no residue on the coat, which some owners really like. The catch is obvious: your cat has to swallow it. Some tablets act quickly, but timing varies by product, so it’s worth checking the box.
Flea collars for cats
Collars can feel very fuss-free once fitted properly, especially if your cat is impossible to catch every month. They’re a good long-term option, but comfort and safety matter. If your cat goes outdoors, choose a safety-release design.
If you’re comparing options, our Frontline flea and worming range is a helpful place to start.
Which option works best for your cat’s personality and routine?
No two cats are the same, so the best flea treatments for cats usually come down to one simple question: what will your cat actually tolerate, and what can you realistically keep up with?
The indoor lounger: A monthly spot on flea treatment for cats is often the easiest fit. If your cat is fairly relaxed about being handled, you can part the fur and apply it in seconds. For mostly indoor cats, that simple routine often feels manageable.
The outdoor explorer: If your cat spends half the day in the garden, hedges or next door’s flowerbeds, a longer-lasting flea collar for cats can be handy. It offers ongoing protection without relying on you remembering a date every month. Just make sure your cat is comfortable wearing a collar in the first place.
The nervous rescue cat: Cats who are still settling in may find any close handling tricky, whether that’s a collar or a spot-on. In many cases, a quick spot-on may be less stressful than fastening a collar, but it depends on the cat. If your cat is anxious, it’s well worth reading how to calm an anxious cat before you try anything.
The cat who hates being picked up: Cat flea tablets can be worth asking your vet about, especially if topical treatments always turn into a stand-off. Some tablets are prescription-only, and not every cat will take one happily hidden in food, so they tend to work best when the product suits your cat and you’re confident they’ve swallowed it properly.
Tip: If one option feels impossible at home, that doesn’t mean flea protection is off the table. Often it just means a different format will suit your cat better.
Pick the option that fits real life, not the perfect plan on paper.
How long protection lasts and how often you’ll need to reapply
How often you reapply flea treatment matters just as much as which product you choose. Protection windows vary a lot across spot-ons, tablets, and collars, and finding something that actually fits your routine means you’re far more likely to keep up with it.
Treatment Type
Typical Duration
Reapplication Frequency
Best For
Spot-on
4–5 weeks
Monthly
Owners who like a simple, predictable schedule
Tablet
24 hours to 3 months
Varies by product
Cats who resist topical treatments
Collar
6–8 months
Every 6–8 months
Lower-maintenance households with indoor cats
A few things worth keeping in mind before you settle on a schedule:
Treat every pet in the house at the same time, even if only one cat is showing signs.
Wash bedding, vacuum carpets, and treat soft furnishings too. Fleas spend most of their life cycle off the cat, so the home needs attention as well.
Stick to your schedule even when things look fine. Prevention is so much easier than dealing with a full-blown infestation.
According to EPA guidance, a flea comb can remove adult fleas and flea dirt from your pet’s coat between treatments, which makes it a handy check-in habit to get into.
If a monthly cadence suits you, Frontline Plus for Cats is a vet-trusted spot-on that takes the guesswork out of timing. Flea collars for cats work beautifully for some households too. Ultimately, the best schedule is the one you’ll actually stick to.
What to check on the label before you add anything to basket
Before you add anything to basket, give the label a proper once-over. Even the best flea treatments for cats only work safely if they match your cat’s age, weight and health needs.
Check the minimum age. Some products are fine from 8 weeks, while others are only suitable from 12 weeks. If you’re shopping for flea treatment for kittens, this is the first thing to look at.
Match the weight range. Whether you’re choosing cat flea tablets or a spot on flea treatment for cats, the dose needs to fit your cat’s current weight.
Make sure it says “for cats.” This sounds obvious, but it matters. Never use a dog flea treatment on a cat. Some dog products contain permethrin, which is toxic to cats.
Look at pregnancy and nursing guidance. If your cat is pregnant or feeding kittens, check the label carefully before buying.
Read any health warnings. If your cat has an existing condition, is on medication, or has reacted badly to flea treatment before, it’s worth checking with your vet first.
Check what the product treats. Some flea collars for cats and spot-ons cover fleas only, while others also help with ticks or mites.
It takes two minutes, but it can save a lot of stress later. If you’d like a simple place to start, the Lords & Labradors cat essentials collection is a handy one to browse.
Choosing the best flea treatment for your cat: our quick verdict
There’s no single best flea treatment for cats that works for every household, but once you know your cat’s personality and your own routine, the right choice tends to become pretty clear.
If your cat tolerates handling well and you want simple, reliable protection, a monthly spot-on flea treatment is your easiest win. Apply it, mark the date, move on with your day.
If your cat transforms into a four-legged hurricane the moment you reach for anything, a flea collar fitted once and forgotten for several months can take the stress out of the whole routine. Just make sure it’s a quality one with a proper safety-release mechanism.
Cat flea tablets are worth considering when you need fast-acting relief, or during a heavier infestation when speed matters. They also give you precise control over dosing, which some owners genuinely prefer.
For younger cats, always check the label before buying anything. Flea treatment for kittens needs to be age and weight appropriate — an adult formula is not a safe substitute, even if the packaging looks almost identical.
Whatever format you go with, consistency is what actually keeps fleas away. A treatment applied regularly and correctly will always outperform the technically “best” option that gets skipped because it was too much faff on a busy Tuesday evening.
Frequently Asked Questions
What is the most effective treatment for cat fleas?
The most effective treatment for cat fleas is the one your cat will tolerate and you can use consistently. For fast relief, spot-ons or tablets are usually the best fit, while collars can work well for longer-term protection. Active infestations also need home cleaning, not just treatment on your cat.
What flea medication is most effective for cats?
The most effective flea medication for cats depends on your cat’s temperament, your routine, and how quickly you need results. Spot-ons are often the easiest reliable choice, tablets can act quickly, and collars suit lower-maintenance households. The best option is one that matches your cat and gets used properly every time.
What do vets recommend for cat flea treatment?
Vets commonly recommend using a cat-specific flea treatment that matches your cat’s age, weight, and health needs, then sticking to the schedule properly. A monthly spot-on is often a simple, reliable option, while tablets and collars can suit some cats better. Never use a dog flea treatment on a cat.
Knowing when should female dogs be spayed is one of those questions that sounds straightforward until you actually start looking into it. The answer depends on your dog’s breed, size, lifestyle, and health history, and this article walks through all of it so you can approach the conversation with your vet feeling genuinely prepared. From what affects timing to what to ask before you book, here’s what you actually need to know.
When should female dogs be spayed, and why does timing matter?
Spaying is one of those decisions that sneaks up on you faster than you expect. One minute you’re bringing home a fluffy puppy, and the next your vet is asking whether you’ve thought about getting her neutered. It can feel like a lot of pressure, especially when a quick internet search throws up a dozen different answers.
So, when should female dogs be spayed? The honest answer is that there’s no single magic age that works for every dog. Spaying removes your dog’s ovaries and usually her uterus, stopping her from coming into season, preventing unwanted pregnancies, and reducing the risk of certain health conditions. But the right time to do it depends on far more than a number on a calendar.
A Miniature Dachshund and a Great Dane have very different hormonal timelines. A dog who spends her days running off-lead in the park with other dogs faces different considerations to one living a quieter, more contained life. And if your girl has a family history of certain health conditions, that conversation with your vet needs a little more time and care before anything gets booked in.
Size, breed, lifestyle, and health history all play a role, and the sections below walk through each of them. If you’re still weighing up whether neutering is the right call for your dog at all, our guide on whether you should get your dog neutered is a helpful place to start. Already decided spaying is the route? Read on, because timing really does matter.
What factors change the best age to spay a female dog?
No two dogs are quite the same, and the question of when female dogs should be spayed rarely has a one-size-fits-all answer. Several individual factors shape the ideal timing, and understanding them puts you in a much stronger position when you sit down with your vet.
Breed size: Smaller breeds like Jack Russell Terriers typically reach physical maturity earlier, so vets may recommend spaying sooner. Larger breeds develop more slowly, which often shifts the recommended window later.
Expected adult weight: A dog who’ll top out at 10kg and one heading for 45kg are on very different timelines. Generally speaking, the heavier the expected adult weight, the more time the body needs before spaying is appropriate.
Activity level and development: Active, working, or sporting dogs may benefit from a longer period of hormonal support, particularly for joint health and muscle development. As your puppy grows, her physical milestones are often a more useful guide than her age on paper. Our growing up into an adult dog collection has useful support for this stage.
Heat cycle history: For medium to large breeds especially, some vets prefer to wait until after a first season, as this can reduce certain health risks further down the line.
Existing health conditions: Dogs dealing with hormonal imbalances, mammary concerns, or repeated phantom pregnancies may need earlier or more carefully timed intervention.
Lifestyle and home environment: If your dog lives with unneutered males or has been used for breeding, those practical realities will naturally factor into the timing conversation too.
The best age to spay a female dog is something you work out with a vet who actually knows her. You don’t need to arrive with all the answers, just the right questions.
What UK vets mean when they say there’s no single rule
If you’ve searched for a clear answer on when female dogs should be spayed and ended up more confused than before, you’re in good company. Even experienced UK vets hold genuinely different views on timing — not because anyone’s getting it wrong, but because the research into hormones, breed size, and individual health is still evolving. The evidence can reasonably support more than one approach, and there’s no hidden consensus that someone forgot to share with you.
When your vet thinks through the right timing for your dog, they’re usually weighing up a few key things:
Breed and predicted adult size — larger breeds may benefit from waiting longer, to allow full hormonal development
Whether your dog has already had a season — this can shift the risk profile for certain health conditions
Behaviour and temperament — vets may want to assess anxiety or reactivity before going ahead with surgery
Your dog’s individual health history — any existing conditions can influence when spaying is safest
Your day-to-day circumstances — including whether preventing an unplanned pregnancy is a pressing concern right now
There is no universally correct age. There’s only the right decision for your dog, made with your vet.
This section isn’t here to hand you a formula — it’s here to help you walk into that conversation feeling prepared and confident. In the meantime, keeping a close eye on your dog’s everyday wellbeing is always a good place to start.
How your dog’s day-to-day life can influence the decision
Deciding when to spay your female dog isn’t a purely medical question. Your dog’s daily routine, social life, and home environment all play a real part in finding the right moment.
If your dog runs off-lead in busy parks or woods, an unplanned encounter with an entire male during a season is a very real risk
Dogs attending daycare or boarding kennels are often turned away while in heat, which can disrupt your working week at short notice
Living with an unneutered male at home adds an obvious layer of urgency to the whole conversation
Trying to manage a season around family holidays, school runs, or a hectic stretch at work is harder to plan for than most people expect
Some dogs become noticeably anxious or unsettled during heat cycles, which can affect how they behave on walks or around other dogs
Heat cycles bring practical challenges that are easy to underestimate until you’re in the middle of one. The discharge, the restlessness, the constant supervision — it all adds up. For busy households, two to three weeks of that can feel relentless, and plenty of owners are genuinely caught off guard the first time round.
It’s also worth thinking about where your dog is in her social development. A young dog still building her confidence around other dogs and new environments may need time to find her feet before a procedure and recovery period interrupt her routine. Good socialisation shapes how she handles new experiences — veterinary ones included.
Knowing when female dogs should be spayed really does mean looking at the whole picture of her life, not just ticking an age box.
Questions to ask your vet before you book the operation
Walking into a vet appointment feeling prepared makes a real difference, especially when the conversation involves something as significant as spaying. Having a few questions ready means you can have a proper back-and-forth rather than nodding along and frantically googling everything on the drive home.
Here are some worth bringing up:
Is my dog mature enough to be spayed now, or should we wait given her breed and size?
Could spaying at this age affect her behaviour, hormonal development, or joint health?
What are the benefits of spaying her before her first season compared to waiting?
What does recovery after a dog spay typically look like, and how long will she need to rest?
Are there any health conditions or physical signs I should watch for before or after the operation?
Given her lifestyle, is there anything that makes earlier or later timing a better fit for her specifically?
It’s also worth knowing that some long-held assumptions about spaying don’t hold up to scrutiny. Despite the common belief that dogs should have one litter first, studies have shown that female dogs spayed before their first heat are generally healthier.
If you’re still in the early stages with a new puppy, our guide to your puppy’s first vet visit is a brilliant place to start building that relationship with your vet. The right timing for spaying is personal to your dog, and asking the right questions is exactly how you find it.
Frequently Asked Questions
Should you let a female dog go into heat before spaying?
Not always. Some vets, especially for medium to large breeds, prefer to wait until after a first season because it can shift certain health risks, while smaller breeds are often spayed earlier. The right timing depends on your dog’s breed, size, lifestyle, health history, and pregnancy risk.
Do female dogs change after being spayed?
They can, but it isn’t a simple yes-or-no change. Vets often consider behaviour and temperament before surgery, and some owners notice differences linked to heat cycles no longer happening, like less restlessness or anxiety during seasons. Your dog’s age, development, and individual temperament all matter.
What happens if a dog is spayed too early?
Spaying too early can affect things your vet will want to weigh carefully, including hormonal development, behaviour, and joint health. That matters most in larger, slower-maturing, or very active dogs. There isn’t one safe age for every dog, which is why breed, size, and lifestyle all count.
Bringing a new puppy home is one of the most exciting things you can do, but knowing how to find ethical dog breeders is what makes the difference between a great experience and a heartbreaking one. This guide walks you through everything that matters, from the questions to ask before you even visit, to what a good puppy visit should feel like, to how much you should realistically expect to pay. Get these things right, and you will be choosing your new dog with real confidence rather than crossed fingers.
What ethical dog breeding actually looks like
When you first start looking into how to find ethical dog breeders, spotting the difference between a good one and a bad one can feel harder than it should. But once you know what to look for, it gets much clearer.
An ethical breeder raises puppies as part of everyday family life. Think: a litter in the kitchen, pups growing used to the hum of a washing machine or the sound of children playing, and a mum who is relaxed, healthy, and clearly loved. That kind of early exposure shapes temperament in ways that stay with a dog for life.
Puppy farms and backyard breeders work very differently. Puppies are often kept in sheds or kennels with little human contact, and the mother is rarely in good health. Some sellers will offer to meet you in a car park or deliver a puppy without a visit — and that is one of the biggest red flags when buying a puppy. Walk away.
A genuinely reputable breeder will want to get to know you. They will ask about your home, your routine, your experience with dogs. That two-way conversation is exactly the kind of sign you want. It tells you they care deeply about where their puppies go, not just that they go.
At its core, this is what ethical breeding looks like: puppies raised indoors, a mum you can meet in person, and a breeder who puts health and temperament before anything else. Get that foundation right, and you will be in a much stronger position as you start preparing to welcome your new puppy home.
The questions to ask before you even visit
Knowing the right questions to ask before you even book a visit is one of the most reliable ways to filter out the wrong fit early. A responsible breeder will welcome your curiosity — in fact, they’ll probably have questions for you too. If someone seems put out by your enquiries, that tells you everything you need to know.
Here are the key questions worth asking upfront:
“How long have you been breeding this breed?” Experience matters. Someone who has spent years focused on one breed will understand its quirks, health history, and temperament inside out.
“What health tests do you carry out on the parents?” A good answer names specific, breed-relevant tests — not a vague “they’re healthy.”
“Are the results available to view?” Reputable breeders are transparent. Results should be documented and shareable, not something you’re expected to take on faith.
“How do you socialise the puppies before they leave?” Look for mentions of household sounds, regular handling, and varied experiences from the earliest weeks.
“How many litters does the mother have per year?” More than two is a red flag. A breeder who genuinely cares about their dogs prioritises the dam’s wellbeing over output.
“Can I meet both parents?” Seeing the mother in person is a strong indicator of an ethical setup. If neither parent is available, always ask why.
“What support do you offer after the puppy comes home?” A breeder who stays involved — answering questions, checking in — genuinely cares where their puppies end up.
Watch out for:
Anyone who can’t name the specific health tests carried out on the parents
Breeders who deflect or discourage questions about meeting the mother
A puppy available immediately, with no waiting list in sight
Once you’ve shortlisted breeders who pass these early checks, you’re in a much stronger position. And when the right match comes along, our guide on how to prepare for your new puppy will help you get everything ready before they arrive.
Why health testing and breed knowledge matter so much
A lot of the real work happens long before puppies arrive. If you’re learning how to find ethical dog breeders, this is one of the biggest things to look at. A caring breeder does not just pair two lovely dogs and hope for the best. They understand their breed inside out and do the health checks that help give puppies the strongest possible start.
Those checks will vary by breed. A Labrador breeder should be able to talk you through hip and elbow scores, while a Cavalier King Charles Spaniel breeder should know about heart testing. That level of detail matters. If someone only says their dogs are “healthy” but cannot explain which tests they have done, that should set alarm bells ringing.
A responsible breeder should be happy to show you:
Hip and elbow scores for both parent dogs
DNA test results for breed-specific inherited conditions
Current eye screening certificates, where relevant
Kennel Club registration or involvement in a recognised health scheme
Clear, confident answers about the health history of both mum and dad
Paperwork matters here. Good breeders keep records and talk you through them without making you feel awkward for asking. In fact, thoughtful questions are usually welcomed.
Some of the biggest red flags when buying a puppy are vague answers, missing certificates, or a breeder who changes the subject when you ask about mum or dad’s results. If they know their lines well, they will be open about them.
Once you’ve found the right breeder and chosen your puppy, our guide to everything you need for your new Labradoodle can help you get ready for those first exciting days at home.
What a good puppy visit should feel like
Visiting in person is one of the most important steps when learning how to find ethical dog breeders — and going in with a clear idea of what you’re looking for helps you stay grounded when a dozen fluffy puppies are doing their absolute best to distract you.
Here’s what a good visit should include:
Clean, spacious living areas with no strong odours, damp bedding, or overcrowding
Puppies that are curious, playful, and happy to toddle over to you without any coaxing
No signs of lethargy, weepy eyes, runny noses, or visible distress
The mother present, calm, and comfortable around both the breeder and visitors
Unrestricted access to the space where the puppies were actually born and raised
Evidence of early handling — puppies that stay relaxed when you pick them up are a great sign
Age-appropriate toys, enrichment, and room to explore safely
A breeder who answers your questions openly and is clearly attached to the litter
One of the clearest signs of a reputable dog breeder: A responsible breeder will always want you to meet the mother. If she’s kept out of sight or seems anxious and underweight, that’s a serious red flag — not something to brush off.
The environment a puppy grows up in shapes so much of who they become. A breeder who prioritises gentle handling and early exposure to everyday sights and sounds is giving their puppies the best possible start. Once yours comes home, our guide on how to socialise a puppy will help you build on that foundation.
How much you should expect to pay, and what the fee should include
Paying more for a puppy from an ethical breeder is not just about the puppy itself — it reflects the care, planning, and expense that go into raising a healthy, well-socialised litter. If you are learning how to find ethical dog breeders, this is one of the clearest signs of a reputable dog breeder: they charge for the standard of care, not just the demand for the breed.
A responsible breeder’s fee should usually include:
Health-tested parents, such as hip scores, eye tests, and breed-specific DNA testing
Full veterinary health checks for the puppies
First vaccinations
Microchipping
Regular worming and flea treatment
Good-quality food from weaning onwards
Early socialisation, including everyday household sounds, gentle handling, and new experiences
Most puppies from responsible, health-testing breeders cost somewhere between £1,000 and £3,000+, depending on breed, location, and the level of screening involved. Breeds with more extensive health checks often sit at the higher end.
It can feel like a big upfront spend, especially when cheaper puppies are advertised elsewhere. But when you look at the time, health testing, vet care, and early socialisation involved, the difference makes more sense. You are paying for a stronger start in life. Before you commit, it is also worth reading about the full cost of owning a dog so you can budget with confidence.
How to make the final choice with confidence
By the time you reach this point, you’ll have done your research, asked the tough questions, and visited the litter in person. Now it really comes down to how the whole experience felt.
One thing worth remembering: a good breeder will have asked you just as many questions as you asked them. They’ll want to know about your home, your daily routine, whether you have children or other pets, and how much experience you’ve had with dogs. That’s not them being nosy or difficult. That’s them caring deeply about where their puppies end up.
So trust your instincts. If something felt off at any point — the breeder was vague, the puppies seemed anxious, the answers felt a little too polished — it’s completely okay to walk away. Waiting a little longer for the right match is always the better call, even when the excitement of bringing a puppy home makes patience feel almost impossible.
When you do find a breeder who’s transparent, genuinely knowledgeable, and clearly devoted to their dogs, the decision stops feeling like guesswork. It feels like confidence.
Once your puppy is booked in and the countdown begins, it’s a lovely time to start getting everything ready at home. Our guide to settling your puppy into their new home is a brilliant place to start.
Frequently Asked Questions
How can I tell if a dog breeder is ethical?
You can usually tell by how the puppies are raised, how open the breeder is, and whether they put health and temperament first. Look for puppies raised in the home, a mother you can meet in person, clear health-test paperwork, and a breeder who asks plenty of questions about your life too.
Where can I find ethical dog breeders?
The safest approach is to find breeders who welcome questions, let you visit in person, and openly share health-test results for the parent dogs. Focus less on quick availability and more on breeders with real breed knowledge, home-raised puppies, waiting lists, and a genuine interest in where their puppies will live.
What is the most ethical way to buy a dog?
The most ethical way to buy a dog is to choose a breeder who raises puppies as part of family life, health-tests the parents, lets you meet the mother, and cares where each puppy goes. Always visit in person, ask detailed questions, and walk away from anyone offering handovers in car parks or without a visit.
Your dog’s birthday only comes around once a year, and it deserves more than a passing thought. This guide walks you through everything you need to know about how to celebrate your dog’s birthday in a way that actually suits them, from choosing the right activities for their personality to picking safe treats and keeping the day calm and enjoyable. Whether you’re planning a full puppy birthday celebration or simply want to make the day feel a little more special than usual, you’ll find plenty of practical ideas here to work with.
How to celebrate your dog’s birthday in a way they’ll actually enjoy
There’s something about a dog’s birthday that brings out the best in us as pet parents. Maybe you’ve been planning something for weeks, or maybe you’re sitting there right now wondering whether dogs even know it’s their birthday. (Spoiler: they don’t. But they absolutely know when you’re making a fuss of them, and they love every second of it.)
Here’s the thing: knowing how to celebrate a dog’s birthday well has less to do with balloons and banners, and more to do with knowing your dog. Some dogs would happily wear a party hat and greet ten guests at the door. Others would find the whole thing a bit much and just want an extra-long walk, a good sniff around somewhere new, and something delicious to eat. Both are completely valid. This guide will help you figure out which camp your dog falls into — and how to make the day feel genuinely special either way.
Throughout this article, we’ll cover how to tailor the celebration to your dog’s personality, which dog birthday treats and cakes are safe (and which to skip), how to keep things calm if your dog gets easily overwhelmed, and a few small touches that can turn an ordinary day into one worth remembering. Whether you’re going all-out with a puppy birthday celebration or simply want to treat your dog to a brilliant day at home, there’s something here for every dog and every budget.
If you want a little inspiration before you dive in, take a look at our dog birthday collection for treats, toys, and gifts worth wagging about.
Now, let’s start where it always should: with your dog.
Start with your dog’s personality, not the party theme
The best way to celebrate your dog’s birthday isn’t to follow a trend or recreate something you saw on Instagram. It’s to start with who your dog actually is. When you plan around their temperament, energy, and comfort level, the day becomes genuinely enjoyable for them — not just for the photos.
The social butterfly. Some dogs live for a crowd and would happily greet twenty guests with a wagging tail. If your pup loves people and thrives on excitement, a dog birthday party with familiar faces and plenty of fuss is a brilliant way to celebrate.
The shy or anxious dog. A rescue who took months to settle, or a naturally cautious dog, can find big gatherings genuinely overwhelming. A quiet afternoon with just you, a favourite toy, and a special dog birthday treat often feels far more meaningful than any party.
The high-energy adventurer. If your dog’s idea of heaven is a long run or a swim in the river, take them somewhere new and let them go for it. Building a puppy birthday celebration around what they already love beats a party they can’t sit still for.
The senior dog. Older dogs still deserve to feel special, but their joints and energy levels may call for something gentler. A slower walk, a sunny spot to doze in, and a soft treat made for older teeth can make their day just as lovely.
The food-motivated dog. For some dogs, the dog birthday cake is entirely the point. A special meal or a homemade treat is celebration enough, and they’ll be completely delighted.
There’s no single right way to mark the occasion. The best dog birthday ideas are the ones your dog would actually choose. Pay attention to what makes them happiest on an ordinary day and let that guide you. Whether you’re planning something elaborate or keeping it low-key, the Lords & Labradors dog birthday collection has plenty to suit every kind of celebration.
Simple birthday ideas your dog will genuinely love
The good news is that figuring out how to celebrate your dog’s birthday doesn’t require a party planner or a Pinterest board. The most memorable dog birthdays are usually the simplest ones, built around the things your dog already loves. A few thoughtful touches go a long way.
A special walk on their favourite route. Take them somewhere they genuinely love — the local woods, a quiet beach, or that one park where they always seem to come alive. Give them extra time to explore, let them set the pace, and resist the urge to rush. It sounds small, but a longer, unhurried walk is a real treat for most dogs.
A sniffari. Essentially a walk where your dog leads and you follow their nose. Let them sniff everything they want, stop as long as they like, choose the direction. It’s one of the best dog birthday ideas going because it’s mentally enriching and completely free. If you’re after more low-key inspiration, our guide to things to do with your dog at home is a great place to start.
A dedicated play session. Set aside 20 to 30 minutes for their favourite game — fetch, tug, hide and seek with a treat. No distractions, no half-hearted throws while you check your phone. Your full attention is genuinely one of the greatest gifts you can give a dog.
A new toy. Something to sniff, chew, and demolish (or lovingly carry everywhere for the next six months) makes a simple but satisfying birthday treat. Choose something suited to how your dog actually plays, rather than what looks good in a photo.
A homemade dog-safe treat. Dog birthday treats don’t need to be complicated. A frozen banana and peanut butter Kong, or a batch of simple baked biscuits, can feel just as celebratory as any shop-bought dog birthday cake. We’ll cover safe recipes and ingredients to avoid in the next section.
A cosy evening in. Some dogs would genuinely choose a quiet night on the sofa over any organised activity. A blanket, their favourite spot, and your undivided company can be the loveliest way to close out the day.
Whether it’s a puppy birthday celebration or you’re marking another year with your grey-muzzled best friend, the same principle applies: know your dog, keep it personal, and you really can’t go wrong.
Dog birthday treats, cakes, and party food: what’s safe and what to skip
Food is at the heart of any good celebration, and your dog’s birthday is no exception. Knowing how to celebrate your dog’s birthday safely means making smart choices about what goes in their bowl — or on their birthday plate. With a few simple swaps, you can put together a spread that feels genuinely festive and keeps tails wagging for all the right reasons.
Safe birthday treat ideas for dogs
Peanut butter and banana pupcakes (made with dog-safe, xylitol-free peanut butter)
Plain cooked chicken or turkey pieces, cut into small bites
Carrot sticks or apple slices (core and seeds removed)
Frozen natural yogurt treats, plain and unsweetened
A dog-friendly birthday cake made with oats, eggs, and dog-safe toppings like cream cheese frosting
Ingredients to avoid
Chocolate, in any form
Xylitol, a sweetener hidden in many peanut butters, baked goods, and sweets
Grapes and raisins, which are toxic to dogs even in tiny amounts
Onions and garlic, including powdered forms
Artificial sweeteners of any kind
Macadamia nuts
A note on portions
Even dog-safe treats should be given in moderation. An exciting day can already be a lot for your dog’s system, and too many rich or unfamiliar foods at once can easily tip into an upset stomach. Keep portions small and spread treats throughout the day rather than serving everything in one go.
The good news is that a thoughtful, dog-safe birthday spread doesn’t need to be complicated. A simple pupcake with a smear of peanut butter means just as much to your dog as anything more elaborate, and it keeps the day joyful without the messy aftermath. If you want a fuller picture of what your dog can safely enjoy year-round, our guide on what dogs can eat for treats is a great place to start.
How to set up a birthday that feels special without overwhelming your dog
The best way to celebrate your dog’s birthday is to build the day around what actually makes them comfortable, not what looks great on camera. Get the setup right, and the whole thing feels effortless — your dog included.
Pick the right time of day. Plan around when your dog is naturally settled. Mid-morning after a walk or a quieter post-lunch window tends to work well. Avoid times when they’re already wired or flagging.
Keep the guest list small. A couple of familiar faces is plenty for most dogs. If crowds or new people stress your dog out, keep it to immediate family and skip the party format altogether.
Set up a quiet retreat. Even on their birthday, your dog needs somewhere to decompress. Tuck their favourite bed or a cosy blanket into a low-traffic corner so they can step away whenever they need to.
Plan one dedicated photo moment. Rather than following your dog around all day hoping for a decent shot, pick a calm moment, settle them on their bed, pop on a birthday bandana, and take a few pictures. Then let them get on with their day.
Keep decorations minimal and dog-tested. If your dog is completely unbothered by balloons and bunting, go for it. If they’re likely to spook or chew everything in sight, a simple bandana gets the job done with zero drama.
Watch their body language throughout. Yawning, turning away, or quietly leaving the room are all signs your dog has had enough. Scale back anything that seems to be adding stress rather than fun.
Quick tip: Your dog won’t tell you when they’ve had enough, but they will always show you. Check in regularly and let their cues guide the pace of the day.
A simple celebration built around your dog will always feel more special than an elaborate one they spend half the time trying to escape. If you want to add a few thoughtful finishing touches, the Lords and Labradors gifts for dogs collection has some lovely options — from soft beds to birthday bandanas — that add a little something extra without overwhelming your pet.
Little ways to make the day memorable and start a birthday tradition
The best birthday celebrations have a way of becoming something you both look forward to. And once you find a rhythm that suits your dog, it gets easier and more meaningful with every passing year.
Start simple. Take a photo at the end of the day — even just a quick snap of them with their birthday treat or sprawled out after a long walk. A small collection of yearly photos becomes something genuinely lovely over time, and you’ll be surprised how much it captures the way they change.
It’s also worth jotting down a few notes about what made the day. Which treat had them doing laps around the kitchen? Did they make a new friend at the park? Small details like these are easy to forget but so nice to have. Some people keep a little birthday note tucked into a memory box; others just add a voice memo to their phone. There’s no wrong way to do it.
Repeating a favourite tradition each year is what turns a nice day into a real celebration. Maybe it’s always that particular walk, always a special meal, always a personalised birthday cake from Lords and Labradors with their name on it. The repetition is actually the point. Dogs find comfort in routine, and honestly, you might find you do too.
Knowing how to celebrate your dog’s birthday well isn’t about doing more each year. It’s about doing the things that feel right for your dog, in a way you’ll both genuinely enjoy. That’s the tradition worth keeping.
Frequently Asked Questions
Is it normal to celebrate your dog’s birthday?
Yes, it’s completely normal to celebrate your dog’s birthday. Dogs may not understand the date itself, but they absolutely notice the extra attention, favourite activities, and special treats. A celebration can be as simple as a longer walk, a new toy, or a dog-safe birthday snack at home.
Do dogs recognize their birthdays?
No, dogs don’t recognize their birthdays in the way we do. They won’t know the date, but they will notice when you make a fuss of them. Extra attention, a favourite walk, a tasty dog-safe treat, and quality time are what make the day feel special to them.
At Lords & Labradors, we specialise in dog crate bedding and accessories. Our dog crate cover and bed sets are available in a stylish choice of fabrics and come in a variety of sizes. These sets create the ultimate comfort spot for your puppy or adult dog. Luxury dog crates...
Read more
At Lords & Labradors, we specialise in dog crate bedding and accessories. Our dog crate cover and bed sets are available in a stylish choice of fabrics and come in a variety of sizes. These sets create the ultimate comfort spot for your puppy or adult dog.
Luxury dog crates
All our deluxe dog crates are made from pet-safe metal and feature removable trays to make them practical and super easy to clean. With sizes ranging from small to XXL, there’s a dog crate set to suit all breeds. Crates are essential when it comes to house training your new puppy. We always suggest buying a larger size dog crate and bed for your puppy so they can grow into it, saving you from having to purchase a new crate when they’re older.
Luxury crate bedding
Our luxury bedding is hand-crafted and designed to the highest quality, appearing both practical and stylish. Bumpers sit around the edge of the crate cushion to provide a super-soft wall of comfort for your pooch. All our bumpers and cushions feature waterproof linings in case of any accidents. It’s recommended to choose a dog crate with a cover – they’ll provide your draughty, bare cage with a fresh new look and offer some privacy for your dog too. They’re particularly great for helping young puppies settle into their night-time routines and offer nervous dogs an extra feeling of security.
Purchase your dog crate set online today
Treat your four-legged friend to one of our stylish dog crate, cover, bedding and bumper sets by browsing our online range today. If you’re struggling to decide which one would be perfect for your pooch, contact our team today who will be more than happy to help. You’ll have 28 days to return your product if you’re unhappy with it for any reason. Our Lords & Labradors items also come with a 365-day quality guarantee, so it’s easy to see why we’ve received so many positive reviews. We also offer free delivery on all orders over £75. Browse the range and order your dog crate set today.
Read less
Top
Choosing a selection results in a full page refresh.



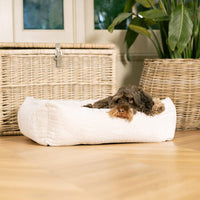


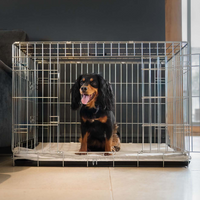





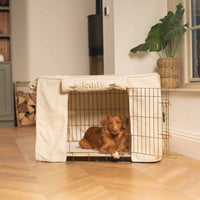
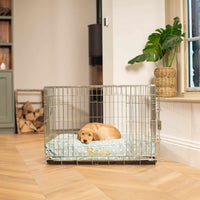


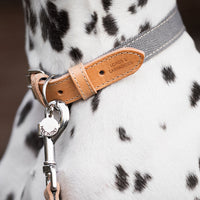
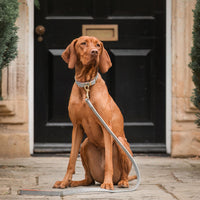


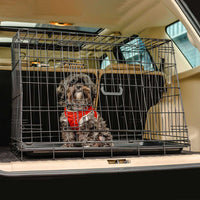
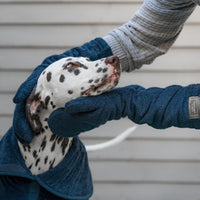
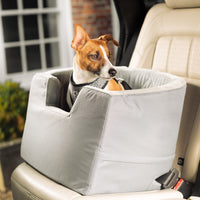


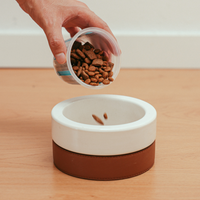
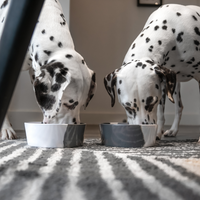
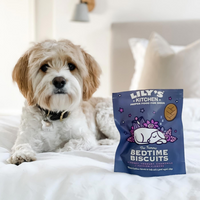


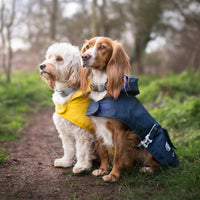

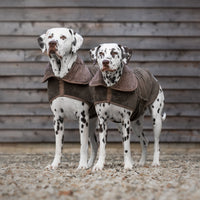


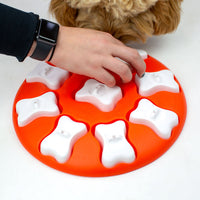
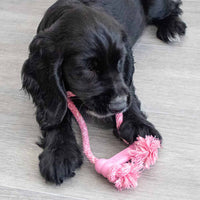


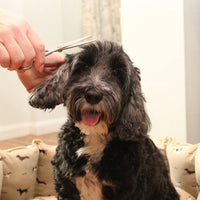

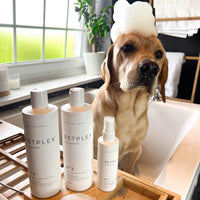


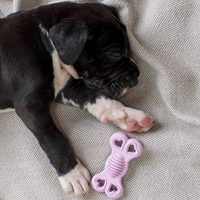
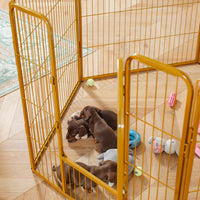


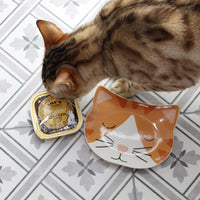
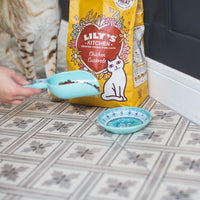
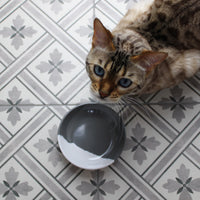


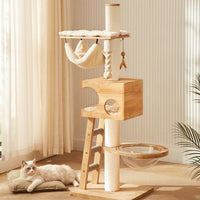
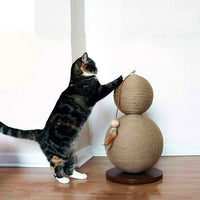




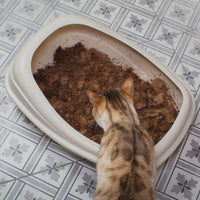
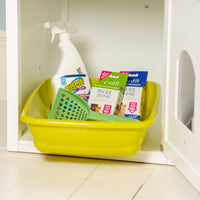


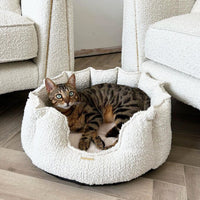
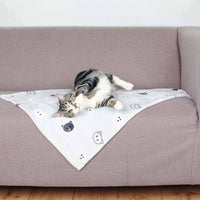
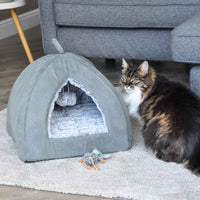




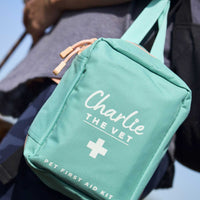


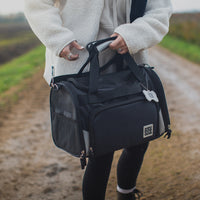

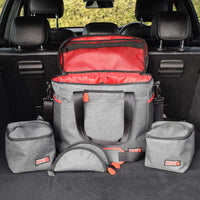



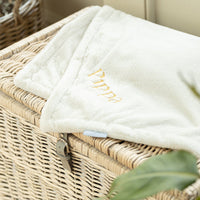


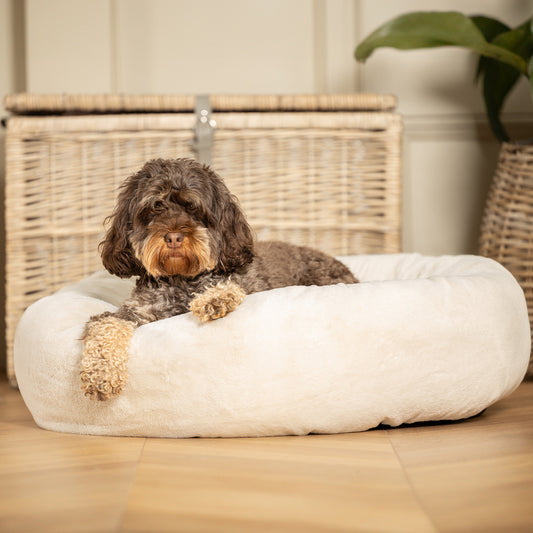


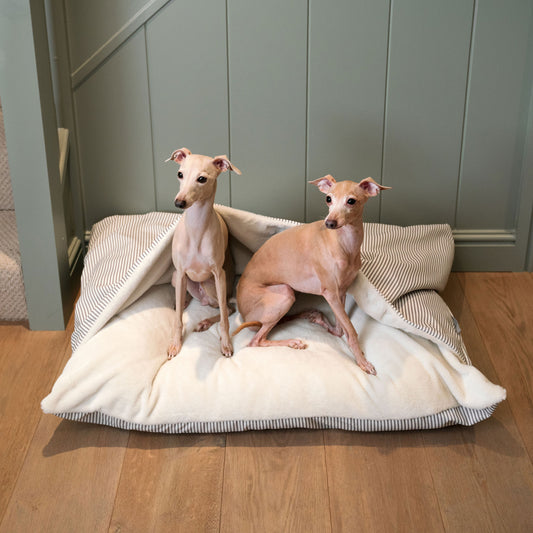


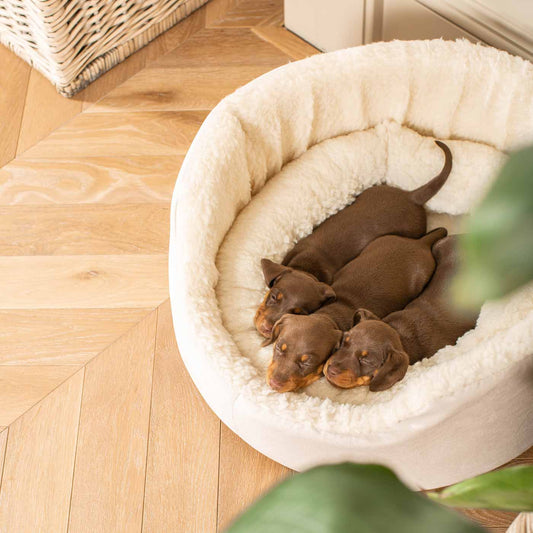


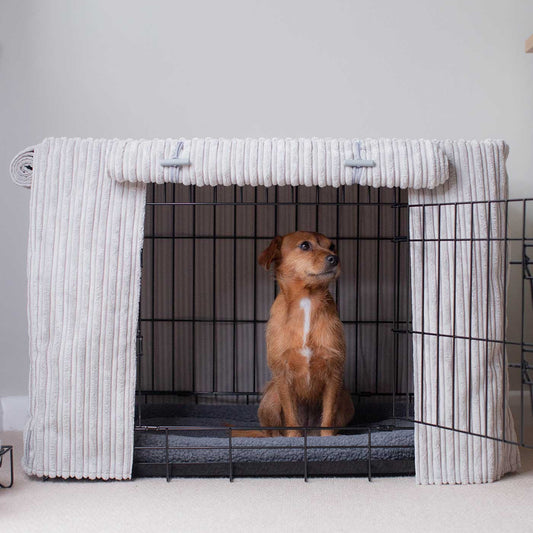

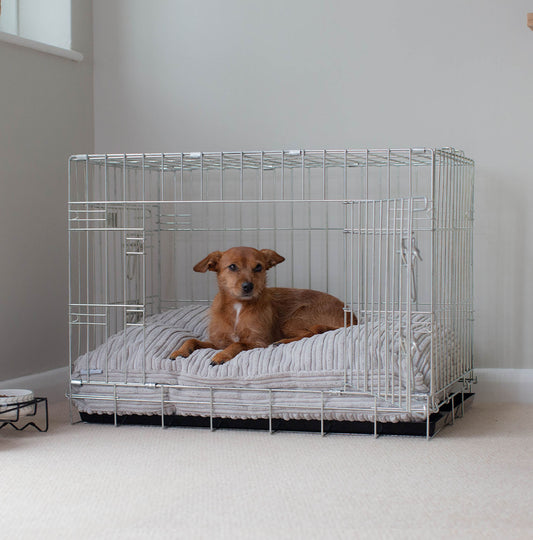


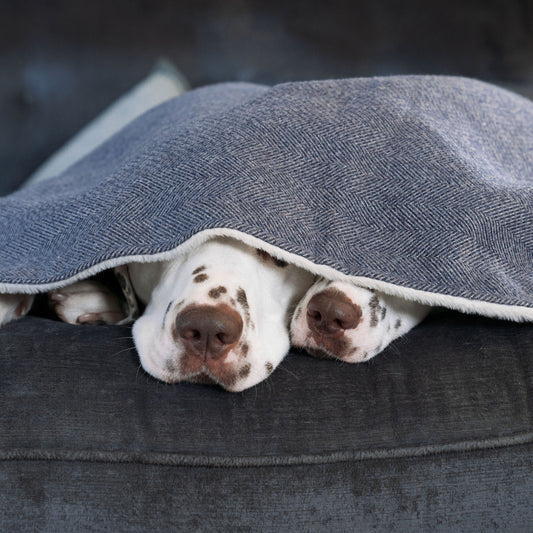


![[color:hh pink]](http://www.lordsandlabradors.co.uk/cdn/shop/files/Hugo-Hudson-Reversible-Puffer-Jacket-pink_eed0f83b-3d41-4b01-8c6a-1dcd57e38550.jpg?v=1705421785&width=533)