





















Guide To Bathing Your Dog
18.05.23 May 18, 2023 Health

Guide To Bathing Your Dog

Bathing your dog is an essential part of their overall grooming routine. Not only does it keep their coat clean and shiny, but it also helps maintain their overall hygiene. However, as a dog owner, you may find yourself wondering, "How often should I bathe my dog?" and "What's the best way to bathe them?" Well, fear not! In this comprehensive guide, we'll answer all your questions and provide you with helpful tips to make bath time an easy experience for both you and your beloved canine companion. How Often Should You Bathe a Dog? One of the most common queries among dog owners is how frequently they should bathe their furry pals. The answer varies depending on several factors, such as your dog's breed, coat type, and lifestyle. In general, most dogs benefit from a bath every 4-6 weeks. However, certain breeds with specific coat types may require more frequent bathing, while others may need it less often. Our pet experts have written an in-depth guide on how often you should groom your breed of dog which is definitely worth checking out.   Can I Bathe My Dog Once a Week? While regular bathing is important for maintaining cleanliness, it's generally not recommended to bathe your dog more than once a week. Frequent bathing can strip their coat of natural oils, leading to dry skin and irritation. However, certain situations, such as skin allergies or medical conditions, may require more frequent bathing depending on your vet’s advice.   What Do I Need To Bath My Dog At Home?  Dog Specific Shampoo - We recommend PetPlex, they have shampoos suitable for different coat types, ages and skin conditions so there’s sure to be something for your dog. Dog Specific Conditioner - pamper your pooch with a conditioner, this will help keep their coat looking shiny and silky. Detangling Spray - A Detangling Spray is good for curly haired or long haired dogs before their bath to help remove any knots or matts, this will help make the bathing process as easy as possible A Brush or Comb - there are lots of different types of brushes and the best one for your dog will depend on their coat type. Explore our range of brushes to find the best one for your furry friend. Drying Coat, mitts or towel - You’ll have a soggy doggy after a bath and having something you can dry your dog off with will come in handy. An old towel works or our favourite-fuss free way to dry your dog off is with a drying coat. They simply slip on over your dog’s head and fasten under their belly. Alternatively our drying mats are one size fits all and making drying your dog quick and easy Treats or a licki mat - you want your dog to associate bath time as a fun positive experience and a rewards based training method is our favourite way to do this. Having plenty of treats to hand and praising your dog throughout the process will help them form positive associations with the process. 
The anti-anxiety bath ducks are great for distracting nervous dogs, they stick to the wall and you can put wet food or peanut butter on there for your dog to lick off whilst you bathe them. Licking is actually anxiety reducing for dogs as it releases calming hormones so is perfect for nervous dogs. 
If you do have a nervous pup on your hands why not check out our blog on how to desensitise your dog to grooming, it has our pet experts top tips and tricks on how to make grooming your dog a calmer experience for you both. How To Bathe A Dog At Home: Now that you know the ideal frequency and the essentials you’ll need, let's dive into the step-by-step process of how to bathe your dog: Gather Your Supplies: Have all the items we listed above to hand, making sure they’re in reaching distance will make bath time easier for you and your dog Prep the Bathing Area: Choose a suitable location for the bath, preferably a bathtub or a large wet room. You can place a non-slip mat at the bottom to provide your dog with a secure footing, this is a good idea if your dog doesn’t love bath time and likes to move around. Brush Your Dog: We recommend brushing your dog's coat thoroughly before bathing them to remove any loose fur or tangles, especially if they have a long or curly hair coat. This will prevent matting and will mean it’s easier to make sure your dog’s coat is fully clean. Test The Temperature You’ll want the water to be lukewarm, not too hot or cold. You can either run a bath or use the shower to wash your dog, whichever works best for you and your dog. Rinse Your Dog’s Coat
 Work from the neck down with either a jug of water or the shower head to pour water over your dog’s coat. You’ll want to make sure their coat is nice and wet Shampooing Your Dog 
You’ll want to either put a small amount of shampoo in your hand and massage it into your dog’s coat making sure it lathers up, or you can use a shampoo brush like this Rosewood brush, which allows you to put shampoo in the top and dispenses it as you brush your dog’s coat. Be careful of their eyes and ears and focus on their body and paws. Once you’ve shampooed your dog’s body you’ll want to rinse them off with lukewarm water to remove the suds, making sure no product remains in their coat.  Conditioning Your Dog 
Once you’ve shampooed your dog, you’ll want to apply a conditioner. This will help keep their coats shiny by adding moisture back in after shampooing them. Massage into your dog’s coat and then leave for a couple of minutes before rinsing Wash Your Dog’s Face
 Whilst your conditioner is soaking into your dog’s coat it’s a good time to wash their face. We recommend using a cloth or a flannel with some clean water to wipe their face clean, you want to avoid getting any shampoo in their eyes or ears. How To Dry A Dog After The Bath: After rinsing, use a large towel, drying mitts or a drying coat to gently dry your dog's coat. If your dog is comfortable with a blow dryer on a low heat setting, you can use it to speed up the drying process. Make sure to keep it at a safe distance from their skin. Gradually dry their coat, keeping the dryer moving to avoid overheating any particular area. Brushing Your Dog 
Once your dog's coat is mostly dry, use a brush or comb appropriate for their coat type to remove any remaining tangles or mats. Reward Your Pup
 After bath time make sure to give your pup plenty of fuss and reward them for being a good boy or girl during bath time. Our Pet Experts Tips To A Successful Bathing Experience: To make bath time enjoyable for both you and your furry friend, our pet experts have put together their top tips: Introduce Bathing Gradually: If your dog is not accustomed to baths, introduce the process gradually. Start by getting them comfortable with water by offering treats or toys near the bath area. Gradually progress to wetting their paws, then their entire body. This is a great thing to do with them right from the get-go as a puppy as it helps to desensitise them from a young age Positive Reinforcement: Use positive reinforcement throughout the bathing process. Reward your dog with treats, praise, and gentle strokes to make them associate bath time with positive experiences. Ear Care: During bathing, be cautious not to let water enter your dog's ears, as it can cause infection. Use cotton balls to plug their ears or consider using a specialised ear cleaning solution after the bath to keep their ears clean and dry. Nail Trimming: Bath time can also be an opportunity to trim your dog's nails if needed. However, if you're unsure or uncomfortable doing so, it's best to consult a professional groomer or veterinarian. We’ve got a handy guide on cutting your dog’s claws. Double Shampoo: 
Our pet experts recommend shampooing your dog twice, as long as they don’t have sensitive skin. This will help make sure they’re squeaky clean Drying Your Dog: Avoid rubbing your dog when towel or mitt drying them, this could cause matts or tangles in their coat. Instead gently pat them dry. Bathing your dog is an important part of their overall hygiene routine. By following the tips and guidelines provided in this guide, you can ensure a pleasant and effective bathing experience for your furry companion. Remember to consider your dog's breed, coat type, and lifestyle when determining the ideal bathing frequency. With patience, positive reinforcement, and proper care, bath time can become a bonding experience that leaves your dog feeling clean, healthy, and happy.

By Megan Willis

Read more
Bathing your dog is an essential part of their overall grooming routine. Not only does it keep their coat clean and shiny, but it also helps maintain their overall hygiene. However, as a dog owner, you may find yourself wondering, "How often should I bathe my dog?" and "What's the best way to bathe them?" Well, fear not! In this comprehensive guide, we'll answer all your questions and provide you with helpful tips to make bath time an easy experience for both you and your beloved canine companion.

How Often Should You Bathe a Dog?

One of the most common queries among dog owners is how frequently they should bathe their furry pals. The answer varies depending on several factors, such as your dog's breed, coat type, and lifestyle. In general, most dogs benefit from a bath every 4-6 weeks. However, certain breeds with specific coat types may require more frequent bathing, while others may need it less often. Our pet experts have written an in-depth guide on how often you should groom your breed of dog which is definitely worth checking out.

Dachshund being shampooed


Can I Bathe My Dog Once a Week?

While regular bathing is important for maintaining cleanliness, it's generally not recommended to bathe your dog more than once a week. Frequent bathing can strip their coat of natural oils, leading to dry skin and irritation. However, certain situations, such as skin allergies or medical conditions, may require more frequent bathing depending on your vet’s advice.


What Do I Need To Bath My Dog At Home? 

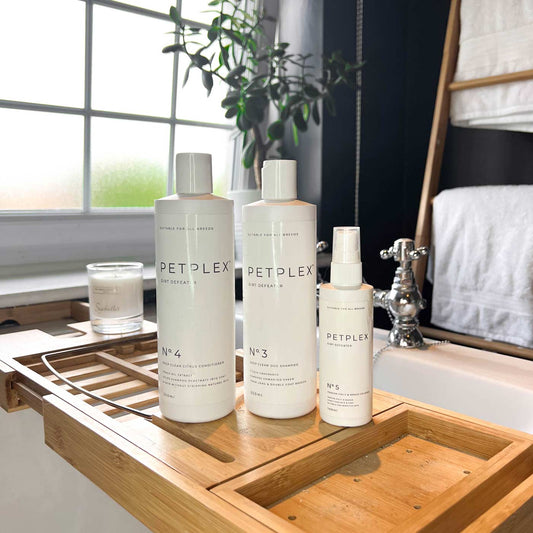
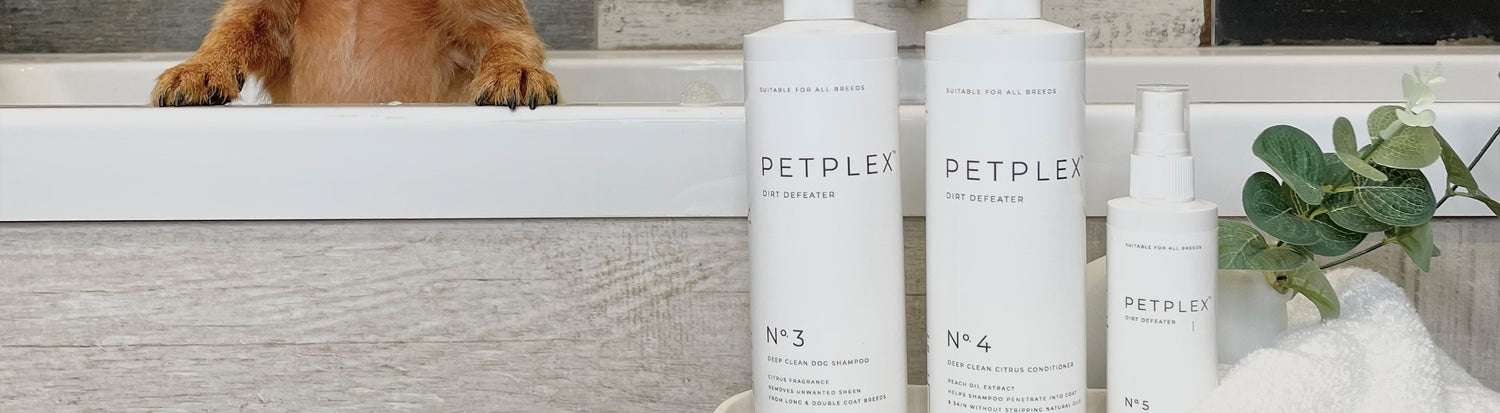
  • Dog Specific Shampoo - We recommend PetPlex, they have shampoos suitable for different coat types, ages and skin conditions so there’s sure to be something for your dog.
  • Dog Specific Conditioner - pamper your pooch with a conditioner, this will help keep their coat looking shiny and silky.
  • Detangling Spray - A Detangling Spray is good for curly haired or long haired dogs before their bath to help remove any knots or matts, this will help make the bathing process as easy as possible
  • A Brush or Comb - there are lots of different types of brushes and the best one for your dog will depend on their coat type. Explore our range of brushes to find the best one for your furry friend.
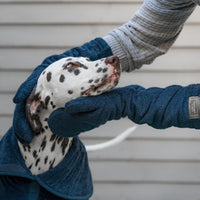
  • Drying Coat, mitts or towel - You’ll have a soggy doggy after a bath and having something you can dry your dog off with will come in handy. An old towel works or our favourite-fuss free way to dry your dog off is with a drying coat. They simply slip on over your dog’s head and fasten under their belly. Alternatively our drying mats are one size fits all and making drying your dog quick and easy
  • Treats or a licki mat - you want your dog to associate bath time as a fun positive experience and a rewards based training method is our favourite way to do this. Having plenty of treats to hand and praising your dog throughout the process will help them form positive associations with the process. 
The anti-anxiety bath ducks are great for distracting nervous dogs, they stick to the wall and you can put wet food or peanut butter on there for your dog to lick off whilst you bathe them. Licking is actually anxiety reducing for dogs as it releases calming hormones so is perfect for nervous dogs. 
If you do have a nervous pup on your hands why not check out our blog on how to desensitise your dog to grooming, it has our pet experts top tips and tricks on how to make grooming your dog a calmer experience for you both.
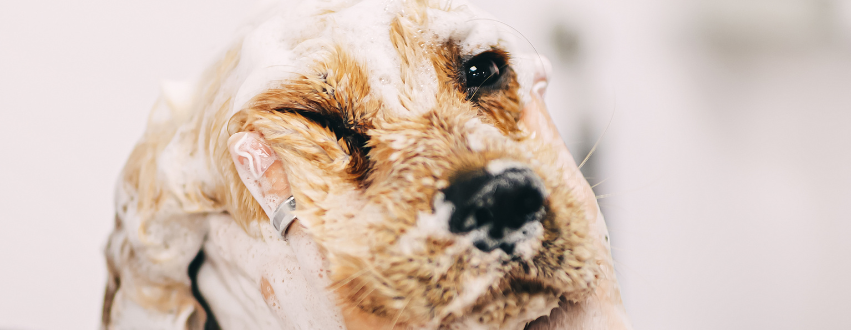
Cockerspaniel bathing routine


How To Bathe A Dog At Home:

Now that you know the ideal frequency and the essentials you’ll need, let's dive into the step-by-step process of how to bathe your dog:

  1. Gather Your Supplies:

    Have all the items we listed above to hand, making sure they’re in reaching distance will make bath time easier for you and your dog

  2. Prep the Bathing Area:

    Choose a suitable location for the bath, preferably a bathtub or a large wet room. You can place a non-slip mat at the bottom to provide your dog with a secure footing, this is a good idea if your dog doesn’t love bath time and likes to move around.

  3. Brush Your Dog:

    We recommend brushing your dog's coat thoroughly before bathing them to remove any loose fur or tangles, especially if they have a long or curly hair coat. This will prevent matting and will mean it’s easier to make sure your dog’s coat is fully clean.

  4. Test The Temperature

    You’ll want the water to be lukewarm, not too hot or cold. You can either run a bath or use the shower to wash your dog, whichever works best for you and your dog.

  5. Rinse Your Dog’s Coat


    Work from the neck down with either a jug of water or the shower head to pour water over your dog’s coat. You’ll want to make sure their coat is nice and wet
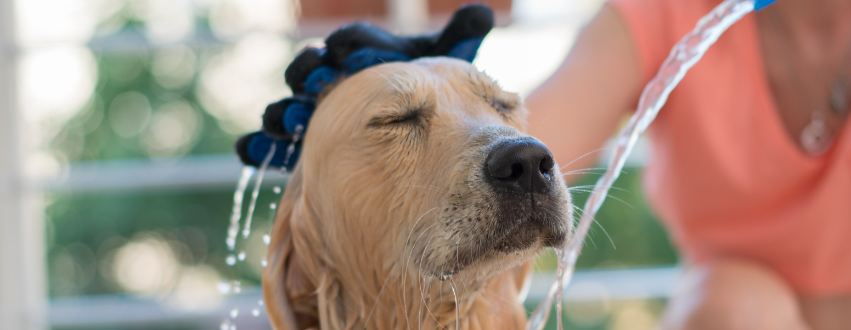
    Golden retriever rinsing shampoo off in the bath

  6. Shampooing Your Dog

    
You’ll want to either put a small amount of shampoo in your hand and massage it into your dog’s coat making sure it lathers up, or you can use a shampoo brush like this Rosewood brush, which allows you to put shampoo in the top and dispenses it as you brush your dog’s coat. Be careful of their eyes and ears and focus on their body and paws. Once you’ve shampooed your dog’s body you’ll want to rinse them off with lukewarm water to remove the suds, making sure no product remains in their coat.

  7.  Conditioning Your Dog

    
Once you’ve shampooed your dog, you’ll want to apply a conditioner. This will help keep their coats shiny by adding moisture back in after shampooing them. Massage into your dog’s coat and then leave for a couple of minutes before rinsing
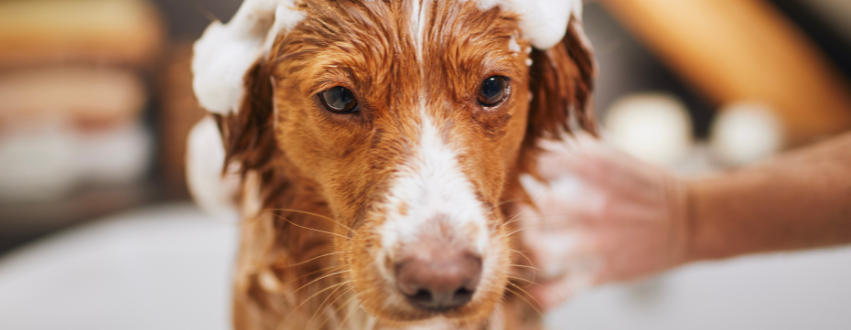
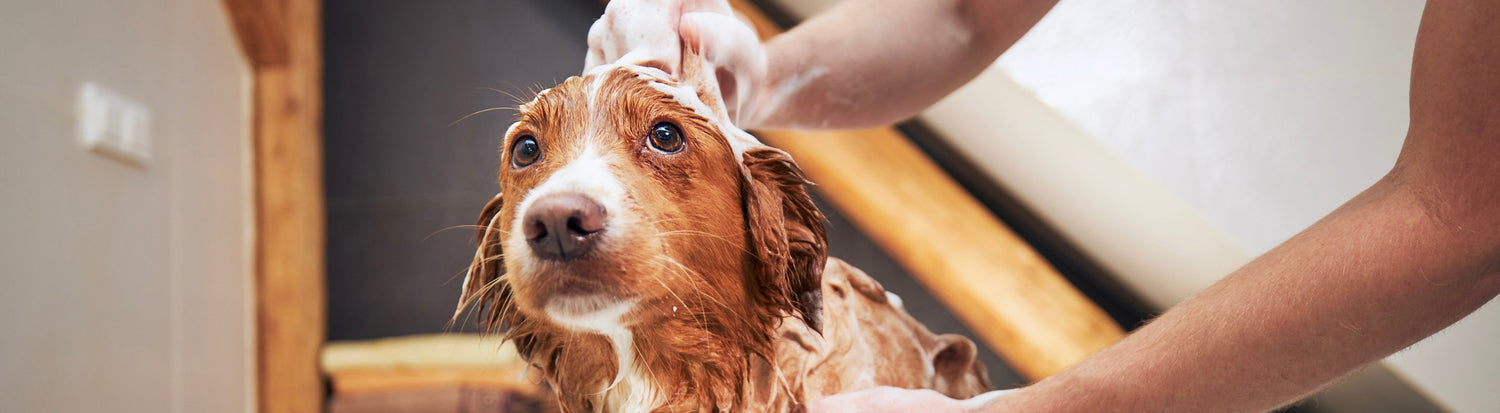
    Nova Scotia Duck Tolling Retriever being bathed

  8. Wash Your Dog’s Face


    Whilst your conditioner is soaking into your dog’s coat it’s a good time to wash their face. We recommend using a cloth or a flannel with some clean water to wipe their face clean, you want to avoid getting any shampoo in their eyes or ears.

  9. How To Dry A Dog After The Bath:

    After rinsing, use a large towel, drying mitts or a drying coat to gently dry your dog's coat. If your dog is comfortable with a blow dryer on a low heat setting, you can use it to speed up the drying process. Make sure to keep it at a safe distance from their skin. Gradually dry their coat, keeping the dryer moving to avoid overheating any particular area.

  10. Brushing Your Dog

    
Once your dog's coat is mostly dry, use a brush or comb appropriate for their coat type to remove any remaining tangles or mats.

  11. Reward Your Pup


    After bath time make sure to give your pup plenty of fuss and reward them for being a good boy or girl during bath time.


Our Pet Experts Tips To A Successful Bathing Experience:

To make bath time enjoyable for both you and your furry friend, our pet experts have put together their top tips:

  • Introduce Bathing Gradually: If your dog is not accustomed to baths, introduce the process gradually. Start by getting them comfortable with water by offering treats or toys near the bath area. Gradually progress to wetting their paws, then their entire body. This is a great thing to do with them right from the get-go as a puppy as it helps to desensitise them from a young age
  • Positive Reinforcement: Use positive reinforcement throughout the bathing process. Reward your dog with treats, praise, and gentle strokes to make them associate bath time with positive experiences.
  • Ear Care: During bathing, be cautious not to let water enter your dog's ears, as it can cause infection. Use cotton balls to plug their ears or consider using a specialised ear cleaning solution after the bath to keep their ears clean and dry.
  • Nail Trimming: Bath time can also be an opportunity to trim your dog's nails if needed. However, if you're unsure or uncomfortable doing so, it's best to consult a professional groomer or veterinarian. We’ve got a handy guide on cutting your dog’s claws.
  • Double Shampoo: 
Our pet experts recommend shampooing your dog twice, as long as they don’t have sensitive skin. This will help make sure they’re squeaky clean
  • Drying Your Dog: Avoid rubbing your dog when towel or mitt drying them, this could cause matts or tangles in their coat. Instead gently pat them dry.
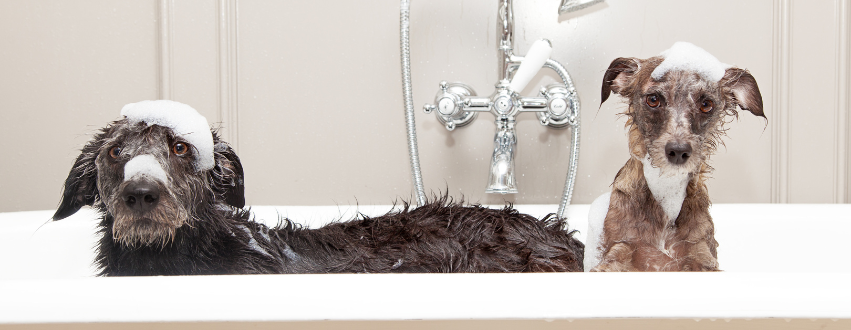
Two dogs in the bath


Bathing your dog is an important part of their overall hygiene routine. By following the tips and guidelines provided in this guide, you can ensure a pleasant and effective bathing experience for your furry companion. Remember to consider your dog's breed, coat type, and lifestyle when determining the ideal bathing frequency. With patience, positive reinforcement, and proper care, bath time can become a bonding experience that leaves your dog feeling clean, healthy, and happy.

Related Products

Related Collections

Dog Grooming & Healthcare

Lords & Labradors’ range of dog grooming equipment contains all the products... 

Next Article
Our Top Summer Dog Accessories For Home & Away

Related Articles

  • Best flea treatment for dogs: what works fastest and lasts longest
    08.10.26 October 08, 2026 Health

    Best flea treatment for dogs: what works fastest and lasts longest

    Finding the best flea treatment for dogs gets overwhelming fast, especially when every product promises to be the strongest, quickest, or most long-lasting option on the shelf. This guide cuts through that noise by looking at how quickly different treatments actually work, how long they last between doses, and which formats are genuinely easiest to use in real life. By the end, you’ll have a clear sense of what suits your dog’s age, size, and routine, without the second-guessing. What flea treatment actually needs to do when you’ve spotted the first itch Spotting your dog scratching more than usual tends to trigger that same panic in every pet parent: what’s going on, and how do I fix it fast? Here’s the thing — a single flea is rarely just one flea. By the time you notice the itch, eggs may already be dropping into your carpet, bedding, and sofa cushions. So the best flea treatment for dogs needs to do more than kill the adults you can see. It also needs to tackle eggs and larvae before they hatch, then keep working long enough to stop new fleas hitching a ride after walks, park visits, or a playdate with a friend’s dog. That’s why it’s worth understanding what each product type actually does before you buy. Spot-ons are applied directly to the skin at the back of the neck, absorbing into the coat and skin oils to kill fleas on contact. Chewable tablets work through the bloodstream and tend to act quickly, making them a go-to when you need the fastest flea treatment for dogs. Collars release active ingredients steadily over weeks or months, so they’re well suited to long-lasting flea and tick treatment with minimal effort. Sprays are more targeted and handy for a top-up between doses, or if your dog simply won’t tolerate tablets or pipettes. Before settling on one, think honestly about how your dog handles different application methods, how often you can realistically re-treat, and whether you’re fighting an active infestation or trying to stay ahead of one. If it’s the former, our guide on how to get rid of fleas on your dog is a brilliant place to start. If you need fast relief, which flea treatment works quickest? When your dog is already scratching, “fastest” matters, but it isn’t the same for every type of flea treatment for dogs. The key thing to know is that timings vary by active ingredient and brand, so it’s better to treat these as typical patterns rather than fixed rules. Format Typical start time What to know Best for Oral tablet Often within hours Some products begin killing fleas very quickly, but timing depends on the tablet Fast relief when fleas are already causing real irritation Spot-on Usually within several hours to around a day Needs time to spread across the skin and coat Good all-round option for treatment plus ongoing cover Spray Varies widely by product Can be useful for direct, targeted use, but may need more hands-on application Small areas or dogs who need a more local approach Collar Usually slower to fully protect Better at ongoing prevention than immediate relief Longer-term flea and tick support Worth knowing: If your priority is the fastest flea treatment for dogs, oral options are often the quickest to start working, but always check the label for the specific product you’re considering. In real life, that means a miserable, constantly scratching dog may need a different choice from one who just needs steady monthly protection. A collar can be brilliant for prevention, but it usually wouldn’t be my first pick for urgent relief. Spot-ons sit somewhere in the middle: not usually the fastest option, but often a practical balance of ease and longer-lasting cover. If that’s what you’re after, Frontline Plus for small dogs is a helpful example of a spot-on to compare when you’re weighing up convenience, monthly protection, and whether it feels like the best flea treatment for dogs for your routine. Which flea treatment lasts longest between doses? If you’ve ever come home from a weekend away and quietly panicked trying to remember whether you treated your dog before you left, you already know why duration matters. Finding a long-lasting flea treatment for dogs can genuinely take one more thing off your mental load, whether you’re out on muddy woodland walks every Saturday or heading off somewhere with your dog in tow. Treatment Type Typical Duration Best For Convenience Rating Spot-ons Up to 4 weeks Most dog owners, easy monthly routine 4/5 Tablets 24 hours to 3 months (varies by product) Dogs who hate topical treatments 3/5 Collars Up to 8 months Owners wanting long-term, hands-off protection 5/5 Sprays Days to a few weeks Top-up coverage or treating the environment 2/5 Worth knowing: Spot-ons like Frontline Plus offer up to four weeks of flea and tick protection from a single application. Set a monthly reminder, apply it, and you’re done. Longer-lasting formats make missed doses far less likely, and that’s no small thing when life gets busy. For most pet parents, the best flea treatment for dogs isn’t necessarily the most advanced one on the market — it’s the one that slots into your existing routine without you having to think too hard about it. A good dog flea and tick treatment should just quietly get on with the job, leaving you free to enjoy the walk rather than worry about what might be lurking in the long grass. What’s easiest to give your dog: spot-on, tablet, collar or spray? The best flea treatment for dogs isn’t just about what kills fleas fastest. It’s also about what your dog will actually tolerate, and what fits into your life without becoming a whole production. A treatment that sits unopened in the cupboard because your dog bolts the moment you reach for it isn’t helping anyone. Format Best For Watch Out For Spot-on Dogs who are easy to handle and don’t swim or bathe frequently Can feel greasy; needs to absorb fully before contact with other pets Tablet Fussy handlers or multi-dog households where cross-contact is a concern Determined fussy eaters will find it, even inside a pill pocket Collar Set-and-forget households wanting long-term coverage Fit matters; some dogs find them uncomfortable or chew them off Spray On-demand use between treatments or for lighter coverage Needs applying thoroughly; some dogs dislike the sensation Before you decide, it’s worth thinking through a few practical questions: Does your dog swim or get bathed regularly? Both can affect how well spot-ons and collars hold up. Are they a dedicated fussy eater who sniffs out tablets no matter how well you hide them? Do you have multiple dogs where a freshly applied spot-on could transfer during a cuddle? Would you rather apply once and forget about it, or do you prefer the flexibility to treat as needed? Does your dog get anxious around handling, aerosol sounds, or anything fastened near their neck? No single format suits every dog, which is why lifestyle fit matters just as much as efficacy. If you want something flexible to use between treatments, our dog sprays are a low-fuss option worth keeping in the cupboard for when you actually need them. How to choose the safest option for your dog’s age, size and lifestyle The best flea treatment for dogs isn’t always the one making the boldest promises on the box. It’s the one that actually fits your dog — their age, their size, their skin, and how they spend their days. Getting that match right is what separates a treatment that works from one that quietly disappoints. Before you buy, run through these checks: Minimum age: Many treatments aren’t suitable for puppies under eight or twelve weeks. Always check the label before using anything on a young dog. Weight band accuracy: Flea treatments are dosed by weight, so using the wrong band can mean under-dosing or, more seriously, giving too much. Weigh your dog before you buy. Skin sensitivity: If your dog has reacted to topical treatments before, a tablet-based option may suit them better. Other medications or health conditions: Some ingredients interact with existing treatments. If your dog is on medication, a quick call to your vet is worth it. Swimming and bathing habits: Spot-ons can lose their effectiveness faster on dogs that swim regularly or get bathed weekly. A collar or tablet tends to hold up better in those cases. Puppy-safe formulas differ significantly from adult treatments — always check the minimum age on the label before applying anything. There are plenty of long-lasting and fast-acting dog flea and tick treatment options available, but they only do their job properly when they’re right for the individual dog. If you have a puppy or a younger dog joining the family, our puppy flea and worming treatments are a good place to start. How to make the final choice without overthinking it If you’ve made it through this guide and you’re still not quite sure which way to go, here’s a simple way to think about it. If your dog is already scratching and miserable, speed is what matters right now. Find a fast-acting flea treatment for dogs that starts working within hours, and figure out the longer-term routine once the immediate discomfort is sorted. If you’re someone who forgets monthly doses, honestly, you’re in good company — pick the longest-lasting option you can find. A treatment that covers three months gives you far more breathing room than one you need to remember every four weeks like a recurring alarm you keep snoozing. And if your dog is the type who clamps their jaw shut the second anything remotely medicinal appears, go with whatever format they’ll actually tolerate. A spot-on they barely notice beats a chew they spit out across the kitchen floor every single time. Once you know which of those three things matters most, the best flea treatment for dogs for your situation becomes a lot easier to land on. It really does come down to your dog, your routine, and your life — not some universal right answer. To compare options across all three priorities, take a look at the Lords and Labradors Frontline flea and worming range and find something that actually works for both of you.

    By Adele Busby

    Read more
  • What to Do When Your Dog is Reverse Sneezing
    24.08.26 August 24, 2026 Health

    What to Do When Your Dog is Reverse Sneezing

    That sudden honking, snorting sound your dog makes out of nowhere is enough to stop any pet parent’s heart, but knowing what to do when your dog is reverse sneezing makes all the difference. In this guide, we’ll walk you through why it happens, how to keep both of you calm in the moment, and which signs are worth a call to the vet. We’ll also share some simple changes you can make at home to reduce how often it happens in the first place. What reverse sneezing looks and sounds like in dogs If you’ve ever watched your dog suddenly freeze, stretch their neck forward, and let out a loud, honking snort like they’re trying to inhale and sneeze at the same time, you’ve almost certainly witnessed a reverse sneeze. It sounds alarming. It looks alarming. And if you had no idea what you were watching, panicking is a completely natural response. The reassuring news? Reverse sneezing is usually harmless. It’s not a cough, not a seizure, and not a sign that something is lodged in their throat. Think of it as a reflex, much like a regular sneeze, just working in reverse. Instead of air rushing outward, your dog rapidly pulls air in through their nose, producing that distinctive snorting or honking sound that tends to stop everyone in the room. During an episode, most dogs stand still with their elbows splayed, neck outstretched, and eyes wide open. Some look genuinely distressed, which is hard to watch even when you know what’s happening. The episode itself usually lasts anywhere from a few seconds to around a minute, and the vast majority of dogs bounce back to their normal selves almost immediately. Paying attention to how your dog behaves before and after can tell you a lot. A dog that’s relaxed and happy on either side of the episode is generally nothing to worry about. Our guide to understanding your dog’s body language can help you get better at reading those subtle signals. Recognising what reverse sneezing looks and sounds like is honestly half the battle — because once you know, it’s so much easier to stay calm when it happens. Why dogs reverse sneeze in the first place Reverse sneezing is an involuntary reflex, and it usually comes down to something irritating the soft palate, throat, or nasal passages. Think of it like a sneeze in reverse — the body trying to clear an irritant rather than signal that something is seriously wrong. Most dogs will experience it at some point, and for the vast majority, it’s completely normal. Common triggers include: Nasal or throat irritation from dust, pollen, or mould Excitement or over-stimulation, like bounding over to greet you at the door Pulling on the lead, which puts pressure on the throat Eating or drinking too fast Strong scents, household sprays, or air fresheners Sudden changes in temperature or air quality Being a flat-faced (brachycephalic) breed, such as a Pug, French Bulldog, or Cavalier King Charles Spaniel — their shorter airways make them anatomically more prone to episodes Understanding the dog reverse sneezing causes behind an episode really does help in the moment. Once you recognise that the body is simply doing what it needs to do — the same way we might need to cough or clear our throat — it’s much easier to stay calm rather than panic. And calm is exactly what your dog needs from you. The good news is that most episodes pass within seconds to about a minute. One moment your dog is honking away, and the next they’re trotting off like nothing happened. That’s usually all there is to it. What to do in the moment when your dog is reverse sneezing If you’re wondering what to do when your dog is reverse sneezing, the first thing is simple: try not to panic. It can sound dramatic, especially the first time you hear it, but many episodes are brief and pass within 30 seconds to a minute. Your calm really helps. In the moment, focus on gentle comfort: Stay relaxed and speak softly. Your dog will pick up on your energy. A quiet, reassuring voice can help them settle while the episode passes. Gently stroke their throat or chest. Slow, light strokes may encourage a swallow, which can help the spasm ease naturally. Offer a tiny sip of water if they’re settled enough to take it. Not a full bowl, and don’t force it. Sometimes a small swallow is all that’s needed. Move them away from obvious triggers. If they’ve been sniffing dust, pulling on the lead, or sitting near strong smells like candles or cleaning sprays, guide them to a calmer spot with fresher air. A good rule of thumb with reverse sneezing in dogs treatment at home is to keep things quiet, gentle, and low-stress. Most of the time, your job is simply to comfort rather than intervene. What not to do: Don’t put your fingers in your dog’s mouth Don’t hold them down or restrain them forcefully Don’t fuss loudly or crowd them, even if you feel worried Once it’s over, many dogs go straight back to normal as if nothing happened. If your dog’s reverse sneezing symptoms seem to happen often, last longer than usual, or leave them distressed, that’s when it’s sensible to think about dog reverse sneezing causes and whether a vet check is the right next step. When reverse sneezing is worth a vet call Most of the time, reverse sneezing in dogs is completely harmless and passes within seconds. But if you start noticing that episodes are happening more often, or that your dog seems off afterwards, it’s worth paying closer attention. You know your dog better than anyone, so trust that instinct. These are the signs that deserve a vet conversation: Episodes happening multiple times a day, or lasting longer than a minute Your dog seeming distressed, panicked, or wiped out afterwards Nasal discharge, whether clear, cloudy, or discoloured A new cough appearing alongside the reverse sneezing Laboured or noisy breathing between episodes Gums that look pale or slightly blue Lethargy, low energy, or a noticeable dip in appetite An occasional isolated episode is rarely cause for concern. A recurring or worsening pattern is always worth getting checked. When to worry about dog reverse sneezing really comes down to that shift in pattern. A vet can look into common culprits like allergies, a low-grade infection, a foreign body in the nasal passage, or a structural issue affecting the airway. None of these are things you’d pick up at home, but all of them are very treatable when caught early. Even if everything turns out to be fine, you’ll come away with peace of mind, and that’s never wasted. How to reduce reverse sneezing triggers at home Once you understand what sets your dog off, a few small tweaks at home can make a real difference. If your dog tends to pull on the lead and reverse sneezes regularly, switching to a well-fitted harness is one of the easiest wins. Collar pressure on the throat is a surprisingly common trigger, and a harness removes it entirely. Inside, it’s worth thinking about air quality too. Dust little and often, skip the heavily scented candles or plug-in air fresheners, and if you use cleaning sprays, let the room air out before your dog wanders back in. Small habits, but they stack up. Fast eaters are also worth a closer look. Gulping food can irritate the throat and kick off an episode, so a slow feeder bowl or snuffle mat at mealtimes can genuinely help. Beyond that, it’s worth keeping a loose mental note of when episodes happen. After a walk during high pollen season? After a boisterous play session? Spotting a pattern gives you something real to work with, whether that’s adjusting walk times or winding down play more gradually. The reassuring truth is that most dogs live completely happily alongside the occasional reverse sneeze. Now that you know what it looks like, why it happens, and what to do in the moment, you’re already better placed to handle it calmly when it comes. Frequently Asked Questions How to calm down reverse sneezing in dogs? The best way to calm reverse sneezing is to stay relaxed and gently comfort your dog while it passes. Speak softly, stroke their throat or chest, offer a tiny sip of water if they’re settled enough, and move them away from dust, strong smells, or other obvious triggers. When to worry about reverse sneezing? Reverse sneezing is worth worrying about if it becomes frequent, lasts longer than a minute, or your dog seems unwell afterwards. Signs that need a vet call include distress, nasal discharge, a new cough, noisy breathing between episodes, pale or blue gums, lethargy, or a drop in appetite. What triggers reverse sneezing in dogs? Reverse sneezing is usually triggered by irritation in the throat or nasal passages. Common causes include dust, pollen, mould, strong household scents, excitement, pulling on the lead, eating or drinking too fast, temperature changes, and being a flat-faced breed with shorter airways. How long is too long for a dog to reverse a sneeze? Anything lasting longer than about a minute is a sensible point to call your vet. Most reverse sneezing episodes pass within a few seconds to around a minute, and dogs usually seem completely normal again straight afterwards.

    By Adele Busby

    Read more
  • How to Cut Dog Nails That Are Black
    19.08.26 August 19, 2026 Health

    How to Cut Dog Nails That Are Black

    Trimming black dog nails can feel like a guessing game, but it really does not have to be. This guide walks you through how to cut dog nails that are black with confidence, covering everything from spotting the quick before you snip to choosing the right tools, handling the odd nick along the way, and building a calmer routine over time. Whether you are starting from scratch or just looking to feel less uncertain with the clippers, there is something here to help you and your dog get through nail day in one piece. How to Tell Where the Quick Is on Black Dog Nails The quick is the living core of your dog’s nail. It contains blood vessels and nerves, so if you catch it with the clippers, it bleeds and stings — not ideal for anyone involved. With light-coloured nails, you can usually spot it as a soft pink shadow running through the centre, which makes the whole job much more straightforward. With black nails, that shadow disappears completely, and that’s exactly why so many pet parents feel stuck before they’ve even picked up the clippers. The good news? You don’t have to guess. You just need to slow down and read a few reliable clues. Start by shining a small torch or your phone’s flashlight through the nail from underneath. On finer nails, this can reveal the quick as a darker oval shape within the nail. It won’t work for every dog, but it takes about three seconds to try and it’s genuinely useful when it does. If the light doesn’t show much, nail texture becomes your next guide. Trim a tiny sliver from the tip and look at the cut surface. At first it’ll appear solid and chalky, white or grey all the way through. That’s safe ground. Keep taking small slivers, checking each time, and eventually the centre will shift. It might look darker, almost black, or you’ll notice a small grey dot appearing in the middle. That dot is your cue to stop. You’re getting close to the quick. Nail shape tells you something before you even make a cut, too. Most dog nails curve downward and taper toward the tip, and the quick follows that same curve. It typically sits further back than you’d expect, so if the nail has a definite hook at the end, trimming just that hooked portion is usually where you want to start. One last thing: a calm dog makes all of this much easier. When they’re tense and pulling away, it’s harder to look closely and work carefully. Keeping an eye on your dog’s body language throughout the trim helps you spot early signs of stress before things unravel. The Tools That Make Black Nail Trims Safer and Calmer Having the right tools ready before you start makes a real difference when you’re working with black nails. They help you make smaller, more controlled cuts, reduce the chance of catching the quick off guard, and keep the whole experience calmer for your dog from the very first snip. Sharp scissor-style or guillotine clippers. Blunt clippers crush rather than cut cleanly, which is uncomfortable for your dog and makes it much harder to read the cut surface. Sharp blades give you a clean edge — exactly what you need when taking black nails back little by little. A nail grinder. If clippers feel a bit too all-or-nothing, a grinder lets you remove nail gradually and gives you much finer control over how much you take off. Many dogs also find the sensation less startling than a sudden snap. A small flashlight or phone torch. Holding a light against the top of the nail can help you spot the quick’s shadow before you cut. It doesn’t work on every dog, but it takes seconds to try and is well worth doing. Styptic powder. Have this within arm’s reach before you begin. If you nick the quick, it works fast — and knowing it’s right there helps you stay calm rather than scrambling. High-value treats. Something your dog doesn’t get at any other time, like a small cube of cheese or a bit of cooked chicken, makes the session feel worthwhile for them and keeps their focus in the right place. A non-slip mat or towel. This gives your dog something to grip, helps them feel a little more settled, and means less wriggling for you to work around. What is styptic powder? It stops minor bleeding almost instantly if you nick the quick. It’s a staple in any dog nail trimming kit, so always have it to hand before you start. None of these are hard to find, and together they genuinely change how confident you feel tackling black nails at home. If you’re building out your grooming kit, you’ll find plenty of dog care essentials over at Lords and Labradors. Good preparation really is the best dog nail trimming tip there is — have everything ready before your dog sits down, and you’re already off to a better start. A Step-by-Step Way to Cut Black Dog Nails Without Hitting the Quick Once you understand how to read the nail, the actual cutting becomes far less daunting. Trimming black dog nails safely is really about slowing down, taking tiny slices, and trusting what you see rather than guessing where to stop. Settle your dog before you pick up the clippers. Sit on the floor together, offer a few treats, and let them sniff the clippers. A calm start makes everything that follows easier. Find a comfortable position for you both. Some dogs are happy lying on their side while you kneel beside them. Others prefer sitting upright with a paw gently lifted. Work with your dog rather than forcing a hold that makes them tense. Press the toe pad gently to extend one nail at a time. This gives you a clear view and keeps the paw steady without gripping so tight that your dog pulls away. Start with a small snip at a slight angle. Take just the very tip off. You’re not trying to do it all in one go — you’re just getting started. Check the cut surface before you snip again. Hold the nail up to the light and look at the cross-section. A chalky white or grey centre means you’re well away from the quick and safe to continue. Keep going in tiny increments, checking every time. As you get closer, the centre of the nail will start to shift. The moment you see a darker grey or black dot beginning to appear in the middle, stop on that nail. That dot is the quick showing itself, and one slice further could cause real discomfort. Reward your dog between nails, not just at the end. A treat after each one keeps things positive and gives your dog a natural moment to breathe and reset. Stop if your dog tells you they’ve had enough. Panting, pulling the paw away, or going rigid are all signs to pause — even if you’ve only done two nails. Pushing through rarely ends well. Split the session across days if that’s what your dog needs. Front paws today, back paws tomorrow. There’s no rule that says all twenty nails have to happen at once, and honestly, your dog will thank you for it. A note on the black dog nail quick: In lighter nails, the quick shows up as a visible pink line running through the centre. In black nails, you simply can’t see it from the outside, which is why reading the cross-section matters so much. A small dark dot or a soft pale ring appearing in the centre after a snip is your signal to stop. That’s the quick beginning to surface, and going any further risks pain and bleeding. The whole point of learning how to cut dog nails that are black is building confidence through small wins, not racing to finish. Three nails done calmly is genuinely better than twenty done with your dog stressed and wriggling. If your dog tends to find grooming difficult, it’s worth thinking about how you handle other anxious moments together — the same approach that helps keep dogs calm during stressful situations like fireworks applies just as well here. What to Do if You Nick the Quick Nicking the quick when you’re learning how to cut dog nails that are black happens to almost every pet parent at some point. It looks more dramatic than it is — a small dark red bleed from the tip of the nail — and it tends to startle you far more than it hurts your dog. Take a breath. You’ve got this. Here’s exactly what to do: Stop trimming and set the clippers down. Apply styptic powder or cornstarch directly to the nail tip. Hold gentle pressure with a clean cloth or your finger for 30 to 60 seconds. Keep your dog calm and still with a quiet voice and a soft, steady touch. Once the bleeding slows, check the nail before letting your dog wander off. Styptic powder is a clotting agent that stops bleeding quickly — and it’s the single most useful thing to have nearby during any nail trim. Purdue University’s veterinary guidance specifically recommends that you keep styptic powder available when clipping a pet’s nails to stop bleeding if you clip too short. Pick some up before your next session if you don’t already have it. For aftercare, keep the paw clean and dry for the rest of the day. Avoid rough-surface walks for 24 hours, and check back on the nail over the next day or so for any redness or swelling. If the bleeding hasn’t slowed within 5 to 10 minutes, or your dog seems to be in genuine pain rather than just briefly unsettled, call your vet. That’s the sensible thing to do — not a sign that anything has gone seriously wrong. How to Make Nail Trims Easier Next Time The biggest dog nail trimming tip anyone can give you? Trim more often. It sounds almost too simple, but when you’re working out how to cut dog nails that are black, consistency matters just as much as technique. Dogs who seem completely impossible to trim can surprise you once a calm routine clicks into place. Trim every 3 to 4 weeks. Regular sessions keep nails at a manageable length and make each one shorter and less stressful — for both of you. Reward after every single nail. Use something your dog genuinely loves, like a small piece of cheese or chicken, and give it the moment you finish each nail rather than saving it until the end. Handle paws between sessions. A minute or two of gentle paw touching while you’re watching TV or winding down costs nothing and builds real tolerance without any pressure attached. Take a little, more often. Small snips every few weeks feel far less daunting than trying to tackle seriously overgrown nails after a long gap — and you’ll stay well clear of the quick. Keep the setup consistent. Same spot, same time of day, same calm energy. Dogs read routine surprisingly well, and familiarity genuinely helps settle nerves. Start puppies early. Even pretend trims with no cutting involved help young dogs learn that paw handling is completely normal. Pro tip: Trimming a tiny amount every 2 to 3 weeks is far safer than waiting until nails are overgrown — especially when you’re navigating the black dog nail quick. Think of each session as a training opportunity rather than a chore to get through. Dogs who once wriggled, whined, or flatly refused can absolutely learn to sit calmly for a trim. It just takes consistency, patience, and a well-stocked treat supply. When to Ask a Groomer or Vet for Help Sometimes, the most caring thing you can do is hand the clippers to someone else. If you have worked through how to cut dog nails that are black and still feel uncertain, that is completely fine. Some dogs have nails that are genuinely thick, curved, or difficult to read, even for owners who have been doing this for years. Others simply will not settle, no matter how many treats you offer or how carefully you have set the scene. Professional groomers trim nails every single day. They know how to read the nail, position the dog, and work with a calm confidence that only comes with real experience. Booking a session or two is not admitting defeat. It is a smart way to watch someone skilled work up close, ask questions, and pick up the kind of practical knowledge that no article can fully replace. Your vet is equally worth considering, especially if your dog has unusually thick nails, any history of paw injuries, or anxiety that makes handling genuinely difficult. They can trim safely and point you toward ways to make future sessions less stressful for your dog and for you. The most important shift is this: professional help is a starting point, not a last resort. Once your dog has had a calm, positive experience with someone who knows exactly what they are doing, you will often find that the next trim at home feels a little easier too. Frequently Asked Questions How do you know where the quick is on black dog nails? You find the quick on black dog nails by trimming tiny slivers and checking the cut surface each time. A chalky white or grey centre is usually safe; when you start to see a darker dot or change in the middle, stop. A torch underneath the nail can sometimes help too. Can I trim my dog’s black nails? Yes, you can trim your dog’s black nails if you go slowly and take very small amounts at a time. The safest approach is to remove the hooked tip first, check the cut surface after every snip, and stop as soon as you see a darker centre appearing. How do you trim severely overgrown dog nails? Trim severely overgrown dog nails by taking off only a little at a time and spreading the work over multiple sessions if needed. Tiny, regular trims every 2 to 4 weeks are safer than one big cut, especially with black nails, because they help you avoid catching the quick.

    By Adele Busby

    Read more
  • How often should you worm your dog or cat? A complete worming guide
    12.10.26 October 12, 2026 Owning a Dog

    How often should you worm your dog or cat? A complete worming guide

    Worms are one of those topics most pet parents only think about when something seems off, but knowing how often to worm a dog or cat before that happens makes everything so much simpler. This guide covers the worms most likely to affect your pet, how a worming schedule changes from puppyhood through to the senior years, and what your pet’s lifestyle tells you about how often they really need treating. By the end, you’ll have a clear, practical routine you can actually stick to. How often should you worm a dog or cat? Start with the basics Worming your pet is one of those things that’s easy to put off — until you find yourself Googling “how to tell if a dog has worms” at 11pm because your dog has been scooting across the carpet. Sound familiar? Once you understand the basics, though, it really is straightforward to stay on top of. So, how often should you worm a dog or cat? The honest answer is: it depends on their age, lifestyle, and where they spend their time. As a starting point, most adult dogs and cats need worming every three months. Puppies and kittens need it far more frequently — sometimes as often as every two weeks in those earliest weeks of life. We’ll get into all of that further down. What worming treatments actually do is target internal parasites that can quietly take up residence in your pet’s gut, or occasionally other organs, without any obvious signs. Some pets show clear clues: weight loss, a rounded belly, or worms visible in their stool. Others seem perfectly fine. That’s exactly why a regular schedule beats a reactive one every time. Dogs and cats also have slightly different needs. Dogs tend to pick up worms through scavenging, eating grass, or contact with other dogs on walks. Cats, especially those who hunt, face their own set of risks. A good routine accounts for how your pet actually lives, not just the textbook version of their species. This guide covers everything: which worms to know about, how a dog worming schedule shifts with age, what factors change how often you should treat, and how to build a habit that genuinely sticks. You can also browse our flea and worming treatments if you want to get sorted while you read. Which worms are we talking about, and how do pets pick them up? Most dogs and cats will pick up worms at some point in their lives — it’s just part of being a curious, sniff-everything, roll-in-anything kind of animal. Knowing which worms to look out for, and how pets actually come into contact with them, makes it so much easier to build a worming routine that sticks. The main worms to know about: Roundworm — the most common type, especially in puppies and kittens. These live in the gut and can cause a pot-bellied appearance, vomiting, and poor growth. Tapeworm — flat, segmented worms that attach to the gut lining. You might spot small white segments around your pet’s bottom or in their bedding. Hookworm — less common, but worth knowing about. These latch onto the intestinal wall and feed on blood, which can cause anaemia in younger or smaller animals. Whipworm — more of a dog problem than a cat one. They live in the large intestine and can cause bloody diarrhoea and gradual weight loss. How do pets pick them up? Sniffing or accidentally swallowing infected faeces on walks or in the garden Hunting or scavenging — eating birds, rodents, or other small animals Fleas — swallowing an infected flea during grooming is one of the most common routes for tapeworm Sharing outdoor spaces with other dogs, cats, or wildlife Mother-to-puppy or mother-to-kitten transmission, either during birth or through nursing That last point matters more than most people realise. Puppies and kittens arrive in the world already vulnerable, which is why those early weeks call for extra care. Good puppy flea and worming treatments can make a real difference right from the start. How often to worm a dog or cat comes down to age, lifestyle, and risk level — and we’ll work through all of that next. The usual worming schedule by age: puppies, kittens, adults and seniors Worming frequency shifts quite a bit depending on where your pet is in life, so treat the schedule below as a practical starting point rather than a fixed rule. The exact timing will always come down to the product you’re using and how your pet actually spends their days. Life Stage Recommended Frequency Key Reason Puppies Every 2 weeks until 12 weeks old, then monthly until 6 months Worm burdens are high in young pups, and maternal transmission is common Kittens Every 2 weeks until 12 weeks old, then monthly until 6 months Kittens are particularly vulnerable and often pick up worms through their mother’s milk Adult Dogs Every 3 months as a minimum Keeps protection consistent against roundworms and tapeworms throughout the year Senior Dogs Every 3 months, reviewed with your vet Older pets may have weaker immune systems, and changing health needs can affect what treatment works best Once your dog or cat reaches adulthood, a quarterly routine covers most households well. That said, some pets genuinely need worming more often, and it’s worth thinking this through before you settle on a schedule. You might want to worm more frequently if your pet: Spends a lot of time outdoors, rooting through grass, puddles, or woodland Hunts or scavenges, even now and then Mixes regularly with other dogs, cats, or animals at parks, kennels, or training classes Lives with young children, who are more vulnerable to certain worm infections For example, a Labrador who swims in every pond he passes and lives for a good rummage in the undergrowth is a different case to a greyhound who sticks to pavement walks and rarely meets other dogs. Same species, very different risk. If you have a large adult dog and want a reliable treatment to keep on hand, our worming tablets for large adult dogs slot neatly into a quarterly routine. Whatever product you choose, always follow the guidance closely, and if your pet’s lifestyle puts them in a higher-risk category, a quick chat with your vet will help you get the timing right. What changes the answer? Lifestyle, risk and the way your pet lives Standard worming schedules give you a solid starting point, but they don’t tell the whole story. Every pet lives a different life, and some lifestyles genuinely put dogs and cats at greater risk of picking up worms more often. Working out how often to worm a dog really comes down to understanding what your pet actually gets up to day to day. Here are the key factors that can push the risk higher: Raw feeding. Raw meat, particularly offal, can carry worm larvae. Dogs and cats on a raw diet are more exposed than those eating cooked or commercial food. Hunting or catching prey. Cats that bring home birds or mice, or dogs that snap at rabbits on walks, are repeatedly exposed to intermediate hosts that carry worms. Scavenging on walks. If your dog is the type to hoover up anything they find on the ground, their risk goes up every single time you leave the house. Homes with young children. Children play close to pets and often put their hands in their mouths, which raises the stakes around roundworm transmission in particular. Multi-pet households. More animals sharing a space means more opportunity for reinfection, especially if one pet picks something up outdoors and brings it home. Frequent boarding or daycare. Regular contact with lots of other dogs increases exposure. It’s that simple. Inconsistent flea treatment. Fleas and worms are more closely linked than many owners realise. Gaps in flea cover can leave your pet more vulnerable than you’d expect. The more of these factors that apply to your pet, the more likely they are to need worming more frequently than the standard schedule suggests. That last point about fleas is worth pausing on. Fleas can transmit tapeworms directly, which makes the two genuinely inseparable. Keeping on top of both isn’t doubling your workload — it’s just good sense. If you want to review what you’re using, our flea and worming treatments are a good place to start. How to worm your pet safely without the guesswork Getting worming right feels complicated at first, but once you’ve done it a couple of times, it genuinely isn’t. Whether you’re figuring out how often to worm a dog for the first time or just trying to be more consistent, a few simple habits make it easy to stay on top of. Choose a species-appropriate product. Always use a wormer made specifically for dogs or cats. They are not interchangeable — and using the wrong one can cause serious harm. Dose by weight, not by guesswork. Weigh your pet before each treatment and follow the label closely. Too little won’t work; too much creates unnecessary risk. Set a recurring reminder. Tying your dog worming schedule to something you already remember — the first of the month, a pet’s birthday, a regular vet visit — means it becomes habit rather than something you have to think about. Don’t double dose if you miss one. Simply treat as soon as you remember and reset your schedule from there. No need to compensate. Never use a dog product on a cat. Some ingredients that are perfectly safe for dogs are toxic to cats. This one really matters. When to speak to a vet first: Pregnant or nursing pets Very young animals (a vet can give you a tailored plan if you’re unsure how often to deworm a puppy in those early weeks) Pets with existing health conditions or on other medications It’s also worth staying alert to the signs your dog has worms between treatments — things like changes in appetite, a bloated belly, or visible worms in their stool. Caught early, it’s rarely a big deal. And if you want trusted support between vet visits, our vet-approved wellbeing range is a good place to explore. Building a routine that’s easy to stick to Once you know how often to worm a dog or cat, the real challenge is turning that knowledge into a habit you’ll actually keep. The good news? A little planning upfront makes it almost effortless to maintain. The simplest approach is to tie worming into something you already do. If you apply flea treatment on the first of the month, add worming to the same date. Some products cover both, which makes things even easier. A sticky note on the fridge, a recurring phone reminder, or a note in your pet’s health file all do the job — whatever suits the way your brain works is the right system. It also helps to keep treatments in stock so you’re never caught short. Running out mid-schedule is one of the most common reasons routines slip, and it matters most with puppies and kittens who need worming every two weeks. If you share care of your pet with a partner or family member, agree on who’s responsible. It sounds obvious, but a quick “did you worm them this month?” conversation avoids a surprising amount of confusion. It’s also worth thinking seasonally. Autumn walks bring more mud, more wildlife contact, and more opportunities for a dog to sniff out something they shouldn’t — all of which can increase worm risk. Our autumn pet care guide covers everything you need to keep your dog or cat healthy as the seasons change. The routine doesn’t need to be complicated. Consistent and simple is genuinely all it takes. Frequently Asked Questions Can you overworm a dog? Yes, giving more wormer than the label recommends creates unnecessary risk. The safest approach is to use a dog-specific product, weigh your dog before each treatment, and follow the dosing instructions closely. If you miss a dose, treat when you remember rather than doubling up to compensate. What are the signs that a dog needs worming? Common signs include weight loss, a bloated or rounded belly, changes in appetite, vomiting, scooting, and visible worms or white tapeworm segments in your dog’s stool or around their bottom. Some dogs show no obvious signs at all, which is why a regular worming routine matters. Can I deworm my dog again after 2 weeks? Yes, in some cases worming again after 2 weeks is part of a normal schedule, especially for puppies in their earliest weeks. For adult dogs, timing depends on the product and your dog’s lifestyle, so follow the label carefully rather than repeating doses early without a reason. Is one round of dewormer enough? No, one round of dewormer usually isn’t enough as a long-term plan. Most adult dogs need worming every 3 months as a minimum, while puppies need it much more often at first. A regular schedule works better than only treating once or waiting until you spot signs.

    By Adele Busby

    Read more

loyal customer in 17 countries

Why Shop With Us?

  • Free Delivery

    Orders over £75 qualify for free standard UK delivery. Orders under £75 will be calculated at the checkout.

  • Shopping Made Easy

    Gain exclusive access to sales and shop all your pets favourites on the go by downloading our app.

  • Designed in the UK

    Our own brand products are lovingly designed in our specialist UK workshop to our exacting standards.

  • We're Here For You

    Contact our Pet Experts on Chat or by email at sales@lordsandlabradors.co.uk