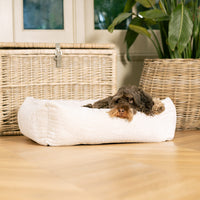
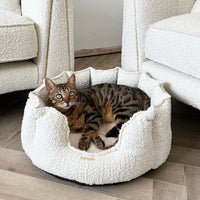
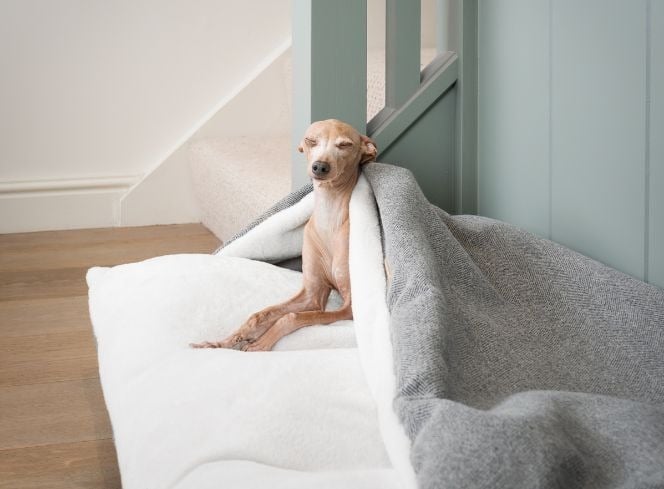
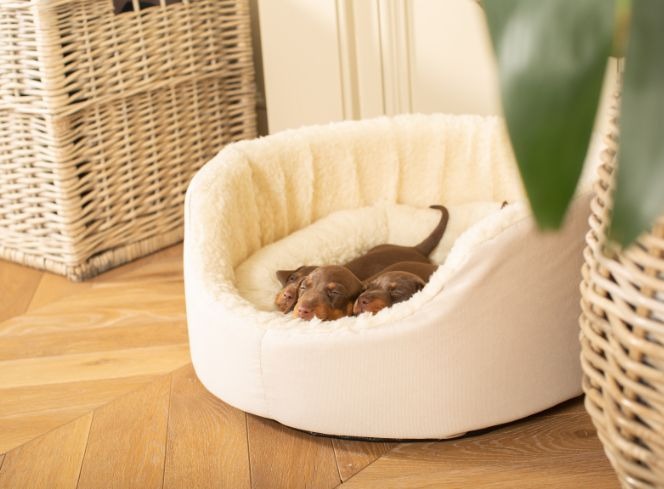
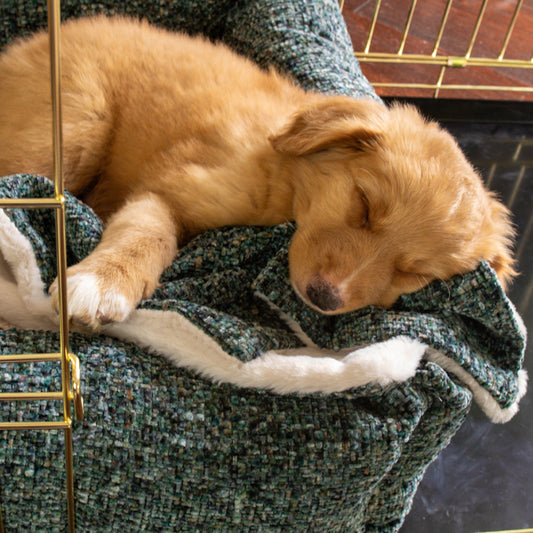
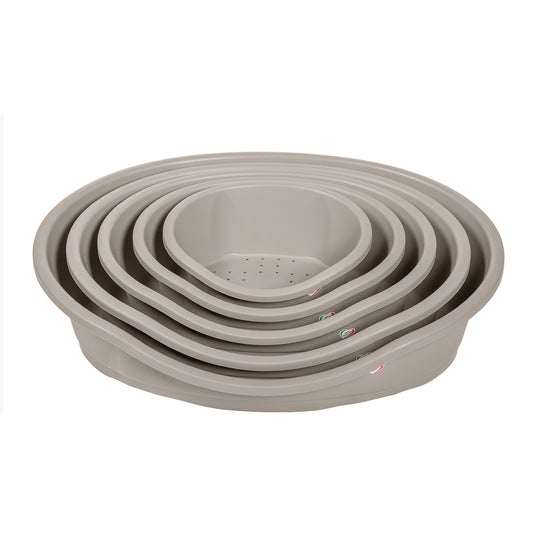
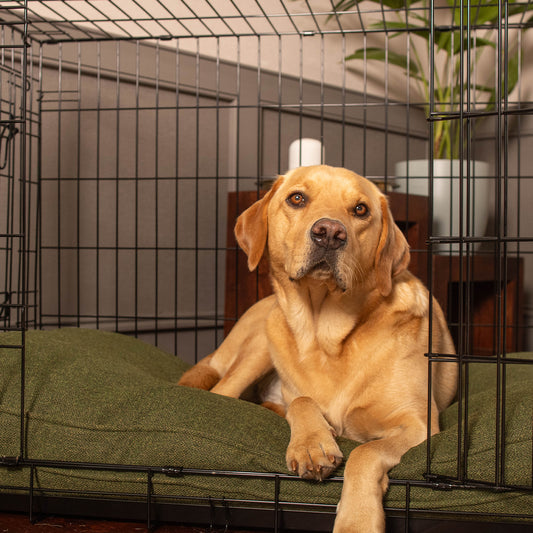
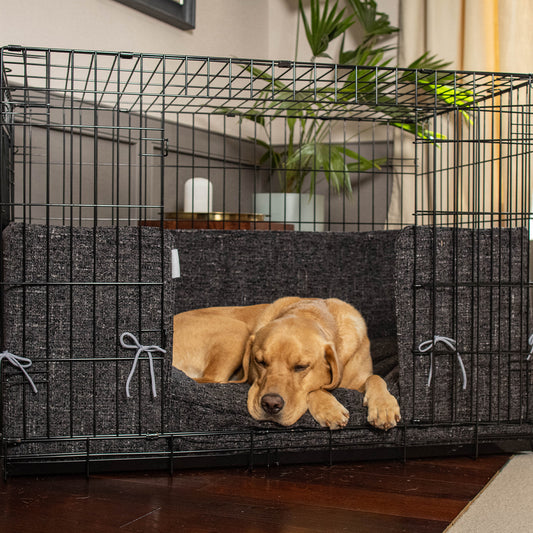
Did you know dogs spend 12 to 14 hours a day sleeping? That's a lot of time in bed so it's no surprise that their bed might be looking a little worse for wear. Dogs are creatures of comfort so making sure they have a a clean and supportive bed is essential for their overall well-being. In this guide, our Pet Experts explore the signs that indicate it's time to change your dog's bed and share expert tips on how to care for your canine's cherished sleeping spot.
How Often Should You Replace Your Dog’s Bed?
Determining how often to replace your dog's bed depends on several factors including the quality of the bed, your dog's size and activity level, and any specific health considerations. As a general guideline, it's advisable to replace your dog's bed every 1 to 3 years, or sooner if signs of wear and tear become noticeable.
Signs It's Time to Change Your Dog's Bed:
Visible Wear and Tear: Over time, your dog's bed may start showing signs of wear and tear, such as flattened cushions, lumps, or torn fabric. If you notice any significant damage, it's a clear indication that it's time to consider a replacement.
Lingering Odours: Despite regular cleaning, dog beds can accumulate odours over time, especially if your furry friend enjoys outdoor adventures or has accidents indoors. Lingering smells that persist even after washing could signal the need for a new bed.
Loss of Support: Just like humans, dogs require proper support for their joints and muscles, especially as they age or if they have existing health conditions. If your dog's bed no longer provides adequate support or has become too soft, it's time to invest in a new one to ensure their comfort and well-being. It might be worth investing in an orthopaedic dog bed if your dog’s breed is prone to joint issues.
Allergies and Skin Irritations: Dogs can develop allergies or skin irritations from prolonged exposure to dust mites, pet dander, or other allergens that accumulate in their beds over time. If you notice your dog scratching more than usual or experiencing skin issues, a new bed with hypoallergenic materials may offer relief.
Preference for Alternative Sleeping Spots: Dogs are creatures of habit, and if you notice your furry friend opting for alternative sleeping spots around the house instead of their bed, it could indicate that they're no longer comfortable or satisfied with their current sleeping arrangements. It’s worth looking at how your dog likes to sleep so you can get the best bed shape to suit their sleeping style, our Information Hub has a guide on how to choose the perfect dog bed for your dog.
Top Ways to Care for Your Dog's Bed:
Regular Washing: Establish a routine for washing your dog's bed to remove dirt, hair, and odour-causing bacteria. Most of our Lords & Labradors dog beds are machine washable, we have a handy guide on how to wash your dog’s bed here.
Use a Removable Cover: Opt for dog beds with removable, machine-washable covers for easy cleaning. Having a spare cover on hand allows you to swap them out while one is being laundered, ensuring your pup always has a fresh and clean place to sleep. We also sell bamboo bed covers which are great for popping over your dog’s bed to help keep them clean especially after a muddy dog walk, they will act as an additional layer of defence against moisture and stains, extending the life of the bed!
Vacuum and Spot Clean: In between washings, use a handheld vacuum or lint roller to remove hair and debris from the surface of the bed. Spot clean any stains or spills promptly to prevent them from setting into the fabric.
Rotate and Fluff: Just like flipping a mattress, periodically rotate your dog's bed to distribute wear evenly and prevent premature sagging. Fluffing the bed's filling helps maintain its loft and support over time.
Sun and Air Dry: On sunny days, take advantage of natural sunlight by airing out your dog's bed outdoors. Sunlight helps eliminate odours and kills bacteria, leaving the bed feeling fresh and revitalised.
Inspect Regularly: Take time to inspect your dog's bed for any signs of damage, loose seams, or worn-out stuffing. Promptly address any issues to prevent further deterioration and ensure your pup's safety and comfort.
By recognising the signs that it's time to change your dog's bed and implementing proper care and maintenance techniques, you can provide your furry friend with a clean, comfortable, and supportive sleeping environment. Remember, a happy and well-rested pup makes for a happier pet parent too!
If you’re looking to upgrade your dog’s bed why not check out our collection of luxury dog beds? Bedding is our speciality, we design and craft all of our bedding here in our Lincolnshire workshop so you can be sure your dog will be getting the best sleep possible in one of our luxury dog beds.
The Importance Of Correct Nutrition For Dogs And Cats!
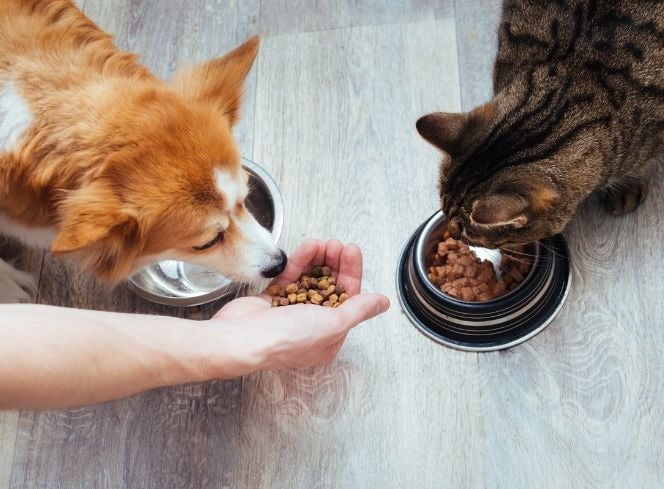
Ensuring optimal nutrition for our beloved pets is paramount for their overall health and well-being. As responsible pet owners, it is crucial to understand the significance of providing nutritionally complete and balanced meals to our furry friends. In this comprehensive guide, we will delve into the world of dog and cat nutrition, exploring the importance of the right food choices, nutritionally complete homemade recipes, and the best commercial options available.
Understanding Dog and Cat Nutrition
Your pet's nutrition plays a pivotal role in their vitality and longevity. Just like humans, dogs and cats require a balanced diet that fulfils their specific dietary needs. A well-rounded diet supports their immune system, maintains a healthy weight, and promotes optimal organ function. Pet food ranges from being more processed to being raw and rich in natural ingredients, finding the right fit for your pet is important!
Dog Food Nutrition
Choosing the right dog food is a key aspect of canine care. With an abundance of options available, it's essential to prioritise nutritionally complete choices. To make an informed decision, consider using a dog food nutrition calculator and comparing different products. Look for the best nutritional dog food that meets your pet's unique requirements, taking into account factors such as breed, size, and age. Our favourite nutritionally rich dog foods are Orijen, Carnilove and Acana, they are all designed with your dogs nutrition in mind.
Dog Nutrition Facts and Guide
Understanding dog nutrition facts is imperative for providing the best care. Refer to a dog food nutrition guide to navigate through the plethora of choices available in the market. Learn about your dog's daily nutritional requirements and make informed decisions that contribute to their overall health and happiness.
Cat Food Nutrition
Cats, being obligate carnivores, have unique nutritional requirements. The best cat food for nutrition considers their need for high-quality protein and essential nutrients. Explore dry cat food nutrition labels to ensure your feline friend receives a balanced diet that supports their specific dietary needs. For a cat food which is high in protein and great for fussy felines we love Carnilove, they all have at least 80% wild origin meat content and contain No grains, potatoes, GMO, soy, sugar, preservatives or colourants.
Daily Nutritional Requirements for Cats
Cats require a carefully balanced diet to thrive. Knowing the daily nutritional requirements for cats is essential for choosing the right cat food. Consult with your vet to understand the specific needs of your cat, such as the importance of taurine and other essential nutrients crucial for their health.
In conclusion, the importance of correct nutrition for dogs and cats cannot be overstated. Whether choosing commercial options or crafting homemade recipes, prioritising nutritionally complete meals is key to ensuring your pet's health and happiness. Stay informed about dog and cat nutrition, consult with professionals, and make choices that align with your pet's unique requirements. By providing the best nutritional dog food or cat food, you contribute to a longer, healthier life for your furry companions. Here at Lords & Labradors we have a large range of both cat and dog food so you can pick the best option for you and your pet
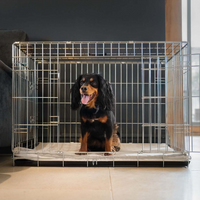
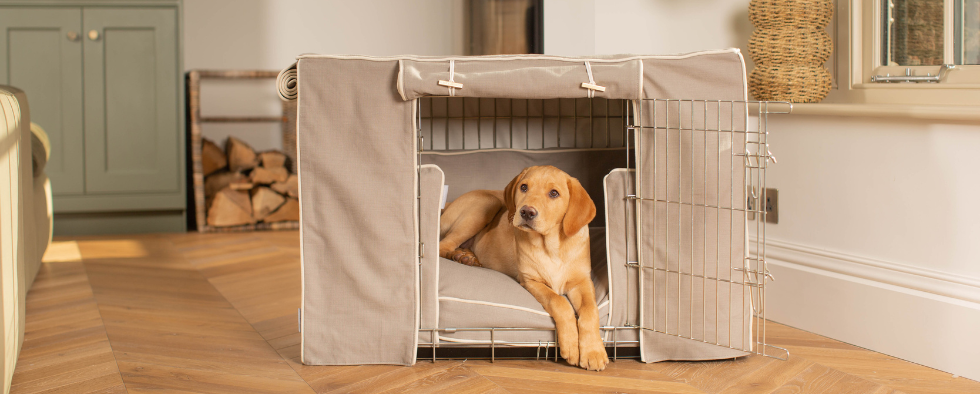
Crate training is an important part of settling in a new puppy. A crate provides a safe, quiet space for your pup and will help them to get used to their nighttime routine and with toilet training. A dog crate can be made into a cosy den that will be loved by your new four-legged friend for a lifetime. In this article we will explain the best crate set-up for puppies, how to change the set-up as they grow up and also how to look after your crate and crate bedding.
How To Make The Perfect Crate Set-Up For A Puppy
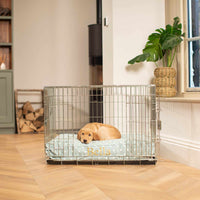
Crate training your puppy will have lots of advantages, helping them to settle and feel safe in their home as well getting them into a consistent bedtime routine. The perfect crate for a puppy will feel safe, warm and cosy. It’s important that it’s inviting so that they feel compelled to use it.
With this in mind we’d suggest the following items:
Crate Cover
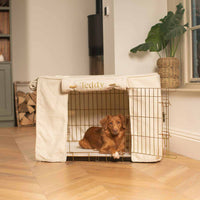
[product]Crates in their basic form can be rather draughty and a little bit unsightly! A crate cover will not only make the crate look stylish, but it will make the crate feel cosy inside. Our crate covers feature roll down doors which can be lowered when it’s time for bed. Puppy will soon learn when they should be sleeping (doors rolled down) and when it’s time to get up (doors rolled up). Our crate covers come in a range of fabrics which have been designed to match your home and they're all machine washable, making them brilliant for puppies!
Cosy & Calming Puppy Crate Bed
[product]
Our cosy and calming beds have been designed with crate training in mind. Each size is made to fill exactly one half of the corresponding crate size. So if you have a small crate for a Chihuahua for example, the small bed will fit in exactly one half of the crate. This then leaves room for a puppy pad in the other half along with a bowl for water. They come in a range of our printed cotton fabrics and feature a reversible cushion pad inside - one side covered in super plush sherpa!
Puppy Pads
Whilst we don’t want to encourage puppies to pee in the crate, it’s also important to note that they can’t hold themselves for very long at all. Whilst you will be able to take them outside at regular intervals during the day, this may not be the case at night. When you put them to bed, putting a puppy pad in one half of the crate will help to stop any accidents from dirtying their bed or crate tray.
Crate Bowls
Puppies will need access to water at all times and a crate bowl is a brilliant accessory as it can be fastened to the crate walls. This will ensure it doesn’t get tipped over or knocked like a standard bowl might.
The Perfect Crate Set-Up For An Adult Dog
As your dog becomes toilet trained and they begin to need the full space of the crate for their bed, you will need to consider swapping out the puppy accessories for their proper adult bed. At Lords & Labradors we specialise in crate bedding that will make your dog’s den look stunning as well as super comfortable inside.
Crate Cushion
Our crate cushions are designed to fit our crates perfectly. They come in a range of fabulous fabric designs from luxurious tweeds to printed cottons. There really is something to suit every taste and home.
Crate Bumper
Crate walls aren’t the most comfortable things to snuggle up to, and if your dog likes to curl in the corner of their bed, they will need something other than metal bars! That’s where our fabulous bumpers come in. They sit around the edge of the crate cushion and create a spongey layer of warmth around the walls. Perfect for snuggling up in the corner when nap time calls!
Crate Cover
Our crate covers are perfect for setting a routine with your dog, when the doors are rolled down it will signal to them it's time to sleep. Our crate covers are fully lined to help keep light out and come in matching fabrics to our bumpers and cushions to you can be sure crate will look stylish!
Crate Set Aftercare and How To Clean A Crate
With a little love and care your crate set will last a long time. Here we detail how to look after your crate set:
The Crate - The crate is made of sturdy metal and is really easy to keep clean. Our crates are easy to wipe clean and the tray is removable so you can get into the corners properly. It’s really important to make sure the crate is completely dry before setting back up and allowing your pet back in, we recommend drying your crate to avoid any rusting.
Lords & Labradors Cushion & Bumper Covers - For our bedding from our core collection you will be able to remove the covers on the cushions and bumpers. Turn the cover inside out and machine wash on a 20 degree gentle cycle. Allow the covers to air dry (do not tumble dry). Once dry return the inner cushion to the cover.
Essentials Plush Collection Bumpers & Cushions - Our bumpers and cushions from the Essentials Plush Collection don't have removable covers, we recommend spot washing your essentials plush bumpers and cushions.
Lords & Labradors Crate Covers - Our crate covers are all machine washable on a 20 degree gentle cycle, apart from our oil cloth crate covers. After washing, we recommend air drying your crate cover over your crate to help keep it in shape and to make sure it doesn't shrink. A cool iron on the reverse of the cotton fabrics is fine if necessary, but often they won’t even need that. Our tweeds and Savanna fabrics are super fast drying and they will come out of the spin almost dry. Just give them an air and they’ll be ready to use again in no time at all!
Cushion and bumper inners - The cushion and bumper inners are protected by waterproof interlinings, so won’t need washing. This will preserve the inner fillings. The waterproof liners are wipe clean. If they become soiled, simply wipe down with a mild pet-safe detergent and they’ll be as good as new again.
Cosy and Calm Puppy Bed - Our puppy beds are fully machine washable. You can put the whole bed in the machine and wash on a 20° cycle. When removed, simply shake and plump the cushion back into shape and leave to air dry.
Follow these simple steps and your crate sets will last and look stunning for years to come!
We’re getting to that time of year again where we’re travelling more with our pets to the beach, staycations and even trips to a different location for a long walk. No matter how long the journey - even if it’s a trip to the local vets - you should ensure your dog is properly restrained and safe to travel. Here in the UK it’s the law when travelling by car your dog needs to be restrained. In this blog, we breakdown how to travel safely with your pet.
What Is The Law With Dogs In Cars?
The Highway Code states in their Rules about Animals, when in a vehicle, dogs are to be suitably restrained so they cannot distract you while you’re driving or injure you, or themselves, if you should need to stop quickly. If you were in an accident caused by your dog distracting you whilst you were driving, this could be considered as ‘dangerous driving’. It’s also good to check your insurance policy, as car insurance providers may require you to restrain your pet.
Is It The Law To Restrain A Dog In A Car?
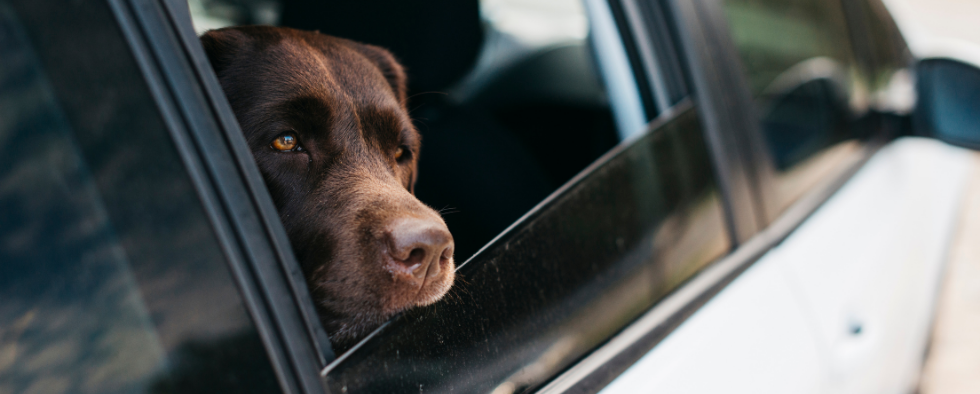
It is the law to restrain your dog when travelling in your car. So as fun as it is for your pooch to sit with their head out of the window, they must be suitably restrained so they cannot distract you and potentially hurt either you or themselves. When it comes to where your dog should be when travelling, although there are no laws against your dog travelling in the footwell of the car, unfortunately they would not be properly restrained and if you did have an accident, you may be prosecuted for ‘dangerous driving’.
When choosing where your dog should be properly restrained, no matter what method you choose, your dog should not sit in the front seat - securing them in the boot or back seat behind a front seat is considered a safer option.
How To Secure A Dog In The Car
There are many safety products you can choose from, which can help with travelling safely in the car. It’s most important you choose a solution that’s suitable and comfortable for your pooch, and it has been installed and executed correctly to ensure the safety of your pet. Here at Lords & Labradors, we’d recommend the following for safe travel.
Dog Carriers
Our pet carriers come in different sizes and weights which will vary for the suitability for you and your dog. It’s a lighter option to our metal crates and are easily packed away if you’re staying away from home. Carriers are great when travelling by car and when taking your dog from the car into a safe place to let them out and stretch their legs. They keep your pooch safe and settled whilst travelling.
Travel Harnesses
Our pet-friendly harnesses come in a variety of sizes, suitable to your dogs breed and size. Travel harnesses are easy to fit onto your dog and it’s quick to clip them into place. They’re specially designed to prevent your dog from moving around whilst in the car, all whilst keeping your pet safe and comfortably restrained.
Travel Crates
Crating your dog keeps them safe & secure - using a crate to transport your pet has the added benefit if they’re already used to being crated at home. If your dog is used to being crated, often when travelling they’ll feel safer and their surroundings will reduce any anxiety your dog may have around travelling.
How Long Can A Dog Travel In A Car
Being stuck in the car can be hard for your dog! Not only will your dog need regular toilet breaks, they’ll also need to stretch their legs and get some of their energy out. When stopping for your dog to toilet and stretch their legs, you could also give them some food and water to avoid any spillages whilst travelling. Ideally you should try to keep to your dogs routine where possible (even when travelling) - every 2 to 4 hours for about 15 to 30 minutes is a good guide to follow, however you’ll know what is best for your dog and how they travel. If you’re planning a lengthy trip, try to go on few shorter journeys to see how your dog is likely to react.
You may be preparing for the all important ‘Gotcha Day’, the day celebrated by all dog parents as the day you brought your pup home. Taking your puppy home for the first time is exciting, especially if you have prepared for their arrival. Puppy shopping can be so much fun, but also overwhelming if you’re a new pet parent, or if you’ve not had a puppy for a few years. There will be some things you do need to buy for necessity and some things that are worth buying for your new pup. Here at Lords & Labradors we’ve put together the 10 puppy essentials you’ll need to get your new puppy settled.
Our Top 10 Items To Buy For Your New Puppy
1) What crate to buy?
Firstly, if you’ve decided to crate train your puppy, you’ll need a crate that will see you through from puppyhood to adulthood. You’ll need a crate the appropriate size so you can fit a puppy bed at one end and a puppy training pad the other incase they need to toilet when left in their crate. It also gives your pup enough room to stretch, play and sleep if crated during the daytime. Depending on your training methods, you may want to place the crate somewhere the puppy can be near to you, but also not directly in a high traffic area of your home. Remember the crate is your puppy’s den, so discourage any children from climbing inside.
2) Where should my puppy sleep?
We recommend a puppy bed that’s easy for your pup to get in and gives them enough support and comfort whilst they sleep. Our Cosy & Calm Puppy Box Beds have been carefully designed with your puppy in mind. The beds are super squishy and soft, and have the most comfortable sides for your pup to snuggle right into. If you have chosen to crate train your pup, our vet bed is really popular, as it’s cosy, comfortable, robust and relatively puppy proof - it’s easily washed and dried too. It can be used with or without our Cosy & Calm puppy box bed.
3) What will my new puppy eat?
It’s recommended you initially use the same food that your puppy comes home with, in order to avoid any tummy upset during their first few days with you. Once your puppy has settled, you can gradually introduce a new food to their diet. It’s good to check the food guidelines of the food you choose to feed your pup, as often they’ll give you the correct guidelines on how to introduce the new food to your pup.
Make sure you have a clean bowl for water and a clean bowl for food, you can opt for a slanted water bowl if you have a spaniel breed to reduce your dogs ears from getting soaked in their water.
4) Puppy Toilet Training
Top of your list should be a reliable pack of puppy training pads, not only are they great for training your young pup, but they are invaluable when travelling (pop in the bottom of their carrier/crate to catch any travel sickness or accidental toilet trips). You can also use them to absorb muddy, wet paws after your pup has had a play in puddles!
5) How to settle my new puppy at night
When settling your new puppy at night, our heart beat sheep will be your puppy's new best friend. The heart beat sheep features a beating heart inside that mimics the beat of Mum's heart. They're designed to offer comfort and calm to new puppies who may feel nervous in their new home; they help to stop separation anxiety too. Alongside the heart beat sheep, you could pop in a heat pad under your dogs bed/cushion to keep them warm and to mimic the feeling of having siblings/mum near. Both the heat and the heart beat sheep will provide comfort for your puppy, especially whilst they are settling in and adjusting overnight.
6) How to keep your new puppy entertained
Toys will provide something to chew on for your pup, which you’ll find are essential if you want to avoid your puppy chewing on your furniture. Choose a variety of textures, styles and sizes to keep your puppy engaged and interested. You may want to keep a toy box so your pup can choose what they’d like to play with, or keep a few toys in rotation so your puppy doesn’t get bored with them.
You can also buy toys you can fill with treats or their food. If you want/need to leave your puppy - remember to build this up slowly, and don’t leave your new puppy for a long period of time - you could try freezing a peanut butter filled KONG (remember to use doggy/puppy friendly peanut butter). Freezing the toy will take them longer to work through and will give some relief to their sore teething gums and teeth.
7) Does my new puppy need a collar?
You may want to purchase your dogs collar before they arrive home with you, however it’s advised to purchase the correct size collar for your puppy, which you may have to wait until they’re here to measure them properly. It is a legal requirement to have a tag with your details on incase your puppy gets lost or strays away, but it’s advised not to add your puppy’s name to the tag.
8) How will I get my new puppy home?
Collecting your puppy to take them home is really exciting, but it’s best to be prepared. Make sure you have a suitable carrier/crate to store them in safely for the journey. It’s important your dog is restrained as it is the law to keep your puppy properly restrained whilst driving. In your carrier, you may want to pop in a blanket that smells like home and a scent blanket that smells like their mum and litter mates. It’s also good to have some puppy training pads to hand incase of any car sickness or accidental toilet trips.
9) When to start training my new puppy?
You can start with bonding and training your puppy almost straight away, get some high quality, puppy training treats (make sure to check the guidelines), and enjoy teaching them new tricks - you’ll be amazed at how quick they learn!
10) When do I start grooming my puppy?
It’s recommend that even if your pup won’t require grooming at first, you should regularly brush them to get them used to being groomed and handled. Choose a simple, soft brush and/or comb for the first couple of months. There will be a time you will need to wash your puppy, make sure you’re not using human shampoo as this will upset your puppy's PH levels and may not be compatible with your puppy flea treatment. It’s best to invest in a puppy shampoo that you can use when and if you need to bathe your puppy. We have our own puppy grooming set in our Petplex collection called the 'Puppy Purifier' it has a shampoo and a cologne to help keep your puppy smelling fresh.
Joint supplements for dogs: glucosamine, green lipped mussel and more
Whether your dog is showing the first signs of slowing down or you simply want to protect their joints before any problems start, finding the best joint supplements for dogs UK pet parents can actually rely on is harder than it looks. This guide cuts through the noise on ingredients like glucosamine and green lipped mussel, explains how to match a supplement to your dog’s age and mobility needs, and helps you figure out which format and formula will realistically fit into your daily routine.
What to look for in the best joint supplements for dogs in the UK
If you’ve noticed your dog taking a little longer to get going on morning walks, or pausing before jumping up onto the sofa, you’re not imagining it. Joint stiffness tends to become more noticeable as the temperature drops, and for a lot of owners, that’s the moment they start thinking seriously about joint supplements for the first time.
But finding the best joint supplements for dogs in the UK means looking beyond the packaging. There’s a lot on the market, from budget pots in the supermarket to vet-formulated chews with proper clinical backing, and the gap in quality can be significant. Ingredients are where it really counts. Glucosamine for dogs is probably the one you’ve come across most, but green lipped mussel, omega-3s, and hyaluronic acid all do different jobs: supporting cartilage, reducing inflammation, keeping joints lubricated. A well-made supplement will usually combine several of these, rather than leaning on a single ingredient to do all the work.
Your dog’s age and lifestyle matter just as much as the formula itself. A two-year-old Labrador who runs daily has very different needs to a nine-year-old spaniel already showing signs of stiffness. Format is part of the equation too, because the best supplement in the world is useless if your dog turns their nose up at it.
It’s also worth being clear on what you’re actually trying to achieve. Everyday maintenance looks quite different to active joint support for a dog already slowing down. Our dog wellbeing range covers a variety of needs, and the sections below will help you figure out exactly what your dog needs before you commit to anything.
Glucosamine, green lipped mussel and other ingredients: what they actually do
Most good joint supplements don’t rely on a single star ingredient — they work because several active compounds are doing different jobs at the same time. Think of it like a team, where each player covers something the others can’t. Here are the five you’ll most commonly see on labels, and what they’re actually there for:
Glucosamine helps rebuild and maintain cartilage, the cushioning tissue that stops bones grinding against each other.
Chondroitin works alongside glucosamine by drawing moisture into cartilage and helping it resist compression under load.
MSM (methylsulfonylmethane) is a natural source of sulphur that supports connective tissue repair and helps calm inflammation at the joint.
Green lipped mussel provides omega fatty acids that support a healthy inflammation response and help keep joints lubricated from the inside out.
Collagen gives structural support to the tendons, ligaments and cartilage that hold everything together as your dog moves.
None of these ingredients is doing exactly the same job as another. That’s the point. Real joint health is multi-layered, and a supplement that only leads with one compound — however good that compound is — is only covering part of the picture.
When you’re searching for the best joint supplements for dogs in the UK, it’s worth pausing on any label that shouts “with glucosamine!” but doesn’t say much else. That single-ingredient focus isn’t necessarily a red flag, but it’s worth asking what else is in there and why.
The formulas that tend to earn the most trust are the ones built around complementary ingredients working together. YuMove’s range, available at Lords and Labradors, is a solid example of that approach — combining active compounds rather than relying on just the headline name to do all the work.
Choosing the right supplement for a senior dog, a young active dog, or a dog already slowing down
The best joint supplement for your dog has less to do with the strongest-sounding formula on the shelf and more to do with what your dog actually needs right now — based on their age, how active they are, and how they’re moving from day to day.
Dog Profile
What to Look For
Additional Support
Senior dog with morning stiffness
High-strength glucosamine and green lipped mussel, anti-inflammatory omega-3s, easy-to-give format like a soft chew or liquid
Joint care dog food, gentle low-impact exercise, warm sleeping spot
Young active dog on long walks or agility
Maintenance-dose glucosamine, green lipped mussel as a protective daily top-up, chew or powder mixed into meals
Weight monitoring, varied terrain to reduce repetitive strain
Dog already slowing down day-to-day
Comprehensive formula with glucosamine, chondroitin, and MSM, palatable format to encourage consistency
Vet check to rule out underlying issues, weight management, rest routine
Practical tip: If your dog is already showing signs of stiffness or slowing down on walks, pairing joint supplements with the right diet can genuinely amplify the results. A food formulated for older dogs — with joint-supporting nutrients already built in — works alongside supplementation rather than duplicating it. Our senior dog food range is a good place to start if you’re thinking about a whole-routine approach.
Joint support really does work best as part of a wider daily routine rather than a standalone fix. Before you buy, use the table above as a quick sense-check: does this formula match your dog’s profile, and is there anything else in their day that could be doing more? Get that right, and whichever product you choose will have a much better chance of making a real difference.
Chews, powders or liquids: which format is easiest to give every day?
The most effective joint supplement is the one your dog will actually eat every single day. Ingredients matter enormously, but if your dog spits it out or sends you into a ten-minute negotiation every morning, you’ve lost before you started. Format is what separates a supplement that genuinely works from one that quietly gathers dust at the back of a cupboard.
Chews: Usually the easiest win. Most dogs treat them like a reward, so you can hand one over with breakfast or tuck it inside a piece of chicken for the suspicious types. Long-lasting dog chews can pull double duty here, supporting joint health while giving your dog something satisfying to work through. Practical tip: offer the chew before the meal, so hunger is firmly on your side.
Powders: A solid choice for dogs on wet food — just stir it straight in. The challenge is the nose-to-bowl inspector who clocks anything unusual immediately. Practical tip: mix the powder into something pungent like tinned sardines or warm bone broth to mask it completely.
Liquids: Easy to dose precisely, though palatability can be hit or miss depending on the product. Practical tip: drizzle over food rather than stirring in, so the scent has a moment to disperse before your dog tucks in.
For most dogs, especially fussy ones, a palatable chew tends to win simply because it actually gets given. When you’re comparing the best joint supplements for dogs UK, daily compliance is the factor most owners underestimate — usually until several weeks have already slipped by.
How to tell if a joint supplement is good value, not just good marketing
Price per pack is rarely the best way to judge value in joint supplements. What actually matters is how much of the good stuff your dog gets each day, and whether it’s something you can realistically keep up long term.
When you’re comparing options, these are the things worth looking at closely:
Cost per daily dose, not the headline price. A larger pack at a higher upfront cost can work out far cheaper day to day than a budget option that runs out in three weeks.
Active ingredient concentration per serving. Look for the mg of glucosamine, green lipped mussel, or other key actives listed clearly on the label. Vague blends with no breakdown are a red flag.
Ingredient form and bioavailability. Hydrolysed collagen, for example, is absorbed more readily than standard forms. How an ingredient is processed makes a real difference to what your dog actually gets from it.
Palatability. The most effective supplement in the world is useless if your dog turns their nose up at it after day two.
Suitability for ongoing use. Joint health is a long game. A formula built for daily, long-term support is worth more than something that works short term and fades.
Worth knowing: A supplement at £35 with a full therapeutic dose can be better value than a £20 option dosed so low you’d need double the serving to get the same effect.
Premium doesn’t always mean overpriced. When a higher price reflects a cleaner formula, better absorption, or a format your dog actually enjoys, it earns its place in your routine. To keep costs manageable without cutting corners, it’s worth exploring how you can subscribe and save on joint supplements over time.
How to narrow it down and pick the best joint care for your dog
The best joint supplements for dogs UK families actually stick with are rarely the most expensive or the most elaborate. They are the ones that slot into real life, that your dog happily takes, and that you actually remember to give.
Start by thinking about where your dog is right now. A young, high-energy Labrador or German Shepherd does well on a maintenance supplement built around glucosamine and omega-3s — something that lays a solid foundation before any problems develop. But if your dog is already taking the stairs more carefully, struggling to find a comfortable position, or stiff on cold mornings, it is worth looking for a higher-strength formula that brings in green lipped mussel, turmeric, or hyaluronic acid for more targeted support.
Then be honest about format. Chews work brilliantly for food-motivated dogs and are easy to build into a daily routine. Powders are a quiet win if you already add wet food or warm broth to the bowl. Pick what suits your household rather than what looks most impressive on the shelf.
Once you have found something promising, check the dosage, confirm the active ingredient levels are clearly stated, and look for GMP-certified manufacturing. If a product is vague about what is actually in it, that tells you something.
And do not stop at the supplement itself. Joint care works best as a whole picture. A well-designed orthopaedic bed can make a real difference to how your dog feels overnight, when joints tend to stiffen most. If that is something you are thinking about, our guide to the best orthopaedic beds for dogs with arthritis is a good place to start.
Frequently Asked Questions
What is the best bone and joint supplement for dogs?
The best bone and joint supplement for dogs is usually one that combines several proven ingredients, rather than relying on just one. Look for a formula with glucosamine, chondroitin, MSM, green lipped mussel or omega-3s, in a format your dog will happily take every day, whether that is a chew, powder or liquid.
What are the early signs of arthritis in dogs?
Early signs of arthritis in dogs often show up as small changes in how they move day to day. You might notice stiffness on cold mornings, taking longer to get going on walks, pausing before jumping onto the sofa, using the stairs more carefully, or generally slowing down and struggling to get comfortable.
Itchy skin in dogs: causes, relief and when to see a vet
Dog itchy skin is one of those things that’s easy to dismiss at first — a bit of scratching here, some paw licking there — but it has a way of quietly getting worse if the cause goes unaddressed. In this article, we look at the most common reasons dogs get itchy, what you can safely do at home to ease mild irritation, and how to choose grooming products that genuinely support sensitive skin. We also cover the signs that tell you it’s time to stop troubleshooting on your own and get a vet involved.
Why your dog’s itchy skin can get worse in winter
If you’ve noticed your dog scratching a lot more once the heating goes on, you’re not imagining it. Winter is genuinely harder on dog skin than most people realise — and the culprit is often right inside your own home.
Central heating strips moisture from the air fast. For dogs with longer or denser coats especially, that drop in humidity can leave skin feeling tight and flaky before you’ve even thought about picking up a grooming brush. Step outside and the situation doesn’t improve much either — cold air holds far less moisture than warm summer breezes, so their skin is effectively fighting on two fronts at once. The result tends to look familiar: a dog scratching a lot, rubbing their face along the sofa, or quietly licking their paws long after their walk is done. All of these can be early signs that their skin barrier is under strain.
The harder part is working out whether what you’re seeing is normal seasonal adjustment or something that needs a closer look. A little extra scratching when the temperature first drops — no redness, no flaking, no broken skin — is usually nothing to worry about. Dogs adapt, and so does their skin. But if the scratching carries on week after week, if you notice dry or flaky patches, a coat that’s lost its shine, or your dog returning to the same spot over and over, that’s a pattern worth taking seriously. Itchy skin in dogs that persists through winter, rather than settling as they adjust, often points to genuine dryness that needs some active support.
Grooming habits are worth revisiting at this time of year too. Small changes can make a real difference to how their coat and skin hold up through the colder months — our winter dog grooming tips are a good place to start.
What’s behind dog itchy skin: the most common causes
Dog itchy skin can stem from a surprising number of different places, and the tricky part is that many of them look almost identical on the surface. Flaking, redness, and constant scratching can show up whether your dog has dry skin, an allergy, or a flea problem — which is why pinpointing the cause before reaching for a remedy really matters.
Common causes of itchy skin in dogs:
Environmental and food allergies: Dog skin allergies are one of the most frequent culprits. Your dog might react to pollen, grass, dust mites, or certain proteins in their food, often showing up as generalised itching, red skin, or repeated paw licking. Some dogs are sensitive to just one trigger; others seem to react to several at once.
Dry skin and flaking: Dog dry skin is especially common in winter, when central heating pulls moisture from the air indoors. You might notice flaky skin around the shoulders, back, or base of the tail, sometimes alongside a dull or rough-feeling coat.
Fleas and parasites: Even a single flea bite can trigger intense itching in sensitive dogs, and you won’t always spot the fleas themselves. If you suspect this might be the cause, our guide on how to get rid of fleas on your dog is a helpful place to start.
Grooming products and contact irritants: A new shampoo, a different washing powder on their bedding, or a product used in the garden can all trigger a reaction. If the scratching started after a change in routine, that timing is worth taking seriously.
Skin conditions like dermatitis: Conditions such as atopic dermatitis cause ongoing inflammation and real discomfort. Rather than clearing up on their own, they tend to flare repeatedly and usually need longer-term management.
Worth knowing: Some causes are short-lived. Switch back to your dog’s old shampoo and the irritation often settles within days. Persistent causes like allergies or dermatitis are a different story — they tend to keep coming back and generally need a vet’s input to manage properly.
If your dog is scratching a lot or you keep catching them licking their paws, those are signals worth taking seriously. The sooner you understand what’s driving it, the sooner you can find something that genuinely helps.
How to soothe itchy skin at home without making it worse
When your dog’s itchy skin is mild, there’s quite a lot you can do at home before reaching for the phone. The key is knowing what actually helps — and what looks helpful but quietly makes things worse.
Simple, safe ways to ease the itch at home:
Bathe with care and the right frequency. Too many baths strip natural oils and leave skin more vulnerable, but a gentle routine with the right shampoo can bring real relief. Our guide to bathing your dog at home covers technique and how often to wash based on your dog’s coat and skin type.
Choose an oatmeal-based or moisturising shampoo. These are far kinder to sensitive skin, helping to calm irritation rather than aggravate it.
Brush regularly. A good brushing session distributes your dog’s natural oils along the coat, keeping skin more supple and less prone to dryness. It’s one of those small habits that adds up.
Apply a vet-safe skin balm or a little coconut oil to dry, flaky patches. Used sparingly, both can offer short-term comfort for dog dry skin between washes.
Run a humidifier where your dog sleeps. Central heating dries out the air, and that dryness affects your dog’s skin just as much as yours. It’s a quiet change that makes a noticeable difference over time.
What to avoid:
Over-bathing, which breaks down the skin’s natural protective barrier
Human shampoos or household cleaning products anywhere near your dog’s coat
Ignoring repeated paw licking — if your dog is constantly licking their paws, that’s worth investigating rather than waiting out
Rubbing or scratching irritated patches, which can spread bacteria and worsen inflammation
If your dog is scratching a lot, the skin looks red or broken, or things haven’t improved after a week, it’s time to call your vet.
Consistent, gentle care really does make a difference. For many dogs dealing with skin allergies or dry skin, a few small tweaks to their grooming routine and home environment are the best starting point.
Choosing the best dog shampoo for itchy skin and flaky coats
Bath time might feel like the most straightforward part of your dog’s care routine, but when their skin is already dry, flaky, or irritated, the shampoo you choose genuinely makes a difference. The wrong formula can strip natural oils, aggravate sensitivity, or even trigger a reaction in dogs already prone to flare-ups. Getting this one right is a simple, practical way to support your dog’s comfort between vet visits.
Look for these ingredients:
Colloidal oatmeal — deeply calming for irritated, reactive skin
Aloe vera — gentle and cooling, especially kind to inflamed skin
Ceramides — help rebuild the skin’s natural barrier, particularly useful through winter
Hypoallergenic, fragrance-free formulas — the safest choice for dogs with dog skin allergies or recurring sensitivity
Gentle, pH-balanced bases — clean effectively without disrupting the skin’s natural balance
What to avoid:
Sulfates and harsh detergents — these strip moisture and worsen dog dry skin
Artificial fragrances and dyes — frequent culprits behind irritation in sensitive dogs
Tea tree oil — despite its natural reputation, it can be toxic to dogs at higher concentrations
Human shampoos — even gentle ones are formulated for a completely different skin pH
One thing worth knowing: medicated shampoos do have their place, but always use them with vet guidance. If your dog is scratching a lot, losing patches of fur, or showing any signs of infection, reaching for a medicated product without advice could mask something that actually needs treatment.
Shampoo is just one part of a broader routine. Pair it with regular gentle grooming and good nutritional support, and you’ll see far better results over time. If you’re unsure where to start, our guide to choosing the right shampoo for your dog walks you through what to look for based on your dog’s coat type and skin needs.
When itchy skin means it’s time to call the vet
Most of us know the feeling of wondering whether the scratching has gone on a bit too long. If you’re asking yourself that, it’s usually worth listening to your gut.
With dog itchy skin, a vet check is a good idea if your dog has been scratching for more than a couple of weeks with no real improvement. The same goes for visible skin changes like redness, sore patches, flaky areas, thickened skin, or hair loss. If your dog keeps licking paws, rubbing their face on the rug, or seems unable to settle, that often points to more than simple dryness.
Broken skin is another clear sign to get help. Once scratching leads to scabs, bleeding, or open sores, infection can creep in quickly. What starts as mild itchy skin in dogs can turn into something much harder to manage if it’s left too long.
Recurring flare-ups matter too. If things calm down for a week or two, then start all over again, there’s probably an underlying trigger. Dog skin allergies, parasites, yeast, bacteria, or even hormonal issues can all cause that stop-start pattern. Gentle home support can still be useful alongside veterinary advice, and it can help to keep a few dog grooming and healthcare essentials on hand for ongoing skin and coat care.
It’s also worth watching for changes in behaviour. A dog who seems quieter than usual, off their food, restless at night, or snappy when you touch a certain area may be feeling more uncomfortable than they’re showing.
The reassuring bit is that a vet will usually start with simple checks to work out what’s driving the itch. Getting help early often means quicker relief for your dog and less chance of a small skin problem turning into a longer-term one.
Frequently Asked Questions
Can seasonal allergies cause itchy skin?
Yes, seasonal allergies can cause itchy skin in dogs. Environmental triggers like pollen and grass often show up as general itching, red skin, or repeated paw licking, and symptoms may flare at certain times of year. If the itching keeps returning, it’s worth getting your vet involved.
What is allergic dermatitis in dogs?
Allergic dermatitis in dogs is an inflammatory skin condition linked to allergy-related flare-ups that cause ongoing discomfort and itching. Rather than settling quickly on its own, it tends to come back repeatedly and usually needs longer-term management, especially if your dog is scratching, licking paws, or showing irritated skin.
Probiotics for dogs: do they work and how to choose one
Choosing the best probiotics for dogs UK pet parents can actually trust means cutting through a lot of noise, and this guide is here to help you do exactly that. We cover what probiotics genuinely do for your dog’s gut, how to read a label without getting bamboozled by marketing, and which formats work best for different dogs and life stages. By the end, you’ll have a clear, practical way to decide whether a probiotic is worth trying for your dog and how to use it well.
What probiotics actually do for dogs — and when they’re worth trying
If your dog has been leaving surprises on the carpet, producing enough gas to clear a room, or just seeming a bit sorry for themselves after a course of antibiotics, you’ve probably ended up down a probiotic rabbit hole. You’re not alone — and you’re asking exactly the right questions.
Probiotics are live bacteria and yeasts that help support the natural balance of microorganisms in your dog’s gut. Picture the gut as a busy, working ecosystem. When everything is ticking along nicely, digestion runs smoothly, nutrients get absorbed properly, and the immune system has a solid foundation to work from. Disrupt that balance — with a sudden diet change, a stomach bug, a stressful stay at the kennels, or a round of antibiotics — and things can quickly go sideways.
Most owners start looking into probiotics for dogs when they notice loose stools that won’t quite firm up, persistent wind, intermittent vomiting, or a dog who takes ages to feel like themselves again after an illness. Others use them as everyday gut support for dogs who’ve always had a sensitive stomach, even when nothing dramatic has happened.
It’s worth being clear about one thing: probiotics are a support tool, not a cure. They work best alongside good nutrition, a consistent routine, and regular vet check-ups. If symptoms are severe or ongoing, always speak to your vet before reaching for a supplement. But for the everyday wobbles that most dogs go through at some point, a well-chosen probiotic can genuinely help things settle. The Lords and Labradors wellbeing range is a good place to start exploring your options.
How to tell if a dog probiotic is actually worth buying
Shopping for dog probiotics can feel genuinely overwhelming. Scroll through any pet retailer online and you’ll find dozens of options making near-identical claims. Knowing what to actually look for on the label makes it far easier to separate the products worth trying from those that are mostly clever packaging — which is exactly what you need when comparing the best probiotics for dogs UK has to offer.
Evaluation Criteria
What to Look For
Strain quality
Named, researched strains like Lactobacillus acidophilus or Enterococcus faecium — not vague “probiotic blend” labelling
CFU count (live cultures)
At least 1 billion CFUs per serving, guaranteed at end of shelf life, not just at the point of manufacture
Storage requirements
Clear guidance on refrigeration. Some shelf-stable formulas are perfectly fine — just make sure the label is upfront about it
Palatability and flavour
Chicken, beef or natural flavours your dog will genuinely eat. A probiotic they turn their nose up at helps no one
Format suitability for picky dogs
Powders that disappear into food often win with fussy eaters — capsules and large chews can be a harder sell
A few myths worth leaving behind:
More strains doesn’t mean more effective. One well-researched strain consistently beats ten poorly studied ones.
Probiotics for dogs aren’t one-size-fits-all. Breed, age and gut history all affect how well a product performs for your individual dog.
Price doesn’t equal quality. Some mid-range options genuinely hold their own against premium labels.
Once you know what you’re looking for, comparing products becomes much less daunting. The next question is which format actually suits your dog — because even the best formula is useless if it ends up spat onto the kitchen floor.
Powder, chews or capsules? Pick the format your dog will actually take
Even the best probiotics for dogs UK pet parents can find will do precisely nothing if your dog turns their nose up at them. Format really does matter — and picking the right one can mean the difference between a supplement that actually gets eaten and one that quietly collects dust at the back of a cupboard.
Format
Best For
Pros
Cons
Powder
Fussy eaters, wet food feeders
Mixes invisibly into food
Can clump; harder to measure
Soft Chews
Most dogs, treat-motivated pups
Easy, treat-style reward
Some dogs eat around them
Capsules
Owners needing precise dosing
Exact dose every time
May need hiding in food
Once you’ve settled on a format, a few simple tricks can help with dogs who are still suspicious:
Stir powder into warm bone broth or a spoonful of wet food to take the edge off any unfamiliar smell
Tuck capsules into a pill pocket or a small piece of cheese — a classic for good reason
Crumble a soft chew over a favourite food topper if your dog ignores it as a standalone treat
Start with a smaller amount and build up gradually, especially if your dog has a sensitive stomach
That last point is worth remembering as a general rule when figuring out how to choose probiotics for dogs: ease them in, watch how they respond, and adjust from there.
Choosing the right probiotic for your dog’s age, size and tummy troubles
Not every probiotic suits every dog, and that’s where a lot of “best probiotics for dogs UK” round-ups fall short. The right pick depends on your dog’s age, size and the kind of tummy trouble you’re trying to help with.
Puppies
Choose a simple formula made for young dogs, with clear dosing and no unnecessary extras
Mild digestive support is often easier to tolerate than a very “loaded” product
If your puppy has ongoing diarrhoea, always check with your vet rather than guessing
Small dogs
Tiny dogs need tiny servings, so look for dog probiotics UK products with dosing based on body weight
Powders or small chews are often easier than large capsules
Rich flavourings can be a bit much for sensitive little stomachs, so simpler can be better
Medium to large dogs
Bigger dogs may need a higher daily amount, but that should come from the label directions, not just the biggest CFU number on the tub
If your dog gets loose stools during travel, kennels or fireworks season, a probiotic can be worth trying as part of their routine
Pick a format you can use consistently. If they happily eat it every day, you’re far more likely to see whether it helps
Senior dogs
Older dogs often do best with easy-to-digest formulas
Some probiotics for dogs also include prebiotics, which may help support a more delicate gut
Avoid anything overly rich if your older dog is prone to digestive flare-ups
Quick tip: If your dog reacts to certain foods, their probiotic should work with their diet, not against it. Our sensitive dog food options can help you keep the rest of the bowl gentle too.
If you’re wondering how to choose probiotics for dogs, start with your dog in front of you, not the marketing on the label.
How to use probiotics safely: timing, dosage and when to call the vet
Probiotics are generally safe for most dogs, but like anything gut-related, they work best when used thoughtfully. Getting the timing and dosage right makes a real difference — and knowing when to call your vet matters just as much as choosing the right product.
Practical tips for using probiotics well:
Give probiotics with food or just after a meal — it helps with tolerability and gives the good bacteria a better chance of surviving the journey through your dog’s digestive system
If your dog has just finished a course of antibiotics, keep going with the probiotic for the full recommended period, even once they seem back to their usual self
For mild tummy upsets, a short course of one to two weeks is usually enough — you don’t need to supplement indefinitely
Always follow the dosage on the label rather than guessing by size, since CFU counts and strain concentrations vary quite a bit between products
When to call your vet straight away:
If your dog is vomiting, has blood in their stool, seems lethargic, or shows signs of dehydration, don’t wait it out. The same goes if symptoms haven’t improved after 48 to 72 hours. These aren’t things a probiotic can sort on its own.
No supplement replaces a proper diagnosis when something is genuinely wrong. The best probiotics for dogs support gut health — but they work best alongside good nutrition and veterinary care, not instead of it. Think of them as one helpful piece of the puzzle, not the whole picture.
So, which probiotic is best for your dog? A simple way to decide
The truth is, there’s no single best probiotic for dogs in the UK that suits every dog. But once you understand what your dog actually needs, the choice becomes much easier.
If your dog has a sensitive stomach, loose stools after meals, or struggles with diet changes, look for a multi-strain formula with a solid CFU count and prebiotic support. Powders tend to work well here — they’re easy to dose and simple to mix into food without any drama.
If your dog is a picky eater who treats anything remotely unfamiliar with deep suspicion, a soft chew or treat-style probiotic is usually the path of least resistance. Palatability genuinely matters. A supplement that gets sniffed and walked away from isn’t helping anyone.
For puppies, seniors, or dogs with ongoing digestive issues, both format and strain selection deserve a little more thought. Check labels carefully, and if you’re unsure, have a quick chat with your vet before you start — especially if your dog is on medication or still recovering from something. Probiotics are generally very safe, but your vet has the full picture.
For most healthy dogs dealing with the occasional upset stomach or a bumpy transition to new food, a well-chosen daily probiotic can make a real difference. Start simple, stay consistent, and give it a few weeks before you decide whether it’s pulling its weight. You’ll usually know.
Best flea treatment for dogs: what works fastest and lasts longest
Finding the best flea treatment for dogs gets overwhelming fast, especially when every product promises to be the strongest, quickest, or most long-lasting option on the shelf. This guide cuts through that noise by looking at how quickly different treatments actually work, how long they last between doses, and which formats are genuinely easiest to use in real life. By the end, you’ll have a clear sense of what suits your dog’s age, size, and routine, without the second-guessing.
What flea treatment actually needs to do when you’ve spotted the first itch
Spotting your dog scratching more than usual tends to trigger that same panic in every pet parent: what’s going on, and how do I fix it fast?
Here’s the thing — a single flea is rarely just one flea. By the time you notice the itch, eggs may already be dropping into your carpet, bedding, and sofa cushions. So the best flea treatment for dogs needs to do more than kill the adults you can see. It also needs to tackle eggs and larvae before they hatch, then keep working long enough to stop new fleas hitching a ride after walks, park visits, or a playdate with a friend’s dog.
That’s why it’s worth understanding what each product type actually does before you buy.
Spot-ons are applied directly to the skin at the back of the neck, absorbing into the coat and skin oils to kill fleas on contact. Chewable tablets work through the bloodstream and tend to act quickly, making them a go-to when you need the fastest flea treatment for dogs. Collars release active ingredients steadily over weeks or months, so they’re well suited to long-lasting flea and tick treatment with minimal effort. Sprays are more targeted and handy for a top-up between doses, or if your dog simply won’t tolerate tablets or pipettes.
Before settling on one, think honestly about how your dog handles different application methods, how often you can realistically re-treat, and whether you’re fighting an active infestation or trying to stay ahead of one. If it’s the former, our guide on how to get rid of fleas on your dog is a brilliant place to start.
If you need fast relief, which flea treatment works quickest?
When your dog is already scratching, “fastest” matters, but it isn’t the same for every type of flea treatment for dogs. The key thing to know is that timings vary by active ingredient and brand, so it’s better to treat these as typical patterns rather than fixed rules.
Format
Typical start time
What to know
Best for
Oral tablet
Often within hours
Some products begin killing fleas very quickly, but timing depends on the tablet
Fast relief when fleas are already causing real irritation
Spot-on
Usually within several hours to around a day
Needs time to spread across the skin and coat
Good all-round option for treatment plus ongoing cover
Spray
Varies widely by product
Can be useful for direct, targeted use, but may need more hands-on application
Small areas or dogs who need a more local approach
Collar
Usually slower to fully protect
Better at ongoing prevention than immediate relief
Longer-term flea and tick support
Worth knowing: If your priority is the fastest flea treatment for dogs, oral options are often the quickest to start working, but always check the label for the specific product you’re considering.
In real life, that means a miserable, constantly scratching dog may need a different choice from one who just needs steady monthly protection. A collar can be brilliant for prevention, but it usually wouldn’t be my first pick for urgent relief. Spot-ons sit somewhere in the middle: not usually the fastest option, but often a practical balance of ease and longer-lasting cover.
If that’s what you’re after, Frontline Plus for small dogs is a helpful example of a spot-on to compare when you’re weighing up convenience, monthly protection, and whether it feels like the best flea treatment for dogs for your routine.
Which flea treatment lasts longest between doses?
If you’ve ever come home from a weekend away and quietly panicked trying to remember whether you treated your dog before you left, you already know why duration matters. Finding a long-lasting flea treatment for dogs can genuinely take one more thing off your mental load, whether you’re out on muddy woodland walks every Saturday or heading off somewhere with your dog in tow.
Treatment Type
Typical Duration
Best For
Convenience Rating
Spot-ons
Up to 4 weeks
Most dog owners, easy monthly routine
4/5
Tablets
24 hours to 3 months (varies by product)
Dogs who hate topical treatments
3/5
Collars
Up to 8 months
Owners wanting long-term, hands-off protection
5/5
Sprays
Days to a few weeks
Top-up coverage or treating the environment
2/5
Worth knowing: Spot-ons like Frontline Plus offer up to four weeks of flea and tick protection from a single application. Set a monthly reminder, apply it, and you’re done.
Longer-lasting formats make missed doses far less likely, and that’s no small thing when life gets busy. For most pet parents, the best flea treatment for dogs isn’t necessarily the most advanced one on the market — it’s the one that slots into your existing routine without you having to think too hard about it. A good dog flea and tick treatment should just quietly get on with the job, leaving you free to enjoy the walk rather than worry about what might be lurking in the long grass.
What’s easiest to give your dog: spot-on, tablet, collar or spray?
The best flea treatment for dogs isn’t just about what kills fleas fastest. It’s also about what your dog will actually tolerate, and what fits into your life without becoming a whole production. A treatment that sits unopened in the cupboard because your dog bolts the moment you reach for it isn’t helping anyone.
Format
Best For
Watch Out For
Spot-on
Dogs who are easy to handle and don’t swim or bathe frequently
Can feel greasy; needs to absorb fully before contact with other pets
Tablet
Fussy handlers or multi-dog households where cross-contact is a concern
Determined fussy eaters will find it, even inside a pill pocket
Collar
Set-and-forget households wanting long-term coverage
Fit matters; some dogs find them uncomfortable or chew them off
Spray
On-demand use between treatments or for lighter coverage
Needs applying thoroughly; some dogs dislike the sensation
Before you decide, it’s worth thinking through a few practical questions:
Does your dog swim or get bathed regularly? Both can affect how well spot-ons and collars hold up.
Are they a dedicated fussy eater who sniffs out tablets no matter how well you hide them?
Do you have multiple dogs where a freshly applied spot-on could transfer during a cuddle?
Would you rather apply once and forget about it, or do you prefer the flexibility to treat as needed?
Does your dog get anxious around handling, aerosol sounds, or anything fastened near their neck?
No single format suits every dog, which is why lifestyle fit matters just as much as efficacy. If you want something flexible to use between treatments, our dog sprays are a low-fuss option worth keeping in the cupboard for when you actually need them.
How to choose the safest option for your dog’s age, size and lifestyle
The best flea treatment for dogs isn’t always the one making the boldest promises on the box. It’s the one that actually fits your dog — their age, their size, their skin, and how they spend their days. Getting that match right is what separates a treatment that works from one that quietly disappoints.
Before you buy, run through these checks:
Minimum age: Many treatments aren’t suitable for puppies under eight or twelve weeks. Always check the label before using anything on a young dog.
Weight band accuracy: Flea treatments are dosed by weight, so using the wrong band can mean under-dosing or, more seriously, giving too much. Weigh your dog before you buy.
Skin sensitivity: If your dog has reacted to topical treatments before, a tablet-based option may suit them better.
Other medications or health conditions: Some ingredients interact with existing treatments. If your dog is on medication, a quick call to your vet is worth it.
Swimming and bathing habits: Spot-ons can lose their effectiveness faster on dogs that swim regularly or get bathed weekly. A collar or tablet tends to hold up better in those cases.
Puppy-safe formulas differ significantly from adult treatments — always check the minimum age on the label before applying anything.
There are plenty of long-lasting and fast-acting dog flea and tick treatment options available, but they only do their job properly when they’re right for the individual dog. If you have a puppy or a younger dog joining the family, our puppy flea and worming treatments are a good place to start.
How to make the final choice without overthinking it
If you’ve made it through this guide and you’re still not quite sure which way to go, here’s a simple way to think about it.
If your dog is already scratching and miserable, speed is what matters right now. Find a fast-acting flea treatment for dogs that starts working within hours, and figure out the longer-term routine once the immediate discomfort is sorted.
If you’re someone who forgets monthly doses, honestly, you’re in good company — pick the longest-lasting option you can find. A treatment that covers three months gives you far more breathing room than one you need to remember every four weeks like a recurring alarm you keep snoozing.
And if your dog is the type who clamps their jaw shut the second anything remotely medicinal appears, go with whatever format they’ll actually tolerate. A spot-on they barely notice beats a chew they spit out across the kitchen floor every single time.
Once you know which of those three things matters most, the best flea treatment for dogs for your situation becomes a lot easier to land on. It really does come down to your dog, your routine, and your life — not some universal right answer.
To compare options across all three priorities, take a look at the Lords and Labradors Frontline flea and worming range and find something that actually works for both of you.
That sudden honking, snorting sound your dog makes out of nowhere is enough to stop any pet parent’s heart, but knowing what to do when your dog is reverse sneezing makes all the difference. In this guide, we’ll walk you through why it happens, how to keep both of you calm in the moment, and which signs are worth a call to the vet. We’ll also share some simple changes you can make at home to reduce how often it happens in the first place.
What reverse sneezing looks and sounds like in dogs
If you’ve ever watched your dog suddenly freeze, stretch their neck forward, and let out a loud, honking snort like they’re trying to inhale and sneeze at the same time, you’ve almost certainly witnessed a reverse sneeze. It sounds alarming. It looks alarming. And if you had no idea what you were watching, panicking is a completely natural response.
The reassuring news? Reverse sneezing is usually harmless. It’s not a cough, not a seizure, and not a sign that something is lodged in their throat. Think of it as a reflex, much like a regular sneeze, just working in reverse. Instead of air rushing outward, your dog rapidly pulls air in through their nose, producing that distinctive snorting or honking sound that tends to stop everyone in the room.
During an episode, most dogs stand still with their elbows splayed, neck outstretched, and eyes wide open. Some look genuinely distressed, which is hard to watch even when you know what’s happening. The episode itself usually lasts anywhere from a few seconds to around a minute, and the vast majority of dogs bounce back to their normal selves almost immediately.
Paying attention to how your dog behaves before and after can tell you a lot. A dog that’s relaxed and happy on either side of the episode is generally nothing to worry about. Our guide to understanding your dog’s body language can help you get better at reading those subtle signals.
Recognising what reverse sneezing looks and sounds like is honestly half the battle — because once you know, it’s so much easier to stay calm when it happens.
Why dogs reverse sneeze in the first place
Reverse sneezing is an involuntary reflex, and it usually comes down to something irritating the soft palate, throat, or nasal passages. Think of it like a sneeze in reverse — the body trying to clear an irritant rather than signal that something is seriously wrong. Most dogs will experience it at some point, and for the vast majority, it’s completely normal.
Common triggers include:
Nasal or throat irritation from dust, pollen, or mould
Excitement or over-stimulation, like bounding over to greet you at the door
Pulling on the lead, which puts pressure on the throat
Eating or drinking too fast
Strong scents, household sprays, or air fresheners
Sudden changes in temperature or air quality
Being a flat-faced (brachycephalic) breed, such as a Pug, French Bulldog, or Cavalier King Charles Spaniel — their shorter airways make them anatomically more prone to episodes
Understanding the dog reverse sneezing causes behind an episode really does help in the moment. Once you recognise that the body is simply doing what it needs to do — the same way we might need to cough or clear our throat — it’s much easier to stay calm rather than panic. And calm is exactly what your dog needs from you.
The good news is that most episodes pass within seconds to about a minute. One moment your dog is honking away, and the next they’re trotting off like nothing happened. That’s usually all there is to it.
What to do in the moment when your dog is reverse sneezing
If you’re wondering what to do when your dog is reverse sneezing, the first thing is simple: try not to panic. It can sound dramatic, especially the first time you hear it, but many episodes are brief and pass within 30 seconds to a minute. Your calm really helps.
In the moment, focus on gentle comfort:
Stay relaxed and speak softly. Your dog will pick up on your energy. A quiet, reassuring voice can help them settle while the episode passes.
Gently stroke their throat or chest. Slow, light strokes may encourage a swallow, which can help the spasm ease naturally.
Offer a tiny sip of water if they’re settled enough to take it. Not a full bowl, and don’t force it. Sometimes a small swallow is all that’s needed.
Move them away from obvious triggers. If they’ve been sniffing dust, pulling on the lead, or sitting near strong smells like candles or cleaning sprays, guide them to a calmer spot with fresher air.
A good rule of thumb with reverse sneezing in dogs treatment at home is to keep things quiet, gentle, and low-stress. Most of the time, your job is simply to comfort rather than intervene.
What not to do:
Don’t put your fingers in your dog’s mouth
Don’t hold them down or restrain them forcefully
Don’t fuss loudly or crowd them, even if you feel worried
Once it’s over, many dogs go straight back to normal as if nothing happened. If your dog’s reverse sneezing symptoms seem to happen often, last longer than usual, or leave them distressed, that’s when it’s sensible to think about dog reverse sneezing causes and whether a vet check is the right next step.
When reverse sneezing is worth a vet call
Most of the time, reverse sneezing in dogs is completely harmless and passes within seconds. But if you start noticing that episodes are happening more often, or that your dog seems off afterwards, it’s worth paying closer attention. You know your dog better than anyone, so trust that instinct.
These are the signs that deserve a vet conversation:
Episodes happening multiple times a day, or lasting longer than a minute
Your dog seeming distressed, panicked, or wiped out afterwards
Nasal discharge, whether clear, cloudy, or discoloured
A new cough appearing alongside the reverse sneezing
Laboured or noisy breathing between episodes
Gums that look pale or slightly blue
Lethargy, low energy, or a noticeable dip in appetite
An occasional isolated episode is rarely cause for concern. A recurring or worsening pattern is always worth getting checked.
When to worry about dog reverse sneezing really comes down to that shift in pattern. A vet can look into common culprits like allergies, a low-grade infection, a foreign body in the nasal passage, or a structural issue affecting the airway. None of these are things you’d pick up at home, but all of them are very treatable when caught early. Even if everything turns out to be fine, you’ll come away with peace of mind, and that’s never wasted.
How to reduce reverse sneezing triggers at home
Once you understand what sets your dog off, a few small tweaks at home can make a real difference. If your dog tends to pull on the lead and reverse sneezes regularly, switching to a well-fitted harness is one of the easiest wins. Collar pressure on the throat is a surprisingly common trigger, and a harness removes it entirely.
Inside, it’s worth thinking about air quality too. Dust little and often, skip the heavily scented candles or plug-in air fresheners, and if you use cleaning sprays, let the room air out before your dog wanders back in. Small habits, but they stack up.
Fast eaters are also worth a closer look. Gulping food can irritate the throat and kick off an episode, so a slow feeder bowl or snuffle mat at mealtimes can genuinely help.
Beyond that, it’s worth keeping a loose mental note of when episodes happen. After a walk during high pollen season? After a boisterous play session? Spotting a pattern gives you something real to work with, whether that’s adjusting walk times or winding down play more gradually.
The reassuring truth is that most dogs live completely happily alongside the occasional reverse sneeze. Now that you know what it looks like, why it happens, and what to do in the moment, you’re already better placed to handle it calmly when it comes.
Frequently Asked Questions
How to calm down reverse sneezing in dogs?
The best way to calm reverse sneezing is to stay relaxed and gently comfort your dog while it passes. Speak softly, stroke their throat or chest, offer a tiny sip of water if they’re settled enough, and move them away from dust, strong smells, or other obvious triggers.
When to worry about reverse sneezing?
Reverse sneezing is worth worrying about if it becomes frequent, lasts longer than a minute, or your dog seems unwell afterwards. Signs that need a vet call include distress, nasal discharge, a new cough, noisy breathing between episodes, pale or blue gums, lethargy, or a drop in appetite.
What triggers reverse sneezing in dogs?
Reverse sneezing is usually triggered by irritation in the throat or nasal passages. Common causes include dust, pollen, mould, strong household scents, excitement, pulling on the lead, eating or drinking too fast, temperature changes, and being a flat-faced breed with shorter airways.
How long is too long for a dog to reverse a sneeze?
Anything lasting longer than about a minute is a sensible point to call your vet. Most reverse sneezing episodes pass within a few seconds to around a minute, and dogs usually seem completely normal again straight afterwards.
SIGN UP FOR USEFUL TIPS & GUIDES STRAIGHT TO YOUR INBOX
19.08.26August 19, 2026HealthFeatured
How to Cut Dog Nails That Are Black
Trimming black dog nails can feel like a guessing game, but it really does not have to be. This guide walks you through how to cut dog nails that are black with confidence, covering everything from spotting the quick before you snip to choosing the right tools, handling the odd nick along the way, and building a calmer routine over time. Whether you are starting from scratch or just looking to feel less uncertain with the clippers, there is something here to help you and your dog get through nail day in one piece.
How to Tell Where the Quick Is on Black Dog Nails
The quick is the living core of your dog’s nail. It contains blood vessels and nerves, so if you catch it with the clippers, it bleeds and stings — not ideal for anyone involved. With light-coloured nails, you can usually spot it as a soft pink shadow running through the centre, which makes the whole job much more straightforward. With black nails, that shadow disappears completely, and that’s exactly why so many pet parents feel stuck before they’ve even picked up the clippers.
The good news? You don’t have to guess. You just need to slow down and read a few reliable clues.
Start by shining a small torch or your phone’s flashlight through the nail from underneath. On finer nails, this can reveal the quick as a darker oval shape within the nail. It won’t work for every dog, but it takes about three seconds to try and it’s genuinely useful when it does.
If the light doesn’t show much, nail texture becomes your next guide. Trim a tiny sliver from the tip and look at the cut surface. At first it’ll appear solid and chalky, white or grey all the way through. That’s safe ground. Keep taking small slivers, checking each time, and eventually the centre will shift. It might look darker, almost black, or you’ll notice a small grey dot appearing in the middle. That dot is your cue to stop. You’re getting close to the quick.
Nail shape tells you something before you even make a cut, too. Most dog nails curve downward and taper toward the tip, and the quick follows that same curve. It typically sits further back than you’d expect, so if the nail has a definite hook at the end, trimming just that hooked portion is usually where you want to start.
One last thing: a calm dog makes all of this much easier. When they’re tense and pulling away, it’s harder to look closely and work carefully. Keeping an eye on your dog’s body language throughout the trim helps you spot early signs of stress before things unravel.
The Tools That Make Black Nail Trims Safer and Calmer
Having the right tools ready before you start makes a real difference when you’re working with black nails. They help you make smaller, more controlled cuts, reduce the chance of catching the quick off guard, and keep the whole experience calmer for your dog from the very first snip.
Sharp scissor-style or guillotine clippers. Blunt clippers crush rather than cut cleanly, which is uncomfortable for your dog and makes it much harder to read the cut surface. Sharp blades give you a clean edge — exactly what you need when taking black nails back little by little.
A nail grinder. If clippers feel a bit too all-or-nothing, a grinder lets you remove nail gradually and gives you much finer control over how much you take off. Many dogs also find the sensation less startling than a sudden snap.
A small flashlight or phone torch. Holding a light against the top of the nail can help you spot the quick’s shadow before you cut. It doesn’t work on every dog, but it takes seconds to try and is well worth doing.
Styptic powder. Have this within arm’s reach before you begin. If you nick the quick, it works fast — and knowing it’s right there helps you stay calm rather than scrambling.
High-value treats. Something your dog doesn’t get at any other time, like a small cube of cheese or a bit of cooked chicken, makes the session feel worthwhile for them and keeps their focus in the right place.
A non-slip mat or towel. This gives your dog something to grip, helps them feel a little more settled, and means less wriggling for you to work around.
What is styptic powder? It stops minor bleeding almost instantly if you nick the quick. It’s a staple in any dog nail trimming kit, so always have it to hand before you start.
None of these are hard to find, and together they genuinely change how confident you feel tackling black nails at home. If you’re building out your grooming kit, you’ll find plenty of dog care essentials over at Lords and Labradors. Good preparation really is the best dog nail trimming tip there is — have everything ready before your dog sits down, and you’re already off to a better start.
A Step-by-Step Way to Cut Black Dog Nails Without Hitting the Quick
Once you understand how to read the nail, the actual cutting becomes far less daunting. Trimming black dog nails safely is really about slowing down, taking tiny slices, and trusting what you see rather than guessing where to stop.
Settle your dog before you pick up the clippers. Sit on the floor together, offer a few treats, and let them sniff the clippers. A calm start makes everything that follows easier.
Find a comfortable position for you both. Some dogs are happy lying on their side while you kneel beside them. Others prefer sitting upright with a paw gently lifted. Work with your dog rather than forcing a hold that makes them tense.
Press the toe pad gently to extend one nail at a time. This gives you a clear view and keeps the paw steady without gripping so tight that your dog pulls away.
Start with a small snip at a slight angle. Take just the very tip off. You’re not trying to do it all in one go — you’re just getting started.
Check the cut surface before you snip again. Hold the nail up to the light and look at the cross-section. A chalky white or grey centre means you’re well away from the quick and safe to continue.
Keep going in tiny increments, checking every time. As you get closer, the centre of the nail will start to shift. The moment you see a darker grey or black dot beginning to appear in the middle, stop on that nail. That dot is the quick showing itself, and one slice further could cause real discomfort.
Reward your dog between nails, not just at the end. A treat after each one keeps things positive and gives your dog a natural moment to breathe and reset.
Stop if your dog tells you they’ve had enough. Panting, pulling the paw away, or going rigid are all signs to pause — even if you’ve only done two nails. Pushing through rarely ends well.
Split the session across days if that’s what your dog needs. Front paws today, back paws tomorrow. There’s no rule that says all twenty nails have to happen at once, and honestly, your dog will thank you for it.
A note on the black dog nail quick:
In lighter nails, the quick shows up as a visible pink line running through the centre. In black nails, you simply can’t see it from the outside, which is why reading the cross-section matters so much. A small dark dot or a soft pale ring appearing in the centre after a snip is your signal to stop. That’s the quick beginning to surface, and going any further risks pain and bleeding.
The whole point of learning how to cut dog nails that are black is building confidence through small wins, not racing to finish. Three nails done calmly is genuinely better than twenty done with your dog stressed and wriggling. If your dog tends to find grooming difficult, it’s worth thinking about how you handle other anxious moments together — the same approach that helps keep dogs calm during stressful situations like fireworks applies just as well here.
What to Do if You Nick the Quick
Nicking the quick when you’re learning how to cut dog nails that are black happens to almost every pet parent at some point. It looks more dramatic than it is — a small dark red bleed from the tip of the nail — and it tends to startle you far more than it hurts your dog. Take a breath. You’ve got this.
Here’s exactly what to do:
Stop trimming and set the clippers down.
Apply styptic powder or cornstarch directly to the nail tip.
Hold gentle pressure with a clean cloth or your finger for 30 to 60 seconds.
Keep your dog calm and still with a quiet voice and a soft, steady touch.
Once the bleeding slows, check the nail before letting your dog wander off.
Styptic powder is a clotting agent that stops bleeding quickly — and it’s the single most useful thing to have nearby during any nail trim. Purdue University’s veterinary guidance specifically recommends that you keep styptic powder available when clipping a pet’s nails to stop bleeding if you clip too short. Pick some up before your next session if you don’t already have it.
For aftercare, keep the paw clean and dry for the rest of the day. Avoid rough-surface walks for 24 hours, and check back on the nail over the next day or so for any redness or swelling.
If the bleeding hasn’t slowed within 5 to 10 minutes, or your dog seems to be in genuine pain rather than just briefly unsettled, call your vet. That’s the sensible thing to do — not a sign that anything has gone seriously wrong.
How to Make Nail Trims Easier Next Time
The biggest dog nail trimming tip anyone can give you? Trim more often. It sounds almost too simple, but when you’re working out how to cut dog nails that are black, consistency matters just as much as technique. Dogs who seem completely impossible to trim can surprise you once a calm routine clicks into place.
Trim every 3 to 4 weeks. Regular sessions keep nails at a manageable length and make each one shorter and less stressful — for both of you.
Reward after every single nail. Use something your dog genuinely loves, like a small piece of cheese or chicken, and give it the moment you finish each nail rather than saving it until the end.
Handle paws between sessions. A minute or two of gentle paw touching while you’re watching TV or winding down costs nothing and builds real tolerance without any pressure attached.
Take a little, more often. Small snips every few weeks feel far less daunting than trying to tackle seriously overgrown nails after a long gap — and you’ll stay well clear of the quick.
Keep the setup consistent. Same spot, same time of day, same calm energy. Dogs read routine surprisingly well, and familiarity genuinely helps settle nerves.
Start puppies early. Even pretend trims with no cutting involved help young dogs learn that paw handling is completely normal.
Pro tip: Trimming a tiny amount every 2 to 3 weeks is far safer than waiting until nails are overgrown — especially when you’re navigating the black dog nail quick.
Think of each session as a training opportunity rather than a chore to get through. Dogs who once wriggled, whined, or flatly refused can absolutely learn to sit calmly for a trim. It just takes consistency, patience, and a well-stocked treat supply.
When to Ask a Groomer or Vet for Help
Sometimes, the most caring thing you can do is hand the clippers to someone else. If you have worked through how to cut dog nails that are black and still feel uncertain, that is completely fine. Some dogs have nails that are genuinely thick, curved, or difficult to read, even for owners who have been doing this for years. Others simply will not settle, no matter how many treats you offer or how carefully you have set the scene.
Professional groomers trim nails every single day. They know how to read the nail, position the dog, and work with a calm confidence that only comes with real experience. Booking a session or two is not admitting defeat. It is a smart way to watch someone skilled work up close, ask questions, and pick up the kind of practical knowledge that no article can fully replace.
Your vet is equally worth considering, especially if your dog has unusually thick nails, any history of paw injuries, or anxiety that makes handling genuinely difficult. They can trim safely and point you toward ways to make future sessions less stressful for your dog and for you.
The most important shift is this: professional help is a starting point, not a last resort. Once your dog has had a calm, positive experience with someone who knows exactly what they are doing, you will often find that the next trim at home feels a little easier too.
Frequently Asked Questions
How do you know where the quick is on black dog nails?
You find the quick on black dog nails by trimming tiny slivers and checking the cut surface each time. A chalky white or grey centre is usually safe; when you start to see a darker dot or change in the middle, stop. A torch underneath the nail can sometimes help too.
Can I trim my dog’s black nails?
Yes, you can trim your dog’s black nails if you go slowly and take very small amounts at a time. The safest approach is to remove the hooked tip first, check the cut surface after every snip, and stop as soon as you see a darker centre appearing.
How do you trim severely overgrown dog nails?
Trim severely overgrown dog nails by taking off only a little at a time and spreading the work over multiple sessions if needed. Tiny, regular trims every 2 to 4 weeks are safer than one big cut, especially with black nails, because they help you avoid catching the quick.
To understand why the 7 second rule matters so much, it helps to know what is actually happening beneath your dog's paws on a warm day. Most of us instinctively judge the temperature by the air around us, but the ground tells a very different story. Surfaces that feel perfectly walkable to us can reach temperatures that cause real damage to paw pads within seconds, and the gap between the two can be startling. Here is why hot ground is a bigger problem than it might look.
What is the 7 second rule for dogs why it is important
The 7 second rule for dogs is a simple test that helps you decide whether pavements, tarmac, or artificial grass are too hot for your dog's paws. Here's how it works: place the back of your hand flat against the surface where you plan to walk. If you can't keep it there comfortably for a full seven seconds, the ground is too hot for your dog.
This quick check has become a go-to for pet parents because it gives you an instant answer without needing thermometers or guesswork. If the surface feels uncomfortably hot against the sensitive skin on the back of your hand, your dog's paw pads will feel it even more intensely. Those paw pads might look tough, but they're actually more delicate than many people realise.
The rule works particularly well for checking pavements, car park surfaces, and artificial grass, which can heat up surprisingly quickly on sunny days. You know those mornings when the air feels lovely and mild, but the pavement is already scorching? That's exactly when this test saves the day.
Now, this isn't a perfect scientific measurement. It's more like a practical safeguard that helps you make smarter decisions in the moment. Some dogs have more sensitive paws than others, and factors like your dog's size and the humidity can affect how they cope with warm surfaces.
Think of the 7 second rule as your first line of defence during summer walks. Just like checking if it's too wet to venture out (much like deciding whether you can walk your dog in the rain), a quick hand test becomes second nature once you start using it regularly.
Why hot ground can be harder on paws than many people realise
One of the biggest surprises for many pet parents is discovering just how much hotter surfaces can be compared to the air temperature around us. While it might feel like a pleasant 25°C day, the pavement beneath your feet could easily be reaching 50°C or more. Hard surfaces absorb and store heat throughout the day, creating conditions that can genuinely damage your dog's paws within seconds.
The surfaces that pose the biggest risks to our dogs include:
Tarmac and asphalt - These dark surfaces are notorious heat absorbers and can become scorching even on moderately warm days
Concrete paving stones - Whether it's pavements, patios, or car parks, concrete retains heat long after the sun starts to fade
Wooden decking - Particularly darker woods that can become almost untouchable by mid-afternoon
Beach sand - Fine sand heats up quickly and can be deceptively hot, especially in direct sunlight
Artificial grass - Modern synthetic surfaces can reach surprisingly high temperatures
Metal surfaces - Manhole covers, drain covers, and metal fixtures become genuine hazards in warm weather
Here's what makes this particularly tricky for our dogs: they can't slip on a pair of trainers like we can. Your pup relies entirely on you to make the right call about ground safety. They trust us to protect their precious paw pads, which are more delicate than they appear and can suffer burns, blisters, dryness, and painful cracking when exposed to excessive heat.
Think of it this way - if the ground is too hot for your bare feet, it's definitely too hot for theirs. Just as we consider temperature extremes in colder weather for our dogs' comfort and safety, hot surfaces deserve the same thoughtful approach to keep our four-legged family members happy and healthy.
Signs your dog’s paws may be too hot, sore, or damaged
When your dog suddenly starts acting differently on a warm walk, they're usually telling you something important about their comfort. Many pet parents assume their dog is being stubborn when they stop mid-walk or refuse to keep going, but these behaviors are actually valuable signals that hot pavement might be affecting their paws.
Recognizing these warning signs helps you respond quickly before minor discomfort turns into serious damage:
Limping or favoring one paw - especially if it starts suddenly during the walk
Stopping abruptly or refusing to move forward on pavement or concrete
Excessive paw licking or chewing during or immediately after walks
Visibly darkened, reddened, or swollen paw pads when you check them
Small blisters, cuts, or rough patches on the paw surface
Reluctance to walk on certain surfaces while seeming fine on grass or dirt
Seeking shade or cooler ground repeatedly during your usual route
High-stepping or "dancing" movements, as if trying to minimize ground contact
Quick tip: Any sudden change in your dog's walking behavior on warm surfaces deserves immediate attention. Move to grass, carry them to shade, or head home straight away.
I've learned that dogs who normally love their walks but suddenly become "difficult" on hot days are often just trying to protect themselves. Understanding what the 7 second rule for dogs teaches us means staying alert to these signals and treating them as important communication rather than defiance. Your dog can't tell you their paws are burning, so these physical cues become their way of asking for help before real harm occurs.
How to use the 7 second rule alongside other common-sense checks
The 7 second rule for dogs works brilliantly as your first check, but pairing it with other practical safety measures gives you the complete picture for protecting your pup's paws on warm days.
Time your walks strategically - Early morning or evening walks avoid the hottest part of the day when pavement reaches peak temperatures. You'll often find a comfortable window even when midday conditions would fail the hand test completely.
Choose cooler walking routes - Grass, tree-lined streets, and woodland paths stay significantly cooler than exposed concrete or asphalt. Your dog will thank you for seeking out those naturally shaded spots.
Bring water for both of you - A portable water bowl becomes essential when temperatures climb. If your dog starts panting more heavily or seems less enthusiastic than usual, frequent drink breaks can make all the difference.
Shorten walks on borderline days - Even if the ground passes the 7 second test, consider cutting your usual 45-minute adventure down to 15-20 minutes when it's particularly warm outside.
Watch for early warning signs - Dogs lifting paws, seeking shade, or lagging behind often show these signals before serious damage occurs. Trust these cues and head home or find a cooler spot.
These common-sense approaches work hand-in-hand with the dog 7 second rule to create a complete safety strategy. Rather than relying on temperature alone, this layered approach helps you make confident decisions about when to venture out, which route to take, and when it's simply better to save the adventure for a cooler day. Your dog's comfort and safety are worth that extra bit of planning.
When to skip the walk and what to do if paws get burned
Sometimes the smartest choice is staying home. When the ground fails the 7 second rule test, indoor enrichment becomes your best friend. Puzzle toys, training sessions, or a good sniff-and-find game can tire out even the most energetic dog without risking burnt paw pads.
If you have a garden, early morning or late evening might offer cooler grass for a quick outdoor break. Just remember to test any surface your dog will walk on—decking and patio stones can be surprisingly brutal heat traps, even when they look innocent.
Despite your best efforts, if you suspect your dog's paws have been burned, act quickly but stay calm. Get to shade immediately and gently rinse those paws with lukewarm water. Skip the ice or freezing water, which actually makes burns worse. Pat dry with a soft towel and discourage any frantic licking.
Call your vet if you spot blistering, ongoing limping, or if your dog seems genuinely distressed. Most minor paw irritation heals beautifully with proper care, but when in doubt, professional guidance beats guesswork every time.
The beauty of understanding what the 7 second rule for dogs really means lies in its simplicity. This quick palm test gives you the confidence to make smart decisions that keep summer adventures joyful rather than painful. Your dog counts on you to make these judgment calls, and this straightforward rule makes protecting those precious paws so much easier.
When it comes to giving our dogs the very best in comfort and care, their bed is one of the most important investments we can make. While any soft cushion might seem like enough, for certain dogs, especially seniors or breeds prone to joint issues an orthopaedic dog bed can make a world of difference. But are they really worth it? Let’s explore the benefits, the dogs who need them most, and what to look for in the best dog bed for arthritis and joint support.
What Is an Orthopaedic Dog Bed?
An orthopaedic dog bed is designed with supportive materials such as memory foam or high-density foam, which contour to your dog’s body. Unlike traditional beds, these don’t simply flatten under pressure. Instead, they distribute your dog’s weight evenly, reducing strain on sensitive joints, hips, and muscles.
For dogs with arthritis, hip dysplasia, or recovering from surgery, this type of support can be invaluable. But many younger and active dogs benefit too, as it helps prevent wear and tear over time.
Benefits of Orthopaedic Dog Beds
Pain Relief for Senior Dogs - As dogs age, their joints naturally become stiffer. Arthritis is particularly common in older dogs, and getting up and down from hard or unsupportive surfaces can become uncomfortable. An orthopaedic dog bed cushions their joints, making resting and rising easier.
Support for Breeds Prone to Joint Problems - Certain breeds are genetically more likely to develop joint issues. Large dogs such as Labradors, German Shepherds, and Golden Retrievers are especially prone to hip dysplasia and arthritis. For these breeds, an orthopaedic dog bed isn’t just a luxury, it’s a proactive step to support their health.
Improved Sleep Quality - Just like humans, dogs need deep, restorative sleep. When their body is properly supported, they are less likely to toss and turn. A well-rested dog is a happier, healthier dog.
Prevention of Pressure Sores - Dogs that lie for long periods whether due to age, illness, or limited mobility, can develop pressure sores on hard surfaces. Orthopaedic foam reduces this risk by spreading weight evenly and minimising pressure points.
Long-Term Investment - Although an orthopaedic dog bed is usually more expensive than a standard cushion, its durability and health benefits make it a cost-effective choice. Quality foam won’t sag or flatten quickly, meaning you won’t need to replace it as often.
Orthopaedic vs. Standard Dog Beds: What’s the Difference?
To help decide whether an orthopaedic dog bed is worth the investment, here’s a side-by-side look:
Feature
Standard Dog Bed
Orthopaedic Dog Bed
Filling
Polyester stuffing, fibre, or basic foam
Memory foam or high-density foam layers
Support
Can flatten over time, offering uneven support
Even weight distribution, contours to body
Joint Care
Minimal – may aggravate arthritis or joint pain
Reduces pressure on joints, ideal for arthritis
Durability
May lose shape quickly
Designed to last longer without sagging
Price
Lower initial cost
Higher cost but long-term value
Best For
Young, healthy dogs with no mobility issues
Senior dogs, large breeds, or those with arthritis
This comparison shows that while standard beds are suitable for many younger, healthy dogs, orthopaedic beds are the clear winner when it comes to comfort, joint care, and longevity.
What Materials Are Used in Orthopaedic Dog Beds?
The best orthopaedic dog beds are made from memory foam, which adapts to your dog’s shape and returns to its original form after use. High-density foam layers are often combined with memory foam to provide extra firmness and stability.
Other features to look for include:
Removable, washable covers – essential for hygiene.
Water-resistant liners – to protect against accidents or spills.
Raised edges or bolsters – perfect for dogs who like to rest their heads while still supporting their joints.
Is an Orthopaedic Dog Bed Worth It?
For dogs with arthritis, joint problems, or in their golden years, the answer is almost always yes. These beds can significantly improve comfort and quality of life, helping your dog stay mobile and pain-free for longer.
Even if your dog is still young and sprightly, investing in a supportive bed now can help protect their joints as they age. Think of it as preventative care, just as you’d choose a supportive mattress for yourself.
Choosing the Best Dog Bed for Arthritis
When shopping for the best dog bed for arthritis, consider the following:
Size: Ensure your dog can stretch out fully without hanging off the edges.
Thickness: The thicker the foam, the better the support—ideally at least 4 inches.
Ease of cleaning: Removable covers make life much easier.
Design: Flat beds are best for dogs with severe mobility issues, while bolstered beds suit those who like extra head support.
At Lords & Labradors, we offer a range of orthopaedic dog beds crafted with comfort, support, and style in mind, so you don’t have to compromise between practicality and luxury.
An orthopaedic dog bed is more than just a comfy place for your pet to snooze. For senior dogs, those with arthritis, and breeds prone to joint problems, it’s a vital part of their care. The right bed can ease pain, improve sleep quality, and protect long-term joint health, making it a truly worthwhile investment.
Frequently Asked Questions
Are orthopaedic dog beds firm?
Orthopaedic dog beds are designed to be supportive rather than simply soft. Most use memory foam or high-density foam, which provides a firm yet comfortable base that contours to your dog's body. This means the bed won't sink or collapse under your dog's weight the way a standard cushion might. The result is a surface that feels gently firm — enough to support joints and distribute pressure evenly, but with enough give to remain comfortable for extended rest. Think of it like a good mattress for humans: firm enough to support, cushioned enough to sleep well.
What are the disadvantages of orthopaedic beds?
While orthopaedic dog beds offer many benefits, there are a few considerations to keep in mind. The most notable is cost — they are typically more expensive upfront than standard dog beds. They can also be heavier and bulkier, which may make them harder to move around or transport. Some orthopaedic beds may retain heat more than thinner alternatives, which could be uncomfortable for dogs who run warm. Additionally, if the cover isn't removable or the foam isn't waterproof-lined, cleaning can be more challenging. That said, choosing a quality orthopaedic bed with a washable cover and a water-resistant liner addresses most of these concerns.
Do senior dogs like orthopaedic beds?
Most senior dogs take very well to orthopaedic beds, especially once their joints begin to stiffen with age. Older dogs with arthritis or hip dysplasia often find it painful to rise from hard or unsupportive surfaces, so the extra cushioning and joint relief an orthopaedic bed provides can make a noticeable difference to their comfort and mobility. That said, some dogs are creatures of habit and may need a little time to adjust to a new bed. Placing the orthopaedic bed in their favourite spot and making it familiar with a blanket or toy they already love can help ease the transition. Once they feel the difference, most senior dogs are happy to make it their own.
Knowing what is poisonous to cats in the UK can feel overwhelming at first, especially when the most dangerous plants are often the ones sitting prettily on our windowsills or tucked into a supermarket bouquet. This guide walks you through the highest-risk houseplants and garden plants, explains why lilies deserve a category of their own, and covers the festive favourites that deserve a second thought. You will also find clear advice on spotting cat poisoning symptoms and exactly what to do if your cat has had a chew on something they should not have.
What is poisonous to cats in the UK, and why it matters at home
If you've ever watched your cat sniff around a vase of fresh flowers or catch them nibbling the corner of a houseplant, you'll already know that cats and curiosity go hand in hand. The trouble is, that curiosity can lead them straight to plants that are genuinely harmful — and many of them are ones we'd never think twice about having in our homes.
Knowing what is poisonous to cats in the UK is one of the most practical things you can arm yourself with as a cat owner, because the risks aren't just lurking in the garden. Toxic plants turn up in supermarket bouquets, on windowsills, and in seasonal decorations. Everyday houseplants like pothos and peace lilies, garden staples like foxglove and daffodil bulbs, even a carefully arranged spring centrepiece — all of these can make cats seriously unwell.
It's also worth knowing that cats don't need to eat a plant to be affected. Brushing past certain flowers and then grooming pollen from their fur, drinking water from a vase, or chewing a single leaf can all cause problems. Some plants will only cause a mild stomach upset. Others — lilies being the most urgent example — can cause serious organ damage, fast.
The reassuring part? Once you know which plants to look out for, it becomes much easier to make smarter choices: swapping out a few houseplants, rethinking the flowers you bring home, being a little more careful with festive arrangements. Small changes that make a real difference.
Common poisonous plants for cats in UK homes and gardens
Many of the plants we love in our homes and gardens are also plants poisonous to cats, which is why this catches so many owners out. A curious cat only needs one chew on a leaf, a lick of vase water, or pollen brushed onto their coat for there to be a problem. If you have ever wondered what is poisonous to cats UK homes commonly contain, these are some of the biggest ones to know.
Lilies (true lilies such as tiger, Easter and Stargazer): found in bouquets as well as pots, and by far one of the most dangerous. Every part is highly toxic and can cause rapid kidney failure.
Peace lily: not a true lily, but still not cat-safe. It contains crystals that can irritate the mouth, tongue and stomach, leading to drooling, pawing at the face and vomiting.
Aloe vera: a popular windowsill plant, but not a safe one for cats. If nibbled, it can cause vomiting, diarrhoea and lethargy.
Daffodils: a classic spring favourite. The bulbs are the highest-risk part, though the flowers and stems can also upset your cat’s stomach and, in more serious cases, affect the heart.
Tulips: another common spring bulb. Cats are most at risk if they dig into or chew the bulb, but the rest of the plant can still irritate the mouth and digestive system.
Sago palm: sometimes kept as a statement houseplant. Even a very small amount can be extremely dangerous and may lead to liver failure.
Ivy: often grown outdoors and sometimes brought inside too. It can cause drooling, vomiting and skin irritation if the sap gets on your cat.
Foxglove: lovely in a cottage garden, but definitely one to keep cats away from. It contains compounds that can interfere with the heart.
Wisteria: especially risky if your cat gets hold of the seeds or pods, which can cause vomiting and collapse.
Cyclamen: commonly sold as a gift plant. The root is the most toxic part and can cause severe vomiting and heart rhythm problems.
Worth knowing: lilies are in a category of their own. Even pollen on fur, or water from a vase, can be enough to make a cat dangerously ill. There really is no safe amount.
The main takeaway is that toxic plants to cats UK gardens and homes often contain are not always exotic or unusual. Many are everyday favourites. If you are checking your garden for seasonal risks too, our guide to poisonous springtime plants is a helpful next read.
Are lilies poisonous to cats? The one plant every cat parent needs to know
If there's one plant every cat owner in the UK needs to know about, it's the lily. And when people search for what is poisonous to cats in the UK, lilies come up first — for very good reason. They are among the most dangerous plants a cat can encounter, and they turn up in our homes far more often than most of us realise.
True Lilies — Tiger, Asiatic, Easter, and Day lilies — are severely toxic to cats. What makes them especially frightening is that even tiny amounts of exposure can trigger acute kidney failure. A cat brushing against a stem, licking pollen from their coat, or simply drinking from the vase water can be enough. It is not just the flowers themselves you need to worry about.
Every part of a True Lily is toxic to cats: the petals, leaves, stems, pollen, and even the water in the vase.
The hidden risks are worth spelling out, because they catch even the most attentive cat parents off guard:
Gift bouquets often contain lilies without the recipient knowing
Seasonal arrangements around birthdays, Mother's Day, and Christmas regularly feature lily varieties
Florist bunches are not always clearly labelled
Pollen can drift and settle on a cat's coat, and cats groom constantly
It only takes a moment. Your cat rubs against a vase while you are making a cup of tea, has a little groom on the sofa, and that is enough.
If you suspect your cat has had any contact with a lily, call your vet straight away. Do not wait for symptoms to appear. Early treatment genuinely saves lives. For a wider look at what else to watch out for around the house and garden, this guide on plants poisonous to cats is a brilliant place to start.
Christmas plants poisonous to cats: poinsettia, holly, mistletoe and festive bouquets
The festive season brings so much colour and warmth into our homes — but if you share your space with a cat, it's worth pausing before you arrange that wreath or unwrap the poinsettia. Between November and January, homes fill with seasonal plants that look beautiful and can cause real harm, which makes knowing what is poisonous to cats in the UK especially important at this time of year.
Here are the main Christmas plants to be aware of:
Poinsettia — the milky sap in the stems and leaves is irritating to cats, causing drooling, vomiting, and skin irritation if your cat chews or brushes against a broken stem.
Holly — both the leaves and berries are toxic. Even a small amount can lead to vomiting, diarrhoea, and lethargy.
Mistletoe — one of the more serious offenders. It can cause digestive upset, a drop in blood pressure, and in larger doses, seizures or collapse. Keep it well out of reach, full stop.
Lilies in festive bouquets — many seasonal arrangements include lilies, and these rank among the most dangerous plants for cats. Even a small amount of pollen, or water from the vase, can cause severe kidney damage.
A note on lilies: if you suspect your cat has come into contact with any part of a lily plant, call your vet immediately. This is not a situation where it's safe to wait and see.
The good news is that you genuinely do not have to give up on festive decorating. Plenty of thoughtful swaps and simple display choices keep the seasonal magic intact while keeping your cat safe. Our guide on how to cat-proof your Christmas is a great place to start if you want practical ideas that actually work for the whole household.
If your cat chews a plant: symptoms to watch for and what to do next
Cats are curious by nature, and sometimes that curiosity leads them straight to a plant you wish they had ignored. If you have caught your cat chewing something suspicious, or come home to a tellingly nibbled leaf on the floor, here is what to do.
Start by watching your cat closely. Common cat poisoning symptoms include drooling, vomiting, retching, pawing at the mouth, lethargy, wobbly movement, tremors, changes in breathing, and a sudden loss of appetite. Some of these show up within minutes of contact. Others, particularly with toxic plants like lilies, can take hours to develop, which is exactly why you should not wait to see if things settle on their own.
If your cat shows any of these signs, or if you suspect they have eaten part of a plant you cannot identify, call your vet straight away. Out of hours, contact a veterinary emergency line. The Animal Poison Line (run by the Veterinary Poisons Information Service) is also available across the UK for confirmed or suspected poisoning cases.
Before you call, try to gather a few key details. Which plant were they near? How much might they have eaten, and when? If you can safely photograph the plant or pop a small sample into a bag to bring along, it will help your vet work out what they are dealing with far more quickly.
Once the immediate worry has passed, it is worth walking through your home and garden with genuinely fresh eyes. Move any plants you are unsure about well out of reach, or consider rehoming them altogether if you have a dedicated chewer on your hands. High shelves are not always the answer either — as any cat owner who has watched their pet calmly scale a bookcase will tell you.
If you share your home with a dog as well as a cat, it is worth knowing that many of the same plants pose a risk to both species, though the specific dangers can differ. Our guide to plants that are toxic to dogs covers everything your canine family member needs too.
Getting your home properly pet-safe takes a little effort, but there is real peace of mind on the other side of it.
Frequently Asked Questions
What is the most poisonous thing a cat can eat?
Lilies are the most dangerous plant exposure for cats mentioned here. True lilies can cause rapid kidney failure, and even tiny amounts are a serious risk — not just chewed petals or leaves, but pollen licked from fur or water from a vase as well.
What is fatally poisonous to cats?
True lilies are one of the clearest examples of something that can be fatally poisonous to cats. Even very small exposure can lead to acute kidney failure, which is why any contact with petals, leaves, pollen, stems, or even vase water needs immediate veterinary attention.
What is the most toxic thing for a cat?
Among the plants covered here, true lilies are the most toxic for cats. They are unusually dangerous because no meaningful exposure is safe: a nibble, a brush against pollen, or a drink from the vase can all cause severe kidney damage very quickly.
What is the deadliest poison for cats?
For plant poisoning, true lilies are the deadliest risk highlighted here for cats. They can trigger acute kidney failure after only tiny exposure, including pollen on the coat or water from a vase, so it is safest to keep lilies completely out of any cat-friendly home.
Your Puppy’s First Vet Visit: Everything You Need to Know and Bring
Bringing home a new puppy is a joyful experience full of cuddles, playful tumbles, and plenty of learning opportunities. One of the most important early steps in ensuring a long, healthy life for your little furry friend is scheduling that very first vet appointment.
Here, we will walk you through everything you need to know—from choosing the right vet to packing essential items—so you can confidently make your puppy’s debut clinic visit a positive, stress-free experience.
When to Schedule the First Vet Visit
Making a timely vet appointment is crucial to kickstart your puppy’s healthcare routine. Most puppies should visit a vet within the first week or two of arriving home, particularly if you have limited information about their vaccination or medical history.
This ensures:
A thorough health check
A clear vaccination schedule
Early detection of any existing health concerns
A chance to address fleas, worms, or other parasites right away
Even if your breeder or rescue provided initial records, scheduling a vet consult soon after you bring your puppy home guarantees you stay on track with recommended treatments and helps your new pup settle confidently into their forever home.
Choosing the Right Veterinary Practice
Finding the right vet is about more than simply picking the nearest clinic. You’ll want a team that resonates with your approach to pet care, offers comprehensive services, and is conveniently located. Here are a few considerations:
1. Recommendations and Reviews
Ask friends, family, or local pet communities about their experiences.
Research online reviews to see what other pet owners say about the clinic’s staff and services.
2. Location and Accessibility
Close proximity to your home can be crucial during emergencies or for regular checkups.
Check if the clinic has easy parking or access to public transport.
3. Clinic Environment
Does the clinic have separate waiting areas for dogs and cats?
Is the staff friendly and accommodating when you phone or visit?
4. Additional Services
Some practices also offer grooming, training, or boarding—bonus points if you’d like one-stop convenience.
We recommend asking plenty of questions beforehand. A good vet will welcome your curiosity and ensure you feel well informed about their protocols and expertise.
Preparing Your Puppy for the Vet
Your puppy’s first vet visit can be a big event, and the best way to ensure it goes smoothly is by acclimating them beforehand. Our team of pet experts suggests the following to help set your puppy up for success:
Practice Being Handled
Gently handle your puppy’s paws, ears, and mouth at home to build their comfort with touch.
Get them used to being lifted onto low tables or countertops (safely) so the vet’s exam table won’t feel too foreign.
Desensitise Through Short Trips
Take quick car rides or walk your puppy past the vet clinic so they can experience these environments without any medical procedures involved.
Reward them with treats and praise during these “practice runs” to create positive associations.
Positive Reinforcement
Reinforce calm behaviour with gentle praise and occasional treats.
If your puppy seems anxious, remain calm and reassuring—your demeanour sets the tone for how they interpret new situations.
What to Bring on Vet Day
Being well-prepared helps make the experience smooth for both you and your pup. A few essentials include:
Medical Records or Documentation - Bring any paperwork from breeders, rescues, or previous owners detailing vaccines and treatments.
Comfortable Carrier or Bed - Our Easy Traveller Bed is perfect for a cosy, secure ride. It’s designed to help your puppy feel snug and calm on the go.
Treats and Toys - Small, tasty treats will help with positive reinforcement, while a familiar toy can offer comfort in unfamiliar surroundings. Stock up on tasty training treats here
Lead and Harness - Always secure your puppy, even if you have a carrier. This ensures you can safely guide them around the waiting area.
Stool Sample (If Requested) - Check if your vet wants a fresh sample for parasite testing. If so, collect it just before the appointment.
Travelling to the Vet
Safety First
Secure your puppy in a travel crate, carrier, or on a harness fastened in the car. This prevents distractions and keeps them safe during the journey.
A bed like the Easy Traveller Bed can be buckled in or placed in a stable spot so your pup feels at ease.
Short Familiarisation Drives
If your puppy is new to car rides, start with short, fun trips around the block or to a local park.
Gradually increase the distance and reward calm behaviour along the way.
Keep the Atmosphere Calm
Use a soft tone of voice and, if possible, a quiet environment in the car (lower radio volume, for instance).
Avoid sudden stops or erratic driving—gentle, steady driving helps your puppy remain relaxed.
Handling the Waiting Room
Vet waiting rooms can be bustling places, filled with unfamiliar scents and animals. Here’s how to keep the experience positive:
Stay Close - Keep your puppy on a short lead or in their carrier to prevent unwanted interactions with other pets. If they haven’t been vaccinated yet we’d recommend keeping them in their carrier or sat on your lap to minimise infection risk.
Pick a Calm Spot - Some clinics separate dogs and cats—choose the dog-friendly side if it’s less hectic.
Offer Comfort - Speak reassuringly, stroke your puppy gently, and provide a treat for good behaviour.
What to Expect During the Exam
Once called in, the vet will likely perform a thorough check to assess your puppy’s overall health. This involves examining the ears, eyes, nose, mouth, heart, and lungs. Making your pup feel comfortable on the exam table is crucial:
Place a familiar toy or blanket on the table to ease any nerves. A lot vets will also provide your puppy with treats during the exam to help reassure them and build trust
Stay relaxed and speak soothingly; puppies pick up on your energy.
Reward calm behaviour with gentle praise—or a small treat if the vet allows.
Key Procedures at the First Vet Visit
Your puppy’s inaugural appointment often covers a few foundational treatments and discussions:
Physical Examination - A nose-to-tail check ensures your puppy has no underlying medical issues that need attention.
Vaccinations - Puppies typically start their core vaccinations around 6–8 weeks old, with boosters scheduled in the following weeks or months. Your vet will clarify the exact timeline.
Microchipping - If your puppy isn’t already chipped, the vet can usually do it on site. This quick, relatively painless procedure provides your pet with permanent identification.
Flea & Worm Prevention - Young puppies can be prone to parasites. Your vet will recommend treatments to guard against fleas, ticks, and worms, and outline an ongoing preventative routine.
Nutritional & Behavioural Advice - Vets can guide you on puppy-appropriate foods, treats, and basic training tips. Don’t hesitate to ask questions!
Essential Tips in a Nutshell
Book Early: Schedule a vet appointment soon after bringing your puppy home.
Practice Handling: Get them used to gentle touches and being lifted.
Travel Prep: Use a comfortable, secure carrier or bed like our Easy Traveller Bed.
Waiting Room Strategy: Keep them on a lead or in a carrier, choose a quiet corner, and reassure them with a calm voice.
Follow Vet Guidance: Stick to the recommended vaccination, microchipping, and parasite prevention schedules.
Final Thoughts
Your puppy’s first vet visit lays the groundwork for a lifetime of good health. By choosing a reputable veterinarian, preparing your pup with gentle handling, and bringing the right essentials—from carriers to treats—you can make this inaugural trip a positive milestone rather than a stressful one. We at Lords & Labradors believe every puppy deserves a great start in life, and our team of pet experts are always here to support you with advice, products, and resources.
Remember, the better the experience at this early stage, the more likely your puppy will feel comfortable during future checkups. A little preparation today goes a long way toward ensuring a lifetime of wagging tails and happy vet visits in the years to come!
Shop all the puppy essentials you will need for your pups first vet visit and beyond at Lords & Labradors.