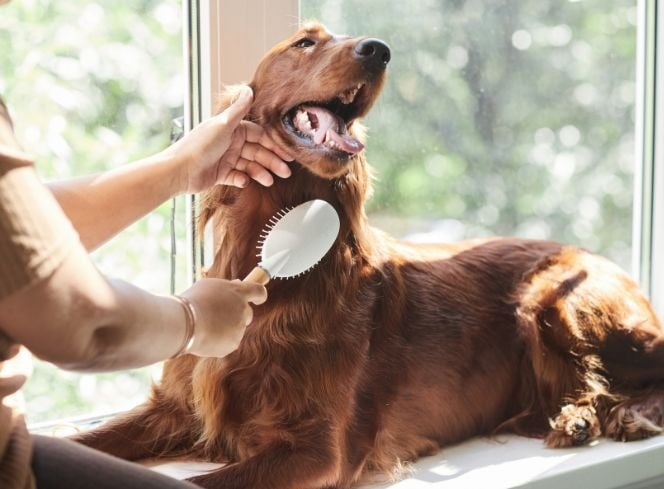
The Red Setter, also known as the Irish Setter, is a sleek and athletic breed recognized for its vibrant, mahogany-red coat and elegant build. Renowned for its friendly demeanour and boundless energy, the Red Setter is an excellent family companion and versatile hunting dog. With its distinctive feathered tail and a proud, noble head, this breed effortlessly combines grace and athleticism. Known for its love of human interaction and playfulness, the Red Setter is a spirited and affectionate member of the sporting dog group.
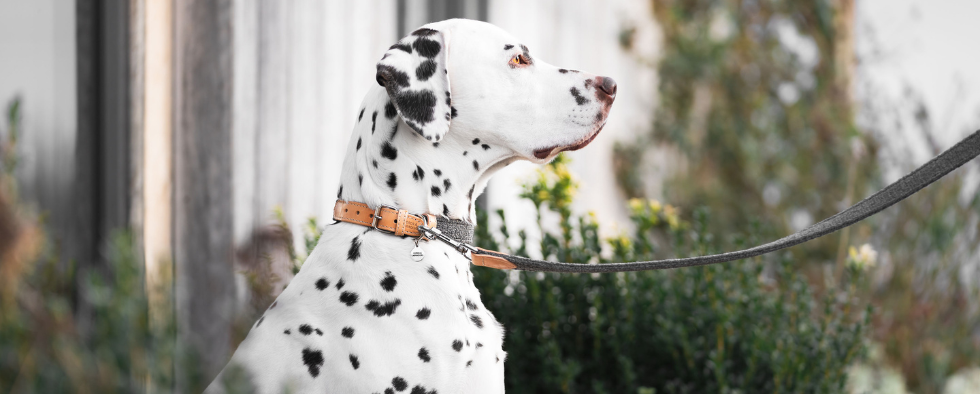
A dog collar is an important item for any dog as it can be used as a form of identification if they go missing and makes the process of attaching a lead for walkies a quick, simple and comfortable experience. However, if a dog collar isn’t properly fitted, it could potentially cause pain to your dog or allow them to escape.
In this blog, we explain how tight a dog collar should be, offer tips on fitting a collar correctly and look into how to measure your dog’s neck to find the right size.
How Tight Should A Dog Collar Be?
When you put a collar on your dog, you will need to ensure that the size is right to avoid causing a feeling of discomfort or even potentially putting your furry friend in danger. Finding the correct fit is a balance between making sure it isn’t too loose, meaning it could fall off, or too tight, potentially causing it to hurt their neck.
Whether you’re currently choosing a collar for your dog and need to find the correct size or already have a collar and need to make sure it’s correctly fitted, it’s important that it’s as it should be to avoid harm. Below, we offer tips on getting the size of your dog’s collar right:
How To Fit A Collar On A Dog
Even if the collar doesn’t look particularly tight or loose around your dog’s neck, it doesn’t mean that it's correctly fitted. It can be difficult to know how best to gauge the most suitable size on your dog’s neck. However, a tried and tested way that is effective in identifying the correct fit is by using what’s known as the ‘two finger rule’.
To do this, simply put the collar on your dog and place two fingers between the surface of the collar and your dog's neck. If your fingers can fit comfortably while still feeling a little restricted, this should be an indication that the collar is a suitable length. If, however, your fingers have a lot of room to move or feel stuck in the collar, you should adjust the length accordingly.
How To Shorten A Dog Collar
Dog collars often use a tri-glide buckle, allowing the owner to easily shorten or lengthen the collar. To shorten the length of the collar, move the end of the collar away from the buckle, tightening and making it shorter.
How to Extend A Dog Collar
Likewise, extending a dog collar that uses a tri-glide buckle requires the opposite action. Instead of moving the end of the collar away from the buckle to tighten it, push the end of the collar towards the buckle, pass it through the buckle itself and pull both ends to make the collar longer.
How To Measure Collar Size For A Dog
If you haven’t yet chosen a collar for your dog and are in the process of deciding the most suitable option, you will want to check that you’ve picked the right size. To help with measuring your dog for a collar, we’ve provided helpful tips on carrying out this process:
Get your dog to sit in front of you, ideally facing the opposite direction.
Place measuring tape around the base of your dog’s neck where their collar would be likely to sit.
Place two fingers between the measuring tape and their neck, making the measurement around one to two inches looser.
Record this measurement using a pencil and paper and mark it down as their neck measurement.
Using the neck measurement you’ve recorded, determine the collar size based on the collars size guide - each brand is sized differently so check the individual products size guide to find the best fit.
Lords & Labradors Essentials Walking Accessories
Our L&L Essentials Walking Collection collars come in seven sizes so you're sure to find the perfect fit, we've put our size guide below to help you find the right collar for your dog:
Collar Size
Neck Size
Recommended For
XXS
23-27 cm
Chihuahua, Yorkshire Terrier
XS
28-32 cm
Jack Russell, Norfolk Terrier
S
30-36 cm
Cockapoo, Standard Dachshund, Spaniel
M
35-41 cm
Bulldog, Schnauzer, English Bull Terrier
L
39-47 cm
Labrador. Red Setter, Labradoodle
XL
44-52 cm
Retriever, Great Dane, Doberman
XXL
49-57 cm
Bullmastiff, Dogue De Bordeaux, Newfoundland
Still not sure on the right size collar for your dog? Why not chat with one of our pet experts? They are available on +44 1790 720 900, sales@lordsandlabradors.co.uk or our live chat on our website - they're always happy to help!
Bathing your dog is an essential part of their overall grooming routine. Not only does it keep their coat clean and shiny, but it also helps maintain their overall hygiene. However, as a dog owner, you may find yourself wondering, "How often should I bathe my dog?" and "What's the best way to bathe them?" Well, fear not! In this comprehensive guide, we'll answer all your questions and provide you with helpful tips to make bath time an easy experience for both you and your beloved canine companion.
How Often Should You Bathe a Dog?
One of the most common queries among dog owners is how frequently they should bathe their furry pals. The answer varies depending on several factors, such as your dog's breed, coat type, and lifestyle. In general, most dogs benefit from a bath every 4-6 weeks. However, certain breeds with specific coat types may require more frequent bathing, while others may need it less often. Our pet experts have written an in-depth guide on how often you should groom your breed of dog which is definitely worth checking out.
Can I Bathe My Dog Once a Week?
While regular bathing is important for maintaining cleanliness, it's generally not recommended to bathe your dog more than once a week. Frequent bathing can strip their coat of natural oils, leading to dry skin and irritation. However, certain situations, such as skin allergies or medical conditions, may require more frequent bathing depending on your vet’s advice.
What Do I Need To Bath My Dog At Home?
Dog Specific Shampoo - We recommend PetPlex, they have shampoos suitable for different coat types, ages and skin conditions so there’s sure to be something for your dog.
Dog Specific Conditioner - pamper your pooch with a conditioner, this will help keep their coat looking shiny and silky.
Detangling Spray - A Detangling Spray is good for curly haired or long haired dogs before their bath to help remove any knots or matts, this will help make the bathing process as easy as possible
A Brush or Comb - there are lots of different types of brushes and the best one for your dog will depend on their coat type. Explore our range of brushes to find the best one for your furry friend.
Drying Coat, mitts or towel - You’ll have a soggy doggy after a bath and having something you can dry your dog off with will come in handy. An old towel works or our favourite-fuss free way to dry your dog off is with a drying coat. They simply slip on over your dog’s head and fasten under their belly. Alternatively our drying mats are one size fits all and making drying your dog quick and easy
Treats or a licki mat - you want your dog to associate bath time as a fun positive experience and a rewards based training method is our favourite way to do this. Having plenty of treats to hand and praising your dog throughout the process will help them form positive associations with the process. The anti-anxiety bath ducks are great for distracting nervous dogs, they stick to the wall and you can put wet food or peanut butter on there for your dog to lick off whilst you bathe them. Licking is actually anxiety reducing for dogs as it releases calming hormones so is perfect for nervous dogs. If you do have a nervous pup on your hands why not check out our blog on how to desensitise your dog to grooming, it has our pet experts top tips and tricks on how to make grooming your dog a calmer experience for you both.
How To Bathe A Dog At Home:
Now that you know the ideal frequency and the essentials you’ll need, let's dive into the step-by-step process of how to bathe your dog:
Gather Your Supplies:
Have all the items we listed above to hand, making sure they’re in reaching distance will make bath time easier for you and your dog
Prep the Bathing Area:
Choose a suitable location for the bath, preferably a bathtub or a large wet room. You can place a non-slip mat at the bottom to provide your dog with a secure footing, this is a good idea if your dog doesn’t love bath time and likes to move around.
Brush Your Dog:
We recommend brushing your dog's coat thoroughly before bathing them to remove any loose fur or tangles, especially if they have a long or curly hair coat. This will prevent matting and will mean it’s easier to make sure your dog’s coat is fully clean.
Test The Temperature
You’ll want the water to be lukewarm, not too hot or cold. You can either run a bath or use the shower to wash your dog, whichever works best for you and your dog.
Rinse Your Dog’s Coat
Work from the neck down with either a jug of water or the shower head to pour water over your dog’s coat. You’ll want to make sure their coat is nice and wet
Shampooing Your Dog
You’ll want to either put a small amount of shampoo in your hand and massage it into your dog’s coat making sure it lathers up, or you can use a shampoo brush like this Rosewood brush, which allows you to put shampoo in the top and dispenses it as you brush your dog’s coat. Be careful of their eyes and ears and focus on their body and paws. Once you’ve shampooed your dog’s body you’ll want to rinse them off with lukewarm water to remove the suds, making sure no product remains in their coat.
Conditioning Your Dog
Once you’ve shampooed your dog, you’ll want to apply a conditioner. This will help keep their coats shiny by adding moisture back in after shampooing them. Massage into your dog’s coat and then leave for a couple of minutes before rinsing
Wash Your Dog’s Face
Whilst your conditioner is soaking into your dog’s coat it’s a good time to wash their face. We recommend using a cloth or a flannel with some clean water to wipe their face clean, you want to avoid getting any shampoo in their eyes or ears.
How To Dry A Dog After The Bath:
After rinsing, use a large towel, drying mitts or a drying coat to gently dry your dog's coat. If your dog is comfortable with a blow dryer on a low heat setting, you can use it to speed up the drying process. Make sure to keep it at a safe distance from their skin. Gradually dry their coat, keeping the dryer moving to avoid overheating any particular area.
Brushing Your Dog
Once your dog's coat is mostly dry, use a brush or comb appropriate for their coat type to remove any remaining tangles or mats.
Reward Your Pup
After bath time make sure to give your pup plenty of fuss and reward them for being a good boy or girl during bath time.
Our Pet Experts Tips To A Successful Bathing Experience:
To make bath time enjoyable for both you and your furry friend, our pet experts have put together their top tips:
Introduce Bathing Gradually: If your dog is not accustomed to baths, introduce the process gradually. Start by getting them comfortable with water by offering treats or toys near the bath area. Gradually progress to wetting their paws, then their entire body. This is a great thing to do with them right from the get-go as a puppy as it helps to desensitise them from a young age
Positive Reinforcement: Use positive reinforcement throughout the bathing process. Reward your dog with treats, praise, and gentle strokes to make them associate bath time with positive experiences.
Ear Care: During bathing, be cautious not to let water enter your dog's ears, as it can cause infection. Use cotton balls to plug their ears or consider using a specialised ear cleaning solution after the bath to keep their ears clean and dry.
Nail Trimming: Bath time can also be an opportunity to trim your dog's nails if needed. However, if you're unsure or uncomfortable doing so, it's best to consult a professional groomer or veterinarian. We’ve got a handy guide on cutting your dog’s claws.
Double Shampoo: Our pet experts recommend shampooing your dog twice, as long as they don’t have sensitive skin. This will help make sure they’re squeaky clean
Drying Your Dog: Avoid rubbing your dog when towel or mitt drying them, this could cause matts or tangles in their coat. Instead gently pat them dry.
Bathing your dog is an important part of their overall hygiene routine. By following the tips and guidelines provided in this guide, you can ensure a pleasant and effective bathing experience for your furry companion. Remember to consider your dog's breed, coat type, and lifestyle when determining the ideal bathing frequency. With patience, positive reinforcement, and proper care, bath time can become a bonding experience that leaves your dog feeling clean, healthy, and happy.
Brushing The Dog: How Often Should You Brush Your Dog
There’s nothing better when your pooch is all clean and smelling lovely, with their beautiful coat cleaned and brushed - but, when it comes to brushing your dog, you might be wondering if your dog even needs brushing, and if they do, exactly how often they require brushing? Adopting a short-haired dog unfortunately doesn’t mean your dog doesn’t need brushing, every dog requires help to keep their coat looking, smelling and feeling nice, we discuss how often your dog requires brushing, and how to keep their coat looking lovely.
How Often Should You Brush Your Dog?
Your dog’s coat may need some help in taking care of, and dependant on their type of coat will determine how frequently it’ll require brushing. Generally, if you have a short haired breed like a Jack Russell, your dog’s coat should be ok to be brushed weekly (this is assuming they’re not rolling around in the wet mud!). Longer haired dog’s such as a Maltese will require daily brushing to keep them comfortable. If your pet sheds, such as a Labrador retriever, they will also require brushing twice weekly, to avoid build up and discomfort.
It's best to start the brushing routine when they’re young, however, you can train your dog to enjoy the bonding process of being brushed at any age. Although the tools and technique will vary from breed to breed, and your dog’s temperament, these are the tips we recommend to follow whilst grooming your dog.
Removing Mats
Start by teasing out any mats your dog has. This may decrease week-by-week if you keep your brushing routine. You may want to opt for a de-matting comb, teasing out the knots in your dog’s fur gently.
De-shed
Once your dog is free from any mats, go over with a de-shedding tool only if your dog has a thick undercoat, or is prone to shedding.
Brushing
When you’ve picked out the perfect tool for brushing your dog, make sure they’re dry and comfortable before brushing in the direction of the way their fur grows. For longer haired breeds, you may want to work in sections.
To help make the process more enjoyable for you and your dog, you may want to spray your dog with a pet-safe detangling spray.
Best Dog Brush
Depending on your dog’s breed will determine the best brush, consider the guidance below before purchasing the brush as these recommendations may work better for you and your dog
Coat Type
Example Breed
Recommended Brush
Wiry Hair
Terriers
Slicker brush or a medium to fine tooth comb.
Short & Smooth Fur
Greyhounds
Soft Bristle Brush or Grooming Glove
Short Fur with Undercoat
Labrador retriever
Undercoat rake, medium to fine tooth comb, slicker brush
Long & Silky fur
Cocker Spaniel
Slicker brush, medium to fine tooth comb
Long & Coarse fur
Shih tzu
Slicker brush, Pin brush, medium/fine tooth comb
Long fur with undercoat
Border Collie
Undercoat rake, medium to fine tooth comb, slicker brush
Curly fur
Poodle
Slicker Brush, medium/fine tooth comb
Please use the above as guidance of which tool to use to brush your pet, as with all breeds, taking the time to brush them will not only physically be more comfortable, but it will strengthen their bond too.
Elevated Dog Bed vs Memory Foam: Which One is Better?
Choosing the right bed for your furry friend shouldn’t feel like a puzzle, but when you’re comparing elevated dog bed vs memory foam options, it’s easy to get overwhelmed by all the promises of better sleep and comfort. Your pup’s age, size, sleeping style, and temperature preferences all play a role in determining which bed will become their new favorite spot. We’ll walk you through the key differences in joint support, temperature control, and maintenance so you can make a confident choice that fits both your dog’s needs and your lifestyle.
Understanding Elevated Dog Beds and Memory Foam: What’s the Difference?
When you’re standing in the pet store aisle or scrolling through countless options online, the choice between elevated dog bed vs memory foam can feel overwhelming. Both types promise better sleep for your furry friend, but they work in completely different ways to achieve that goal.
Elevated dog beds feature a raised platform design that lifts your pup off the ground using a sturdy frame and breathable fabric or mesh surface. Think of it like a camping cot for dogs. These beds promote airflow underneath, which naturally helps regulate your dog’s body temperature. You’ll often see them recommended for outdoor use or hot climates because they prevent your dog from absorbing heat from warm floors.
Memory foam beds take a different approach, focusing on contouring support. They use dense foam that responds to your dog’s weight and body heat, creating a customized sleeping surface that cradles pressure points. If you’ve ever watched an older dog struggle to get comfortable on a thin bed, you’ll appreciate how memory foam can make a real difference for joint comfort.
The key distinction lies in their primary strengths: elevated beds excel at temperature control and cleanliness, while memory foam beds prioritize joint support and pressure relief. Many pet parents find themselves choosing based on their dog’s life stage. Elevated beds tend to be popular for active younger dogs who run hot, while memory foam often becomes the go-to choice for senior pups or dogs dealing with arthritis.
Understanding these fundamental differences helps you match your dog’s specific needs with the right bed type. If you’re curious about exploring the full spectrum of dog bed options and materials, it’s worth understanding how different styles work before diving deeper into this comparison.
Joint Support: Which Bed Offers Better Comfort for Your Pup?
When your furry friend starts taking a little longer to get up from their nap or hesitates when jumping onto the sofa, joint comfort becomes a priority. Whether you choose an elevated dog bed or memory foam, each offers unique benefits for joint support. Knowing these differences helps you make the best choice for your pup’s needs.
Elevated Dog Beds
Memory Foam Beds
Provides a firm, stable surface
Contours to the body, reducing joint pressure
Encourages better spinal alignment
Distributes weight evenly for comfort
Reduces pressure points by positioning joints well
Cradles arthritic joints, supporting natural body curves
Suited for dogs favoring firm surfaces
Ideal for those needing cushioning on sensitive spots
Retains shape and support over time
Adapts to body heat and weight for custom comfort
Several factors help decide between elevated dog beds and memory foam:
Sleeping Style: Dogs who love sleeping on their back might appreciate memory foam’s snug fit, while those who stretch out on their side could find an elevated bed’s firm support more beneficial.
Joint Issues: If your pup struggles with advanced arthritis, memory foam can offer the pressure relief they need. Dogs with less severe joint conditions might do well with the sturdy support of an elevated bed.
Size and Weight: A larger breed like a Labrador might compress memory foam too much, leading it to lose effectiveness over time. Elevated beds maintain their supportive structure regardless of your dog’s weight.
Temperature Preferences: If your dog tends to feel warm while sleeping, elevated beds can provide better airflow. On the other hand, memory foam retains warmth, which is helpful for dogs who sleep cold.
For pups with significant joint pain, memory foam often provides the comforting touch they need. Meanwhile, elevated beds are excellent for offering consistent, firm support, especially for larger breeds prone to hip dysplasia. If joint support is just one part of the decision, check out our dog bed buying guide for a complete overview of factors like size and materials to help find the perfect match for your four-legged family member.
Temperature Regulation: Keeping Your Dog Cool or Cozy
When your Golden Retriever pants all night in summer or your senior Labrador seeks out the warmest spot in winter, you realize how crucial temperature regulation is for your dog’s comfort and quality sleep. The elevated dog bed vs memory foam choice often comes down to whether your pup runs hot or cold, and understanding how each bed type manages temperature can help you make the right decision.
Feature
Elevated Dog Beds
Memory Foam Beds
Airflow
Excellent - mesh or fabric allows air circulation from all sides
Limited - dense foam can restrict air movement
Heat Retention
Minimal - elevated design prevents heat buildup
High - foam contours to body and retains warmth
Seasonal Suitability
Perfect for spring and summer months
Ideal for fall and winter comfort
Best Climate
Hot, humid environments or homes without air conditioning
Cool climates or well-climate-controlled homes
Your dog’s sleeping habits reveal everything about their temperature needs. If they sprawl across cool tile floors or seek out the bathroom’s ceramic surface, they’re telling you they run warm. But if you find them burrowed under blankets or pressed against heating vents, they crave cozy warmth.
Watch for these temperature clues throughout the day:
Excessive panting during sleep or restlessness on warmer nights
Coat thickness and breed tendencies (Huskies versus Greyhounds have very different needs)
Seasonal shifts in where they choose to nap
How they react to different surfaces around your home
Large dogs and thick-coated breeds typically thrive with elevated beds’ natural cooling airflow. Smaller pups, seniors, or thin-coated breeds often gravitate toward memory foam’s heat-retaining embrace. If your dog seems caught between needing support and temperature control, box bed options with breathable yet supportive designs can offer that sweet spot for year-round comfort.
Remember, the best bed works with your dog’s natural preferences, not against them.
Hygiene and Maintenance: Which Bed is Easier to Keep Clean?
When you’re weighing elevated dog bed vs memory foam options, cleaning convenience often becomes the deciding factor, especially if you’re dealing with a drooling Saint Bernard or a muddy Golden Retriever who loves puddle jumping. Dog beds take a real beating, and choosing one that fits your cleaning style can save you countless hours of scrubbing.
Elevated Dog Beds:
Mesh surfaces let dirt and debris fall straight through instead of getting trapped
Quick-drying materials mean you’re back in business faster after washing
Most frames can be hosed down or wiped clean in minutes
Excellent air circulation prevents that musty smell from taking hold
Replacement covers cost much less than buying new memory foam inserts
Memory Foam Beds:
Removable, washable covers make surface cleaning pretty straightforward
Quality options include waterproof liners that protect the foam core
Thick cushioning can trap odors if accidents seep through to the foam
Foam cores need longer drying times and careful handling to prevent mold
Premium models often have multiple cover layers for easier maintenance
Your lifestyle really matters here. If you’re constantly heading outdoors with an active pup, elevated beds tend to be more forgiving. But if you’re caring for a senior dog who has occasional accidents indoors, a memory foam bed with solid waterproof protection might work better for your situation.
Busy pet parents usually find elevated beds the clear winner for hassle-free maintenance. However, if your dog needs that extra comfort and joint support, the additional cleaning effort of memory foam beds often feels worth it. Think honestly about how often you want to tackle deep cleaning when making your choice—proper cleaning techniques can help either bed type last years longer.
Breed Suitability: Finding the Perfect Fit for Your Furry Friend
When it comes to deciding between an elevated dog bed vs memory foam for your furry friend, consider how your dog’s breed characteristics influence their comfort. Different breeds have varying sizes, weights, and sleeping habits, which can impact which bed type they’d prefer.
Small breeds, like Chihuahuas, Yorkies, and Pugs, often gravitate toward memory foam beds. These beds provide a snug, nest-like support that keeps them warm and secure. On the other hand, large breeds such as Great Danes, German Shepherds, and Labs might benefit from both bed types. While elevated beds offer joint relief and make it easier for big dogs to get on or off, memory foam beds deliver essential support for their heavier frames. Your choice could hinge on joint health or climate—cooling dog beds might make a significant difference in warmer environments.
For senior dogs, regardless of breed, memory foam beds frequently prove more beneficial. Their aging muscles and joints appreciate the contoured support these beds provide. Meanwhile, active breeds like Border Collies and Retrievers could thrive with elevated beds, as the airflow helps prevent overheating after they’ve been romping around.
Puppies’ needs shift as they mature, so a single bed might not cut it. Consider the Grow with Me Puppy Bed, which adapts to their changing size and preferences over time, eliminating the need for multiple purchases.
Remember your dog’s quirks. If your Greyhound seeks the coolest spot in the house, they might enjoy an elevated bed for its breezy airflow. If your Cavalier King Charles Spaniel loves snuggling under blankets, then a plush memory foam bed might be their ideal sanctuary. Weighing considerations like weight, coat thickness, and age will guide you to the best choice for your four-legged family member.
Making the Right Choice: Which Bed is Best for Your Dog?
Choosing between an elevated dog bed vs memory foam really comes down to knowing your dog and understanding what makes them comfortable. If you’re caring for a senior pup dealing with arthritis or hip issues, memory foam delivers that gentle, pressure-relieving support their joints crave. But if your four-legged friend tends to overheat or you live in a muggy climate, the natural airflow of an elevated bed could transform their sleep quality.
Take a moment to observe your dog’s habits. Does your pup sprawl out like they’re trying to cool their belly when it’s warm? That’s a strong signal they’d love the ventilation an elevated bed provides. On the flip side, if they curl into a tight ball and seem stiff come morning, the contouring embrace of memory foam might help them wake up feeling more limber.
Your lifestyle matters too. Heavy shedders and the occasional accident-prone pup make elevated beds appealing since they’re generally simpler to keep clean. But dogs who love to dig, nest, and burrow often gravitate toward the cozy give of memory foam.
For those wanting the best of both worlds, seek out beds that marry supportive materials with smart airflow design. The Nest Dog Bed combines memory foam comfort with a removable, machine-washable cover that keeps maintenance stress-free.
Here’s the truth: the perfect bed is whichever one your dog actually chooses to use. Watch where they naturally migrate for naps. If they’re always seeking out cool kitchen tiles, elevated beds are calling their name. If they keep trying to steal your spot on the memory foam mattress, consider that their vote for cushioned comfort.
Bringing home a new baby when you have a bouncy, high-energy dog can feel overwhelming, but with the right approach, your hyperactive pup can become your little one's most devoted protector. Learning how to introduce a hyper dog to a baby takes patience and strategy, but the reward is watching a beautiful friendship bloom between your furry family member and your newest addition. From creating calm environments to reading stress signals and building routines that work for everyone, this guide will help you navigate those crucial first weeks with confidence.
Understanding Your Dog's Energy Levels
Before you learn how to introduce a hyper dog to a baby, you need to understand what's driving your pup's bouncy behavior. High-energy dogs aren't just "excited" – they're often responding to specific triggers like anticipation, lack of mental stimulation, or even anxiety.
Watch for telltale signs: constant pacing, jumping on furniture or people, excessive barking, or that classic "zoomies" behavior where they race around the house. My neighbor's Golden Retriever does this every evening at 6 PM sharp – it's like clockwork! Some dogs also mouth or nip when overstimulated, which becomes especially important to consider with a newborn in the house.
Several factors fuel this hyperactivity. Young dogs naturally have surplus energy that needs an outlet. Certain breeds, like Border Collies or Jack Russell Terriers, were bred for high-intensity work and require significant mental and physical exercise. Even older dogs can become hyper if they're not getting enough stimulation throughout the day.
The arrival of a baby amplifies these energy levels because your dog senses change. New smells, different routines, and altered attention patterns can trigger excitement or stress responses. A dog who usually gets two long walks might suddenly receive shorter, rushed outings, leaving them with pent-up energy right when you need them calmest.
Understanding your dog's specific energy patterns helps you plan better. Does your pup get most wound up in the morning or evening? Do they settle after a good play session, or do they need mental puzzles to truly tire out? Recognizing these patterns – and learning to read your dog's body language – gives you the foundation for successful preparation. Once you know what triggers your dog's hyperactivity, you can start addressing it before baby arrives.
Creating a Safe and Calm Environment
Setting up the right environment is crucial when introducing a hyper dog to a baby. Your lively pup needs clear boundaries and calming influences to manage their energy, while your little one deserves a secure space free from overstimulation. Think of this preparation phase as setting the stage for years of wonderful friendship between your furry and human family members.
Essential Safety Setup Steps:
- Use baby gates to create separate areas where your dog can see and smell the baby without direct access.
- Remove high-energy toys and anything that might trigger excitement during the initial meetings.
- Arrange a cozy retreat area where your dog can relax when feeling overwhelmed; this could be their favorite spot with a comfy bed or a properly configured crate that feels like a sanctuary.
- Place baby items at heights your dog cannot reach, especially during those first weeks of curiosity.
- Establish clear walking paths to safely move around while carrying your baby.
- Lay non-slip rugs in areas where your dog might get too excited and lose their footing.
Scent Familiarization Process:
Unleash the magic of your dog’s incredible sense of smell. Start by bringing home a baby blanket or onesie from the hospital before your baby arrives. Let your dog explore these new scents at their own pace, praising and rewarding calm sniffing with treats.
Introduce baby lotions, powders, and other products you'll use often, as many dogs find these sweet scents intriguing rather than alarming. In the weeks leading up to the big day, practice carrying a baby doll occasionally—while it might feel a bit silly, it helps your dog get accustomed to seeing you handle something cherished.
Reinforce the "gentle" command while your dog investigates baby-scented items. This teaches them that these new smells are cues for calm behavior rather than playtime excitement.
Having a designated calm space is crucial in this transition period. Your dog needs a spot to retreat when the baby’s cries reach those high notes or when guests visit to meet the new addition. A well-set-up crate or a quiet corner offers them a refuge, helping to avoid overstimulation that might lead to problematic behaviors.
These environmental preparations lay the groundwork your family needs for lasting harmony. When your hyper dog feels secure and understands the household boundaries, they’re more likely to approach their new sibling with curiosity and gentleness, creating a loving and joyful home for all.
Step-by-Step Introduction Process
Learning how to introduce a hyper dog to a baby requires patience, consistency, and a thoughtful approach that prioritizes safety while building positive associations. The key is taking things slowly and allowing your energetic pup to adjust gradually to this life-changing addition to your family.
Step 1: Start with scent introduction before baby arrives
Begin preparing your dog weeks before baby comes home by bringing hospital blankets, clothing, or anything that carries the baby's scent. Let your dog sniff these items calmly while rewarding relaxed behavior with treats and praise. Think of it as giving your pup a gentle heads-up about the new family member coming their way.
Step 2: Practice calm greetings with a doll
Here's where things get a bit theatrical, but trust the process. Use a baby doll to rehearse proper behavior around babies. Carry it around, make those soft cooing sounds, and reward your dog for calm, gentle responses. Your neighbors might think you've lost it, but this step is gold when preparing your dog for a new baby because it sets expectations without the unpredictability of a real infant.
Step 3: Create controlled distance for the first meeting
When you first bring baby home, have another family member hold your dog on a loose leash across the room. Allow your dog to see and smell the baby from a safe distance while you stay calm and positive. Your dog will pick up on your energy, so keep things relaxed. Watch their body language like a hawk for signs of excitement or stress.
Step 4: Reward calm behavior consistently
Every single time your dog displays gentle, relaxed behavior around the baby, immediately reward with treats, praise, or their favorite squeaky toy. This positive reinforcement is your secret weapon for managing hyperactive dogs with infants—you're essentially teaching them that baby equals good things happening.
Step 5: Gradually decrease distance over several days
Only when your dog remains calm at a distance should you slowly allow closer interactions. Move incrementally closer during each session, always maintaining control and watching for overstimulation. Think baby steps here—literally. Never rush this process, especially with high-energy breeds.
Step 6: Supervise all interactions closely
Even after successful introductions, never leave your hyperactive dog alone with the baby. Dog behavior around babies can shift unexpectedly, and constant supervision keeps everyone safe while allowing their relationship to bloom naturally.
Step 7: Maintain your dog's routine and exercise needs
A tired dog is a calmer dog—this golden rule becomes even more important now. Keep up those regular walks, play sessions, and training to help your pup burn excess energy before baby time.
Remember that introducing dogs to newborns is a marathon, not a sprint. Some dogs need weeks or even months to fully adjust, and that's completely normal. Stay patient, stick to your routine, and celebrate those small wins along the way.
Recognizing Signs of Stress and Anxiety
When you're figuring out how to introduce a hyper dog to a baby, keeping an eye on stress signals is truly crucial. Your dog's body language can reveal exactly how they're coping with this significant change, and identifying these signs early can help you adjust before anxiety turns into challenging behavior.
Look for these physical signs of stress:
Heavy panting, especially if the room isn't warm
Shaking or trembling without a clear reason
Unusual drooling in a dog that doesn't usually drool
Enlarged pupils or that distinct "whale eye" look (when you can see the whites of their eyes)
Stiff posture or tense muscles
Shedding more than what's typical for the season
Pacing or finding it hard to relax
Reduced appetite or turning down favorite treats
Pay attention to behavioral changes indicating anxiety:
Hiding away under furniture or avoiding favorite spots
Chewing on things or digging destructively
Out-of-the-blue barking or whining
Setbacks in house training
Being overly attached, trailing you everywhere
Uncharacteristic aggression during regular interactions
When you spot these signs, here's what you can do right away:
Comfortably move your dog from the area without making a scene
Guide them to a cozy, familiar space with their usual toys and bedding
Use soothing techniques like gentle massaging or calm breathing exercises nearby
Stick to your regular routine as much as possible to give them a sense of steadiness
Consider trying the calming strategies that work well during fireworks season, as their stress signals are similar
It's helpful to remember that some initial unease is perfectly normal when preparing your dog for a new baby. Their whole world is evolving! But, if stress signals continue for more than a couple of weeks, slowing down the introduction process might be a good move. Sometimes, patience is the best support you can offer to both your furry companion and your expanding family. If needed, don't hesitate to reach out to a professional trainer well-versed in dog behavior around babies for additional guidance.
Building a Routine for Harmony
Creating a predictable daily rhythm is your secret weapon in how to introduce a hyper dog to a baby. A structured routine doesn't just help manage your dog's abundant energy; it also sets clear expectations for when it's time to play and when it's time to relax. It's about creating a household schedule that works for everyone, whether they have two legs or four.
Try these friendly strategies to build a routine that ensures everyone stays happy:
Exercise before the baby's day begins: Take your hyper dog for a brisk walk or have a fun play session before your baby wakes up. This can help your dog be naturally calmer during morning feeds and diaper changes.
Align nap times: When it's naptime for your baby, encourage your dog to head to their quiet space with a puzzle toy or chew. It's a great way to teach both that rest time is for everyone.
Keep consistent meal times: Feed your dog at regular intervals, ideally when you're not busy with the baby, to avoid any competition for attention during feeding.
Prioritize focused time for your dog: Dedicate 15-20 minutes to engaging with your pup when your baby is content or sleeping, so your furry friend doesn't feel left out.
Introduce 'calm zones' during baby care: Train your dog to sit on their mat while you're feeding, changing, or soothing your baby, rewarding them for calm behavior.
End the day peacefully: Enjoy a soothing end-of-day routine with calming activities for both your baby and dog before bedtime.
Dogs flourish with a consistent routine. By reducing stress-related behaviors, you can create a sense of calm and predictability in your household. Just like creating sleep routines for puppies helps them thrive, coordinating your family's rest and activity times fosters a peaceful environment. This will nurture strong bonds between your dog and baby, paving the way for a harmonious household.
When to Seek Professional Help
Sometimes, despite your best efforts to introduce a hyper dog to a baby, you might need backup from a professional dog trainer or animal behaviorist. Here's the thing: reaching out for help doesn't mean you've dropped the ball as a pet parent. It's actually one of the smartest moves you can make for your family's wellbeing.
Watch for warning signs that suggest it's time to call in the pros. If your dog shows persistent stress around your baby that doesn't improve after a few weeks of consistent work, don't wait it out. Red flags include excessive panting when baby's around, destructive episodes triggered by crying, or any resource guarding behavior around baby gear. When your hyperactive pup simply cannot settle during feeding times or refuses to respect nap schedules despite your best routine efforts, a professional can offer strategies tailored specifically to your situation.
You'll definitely want expert guidance if your dog has any history of anxiety or reactivity, even if it's never involved children. A certified positive reinforcement trainer can assess what's actually happening in your home and create a realistic plan for channeling your dog's energy in baby-friendly ways.
Think of professional help as an investment in everyone's happiness, not a white flag. Just like learning how different pets can peacefully coexist sometimes requires expert insight, successfully blending high-energy dogs with newborns often benefits from professional guidance that sets your whole family up for long-term success.
Setting up your puppy's crate for nighttime success involves more than just placing a blanket inside and hoping for the best. From choosing the perfect location to creating a soothing bedtime routine, learning how to set up a puppy crate at night properly transforms those sleepless early weeks into peaceful nights for both you and your furry friend. We'll walk you through everything from essential comfort items to handling those inevitable midnight whimpers, so you can create a cozy sanctuary your puppy will actually love.
Why a Cozy Crate is Your Puppy's Safe Haven
Think of your puppy's crate as their very own bedroom retreat, a place where they can curl up and feel completely secure. Just like children find comfort in their own special spaces, puppies naturally seek out cozy dens where they feel protected from the world around them. When you learn how to set up a puppy crate at night properly, you're giving your little one that essential safe haven they instinctively crave.
The magic of crate training lies in working with your puppy's natural denning instincts rather than against them. In the wild, dogs seek out small, enclosed spaces for rest and safety. Your puppy's crate becomes their modern version of this ancient comfort zone. Once they've settled into their nighttime routine, you'll often find them choosing their crate for afternoon naps even when the door stays open—a sure sign you've created something truly special.
For anxious puppies especially, a well-prepared crate offers emotional security during those overwhelming first weeks in a new home. I've watched countless nervous little ones transform from trembling bundles into confident sleepers once they realize their crate means safety and peace. The secret lies in making that space genuinely inviting rather than feeling like punishment.
Beyond comfort, nighttime crate training builds the foundation for house training success. Puppies naturally avoid soiling their sleeping area, so a properly sized crate encourages them to hold their bladder through gradually longer periods. This creates a genuine win for everyone involved.
The beauty of crate training extends to you as well. Knowing your puppy rests safely in their cozy space means you can actually get some sleep too. No more midnight worries about chewed furniture or bathroom accidents. Instead, you both wake up refreshed and ready to tackle another day of puppyhood adventures together. Creating that perfect nighttime setup makes all the difference in building positive associations that last a lifetime.
Choosing the Perfect Spot for Your Puppy's Crate
Where you place your puppy's crate can make or break your nighttime routine. The perfect spot helps your furry friend feel secure and connected to the family while giving everyone the peaceful sleep you desperately need. Think of it as choosing the best bedroom in the house for your newest family member.
Here are the key factors to consider when selecting your puppy's nighttime spot:
Temperature control: Pick a location away from heating vents, air conditioning units, and drafty windows. Puppies can't regulate their body temperature as well as adult dogs, so consistent warmth without overheating is essential.
Noise levels: Choose a spot that's quiet enough for rest but not completely isolated. A corner of your bedroom or a nearby hallway often works perfectly, letting your puppy hear your breathing without being disturbed by every creak and footstep.
Proximity to family activity: Your puppy shouldn't feel banished to the basement or garage. Placing the crate within earshot of where you sleep helps reduce separation anxiety while still maintaining healthy boundaries.
Easy access for nighttime potty breaks: Position the crate where you can quickly and quietly reach it for those inevitable 2 AM bathroom trips. A clear path to the door saves everyone from stumbling around in the dark.
Safety from household hazards: Avoid areas near stairs, breakable items, or anything your curious puppy might try to reach through the crate bars.
Temperature Tip: Keep your puppy's sleeping area between 65-75°F. Consistent temperature helps regulate their sleep cycle and prevents restless nights caused by being too hot or cold.
Most pet parents find that starting with the crate in their bedroom works wonderfully for the first few weeks. Your puppy feels reassured by your presence, and you can respond quickly to any genuine needs. As your pup grows more confident, you can gradually move the crate to its permanent location if you prefer a different spot.
Getting the location right sets the foundation for successful crate training and better sleep for everyone. Once you've found that sweet spot, pair it with comfortable bedding and thoughtful accessories from our crates and crate bedding collection to create a space your puppy will actually want to call home. A well-placed crate becomes your puppy's favorite retreat, never a place of punishment.
Setting Up the Crate: Bedding and Comfort Essentials
The right bedding and comfort items transform a bare crate into a cozy sanctuary where your puppy feels safe and secure through the night. Just like we need our favorite pillow and soft sheets for a good night's sleep, your puppy needs the right materials to settle in peacefully and develop positive associations with their crate.
Here's how to set up a puppy crate at night with the perfect comfort essentials:
Start with a properly sized crate mat or bed that covers most of the floor space without being too bulky. Your puppy should have enough room to stand, turn around, and lie down comfortably, but not so much space they might use one corner as a bathroom.
Choose soft, washable materials that can handle frequent washing. Fleece blankets, cotton crate pads, or specially designed puppy bedding work beautifully because they're gentle on sensitive skin and easy to clean when accidents happen. Trust me, you'll appreciate this foresight at 2 AM when you're dealing with an unexpected mess.
Add a comfort item with familiar scents like a small piece of your clothing or a soft toy. This helps ease separation anxiety and makes the crate feel less lonely during those first few nights. Many puppy parents find that an old t-shirt works wonders.
Position a small water dish near the front of the crate if your puppy needs overnight access to water. Use a spill-proof bowl or clip-on water bottle to prevent soggy bedding disasters that'll have you changing everything in the middle of the night.
Include one safe chew toy to give your puppy something appropriate to gnaw on if they wake up feeling restless. Avoid anything small enough to swallow or toys with parts that could break off.
Tuck blankets snugly around the bedding to prevent bunching or tangling that might disturb your puppy's sleep. Think of it like making a proper bed—smooth surfaces help everyone rest better.
Quick Tip: Washable materials are your best friend during crate training. Nighttime accidents are completely normal for young puppies, so having bedding you can easily toss in the washing machine saves you stress and keeps the crate fresh and inviting.
When you nail the bedding setup, you're setting the foundation for successful nighttime crate training. The Lords & Labradors boucle cosy calming puppy crate bed set captures this approach perfectly, combining luxury comfort with practical washability to support both peaceful puppy sleep and easy maintenance for busy pet parents.
To Cover or Not to Cover: Creating a Cozy Den
Many puppies sleep better when their crate feels like the cozy den they instinctively seek. Think of it this way: in the wild, dogs gravitate toward enclosed spaces that offer security and calm. A crate cover can transform your puppy's sleeping area from an open cage into a peaceful retreat that blocks distractions and signals bedtime.
That said, covering isn't right for every puppy. Some love the snug, cave-like feeling, while others prefer to see their surroundings. Your puppy's personality and a few safety considerations should guide your decision.
Pros of Covering
Cons of Covering
Reduces visual distractions and household noise
Risk of overheating, especially in warm climates
Creates calming den-like atmosphere
Some puppies feel claustrophobic in enclosed spaces
Helps anxious puppies feel more secure
Can trap odors or reduce air circulation
Blocks morning light for longer sleep
Makes it harder to monitor your puppy's behavior
Establishes clear "bedtime" signal
May increase humidity inside the crate
If you want to try covering your puppy's crate at night, safety comes first:
Always leave at least one side partially open for ventilation
Choose breathable materials like cotton or purpose-made crate covers
Watch for overheating signs like excessive panting or restlessness
Start with just partial coverage to see how your puppy reacts
Remove the cover immediately if your puppy seems stressed
Quality crate covers strike the perfect balance between cozy and practical. Look for designs with breathable fabrics that maintain airflow while creating that essential den feeling. Many feature adjustable panels and machine-washable materials that make your nighttime routine simpler.
Remember, there's no one-size-fits-all approach here. If your puppy seems happier without a cover, trust their preference. The goal is helping them feel secure and comfortable, whatever that looks like for your particular pup.
Handling Nighttime Whimpers: Comforting Your Puppy
Those little whimpers and soft cries in the middle of the night are completely normal for new puppies adjusting to their crate. Remember, your puppy has just left their littermates and is learning to feel secure in their new space. The key to success lies in staying consistent with your approach while offering gentle comfort that doesn't reward the crying behavior.
Here's how to soothe your puppy through those first challenging nights:
Place a piece of your worn clothing in the crate so your scent provides comfort throughout the night. An old t-shirt works perfectly and helps your puppy feel less alone.
Use white noise or soft music to mask household sounds that might startle your puppy awake. A fan or calming playlist can work wonders for creating a peaceful sleep environment.
Implement a gradual response approach by waiting a few minutes before responding to whimpering. If the crying continues, offer quiet reassurance with your voice rather than immediately opening the crate.
Keep nighttime interactions calm and minimal. If your puppy needs a bathroom break, take them out quietly without making it an exciting playtime experience.
Position yourself nearby initially if needed. Some pet parents find sleeping on the couch near the crate for the first few nights helps ease the transition.
Stick to your routine even when it feels difficult. Consistency in your nighttime puppy crate routine helps your puppy learn what to expect and feel more secure.
I remember those exhausting first weeks with my own puppy, lying awake at 2 AM wondering if the whimpering would ever stop. Here's the truth that kept me going: most puppies adapt to their nighttime routine within one to two weeks when you stay consistent. Those sleepless nights feel endless in the moment, but they're building something beautiful—a confident, secure pup who knows their crate is a safe haven. If you're struggling to establish those consistent bedtime habits, our guide on creating the perfect puppy sleep routine offers additional strategies for building a calming nighttime schedule.
Encouraging Fact: Studies show that 85% of puppies sleep through the night within two weeks when their crate is properly set up and a consistent routine is maintained. Your patience during these early nights is building the foundation for years of peaceful sleep ahead.
Building a Nighttime Routine for Peaceful Sleep
Establishing a consistent nighttime routine transforms crate training from a nightly struggle into a peaceful ritual that both you and your puppy can count on. Think of it like bedtime stories for children – the predictability becomes comforting rather than boring.
Start your routine about 30 minutes before you want your puppy settled for the night. Begin with a final potty break outside, followed by a few minutes of calm interaction. Skip the energetic play during this wind-down period. An overstimulated puppy will take ages to settle, and you'll both pay for it later. Instead, try gentle petting or quiet talking while you guide them toward their crate area.
Create positive associations by offering a special treat or chew toy that only appears at bedtime. Many pet parents find that a small training treat or a puzzle toy helps their puppy view crate time as something to anticipate rather than endure. Place this inside the crate while your puppy watches, then use a consistent verbal cue like "bedtime" or "crate time."
The secret to success lies in your own consistency and calm energy. Puppies are emotional sponges – they absorb our stress levels instantly. So approach bedtime with quiet confidence. If your little one fusses initially, resist the urge to immediately respond. Most puppies settle within 10-15 minutes once they realize the routine is non-negotiable.
Learning how to set up a puppy crate at night extends beyond the physical setup to include these daily habits. Some nights will go more smoothly than others, especially during those first exhausting weeks. Adjust your timing as needed, but stick to the same sequence of events.
As your puppy grows more comfortable, you might find certain steps become unnecessary. Still, maintaining some version of this routine helps reinforce the crate as a positive, restful space throughout their life. Consider pairing it with a cozy calming bed that becomes part of this nightly ritual – familiar comfort they can count on every single night.
If you've ever watched your Beagle bounce around the house like a furry pinball machine, you're probably wondering exactly how much exercise does a Beagle need to channel all that energy. The answer isn't as simple as a daily walk around the block—these spirited hunting dogs require a thoughtful blend of physical activity and mental challenges that evolves throughout their lives. From puppyhood through their golden years, we'll help you create the perfect exercise routine that keeps your Beagle happy, healthy, and blissfully tired at the end of each day.
Understanding Your Beagle's Exercise Needs
Beagles are natural athletes with boundless curiosity, originally bred to hunt alongside humans for hours at a time. This heritage means your Beagle comes hardwired with impressive stamina and an insatiable need to explore the world through movement and scent.
When you're wondering how much exercise does a beagle need, think beyond just a quick walk around the block. These spirited dogs thrive on both physical activity and mental challenges to stay balanced and content. You'll likely notice that a tired Beagle is a happy Beagle—while an under-exercised one might redecorate your living room or serenade the neighbors with their famous howl.
The wonderful thing about Beagles is their adaptability. Whether you're training for a marathon or prefer gentle evening strolls, your Beagle can match your rhythm with the right routine. Their daily activity needs shift dramatically throughout their lives, from the careful pacing required for bouncy puppies to the modified activities that keep senior dogs comfortable and engaged.
Getting these evolving needs right makes all the difference in creating a sustainable exercise plan that keeps your Beagle physically fit, mentally sharp, and genuinely happy. Regular exercise becomes the cornerstone of everything from healthy joints to good behavior, setting you both up for years of adventures together.
Exercise Requirements by Age: Puppies, Adults, and Seniors
Understanding how much exercise a Beagle needs isn't straightforward since their energy levels and capabilities change as they grow. A playful eight-week-old puppy has very different requirements from a gentle nine-year-old senior. Striking the right balance is crucial to keeping your furry friend healthy and content.
Puppies (2-12 months)
Beagle puppies are bundles of energy, but protecting their growing joints from overexertion is key:
- Follow the "5-minute rule": Allow 5 minutes of exercise per month of age, twice daily (e.g., a 3-month-old should get 15 minutes, twice daily).
- Focus on short, frequent play sessions rather than long walks.
- Include games like hide-and-seek and puzzle toys.
- Avoid repetitive activities such as jogging or jumping until growth plates close, around 12-18 months.
- Rest is just as important as activity for healthy development.
Callout: The 5-Minute Rule
This helpful guideline prevents joint damage as your puppy grows. For example, a 4-month-old Beagle should get about 20 minutes of structured exercise twice daily, along with plenty of nap time. Creating proper crate training routines ensures your puppy rests adequately between active periods.
Adults (1-7 years)
Adult Beagles have impressive stamina and high energy levels, needing regular outlets:
- Aim for 60-90 minutes of varied activity throughout the day.
- Include two structured walks and additional playtime.
- Mix activities like hiking, fetch, agility training, or scent work.
- Embrace these years as a time for exciting adventures and new experiences together.
Seniors (8+ years)
Older Beagles still require exercise, but comfort becomes more important:
- Scale back to 30-60 minutes of gentler daily exercise.
- Opt for softer surfaces and shorter distances on walks.
- Swimming offers excellent low-impact exercise for aging joints.
- Watch for signs of stiffness and adjust the routine as needed.
Adapting your Beagle's routine to their life stage ensures they remain healthy and happy, protecting their joints while they enjoy many years of tail-wagging adventures.
Mental Stimulation: Keeping Your Beagle's Mind Active
While figuring out how much exercise your beagle needs, it's easy to focus purely on walks and runs while forgetting about their mental workout requirements. Beagles were bred as hunting hounds, which means their brains crave just as much engagement as their bodies do. Without proper mental stimulation, even a well-exercised beagle can turn into a four-legged tornado of destruction—think excessive barking, crater-sized holes in your garden, or your favorite slippers becoming unrecognizable chew toys.
Here are tried-and-tested ways to challenge your beagle's brilliant mind:
Puzzle feeders and treat-dispensing toys that transform mealtime into an engaging brain game
Scent work games like hiding treats around the house or teaching them to find specific toys by smell
Snuffle mats that tap into their natural foraging instincts
Hide-and-seek with family members or favorite toys throughout your home
Short training sessions focusing on new tricks or polishing existing commands (keep these upbeat and brief)
Toy rotation system where you swap out playthings weekly to keep things fresh and exciting
Did You Know? Just 15 minutes of focused mental stimulation can tire your beagle as much as a 30-minute walk.
Mental enrichment isn't an add-on to your beagle's exercise routine—it's absolutely fundamental. A mentally satisfied beagle tends to be calmer, more responsive to training, and genuinely easier to live with. Watch for those telltale signs of contentment after brain games, because understanding your dog's body language helps you recognize when they're truly fulfilled rather than just physically knackered. This insight makes determining your beagle's ideal exercise balance much more tailored to their unique personality and energy levels.
Off-Lead Safety Tips for Beagle Adventures
Beagles were born to follow their noses across open countryside, and off-lead adventures let them express these natural hunting instincts while burning off their abundant energy. These moments of freedom transform routine walks into the kind of beagle daily activity that truly satisfies both their physical needs and their deep-rooted desire to explore.
Safety comes first when transitioning to off-lead exercise:
Master recall training before going lead-free - Start indoors, then move to a securely fenced garden. Your Beagle should return immediately when called, even when distracted by the most tantalizing smells.
Choose enclosed spaces initially - Fenced dog parks, tennis courts, or secure fields give your Beagle freedom while keeping them contained when their nose inevitably takes over their brain.
Start with short off-lead sessions - Five minutes of freedom beats an hour of your anxiety. Build up gradually as both your confidence and their reliability improve.
Watch for "scent lock" - You'll know it when you see it: nose down, ears off, completely oblivious to your existence. Be ready to intervene before they follow that fascinating trail into the sunset.
Keep high-value treats handy - A pocket full of something irresistible makes you infinitely more interesting than whatever they're investigating.
Remember: A rock-solid recall isn't just helpful—it's your Beagle's lifeline during off-lead adventures.
During training sessions, a reliable lead like the Lords & Labradors Essentials Herdwick Dog Lead gives you confidence while practicing recall work, knowing you have secure control when needed.
With proper preparation, off-lead time becomes the crown jewel of how much exercise your beagle needs, delivering the mental stimulation and physical activity that keeps them genuinely content.
Incorporating Lords & Labradors Accessories into Your Routine
The right gear makes every Beagle adventure more enjoyable and safe for both of you. A well-fitted harness distributes pressure evenly across your Beagle's chest—especially helpful when they catch an interesting scent and suddenly pull toward it. This gentle control lets you guide them back to your walking routine without any discomfort.
Interactive toys transform ordinary walks into engaging mental workouts. I love bringing a puzzle ball filled with treats on longer walks, giving your Beagle brain-stimulating breaks between physical activity. These moments satisfy their natural foraging instincts while helping you manage your Beagle's daily activity levels throughout the day.
A hands-free lead attachment can be a game-changer during those energetic morning walks when your Beagle's ready to explore everything at once. You get better balance and control while allowing the natural movement patterns that support healthy exercise habits.
Our Lords & Labradors Essentials Collection includes thoughtfully designed accessories that work with your Beagle's natural energy levels and physical activity needs. The key is choosing gear that enhances your routine rather than complicating it, making those daily walks something you both genuinely look forward to.
As winter approaches, many pet parents find themselves wondering whether their furry friends need an extra layer to stay comfortable during chilly walks and frosty mornings. The answer to "do dogs need sweaters in winter" isn't one-size-fits-all—it depends on your dog's breed, size, age, and individual tolerance for cold weather. From recognizing the signs that your pup is feeling chilly to choosing the perfect fit and keeping their winter wardrobe fresh, we'll help you navigate everything you need to know about keeping your four-legged companion cozy all season long.
Why Some Dogs Need Sweaters in Winter
While many dogs come naturally equipped with thick, insulating coats, others genuinely benefit from a little extra help staying warm during chilly weather. Just like how you might reach for a jacket on a brisk morning walk, some pups need that same consideration when temperatures drop.
Size plays a huge role here. Smaller dogs lose body heat much faster than their larger counterparts because they have more surface area relative to their body mass. Your Chihuahua or Yorkshire Terrier simply can't generate and retain warmth the way a Golden Retriever can. I've watched tiny dogs start shivering within minutes of stepping outside on a cold day, while my neighbor's Bernese Mountain Dog happily romps through snow without missing a beat.
Coat type matters enormously too. Dogs with single-layer coats, short hair, or very fine fur lack the natural insulation that double-coated breeds enjoy. Breeds like Whippets, Italian Greyhounds, and many Pit Bulls have sleek coats that look gorgeous but offer minimal protection against winter's bite. These athletic builds that serve them so well in warmer weather become a disadvantage when frost starts appearing on the grass.
Age and health also factor into whether dogs need sweaters in winter. Senior dogs often struggle more with temperature regulation as their metabolism slows down, and pups with arthritis or other health conditions may need extra warmth to stay comfortable and mobile. Even some short-haired mixed breeds surprise their parents by constantly seeking out sunny spots or hovering near heating vents once the weather turns cold.
The good news is that keeping dogs warm doesn't have to be complicated. A well-fitted sweater can make all the difference for dogs who need that extra layer. You'll find everything from lightweight pullovers for mild days to more substantial winter coats designed for serious cold-weather adventures.
Breeds That Benefit Most from Winter Wear
Not every dog needs a sweater, but certain breeds face real challenges when temperatures drop due to their physical makeup and genetic traits. If you've ever watched a Greyhound shiver on a mild autumn day, you'll understand that some of our four-legged friends simply aren't built for chilly weather.
The breeds most likely to benefit from winter clothing fall into three main categories:
Sighthounds (Greyhounds, Whippets, Italian Greyhounds, Salukis): These elegant athletes have incredibly thin skin, minimal body fat, and short coats that offer little insulation. Their lean build, while perfect for speed, leaves them vulnerable to cold.
Short-haired breeds (Boxers, Pit Bulls, Boston Terriers, French Bulldogs): With single-layer coats and often muscular but low-fat builds, these dogs lack the natural insulation that double-coated breeds enjoy.
Small and toy breeds (Chihuahuas, Yorkshire Terriers, Maltese, Papillons): Their tiny body mass means they lose heat quickly, and many have fine, silky coats that provide minimal warmth.
Special consideration: Senior dogs and puppies within any of these breed categories are especially vulnerable to cold, as age affects their ability to regulate body temperature effectively.
Understanding your dog's breed characteristics helps you answer the question "do dogs need sweaters in winter?" for your particular pup. Breeds like Dachshunds face unique challenges due to their low-to-ground build combined with short coats, which is why many pet parents find that specialized fleeces designed for their body shape work best. The key is recognizing that keeping dogs warm in cold weather isn't about fashion—it's about comfort and health for breeds that genuinely need the extra help.
Signs Your Dog Might Be Cold
Learning to spot when your dog feels cold helps you decide whether they need extra protection during chilly weather. Just like us, our furry friends have their own ways of saying "brrr, it's freezing out here!"
Watch for these telltale signs that your dog might be cold:
Shivering or trembling - The most obvious clue that your pup is trying to warm up
Seeking out warm spots - You'll find them curled up near heating vents, fireplaces, or claiming that perfect sunny patch by the window
Reluctance to go outside - Suddenly hesitating at the door or giving you those pleading eyes to cut the walk short
Lifting paws off cold surfaces - That adorable (but telling) paw dance or favoring one foot at a time
Hunched posture - Tucking their tail under and pulling their body inward like they're trying to become a furry little ball
Whining or showing anxiety - Expressing their discomfort through soft whimpers or restless pacing
Slow movement or stiffness - Moving more gingerly than usual or seeming less bouncy during playtime
Seeking extra cuddles - Becoming your shadow and pressing close to you or other pets for warmth
Keep in mind: Smaller breeds, senior dogs, and those with thin coats feel the cold much faster than their larger, fluffier companions who seem to thrive in winter weather.
When you spot these behaviors, it's worth considering some cozy winter wear for your four-legged friend. Understanding your dog's body language becomes especially valuable during colder months, helping you recognize these subtle signals and keep your companion comfortable all season long.
Choosing the Right Sweater for Your Dog
Finding the perfect sweater for your furry friend depends on your dog's individual needs and the winter weather you're facing together. A Chihuahua in Minnesota will need something quite different from a Labrador in mild coastal conditions, so think about your specific situation first.
When shopping for dog winter clothing, keep these key factors in mind:
Proper fit - The sweater should be snug enough to retain body heat but loose enough for comfortable movement. Measure your dog's chest, neck, and length from collar to tail base before buying. If you're between sizes, go up rather than down.
Material matters - Wool blends offer excellent warmth for dry conditions, while waterproof or water-resistant fabrics work better in snowy or rainy areas. Avoid anything that bunches up around the legs or restricts your dog's natural gait.
Easy on, easy off - Look for designs with simple closures like velcro or snap buttons. Wrestling with complicated fastenings twice daily gets old fast, especially when your pup is already shivering and eager to get moving.
Function over fashion - While a cute pattern is lovely, prioritize features that actually help with keeping dogs warm in cold weather. Think reinforced chest coverage, wind-resistant materials, and secure but comfortable leg openings.
The most important area to cover is your dog's chest and belly, where they lose heat fastest. Any sweater worth buying should provide solid coverage of these vulnerable spots without riding up during walks.
Quality options like the Kings Coronation Dog Coat show how thoughtful design and premium materials make a real difference. When you invest in well-made winter wear, you get both the warmth your dog needs and the durability that makes those daily winter walks comfortable for everyone involved.
Caring for Your Dog's Winter Wardrobe
Once you've decided that your dog needs winter wear, taking proper care of their sweaters ensures they'll stay cozy all season long. I learned this the hard way when my neighbor's Golden Retriever's beautiful cable-knit sweater turned into a felted mess after one trip through the washing machine on hot.
Always check the care label first, but most dog sweaters do best with a gentle machine wash in cold water. Turn them inside out to protect any decorative elements, and use a mesh laundry bag if the sweater has buttons or zippers. Skip the fabric softener—it can reduce the fabric's ability to wick moisture and may irritate sensitive skin.
Air drying works best for maintaining shape and preventing shrinkage. Lay sweaters flat on a clean towel, reshaping them while damp. This also gives you a perfect opportunity to check for loose threads, stretched seams, or worn areas that might poke or chafe.
Between wears, give sweaters a quick shake and brush off any debris. Store them folded in a clean, dry place rather than hanging, which can stretch the fabric over time. Keep a rotation of at least two sweaters so you always have a clean, dry option ready when keeping dogs warm in cold weather becomes a daily necessity.
Regular inspection becomes second nature once you get into the routine. Look for pilling around friction areas like the chest and underarms, and trim carefully with fabric scissors to keep your pup looking sharp throughout winter. You'll find a great selection of quality dog apparel designed to withstand regular washing and seasonal wear.
Ever noticed how your pup struts out of the groomer's looking absolutely adorable with that perfectly tied bandana around their neck? While you might assume it's purely for style, there are actually several thoughtful reasons why groomers put bandanas on dogs that blend fashion, function, and comfort into one charming finishing touch. From providing gentle calming pressure to protecting freshly groomed coats, these simple accessories work harder than you'd expect while making your furry friend look picture-perfect.
The Charm of Bandanas: More Than Just a Fashion Statement
When you pick up your freshly groomed pup and see that adorable bandana tied around their neck, you might wonder why groomers make this charming finishing touch such a standard practice. The truth is, there are wonderful reasons why groomers put bandanas on dogs that go far beyond making your furry friend look picture-perfect—though that's certainly part of the magic.
Think of a bandana as the canine equivalent of that perfect accessory that pulls an entire outfit together. Just as you might add a scarf to complete your look, groomers use bandanas to give dogs that polished, "spa day" glow that makes both pups and their parents beam with pride. But there's so much more happening beneath that stylish exterior.
These simple fabric squares work as gentle comfort tools, helping anxious dogs feel more secure during and after their grooming experience. Many dogs find the light pressure around their neck surprisingly soothing—similar to how a cozy sweater might calm us on a stressful day. Smart groomers have discovered that this small addition can transform a nerve-wracking grooming session into something much more pleasant for everyone.
Bandanas also offer practical perks that make them incredibly useful dog grooming accessories. They protect freshly groomed necks from scratching, help catch any stray loose fur, and create a clean barrier against dirt and debris during those precious first hours when your pup looks absolutely pristine. It's like having a tiny shield that keeps all that grooming work looking fresh just a little bit longer.
A Splash of Style: How Bandanas Enhance Your Pup's Look
When you pick up your freshly groomed pup and see them sporting a perfectly coordinated bandana, you're witnessing the groomer's artistic eye at work. This simple finishing touch transforms your dog from merely clean to absolutely stunning, which explains why groomers put bandanas on dogs as the perfect final flourish to their professional grooming services. Like adding the perfect accessory to your favorite outfit, a well-chosen bandana elevates your pup's entire look.
Dog grooming accessories like bandanas offer several style advantages:
Personality showcase - A playful polka dot pattern highlights your Golden's goofy side, while a sophisticated plaid brings out your Border Collie's intelligence
Color coordination - Rich burgundy bandanas make chocolate Labs look absolutely regal, while bright blues complement golden coats beautifully
Seasonal flair - Halloween pumpkins, Christmas plaids, or spring florals keep your pup looking current and festive
Photo-ready appeal - That Instagram shot becomes infinitely more charming when your freshly groomed dog sports a coordinating bandana
Professional groomers develop an eye for selecting colors and patterns that complement each dog's unique coat, facial features, and breed characteristics. They'll choose warm tones for dogs with rich brown eyes or cool blues for those striking gray coats. It's all about what brings out your pup's natural beauty.
The benefits of dog bandanas extend beyond mere decoration, too. Some naturally reserved dogs seem to prance a little taller when they're dressed up and looking their best. There's something about that finishing touch that gives both you and your pup an extra boost of confidence.
This thoughtful attention to style creates those magical moments when you see your dog looking absolutely picture-perfect, bringing genuine joy to both you and your beautifully groomed companion.
Comfort and Calm: The Soothing Effect of Bandanas
Many groomers have discovered that a simple bandana can work wonders for anxious pups during their spa day. The gentle weight and snug fit around your dog's neck creates a subtle calming effect, much like how a weighted blanket helps us humans feel more secure when we're stressed.
Think of it as a gentle hug that travels with your pup throughout their grooming session. The soft pressure naturally activates calming pressure points, helping even the most nervous dogs settle into a more relaxed state. I've watched anxious rescue dogs visibly relax once that bandana goes on—it's quite remarkable.
The calming benefits go well beyond simple pressure therapy:
Scent infusion capability - Bandanas can be lightly sprayed with calming lavender or dog-safe pheromone sprays for a soothing aromatherapy experience
Familiar texture comfort - The soft fabric provides reassuring tactile sensation during handling
Stress signal reduction - A well-fitted bandana often helps minimize visible stress signals like excessive panting or trembling
Routine establishment - Regular bandana wearing creates positive associations with grooming time
Smart groomers often enhance these accessories by applying a light mist of calming essential oils or synthetic pheromones designed specifically for dogs. This transforms an ordinary piece of fabric into a portable comfort zone that follows your pup from the bath to the blow-dry station.
The gentle compression taps into those deep-seated comfort responses that help puppies feel secure—the same instinct that makes dogs love burrowing under blankets or snuggling into tight spaces when they need to decompress.
Practical Perks: Bandanas as Functional Accessories
When you wonder why do groomers put bandanas on dogs, the answer often goes beyond aesthetics. Professional groomers know that bandanas tackle real challenges we face as pet parents, especially with our more adventurous pups.
Think about it: these simple fabric accessories work surprisingly hard behind the scenes. Here's how they earn their keep:
Sun protection comes first, especially for dogs with thin coats or that adorable pink skin showing through light-colored fur. A well-fitted bandana shields your dog's neck and chest from harsh UV rays during those long summer walks or beach adventures.
Dirt and debris management makes life easier for everyone. Bandanas catch dust, pollen, and those mysterious outdoor particles before they work their way deep into your pup's coat. You'll thank yourself later when cleanup time rolls around.
Drool control saves the day for families with those wonderfully slobbery breeds. Rather than letting drool soak into their coat (and later, your couch), bandanas absorb the excess around the neck area.
Safety visibility matters more than you might think. Bright or reflective bandanas help you spot your dog quickly in crowded parks or during evening walks, giving you that extra peace of mind.
Post-grooming protection keeps freshly trimmed necks comfortable while any sensitive skin settles down, preventing scratches and keeping the area clean.
Professional groomers recommend bandanas because they understand something important: the best dog grooming accessories solve multiple problems at once. That's why these functional pieces have become standard in grooming routines, keeping your pup comfortable, protected, and looking fantastic.
Choosing the Right Bandana for Your Dog
Finding the perfect bandana for your pup doesn't have to be overwhelming. Start with getting the right size by measuring your dog's neck circumference and adding two inches for comfort. The bandana should sit snugly without restricting movement or breathing—much like how you'd want your own scarf to feel.
Material matters more than you might think. Cotton bandanas work wonderfully for everyday wear since they're breathable and easy to wash. For dogs with sensitive skin, look for organic cotton or bamboo blends that feel softer against their fur. If your pup loves outdoor adventures, consider water-resistant materials that can handle muddy paws and unexpected puddle splashes.
Design choices should reflect both your dog's personality and practical needs. Bright patterns and fun prints show off their playful side, while solid colors create a more classic look that photographs beautifully. Think about your dog's coat color too—a red bandana might get lost on a golden retriever, but it'll pop gorgeously on a black lab.
Keep your bandanas fresh by rotating between several styles and washing them regularly with pet-safe detergent. This prevents odor buildup and gives you options for different occasions. I always keep clean bandanas in an easily accessible spot so I can quickly grab one before walks or grooming appointments.
The key is choosing bandanas that make both you and your dog happy. When your pup feels comfortable and looks adorable, you'll understand exactly why groomers put bandanas on dogs—they're the perfect finishing touch that brings joy to everyone involved.
Maintaining a clean litter box is one of the most important things you can do for your cat's health and happiness, but figuring out exactly how often you should change your cat's litter can feel overwhelming with so many conflicting opinions out there. The truth is, the right schedule depends on your specific situation—your cat's habits, the type of litter you choose, and a few simple daily routines that make all the difference. Let's break down the practical steps that will keep your feline friend purring and your home smelling fresh.
Understanding Your Cat's Litter Needs
Your cat's relationship with their litter box tells you everything about their comfort and wellbeing. Most cats make 2-4 trips daily for urination and one for defecation, so this little corner of your home gets serious traffic. When you're wondering how often you should change your cat's litter, you're essentially asking how to keep up with one of their most important daily rituals.
Here's the thing about cats: they're incredibly particular about cleanliness. In the wild, they bury their waste to stay hidden from predators, and that fastidious nature doesn't disappear just because they're living the good life on your sofa. When their litter box falls below their standards, they'll let you know—sometimes by avoiding it altogether, which leads to unwelcome surprises around the house, or through stress behaviors like excessive grooming or finding new hiding spots.
Watch your cat at their litter box, and you'll see exactly what I mean. A happy cat approaches confidently, digs with purpose, does their business, covers it thoroughly, and walks away satisfied. A cat dealing with a less-than-ideal situation? They'll perch on the edges like they're navigating a minefield, rush through everything, or give you those unmistakable "fix this immediately" stares.
The beautiful thing is that staying ahead of litter box maintenance doesn't mean becoming a full-time janitor. A few minutes of daily attention actually saves you hours later by preventing stubborn odors and avoiding those complete box overhauls that nobody enjoys. Your cat stays content, your home stays fresh, and you get the satisfaction of supporting their natural instincts.
Daily Spot-Cleaning: A Simple Routine
Daily spot-cleaning forms the backbone of effective litter box maintenance and directly impacts how often you should change your cat's litter completely. This simple five-minute routine involves removing solid waste and clumped urine daily, keeping the remaining litter fresh for much longer. When you stay on top of daily cleaning, you can stretch the time between full litter changes from every few days to once or twice a week, depending on your cat and litter type.
Here's how to make daily spot-cleaning quick and efficient:
Choose your timing wisely - Most cats prefer using a clean box, so scoop in the morning or evening when your feline friend is most active. I find evening works best since it gives my cats a fresh start for overnight visits.
Use a sturdy, slotted scoop - A good-quality scoop with appropriately sized holes makes the job faster and prevents you from accidentally removing clean litter along with waste.
Work systematically - Start from one end of the box and move to the other, gently sifting to let clean litter fall through while capturing clumps and solids in one smooth motion.
Top off as needed - Add a small amount of fresh litter to replace what you've removed, maintaining a consistent depth of about two to three inches.
Dispose thoughtfully - Seal waste in a small bag or use flushable litter according to manufacturer guidelines and your local regulations.
The benefits of this daily routine extend far beyond keeping things tidy. Your cat enjoys a consistently clean bathroom, which dramatically reduces the chance of accidents outside the box. Odors stay manageable because waste doesn't have time to break down and create stronger smells. You'll actually use less litter overall since the majority stays clean and usable for longer periods.
There's another bonus many pet parents don't consider: regular scooping helps you spot health changes early. When you're checking the box daily, you'll quickly notice if your cat's bathroom habits shift, which can be an early indicator that a vet visit might be needed.
This routine is one of the most effective ways to reduce litter box smell naturally while building a sustainable cleaning schedule that works for busy pet parents. Your cat will appreciate the attention to their comfort, and you'll find that maintaining their space becomes second nature within just a few weeks.
Full Litter Changes: When and Why
While daily scooping keeps things manageable, a complete litter change means emptying the entire box, cleaning it thoroughly, and starting fresh with new litter. This deeper clean eliminates lingering odors, bacteria, and residue that builds up over time—making it essential for maintaining a truly fresh home and keeping your cat comfortable.
Several key factors determine how frequently you'll need these full changes:
• Number of cats sharing the box - A single cat typically allows for weekly changes, but two cats using the same box will need fresh litter every 3-4 days. More cats simply mean more waste and faster odor buildup.
• Type of litter you're using - Clumping litters often last longer between full changes since you remove most waste during daily scooping. Non-clumping varieties absorb odors throughout the litter and usually need replacing every few days.
• Size of your litter box - Larger boxes with more litter volume can go longer between changes, while smaller boxes reach their saturation point much faster, especially with finicky cats who demand pristine conditions.
Here's how to tackle a thorough litter change that actually gets the job done:
Empty all used litter into a sturdy garbage bag, scraping away any stuck bits with your scoop
Rinse the empty box with warm water and mild dish soap
Scrub away residue or stains with a pet-safe cleaner
Rinse thoroughly and dry completely before adding fresh litter
Pour in 2-3 inches of new litter, adjusting based on your cat's digging habits
Place the box back in its usual spot and give your cat time to inspect your handiwork
Most single-cat households can stick to weekly full changes, while multi-cat homes often need refreshing every 3-5 days. Trust your nose and your cat's behavior over rigid schedules. Persistent odors after scooping, your cat avoiding the box entirely, or visible saturation throughout the litter all signal it's time for an immediate refresh. Your cat will thank you for staying on top of it.
Choosing the Right Litter for Your Cat
The type of litter you choose has a massive impact on how often you should change your cat's litter. Some materials naturally control odors better and last longer between full changes, while others need more frequent attention to keep your home fresh and your cat happy.
Litter Type
Change Frequency
Odor Control
Key Pros & Cons
Clay (Non-clumping)
Every 3-4 days
Fair
Affordable, absorbs moisture well / Gets soggy quickly, tracking issues
Clumping Clay
Weekly
Good
Easy scooping, long-lasting / Dusty, heavier to carry
Crystal/Silica
2-3 weeks
Excellent
Superior odor absorption, low dust / Higher upfront cost, some cats dislike texture
Natural/Biodegradable
5-7 days
Good
Eco-friendly, flushable options / Can be pricier, may need more frequent changes
When selecting the best cat litter for odor control that fits your lifestyle, think about these practical considerations:
Your cat's texture preferences—trust me, some cats have very strong opinions about crystal versus clay
Household sensitivity to dust or fragrances (especially important with family members who have allergies)
How much time you realistically have for daily scooping and maintenance
Your budget for both the initial purchase and ongoing costs
Environmental priorities and how you prefer to dispose of used litter
Crystal litters have been game-changers for busy pet parents who want excellent odor control with less frequent full changes. Natural options work beautifully for eco-conscious families, though you might find yourself changing them a bit more often. The secret is finding that perfect match between your cat's comfort and your maintenance routine.
Your litter choice sets the foundation for everything else. When you hit that sweet spot between effective odor management and your cat's preferences, you'll naturally extend time between full changes while keeping a fresh space that makes both of you happy.
Hygiene Best Practices for a Happy Cat
Maintaining excellent litter box hygiene goes far beyond just asking, "how often should I change my cat's litter?" While regular changes are key, creating a fresh and welcoming space for your feline involves caring for the entire litter area. Cats have a keen sense of smell and can detect odors and bacteria that might evade our senses, which directly affect their willingness to use the box and their health.
These essential tips will ensure a happy litter box experience for your cat:
Scoop Twice Daily: Aim for a quick scoop in the morning and evening to keep unpleasant odors at bay and stop bacteria in their tracks.
Weekly Deep Clean: Give the litter box a thorough wash every week using warm water and mild, unscented dish soap. Steer clear of harsh chemicals that might discourage your cat from using the box.
Optimal Litter Depth: Keep 2-3 inches of litter in the box. This helps in absorbing moisture and prevents waste from reaching the box bottom.
Daily Area Clean-Up: Wiping down the area around the box each day helps control tracked litter and stops bacteria from setting up camp.
Liner Management: If liners are part of your routine, change them weekly. Many cats, however, prefer the box without them, so feel free to skip if necessary.
Floor Maintenance: Vacuum or sweep the area around the box every few days to handle any stray litter and maintain cleanliness.
Strategic Mat Placement: A quality litter mat outside the box can trap particles, stopping them from becoming a household menace.
Ventilation Matters: Ensure the litter area has good airflow. This fights moisture and keeps germs at bay.
Following these practices alongside your litter change schedule ensures a space your cat will love. It’s more than just avoiding bad smells—you're nurturing their natural instincts and keeping stress-related behaviors to a minimum. A clean and inviting litter setup means a happy, content cat, and who wouldn't want that?
Creating a Litter Box Routine That Works for You
The key to mastering how often you should change your cat's litter lies in finding a rhythm that works for both you and your feline friend. Start by setting realistic expectations for yourself. If you're naturally a morning person, build litter box maintenance into your coffee routine. Night owls might prefer checking the box before settling in for the evening. The important thing is consistency, not perfection.
Consider your household's unique circumstances when establishing your routine. Multi-cat homes will need more frequent attention, while single-cat households can often stretch a bit longer between full changes. If you travel frequently for work, you might invest in the best cat litter for odor control to maintain freshness during longer stretches. Similarly, if you have a particularly picky cat, you'll quickly learn the signs it's time to change cat litter before they start protesting with pointed stares or strategic deposits outside the box.
Your routine will naturally evolve as you learn your cat's preferences. Maybe you'll discover that Thursday is mysteriously always the smelliest day, or that your cat becomes finicky right before weekend guests arrive. These little quirks become part of your shared language as pet parent and cat—those moments when you think, "Ah, Princess Whiskers is giving me that look again."
Don't stress if it takes a few weeks to find your groove. Every experienced cat parent has stories of trial and error, from accidentally buying the wrong litter type to realizing their "low-maintenance" cat actually has very specific opinions about cleanliness. The goal isn't Pinterest-perfect litter box management, but creating a sustainable system that keeps both you and your cat content with a fresh, clean space.
At Lords & Labradors, we specialise in dog crate bedding and accessories. Our dog crate cover and bed sets are available in a stylish choice of fabrics and come in a variety of sizes. These sets create the ultimate comfort spot for your puppy or adult dog. Luxury dog crates...
Read more
At Lords & Labradors, we specialise in dog crate bedding and accessories. Our dog crate cover and bed sets are available in a stylish choice of fabrics and come in a variety of sizes. These sets create the ultimate comfort spot for your puppy or adult dog.
Luxury dog crates
All our deluxe dog crates are made from pet-safe metal and feature removable trays to make them practical and super easy to clean. With sizes ranging from small to XXL, there’s a dog crate set to suit all breeds. Crates are essential when it comes to house training your new puppy. We always suggest buying a larger size dog crate and bed for your puppy so they can grow into it, saving you from having to purchase a new crate when they’re older.
Luxury crate bedding
Our luxury bedding is hand-crafted and designed to the highest quality, appearing both practical and stylish. Bumpers sit around the edge of the crate cushion to provide a super-soft wall of comfort for your pooch. All our bumpers and cushions feature waterproof linings in case of any accidents. It’s recommended to choose a dog crate with a cover – they’ll provide your draughty, bare cage with a fresh new look and offer some privacy for your dog too. They’re particularly great for helping young puppies settle into their night-time routines and offer nervous dogs an extra feeling of security.
Purchase your dog crate set online today
Treat your four-legged friend to one of our stylish dog crate, cover, bedding and bumper sets by browsing our online range today. If you’re struggling to decide which one would be perfect for your pooch, contact our team today who will be more than happy to help. You’ll have 28 days to return your product if you’re unhappy with it for any reason. Our Lords & Labradors items also come with a 365-day quality guarantee, so it’s easy to see why we’ve received so many positive reviews. We also offer free delivery on all orders over £75. Browse the range and order your dog crate set today.
Read less
Top
Choosing a selection results in a full page refresh.



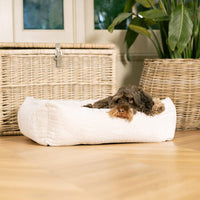


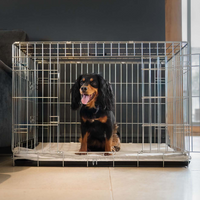
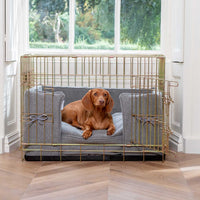
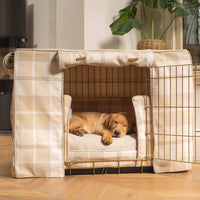



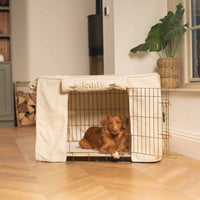
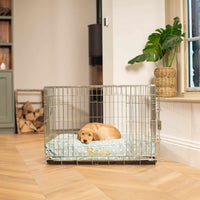


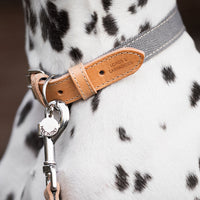




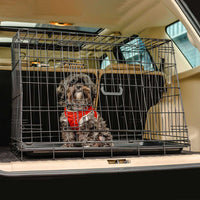

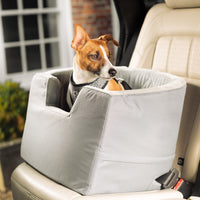


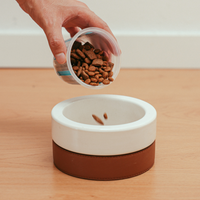
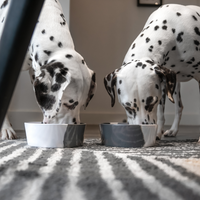




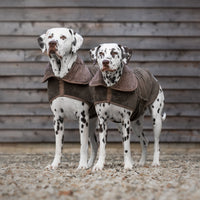


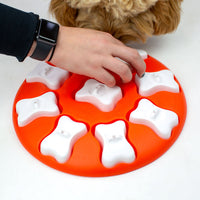
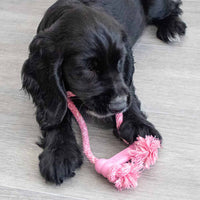
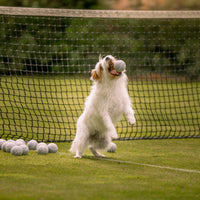


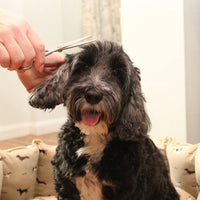




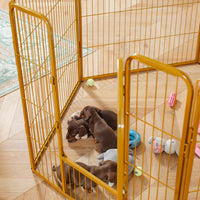












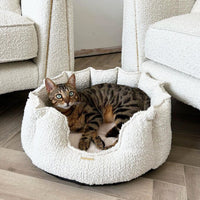















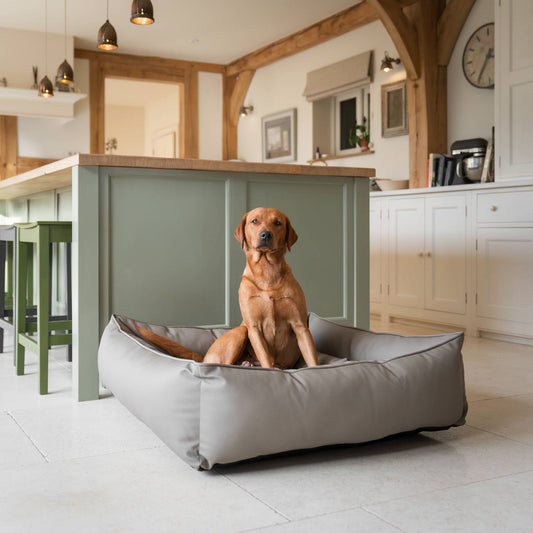

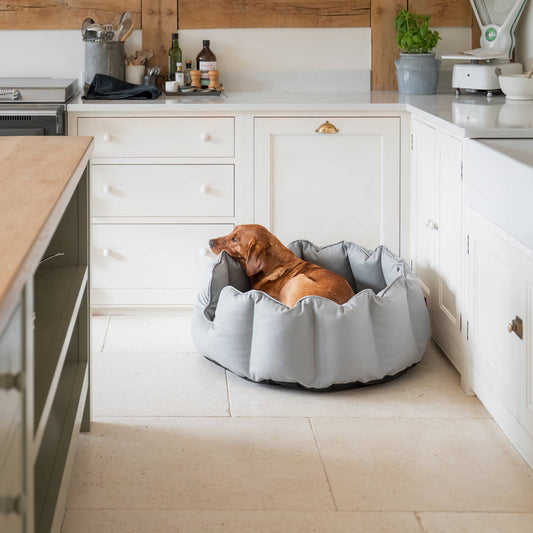

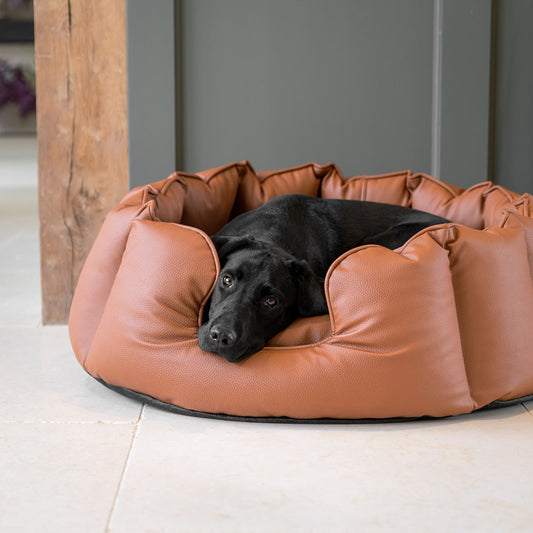


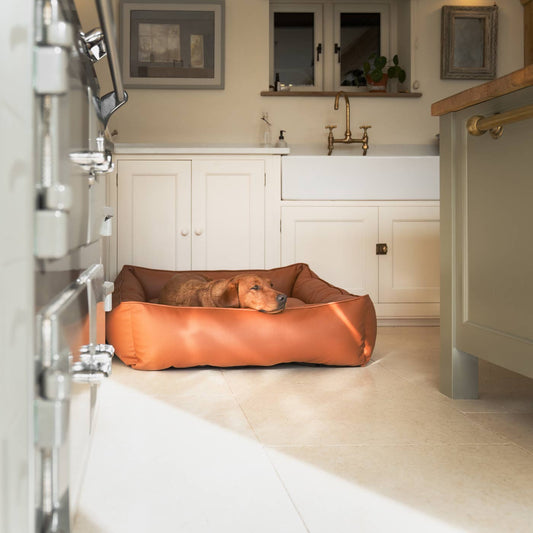

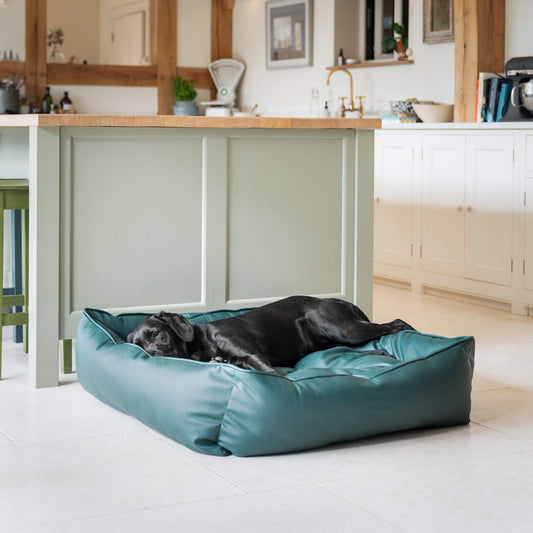


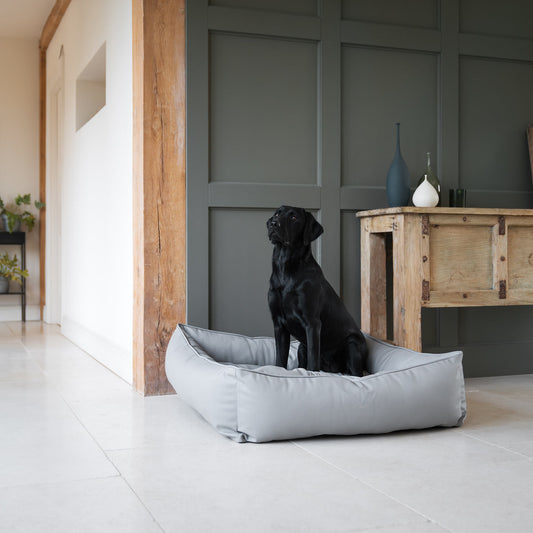


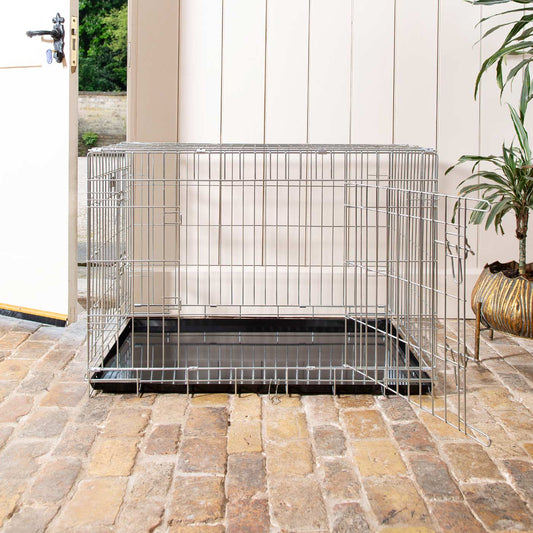
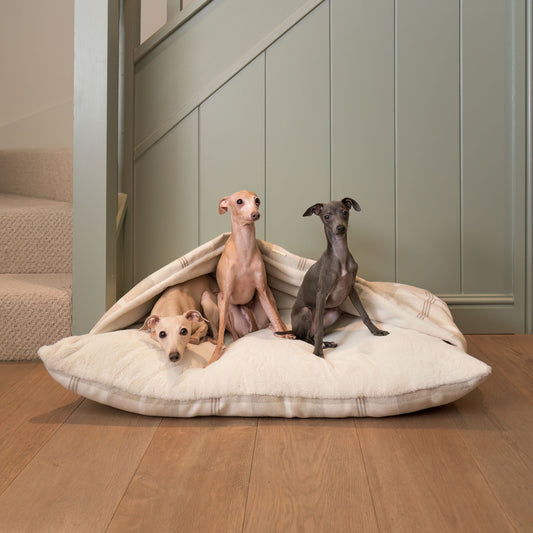


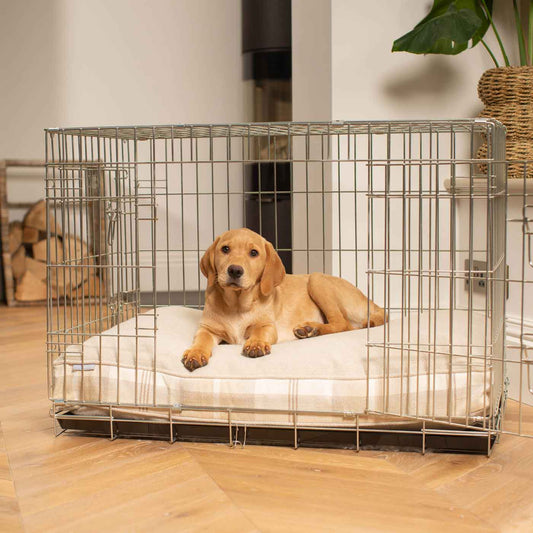
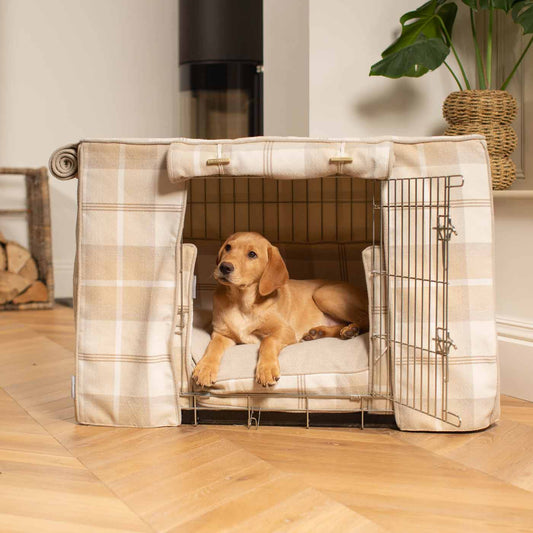
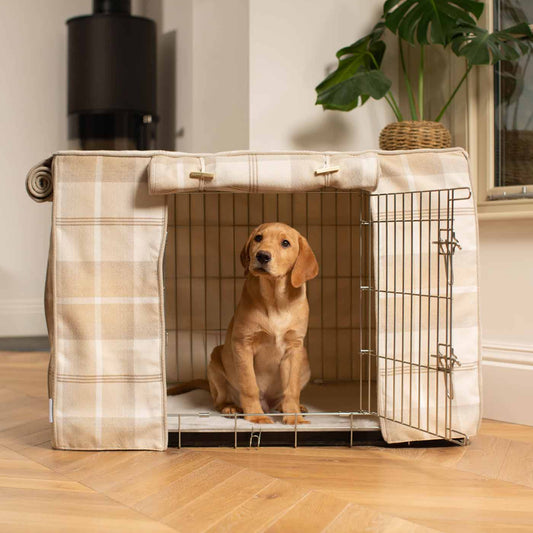
![[color:black]](http://www.lordsandlabradors.co.uk/cdn/shop/files/ScruffsBlackMarblePrintPlacemat2.jpg?v=1684141699&width=533)