


As our beloved feline companions grow older, their needs evolve. An old cat (often referred to as an aged cat or senior cat) requires extra attention to ensure they stay healthy, comfortable, and happy. Whether you’re just beginning your journey in looking after an old cat or you’ve been caring for one for years, it’s always beneficial to review the fundamentals of senior cat care. Below, we’ll walk you through essential tips, from nutrition and environment to health checks and emotional well-being, to help you provide the best ageing cat care for your cherished pet.
Recognising the Signs of Aging
Just like humans, cats often display physical and behavioural signs as they enter their golden years. Although the pace and extent of these changes vary from cat to cat, there are a few common indicators that your feline may be crossing into senior cat territory:
- Reduced Mobility: Stiff joints, difficulty jumping to high perches, or reluctance to climb stairs can signal aging.
- Altered Sleep Patterns: Senior cats might snooze more frequently, or sometimes experience restless nights.
- Weight Changes: An old cat could lose or gain weight depending on their metabolism and activity levels.
- Changes in Coat and Claws: You may notice a thinning coat or brittle claws as your cat ages.
-
Behavioural Shifts: Increased vocalisations at night, disorientation, or a change in grooming habits can all point to an aged cat needing additional support.
Observing these signs is the first step in looking after an old cat.
Regularly discussing any new or concerning observations with your vet is crucial for appropriate guidance and timely intervention.
The Importance of a Senior Cat Diet
One of the key components of senior cat care is providing a nutritionally balanced, age-appropriate meal plan—often referred to as a senior cat diet. Older cats have distinct dietary needs, including higher-quality proteins to maintain muscle mass, along with specific vitamins and minerals that support joint health, kidney function, and overall well-being.
- High-Quality Protein: Look for senior catfood that lists real meat (like turkey, chicken, or fish) as the primary ingredient. Cats are obligate carnivores, meaning they thrive on high-quality animal protein sources.
- Reduced Calories: Many older cats become less active with age. A cat-specific diet with reduced calories can help them maintain a healthy body weight.
- Joint and Immune Support: Some senior catfood formulas include added nutrients like glucosamine and chondroitin for joint health, as well as antioxidants for immune system support.
- Easily Digestible Ingredients: As cats age, their digestive systems might become more sensitive. Foods that are gentle on the stomach can help prevent issues like vomiting or constipation.
One highly recommended option is PRO PLAN LiveClear Sterilised 7+ Senior Cat Dry Food with Turkey. Formulated especially for senior cats, it provides balanced nutrition with quality protein, essential vitamins, and targeted minerals. This helps support your aged cat’s mobility, immune function, and overall vitality, making it an excellent choice for a senior cat diet.
Setting Up a Comfortable Environment
An ageing cat may find it harder to jump, run, or climb, so modifying your home can go a long way in keeping them comfortable:
- Soft, Warm Bedding: Provide plush, warm beds in accessible areas, preferably somewhere quiet. Our luxury cat beds make the perfect nap spot.
- Easy Accessibility: If your cat loves gazing out of the window or snuggling on the sofa, consider adding ramps or pet steps to help them get there without straining.
- Temperature Control: Older cats often feel the cold more than younger ones. Make sure your home has cosy spots away from drafts.
- Quiet Zones: Senior cats appreciate a sense of calm. Ensure there’s a quiet corner where they can relax away from other pets or household bustle.
Common Health Concerns in Senior Cats
Part of ageing cat care involves understanding the common health challenges that may arise. Early detection and professional advice can save your cat from unnecessary discomfort:
- Arthritis: This is one of the most prevalent issues in senior cats. Look out for limping, reluctance to jump, or difficulty using the litter tray.
- Kidney Disease: As cats age, their kidneys may become less efficient. Signs include increased thirst, frequent urination, and weight loss.
- Dental Issues: Tartar buildup, tooth decay, and gum disease can affect senior cats, potentially leading to pain and reduced appetite.
- Hyperthyroidism: This condition can cause weight loss despite an increased appetite, hyperactivity, and a poor coat condition.
When to Worry About Vomiting
It’s not uncommon to see an elderly cat throwing up occasionally, as hairballs or slight digestive upsets can happen. However, if vomiting becomes frequent or is accompanied by lethargy, loss of appetite, or weight loss, it’s crucial to consult a vet. Chronic vomiting can sometimes indicate gastrointestinal issues, kidney problems, or other underlying diseases.
Grooming and Hygiene for Older Cats
Grooming remains an essential part of senior cat care. Since older cats might experience joint stiffness or other issues that make grooming difficult, they may need a bit of extra help:
- Regular Brushing: Keep your cat’s coat free of tangles and mats, stimulate healthy blood flow, and reduce hairball formation. Treat them to a new cat brush here.
- Check the Claws: Senior cats might scratch less or have difficulty shedding the outer layer of their claws. Regular nail trims prevent overgrowth, which can be painful. Learn how to trim your cat's nails here.
- Gentle Assistance: Some older cats may develop greasy coats or dandruff because they can’t reach certain spots to groom. Use a soft brush or damp cloth to help them clean hard-to-reach areas.
Emotional Well-Being and Mental Stimulation
Beyond physical health, it’s equally important to nurture your cat’s emotional well-being. Senior cats can still enjoy playtime, mental challenges, and bonding time:
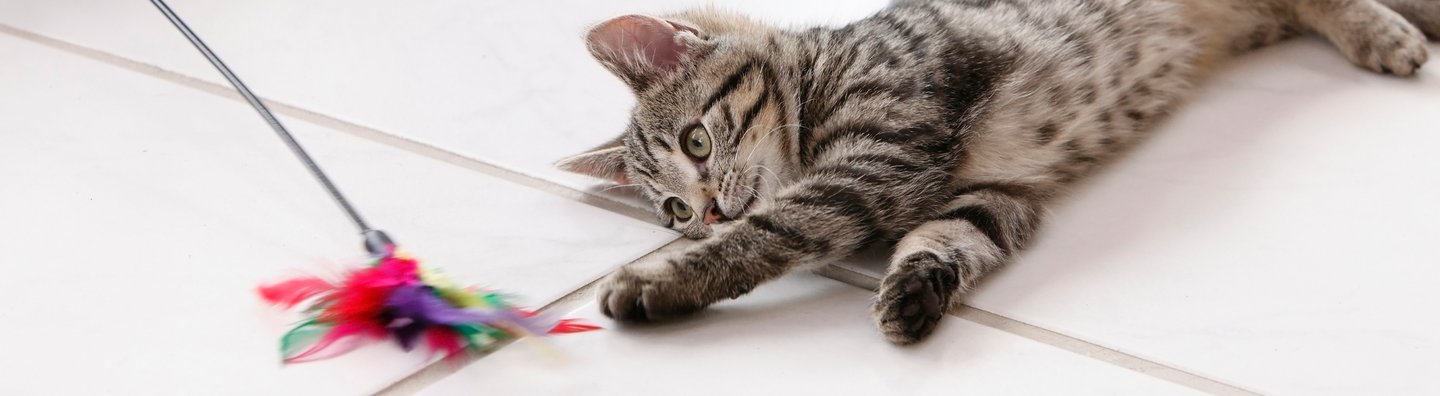
- Interactive Play: Engage in short, gentle play sessions using feather wands or laser pointers. Adapt the activity to suit your cat’s energy level.
- Puzzle Toys: Stimulate your cat’s mind with treat-dispensing or puzzle toys. These keep them mentally alert and reward them with a tasty morsel.
- Quality Time: Spend quiet moments together, stroking or grooming your cat to reinforce your bond. Cats, even independent ones, value consistent human interaction.
Regular Vet Check-Ups
Routine veterinary visits are paramount when looking after an old cat. Senior cats benefit from semi-annual check-ups, allowing your vet to detect any budding health issues early. Discuss any changes in appetite, weight, or behaviour during these appointments. Your vet might recommend blood tests, dental exams, or nutritional adjustments to optimise your cat’s health.
Tips for Simplifying Day-to-Day Senior Cat Care
- Stable Routine: Cats thrive on consistency. Sticking to a regular feeding and play schedule can reduce stress and help your cat feel secure.
- Portion Control: Since older cats can be prone to weight gain or loss, measuring meals and monitoring intake is vital.
- Hydration: Ensure a clean, fresh water source at all times. Some senior cats may enjoy water fountains, which encourage them to drink more.
- Monitoring Litter Box Habits: Keep an eye out for changes in frequency or stool consistency, as these can be early indicators of health problems.
Final Thoughts on Caring for Your Ageing Feline Friend
Caring for a senior cat is both a responsibility and a privilege. By focusing on a tailored senior cat diet, maintaining a comfortable living environment, and keeping a close watch for changes in health or behaviour, you can ensure your aged cat thrives well into their golden years.
Above all, stay attuned to your cat’s needs. Whether it’s helping them groom, altering their play routine, or consulting a vet at the first sign of elderly cat throwing up, proactive care sets the foundation for a long, healthy life. Each old cat deserves every measure of comfort and attention we can offer, and with the right approach to senior cat care, you’ll provide the nurturing environment your feline companion needs to stay happy and content.