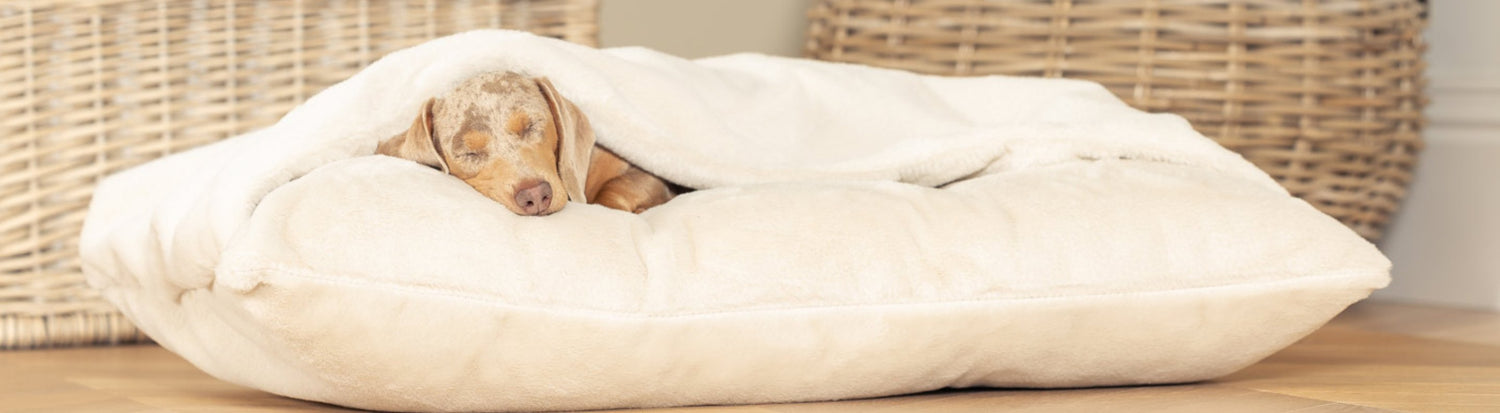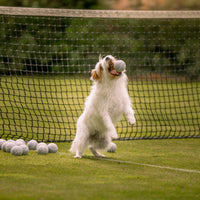


For any dog, their bed is a haven for relaxation and alone time. It’s also something they can become accustomed to and identify as theirs and theirs alone. But if your dog has started to attack their bed, it can mean that they don’t have anywhere to relax and may not feel properly comfortable in your home.
Many different reasons can lead your dog to destroy its bed, and due to this, there can also be different methods of stopping them from displaying this behaviour. In this blog, we look at the ways in which your dog may be doing this and offer tips on how to stop them from totally destroying their own dog bed.
Why Do Dogs Destroy Their Beds?

Not only could there be a variety of reasons why your dog is destroying their own bed, but they may also be doing it in a number of different ways. While some dogs erratically dig in or scratch their bed, others pee on or chew them.
Below, we’ve looked at some of these behaviours and explain why it could be that your dog is acting in this way.
Why Do Dogs Scratch Their Beds?
Scratching beds is one of the most common traits a dog can have, and it could mean any number of things. For instance, it could be something they do alongside urinating on their bed as a way of marking their territory, or a habit they picked up from their parents or siblings during the puppy stage. Alternatively, it could simply be an action they do naturally without thinking.
Another reason could be that they’re nesting. If a female dog isn’t spayed and comes into heat, they will begin to experience maternal instincts. A common behaviour trait of this in female dogs is to prepare their bed for puppies, even if they’re not pregnant. As a dog owner, it can be upsetting to see your pooch preparing their bed for puppies, especially if you intend on having them neutered. However, while this trait may continue several months after being spayed - or it could simply be something they always do - it’s likely to fade with time.
Why Do Dogs Dig In Their Beds?
Although similar to scratching, when a dog digs in their bed, it’s more likely to cause damage as, instead of simply changing the shape of their bed, they could end up breaking through the material.
Despite the similarity with scratching, digging is often a sign that your dog is trying to become more comfortable in their bed. Just like when cats knead their bed before sleep, dogs will dig as a pre-sleep ritual or to make more of an indentation in the bed to improve their comfort. It is something they may also do outside, but with the benefit that digging in mud will cause the surface below them to change, whereas digging in the bed will either have no effect at all or potentially ruin their sleeping aid.
Why Do Dogs Pee On Their Beds?
When your dog pees on their bed, it can be concerning as it may make you think that they’re unwell or haven’t properly picked up the toilet training you’ve given them. Finding pee on your dog’s bed could be a sign that they’ve picked up a bug or simply need more toilet training, but it could also be an indication of many things.
Potential reasons why your dog is peeing on their bed include:
- A side effect of a urine infection
- Feelings of anxiousness, excitement or nervousness
- Incomplete house training
- Naughty behaviour
- To mark their territory
Peeing on beds is also a common trait of female dogs, and while it can improve with age, they may continue to struggle with holding water for long periods of time if they aren’t spayed. Using a waterproof dog bed would prevent the level of damage caused by your dog peeing the bed, but as it won’t stop them from doing it, you need to consider more long-term solutions.
Why Do Dogs Chew Up Their Beds?
It’s less likely that you will find your dog chewing their bed, but if your dog has started to show this trait, it could lead to them needing a new bed entirely. In some instances, a dog chewing their bed could be a result of becoming too excitable during their playtime. However, if they’re doing it in an aggressive manner or appear to be actively trying to ruin their bed, it could be caused by something more serious.
The reason behind why a dog may resort to chewing their own bed is often either anxiety or boredom. If they’re feeling stressed, anxious or panicked, chewing their bed could be a way of showing you how they’re feeling. Some specific dog breeds are especially susceptible to these feelings, with the cause often being related to separation anxiety. As for boredom, dogs are often known for becoming destructive if they’re full of energy and don’t have any way of releasing it. Chewing their bed could be a result of not having enough walks and being overly stimulated, not having enough dog toys to play with, lacking in proper training or being left alone too long and not being given the attention they need.
How To Stop Dogs From Destroying Their Beds

Your dog may be destroying their bed in several different ways and as a result of multiple possible factors. However, there are ways of preventing them from causing too much damage to their bed or potentially stopping them from having the urge to destroy their bed entirely.
Firstly, you should work out if there are any reasons why your dog is damaging their bed and use these reasons to find effective solutions to stop them. For example, if they’re suffering from feelings of stress, anxiety or panic, or they’re struggling to cope when left alone, consider ways to eliminate these feelings. If they’re wetting the bed due to not being properly trained, give them the training they need to understand that peeing should only be done on puppy pads or in the garden. Likewise, scratching their bed may be a sign that they can’t get comfortable and either need extra blankets or a different type of bed that better suits their size, breed and behaviour.
If you’re not entirely sure why your dog is destroying their bed, you may need to try an approach that covers all likely causes. Below, we’ve outlined steps you can try
How To Stop A Dog From Chewing His Bed
- Allow your dog to use their bed, but take it away when you’re not around to supervise. If they’re in a room that isn’t suitable for sleeping on the floor, provide them with a blanket as an alternative option.
- Offer them a selection of chew toys. Dogs are prone to chewing and do it as a way of relaxing or releasing excess energy. By giving them a few different options, they should be able to find one that is suitable and preferable to them.
- Supervise your dog when they’re in their bed and if they begin to chew, dig, scratch or look like they’re getting ready to pee on the bed, say ‘no’ firmly to indicate that it’s bad behaviour. If they don’t take any notice of this, instead use a squeaky toy to distract them.
- As soon as you see your dog behaving in their bed - even if that means they’re sitting comfortably and not acting out - praise them, stroke them and give them a treat as a reward.
- Work out how much exercise the breed of your dog should be getting and take them for the amount of walks they need. During their walk, you could use an extendable lead to give them freedom and allow them to play during their walk, and you could even use their walk as an opportunity to teach them obedience training.
- When you feel like your dog is becoming less inclined to destroy their own bed, start giving them more time with it. You could leave them alone with it for an hour and increase the time by an hour each day until they’re eventually allowed to be left with it permanently.
What Can I Spray On Dog Bed To Stop Chewing?
The Simple Solution Chew Stopper spray is a great choice to spray on your dog's bed to help stop them chewing. Simply spray your dog's bed with the spray, your dog will recognise the marked area as unpleasant and it will discourage them from chewing it.
Indestructible Dog Beds
Although there is no such thing as a completely indestructible dog bed, there are, however, some more chew and scratch resistant options. Here at L&L we developed our Rhino Tough Collection using our toughest fabric with more destructive dogs in mind. The stylish faux leather is water resistant and bleach cleanable making it the perfect choice for dogs who have a habit of urinating on their bed. The Rhino Tough collection is made with no zips or fastenings to discourage chewing, it also comes in 6 stylish colour options. It's also scratch resistant so if your dog likes dig in their bed at night or scratch their bed this might be the choice for you. It's available in our three most popular bed shapes, cushion, high wall and box bed, so however your dog likes to sleep there will be a bed for them. The cushion is a great choice as a indestructible dog bed for crates, if you prefer your dog to sleep in a crate.

Another option if your dog likes to chew soft beds, is a plastic bed which is filled with blankets. Rosewood's Eco bed is constructed with 100% recycled plastic, making it an extremely resilient and robust choice for dogs who like to chew. The ventilated base offers increased airflow, perfect for keeping pets cool in the summertime. Non-slip rubber feet prevent the bed from shifting on hard surfaces, while the plastic is easy to wipe down to clean for dog's who tend to urinate on their beds.