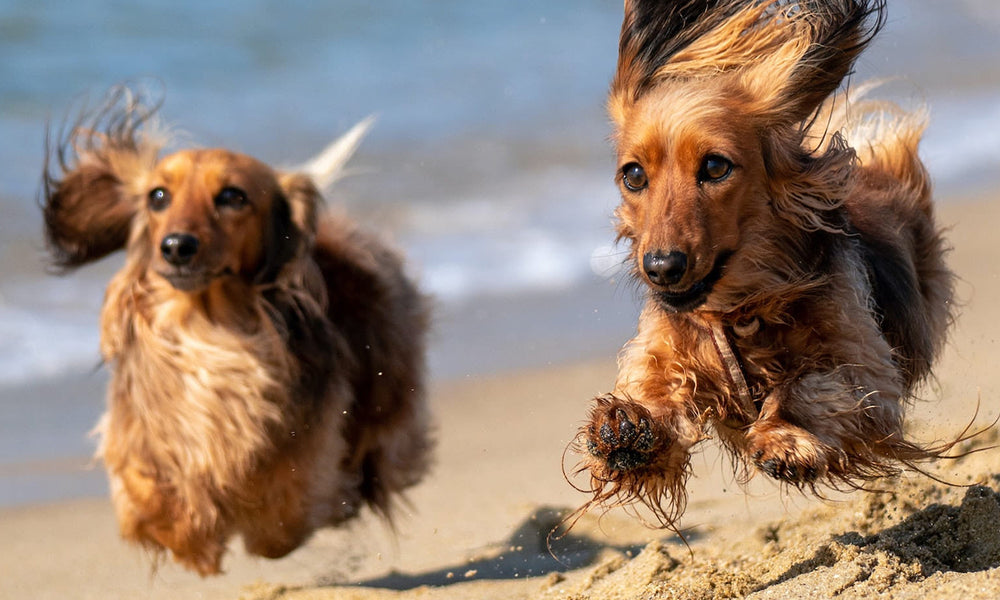
Oh how dogs love the beach. And, if there’s anything better than long sandy beaches, it’s the sea. Everyone loves to be beside the seaside…especially our dogs!
However, according to our friends at Vets Now, the UK’s leading provider of emergency pet care, there’s a number of dangers lurking in a beach visit which means we need to stay beach safe this summer. And get prepared.
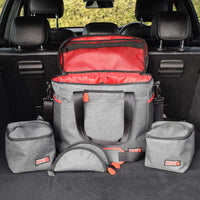
Dave Leicester, Head of Telehealth at Vets Now, reveals the top dangers to be aware of before taking your dog to the beach this summer. And we’ve created a list of must-have accessories to take with you on any beach trip.
If you do find yourself worried whilst at the beach, or afterwards, Vets Now have launched Video Vets Now where you can arrange a video call with one of their emergency vets within minutes, no matter where you are in the UK.
Be Sand Aware
Even in the UK, the sun can heat up the sand to dangerous temperatures. If it’s too hot for you to walk barefoot, then it’s too hot for your dog’s paws. If you’re planning on visiting the beach on a day that’s forecast to be hot, it’s a good idea to take your dog in the early morning or late evening.
Also, make sure your dog doesn’t eat or swallow too much sand through digging or repeatedly picking up sandy balls and toys. Sand can cause a blockage in the intestine, known as sand impaction. Signs of this serious condition, which requires urgent veterinary treatment, include vomiting, dehydration and abdominal pain.
And lastly, keep your pet away from seaweed. It’s been championed as a source of vitamins and minerals, however dried up seaweed washed up on the shoreline can be dangerous for dogs. If swallowed, it can expand in the stomach and become stuck in the intestine.
Stay Sea Safe
Don’t assume your dog can swim. Some breeds are naturally strong swimmers, but other breeds, such as corgis and pugs, are not. If your dog is not used to swimming then the sea is not the place to start so make sure he doesn’t get out of his depth.
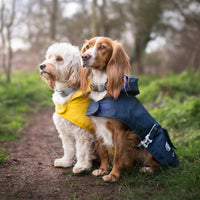
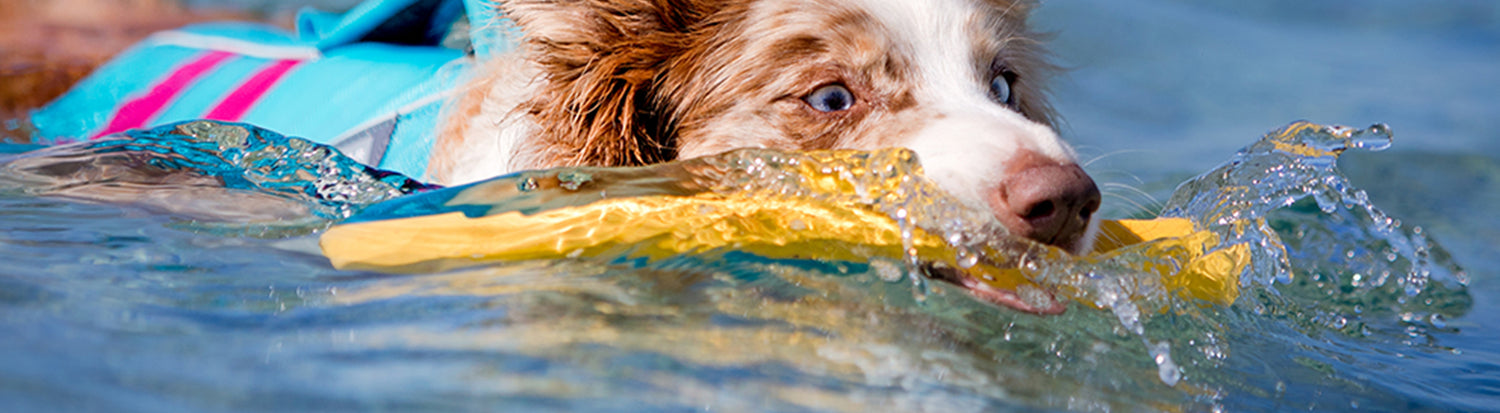
Even if your dog is a strong swimmer, they’re still at risk of being swept under by large rolling waves. Be careful on windy days when the waves are high and make sure your dog doesn’t venture too far out. Waves and currents can quickly exhaust dogs so perhaps consider buying a life vest for your dog.
And if you notice your dog lapping up sea water — stop them. The salt, bacteria and parasites in the water can make them sick. To prevent your dog from drinking salt water, make sure you have plenty of fresh water on hand to give them throughout the day. Irritation to your dog’s skin and paws can be prevented by a fresh-water rinse down before leaving the beach.
Keep Cool
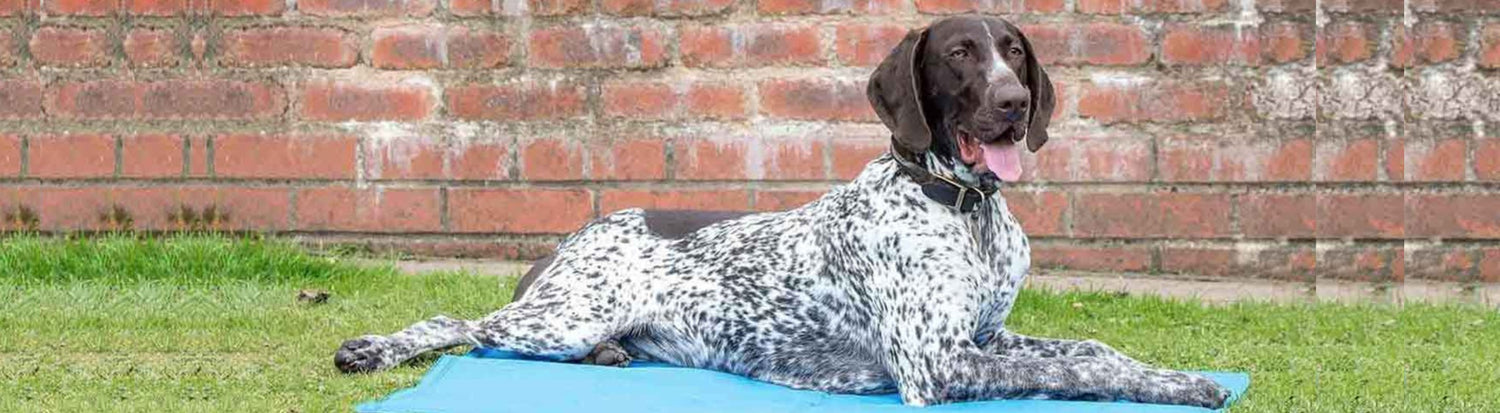
Despite a cool coastal breeze, temperatures on beaches often soar in the height of summer in the UK. Be sure to provide a shaded area for your dog and give them plenty of fresh water to help avoid heatstroke.
Also, don’t forget sunburn. Just like humans, dogs can suffer sunburn too and breeds with short hair or white hair, and pink ears must be particularly careful on hot days. Use a sunscreen made specifically for dogs and avoid those that contain fragrances.
And beware of overexertion. Running on sand takes a lot more effort than running on grass and, add in the summer sun, and this can quickly lead to potentially fatal heat stroke. Make sure they take rests, have shade and fresh water. Lords and Labradors to recommend relevant accessories.
Need some additional advice? If you’re worried about your pet whilst on holiday this summer, or even on a day trip, you can arrange a video chat with one of the highly experienced emergency vets from the Vets Now team, within minutes. A ten-minute video consult costs £24 and is refundable if Vets Now recommend an in-person follow up within 24 hours. For more details and how to book visit: Online Vets | Video Chat With Our UK Based Vets | 8am-11pm Daily (vets-now.com)
Oh how dogs love the beach. And, if there’s anything better than long sandy beaches, it’s the sea. Everyone loves to be beside the seaside…especially our dogs!
However, according to our friends at Vets Now, the UK’s leading provider of emergency pet care, there’s a number of dangers lurking in a beach visit which means we need to stay beach safe this summer. And get prepared.
Dave Leicester, Head of Telehealth at Vets Now, reveals the top dangers to be aware of before taking your dog to the beach this summer. And we’ve created a list of must-have accessories to take with you on any beach trip.
If you do find yourself worried whilst at the beach, or afterwards, Vets Now have launched Video Vets Now where you can arrange a video call with one of their emergency vets within minutes, no matter where you are in the UK.
Be Sand Aware
Even in the UK, the sun can heat up the sand to dangerous temperatures. If it’s too hot for you to walk barefoot, then it’s too hot for your dog’s paws. If you’re planning on visiting the beach on a day that’s forecast to be hot, it’s a good idea to take your dog in the early morning or late evening.
Also, make sure your dog doesn’t eat or swallow too much sand through digging or repeatedly picking up sandy balls and toys. Sand can cause a blockage in the intestine, known as sand impaction. Signs of this serious condition, which requires urgent veterinary treatment, include vomiting, dehydration and abdominal pain.
And lastly, keep your pet away from seaweed. It’s been championed as a source of vitamins and minerals, however dried up seaweed washed up on the shoreline can be dangerous for dogs. If swallowed, it can expand in the stomach and become stuck in the intestine.
Stay Sea Safe
Don’t assume your dog can swim. Some breeds are naturally strong swimmers, but other breeds, such as corgis and pugs, are not. If your dog is not used to swimming then the sea is not the place to start so make sure he doesn’t get out of his depth.
Even if your dog is a strong swimmer, they’re still at risk of being swept under by large rolling waves. Be careful on windy days when the waves are high and make sure your dog doesn’t venture too far out. Waves and currents can quickly exhaust dogs so perhaps consider buying a life vest for your dog.
And if you notice your dog lapping up sea water — stop them. The salt, bacteria and parasites in the water can make them sick. To prevent your dog from drinking salt water, make sure you have plenty of fresh water on hand to give them throughout the day. Irritation to your dog’s skin and paws can be prevented by a fresh-water rinse down before leaving the beach.
Keep Cool
Despite a cool coastal breeze, temperatures on beaches often soar in the height of summer in the UK. Be sure to provide a shaded area for your dog and give them plenty of fresh water to help avoid heatstroke.
Also, don’t forget sunburn. Just like humans, dogs can suffer sunburn too and breeds with short hair or white hair, and pink ears must be particularly careful on hot days. Use a sunscreen made specifically for dogs and avoid those that contain fragrances.
And beware of overexertion. Running on sand takes a lot more effort than running on grass and, add in the summer sun, and this can quickly lead to potentially fatal heat stroke. Make sure they take rests, have shade and fresh water. Lords and Labradors to recommend relevant accessories.
Need some additional advice? If you’re worried about your pet whilst on holiday this summer, or even on a day trip, you can arrange a video chat with one of the highly experienced emergency vets from the Vets Now team, within minutes. A ten-minute video consult costs £24 and is refundable if Vets Now recommend an in-person follow up within 24 hours. For more details and how to book visit: Online Vets | Video Chat With Our UK Based Vets | 8am-11pm Daily (vets-now.com)
SIGN UP FOR USEFUL TIPS & GUIDES STRAIGHT TO YOUR INBOX
Next Article
Owning a Dog
How to choose the best dog food: dry, wet, raw and fresh compared
Best flea treatment for dogs: what works fastest and lasts longest
Finding the best flea treatment for dogs gets overwhelming fast, especially when every product promises to be the strongest, quickest, or most long-lasting option on the shelf. This guide cuts through that noise by looking at how quickly different treatments actually work, how long they last between doses, and which formats are genuinely easiest to use in real life. By the end, you’ll have a clear sense of what suits your dog’s age, size, and routine, without the second-guessing.
What flea treatment actually needs to do when you’ve spotted the first itch
Spotting your dog scratching more than usual tends to trigger that same panic in every pet parent: what’s going on, and how do I fix it fast?
Here’s the thing — a single flea is rarely just one flea. By the time you notice the itch, eggs may already be dropping into your carpet, bedding, and sofa cushions. So the best flea treatment for dogs needs to do more than kill the adults you can see. It also needs to tackle eggs and larvae before they hatch, then keep working long enough to stop new fleas hitching a ride after walks, park visits, or a playdate with a friend’s dog.
That’s why it’s worth understanding what each product type actually does before you buy.
Spot-ons are applied directly to the skin at the back of the neck, absorbing into the coat and skin oils to kill fleas on contact. Chewable tablets work through the bloodstream and tend to act quickly, making them a go-to when you need the fastest flea treatment for dogs. Collars release active ingredients steadily over weeks or months, so they’re well suited to long-lasting flea and tick treatment with minimal effort. Sprays are more targeted and handy for a top-up between doses, or if your dog simply won’t tolerate tablets or pipettes.
Before settling on one, think honestly about how your dog handles different application methods, how often you can realistically re-treat, and whether you’re fighting an active infestation or trying to stay ahead of one. If it’s the former, our guide on how to get rid of fleas on your dog is a brilliant place to start.
If you need fast relief, which flea treatment works quickest?
When your dog is already scratching, “fastest” matters, but it isn’t the same for every type of flea treatment for dogs. The key thing to know is that timings vary by active ingredient and brand, so it’s better to treat these as typical patterns rather than fixed rules.
Format
Typical start time
What to know
Best for
Oral tablet
Often within hours
Some products begin killing fleas very quickly, but timing depends on the tablet
Fast relief when fleas are already causing real irritation
Spot-on
Usually within several hours to around a day
Needs time to spread across the skin and coat
Good all-round option for treatment plus ongoing cover
Spray
Varies widely by product
Can be useful for direct, targeted use, but may need more hands-on application
Small areas or dogs who need a more local approach
Collar
Usually slower to fully protect
Better at ongoing prevention than immediate relief
Longer-term flea and tick support
Worth knowing: If your priority is the fastest flea treatment for dogs, oral options are often the quickest to start working, but always check the label for the specific product you’re considering.
In real life, that means a miserable, constantly scratching dog may need a different choice from one who just needs steady monthly protection. A collar can be brilliant for prevention, but it usually wouldn’t be my first pick for urgent relief. Spot-ons sit somewhere in the middle: not usually the fastest option, but often a practical balance of ease and longer-lasting cover.
If that’s what you’re after, Frontline Plus for small dogs is a helpful example of a spot-on to compare when you’re weighing up convenience, monthly protection, and whether it feels like the best flea treatment for dogs for your routine.
Which flea treatment lasts longest between doses?
If you’ve ever come home from a weekend away and quietly panicked trying to remember whether you treated your dog before you left, you already know why duration matters. Finding a long-lasting flea treatment for dogs can genuinely take one more thing off your mental load, whether you’re out on muddy woodland walks every Saturday or heading off somewhere with your dog in tow.
Treatment Type
Typical Duration
Best For
Convenience Rating
Spot-ons
Up to 4 weeks
Most dog owners, easy monthly routine
4/5
Tablets
24 hours to 3 months (varies by product)
Dogs who hate topical treatments
3/5
Collars
Up to 8 months
Owners wanting long-term, hands-off protection
5/5
Sprays
Days to a few weeks
Top-up coverage or treating the environment
2/5
Worth knowing: Spot-ons like Frontline Plus offer up to four weeks of flea and tick protection from a single application. Set a monthly reminder, apply it, and you’re done.
Longer-lasting formats make missed doses far less likely, and that’s no small thing when life gets busy. For most pet parents, the best flea treatment for dogs isn’t necessarily the most advanced one on the market — it’s the one that slots into your existing routine without you having to think too hard about it. A good dog flea and tick treatment should just quietly get on with the job, leaving you free to enjoy the walk rather than worry about what might be lurking in the long grass.
What’s easiest to give your dog: spot-on, tablet, collar or spray?
The best flea treatment for dogs isn’t just about what kills fleas fastest. It’s also about what your dog will actually tolerate, and what fits into your life without becoming a whole production. A treatment that sits unopened in the cupboard because your dog bolts the moment you reach for it isn’t helping anyone.
Format
Best For
Watch Out For
Spot-on
Dogs who are easy to handle and don’t swim or bathe frequently
Can feel greasy; needs to absorb fully before contact with other pets
Tablet
Fussy handlers or multi-dog households where cross-contact is a concern
Determined fussy eaters will find it, even inside a pill pocket
Collar
Set-and-forget households wanting long-term coverage
Fit matters; some dogs find them uncomfortable or chew them off
Spray
On-demand use between treatments or for lighter coverage
Needs applying thoroughly; some dogs dislike the sensation
Before you decide, it’s worth thinking through a few practical questions:
Does your dog swim or get bathed regularly? Both can affect how well spot-ons and collars hold up.
Are they a dedicated fussy eater who sniffs out tablets no matter how well you hide them?
Do you have multiple dogs where a freshly applied spot-on could transfer during a cuddle?
Would you rather apply once and forget about it, or do you prefer the flexibility to treat as needed?
Does your dog get anxious around handling, aerosol sounds, or anything fastened near their neck?
No single format suits every dog, which is why lifestyle fit matters just as much as efficacy. If you want something flexible to use between treatments, our dog sprays are a low-fuss option worth keeping in the cupboard for when you actually need them.
How to choose the safest option for your dog’s age, size and lifestyle
The best flea treatment for dogs isn’t always the one making the boldest promises on the box. It’s the one that actually fits your dog — their age, their size, their skin, and how they spend their days. Getting that match right is what separates a treatment that works from one that quietly disappoints.
Before you buy, run through these checks:
Minimum age: Many treatments aren’t suitable for puppies under eight or twelve weeks. Always check the label before using anything on a young dog.
Weight band accuracy: Flea treatments are dosed by weight, so using the wrong band can mean under-dosing or, more seriously, giving too much. Weigh your dog before you buy.
Skin sensitivity: If your dog has reacted to topical treatments before, a tablet-based option may suit them better.
Other medications or health conditions: Some ingredients interact with existing treatments. If your dog is on medication, a quick call to your vet is worth it.
Swimming and bathing habits: Spot-ons can lose their effectiveness faster on dogs that swim regularly or get bathed weekly. A collar or tablet tends to hold up better in those cases.
Puppy-safe formulas differ significantly from adult treatments — always check the minimum age on the label before applying anything.
There are plenty of long-lasting and fast-acting dog flea and tick treatment options available, but they only do their job properly when they’re right for the individual dog. If you have a puppy or a younger dog joining the family, our puppy flea and worming treatments are a good place to start.
How to make the final choice without overthinking it
If you’ve made it through this guide and you’re still not quite sure which way to go, here’s a simple way to think about it.
If your dog is already scratching and miserable, speed is what matters right now. Find a fast-acting flea treatment for dogs that starts working within hours, and figure out the longer-term routine once the immediate discomfort is sorted.
If you’re someone who forgets monthly doses, honestly, you’re in good company — pick the longest-lasting option you can find. A treatment that covers three months gives you far more breathing room than one you need to remember every four weeks like a recurring alarm you keep snoozing.
And if your dog is the type who clamps their jaw shut the second anything remotely medicinal appears, go with whatever format they’ll actually tolerate. A spot-on they barely notice beats a chew they spit out across the kitchen floor every single time.
Once you know which of those three things matters most, the best flea treatment for dogs for your situation becomes a lot easier to land on. It really does come down to your dog, your routine, and your life — not some universal right answer.
To compare options across all three priorities, take a look at the Lords and Labradors Frontline flea and worming range and find something that actually works for both of you.
That sudden honking, snorting sound your dog makes out of nowhere is enough to stop any pet parent’s heart, but knowing what to do when your dog is reverse sneezing makes all the difference. In this guide, we’ll walk you through why it happens, how to keep both of you calm in the moment, and which signs are worth a call to the vet. We’ll also share some simple changes you can make at home to reduce how often it happens in the first place.
What reverse sneezing looks and sounds like in dogs
If you’ve ever watched your dog suddenly freeze, stretch their neck forward, and let out a loud, honking snort like they’re trying to inhale and sneeze at the same time, you’ve almost certainly witnessed a reverse sneeze. It sounds alarming. It looks alarming. And if you had no idea what you were watching, panicking is a completely natural response.
The reassuring news? Reverse sneezing is usually harmless. It’s not a cough, not a seizure, and not a sign that something is lodged in their throat. Think of it as a reflex, much like a regular sneeze, just working in reverse. Instead of air rushing outward, your dog rapidly pulls air in through their nose, producing that distinctive snorting or honking sound that tends to stop everyone in the room.
During an episode, most dogs stand still with their elbows splayed, neck outstretched, and eyes wide open. Some look genuinely distressed, which is hard to watch even when you know what’s happening. The episode itself usually lasts anywhere from a few seconds to around a minute, and the vast majority of dogs bounce back to their normal selves almost immediately.
Paying attention to how your dog behaves before and after can tell you a lot. A dog that’s relaxed and happy on either side of the episode is generally nothing to worry about. Our guide to understanding your dog’s body language can help you get better at reading those subtle signals.
Recognising what reverse sneezing looks and sounds like is honestly half the battle — because once you know, it’s so much easier to stay calm when it happens.
Why dogs reverse sneeze in the first place
Reverse sneezing is an involuntary reflex, and it usually comes down to something irritating the soft palate, throat, or nasal passages. Think of it like a sneeze in reverse — the body trying to clear an irritant rather than signal that something is seriously wrong. Most dogs will experience it at some point, and for the vast majority, it’s completely normal.
Common triggers include:
Nasal or throat irritation from dust, pollen, or mould
Excitement or over-stimulation, like bounding over to greet you at the door
Pulling on the lead, which puts pressure on the throat
Eating or drinking too fast
Strong scents, household sprays, or air fresheners
Sudden changes in temperature or air quality
Being a flat-faced (brachycephalic) breed, such as a Pug, French Bulldog, or Cavalier King Charles Spaniel — their shorter airways make them anatomically more prone to episodes
Understanding the dog reverse sneezing causes behind an episode really does help in the moment. Once you recognise that the body is simply doing what it needs to do — the same way we might need to cough or clear our throat — it’s much easier to stay calm rather than panic. And calm is exactly what your dog needs from you.
The good news is that most episodes pass within seconds to about a minute. One moment your dog is honking away, and the next they’re trotting off like nothing happened. That’s usually all there is to it.
What to do in the moment when your dog is reverse sneezing
If you’re wondering what to do when your dog is reverse sneezing, the first thing is simple: try not to panic. It can sound dramatic, especially the first time you hear it, but many episodes are brief and pass within 30 seconds to a minute. Your calm really helps.
In the moment, focus on gentle comfort:
Stay relaxed and speak softly. Your dog will pick up on your energy. A quiet, reassuring voice can help them settle while the episode passes.
Gently stroke their throat or chest. Slow, light strokes may encourage a swallow, which can help the spasm ease naturally.
Offer a tiny sip of water if they’re settled enough to take it. Not a full bowl, and don’t force it. Sometimes a small swallow is all that’s needed.
Move them away from obvious triggers. If they’ve been sniffing dust, pulling on the lead, or sitting near strong smells like candles or cleaning sprays, guide them to a calmer spot with fresher air.
A good rule of thumb with reverse sneezing in dogs treatment at home is to keep things quiet, gentle, and low-stress. Most of the time, your job is simply to comfort rather than intervene.
What not to do:
Don’t put your fingers in your dog’s mouth
Don’t hold them down or restrain them forcefully
Don’t fuss loudly or crowd them, even if you feel worried
Once it’s over, many dogs go straight back to normal as if nothing happened. If your dog’s reverse sneezing symptoms seem to happen often, last longer than usual, or leave them distressed, that’s when it’s sensible to think about dog reverse sneezing causes and whether a vet check is the right next step.
When reverse sneezing is worth a vet call
Most of the time, reverse sneezing in dogs is completely harmless and passes within seconds. But if you start noticing that episodes are happening more often, or that your dog seems off afterwards, it’s worth paying closer attention. You know your dog better than anyone, so trust that instinct.
These are the signs that deserve a vet conversation:
Episodes happening multiple times a day, or lasting longer than a minute
Your dog seeming distressed, panicked, or wiped out afterwards
Nasal discharge, whether clear, cloudy, or discoloured
A new cough appearing alongside the reverse sneezing
Laboured or noisy breathing between episodes
Gums that look pale or slightly blue
Lethargy, low energy, or a noticeable dip in appetite
An occasional isolated episode is rarely cause for concern. A recurring or worsening pattern is always worth getting checked.
When to worry about dog reverse sneezing really comes down to that shift in pattern. A vet can look into common culprits like allergies, a low-grade infection, a foreign body in the nasal passage, or a structural issue affecting the airway. None of these are things you’d pick up at home, but all of them are very treatable when caught early. Even if everything turns out to be fine, you’ll come away with peace of mind, and that’s never wasted.
How to reduce reverse sneezing triggers at home
Once you understand what sets your dog off, a few small tweaks at home can make a real difference. If your dog tends to pull on the lead and reverse sneezes regularly, switching to a well-fitted harness is one of the easiest wins. Collar pressure on the throat is a surprisingly common trigger, and a harness removes it entirely.
Inside, it’s worth thinking about air quality too. Dust little and often, skip the heavily scented candles or plug-in air fresheners, and if you use cleaning sprays, let the room air out before your dog wanders back in. Small habits, but they stack up.
Fast eaters are also worth a closer look. Gulping food can irritate the throat and kick off an episode, so a slow feeder bowl or snuffle mat at mealtimes can genuinely help.
Beyond that, it’s worth keeping a loose mental note of when episodes happen. After a walk during high pollen season? After a boisterous play session? Spotting a pattern gives you something real to work with, whether that’s adjusting walk times or winding down play more gradually.
The reassuring truth is that most dogs live completely happily alongside the occasional reverse sneeze. Now that you know what it looks like, why it happens, and what to do in the moment, you’re already better placed to handle it calmly when it comes.
Frequently Asked Questions
How to calm down reverse sneezing in dogs?
The best way to calm reverse sneezing is to stay relaxed and gently comfort your dog while it passes. Speak softly, stroke their throat or chest, offer a tiny sip of water if they’re settled enough, and move them away from dust, strong smells, or other obvious triggers.
When to worry about reverse sneezing?
Reverse sneezing is worth worrying about if it becomes frequent, lasts longer than a minute, or your dog seems unwell afterwards. Signs that need a vet call include distress, nasal discharge, a new cough, noisy breathing between episodes, pale or blue gums, lethargy, or a drop in appetite.
What triggers reverse sneezing in dogs?
Reverse sneezing is usually triggered by irritation in the throat or nasal passages. Common causes include dust, pollen, mould, strong household scents, excitement, pulling on the lead, eating or drinking too fast, temperature changes, and being a flat-faced breed with shorter airways.
How long is too long for a dog to reverse a sneeze?
Anything lasting longer than about a minute is a sensible point to call your vet. Most reverse sneezing episodes pass within a few seconds to around a minute, and dogs usually seem completely normal again straight afterwards.
Trimming black dog nails can feel like a guessing game, but it really does not have to be. This guide walks you through how to cut dog nails that are black with confidence, covering everything from spotting the quick before you snip to choosing the right tools, handling the odd nick along the way, and building a calmer routine over time. Whether you are starting from scratch or just looking to feel less uncertain with the clippers, there is something here to help you and your dog get through nail day in one piece.
How to Tell Where the Quick Is on Black Dog Nails
The quick is the living core of your dog’s nail. It contains blood vessels and nerves, so if you catch it with the clippers, it bleeds and stings — not ideal for anyone involved. With light-coloured nails, you can usually spot it as a soft pink shadow running through the centre, which makes the whole job much more straightforward. With black nails, that shadow disappears completely, and that’s exactly why so many pet parents feel stuck before they’ve even picked up the clippers.
The good news? You don’t have to guess. You just need to slow down and read a few reliable clues.
Start by shining a small torch or your phone’s flashlight through the nail from underneath. On finer nails, this can reveal the quick as a darker oval shape within the nail. It won’t work for every dog, but it takes about three seconds to try and it’s genuinely useful when it does.
If the light doesn’t show much, nail texture becomes your next guide. Trim a tiny sliver from the tip and look at the cut surface. At first it’ll appear solid and chalky, white or grey all the way through. That’s safe ground. Keep taking small slivers, checking each time, and eventually the centre will shift. It might look darker, almost black, or you’ll notice a small grey dot appearing in the middle. That dot is your cue to stop. You’re getting close to the quick.
Nail shape tells you something before you even make a cut, too. Most dog nails curve downward and taper toward the tip, and the quick follows that same curve. It typically sits further back than you’d expect, so if the nail has a definite hook at the end, trimming just that hooked portion is usually where you want to start.
One last thing: a calm dog makes all of this much easier. When they’re tense and pulling away, it’s harder to look closely and work carefully. Keeping an eye on your dog’s body language throughout the trim helps you spot early signs of stress before things unravel.
The Tools That Make Black Nail Trims Safer and Calmer
Having the right tools ready before you start makes a real difference when you’re working with black nails. They help you make smaller, more controlled cuts, reduce the chance of catching the quick off guard, and keep the whole experience calmer for your dog from the very first snip.
Sharp scissor-style or guillotine clippers. Blunt clippers crush rather than cut cleanly, which is uncomfortable for your dog and makes it much harder to read the cut surface. Sharp blades give you a clean edge — exactly what you need when taking black nails back little by little.
A nail grinder. If clippers feel a bit too all-or-nothing, a grinder lets you remove nail gradually and gives you much finer control over how much you take off. Many dogs also find the sensation less startling than a sudden snap.
A small flashlight or phone torch. Holding a light against the top of the nail can help you spot the quick’s shadow before you cut. It doesn’t work on every dog, but it takes seconds to try and is well worth doing.
Styptic powder. Have this within arm’s reach before you begin. If you nick the quick, it works fast — and knowing it’s right there helps you stay calm rather than scrambling.
High-value treats. Something your dog doesn’t get at any other time, like a small cube of cheese or a bit of cooked chicken, makes the session feel worthwhile for them and keeps their focus in the right place.
A non-slip mat or towel. This gives your dog something to grip, helps them feel a little more settled, and means less wriggling for you to work around.
What is styptic powder? It stops minor bleeding almost instantly if you nick the quick. It’s a staple in any dog nail trimming kit, so always have it to hand before you start.
None of these are hard to find, and together they genuinely change how confident you feel tackling black nails at home. If you’re building out your grooming kit, you’ll find plenty of dog care essentials over at Lords and Labradors. Good preparation really is the best dog nail trimming tip there is — have everything ready before your dog sits down, and you’re already off to a better start.
A Step-by-Step Way to Cut Black Dog Nails Without Hitting the Quick
Once you understand how to read the nail, the actual cutting becomes far less daunting. Trimming black dog nails safely is really about slowing down, taking tiny slices, and trusting what you see rather than guessing where to stop.
Settle your dog before you pick up the clippers. Sit on the floor together, offer a few treats, and let them sniff the clippers. A calm start makes everything that follows easier.
Find a comfortable position for you both. Some dogs are happy lying on their side while you kneel beside them. Others prefer sitting upright with a paw gently lifted. Work with your dog rather than forcing a hold that makes them tense.
Press the toe pad gently to extend one nail at a time. This gives you a clear view and keeps the paw steady without gripping so tight that your dog pulls away.
Start with a small snip at a slight angle. Take just the very tip off. You’re not trying to do it all in one go — you’re just getting started.
Check the cut surface before you snip again. Hold the nail up to the light and look at the cross-section. A chalky white or grey centre means you’re well away from the quick and safe to continue.
Keep going in tiny increments, checking every time. As you get closer, the centre of the nail will start to shift. The moment you see a darker grey or black dot beginning to appear in the middle, stop on that nail. That dot is the quick showing itself, and one slice further could cause real discomfort.
Reward your dog between nails, not just at the end. A treat after each one keeps things positive and gives your dog a natural moment to breathe and reset.
Stop if your dog tells you they’ve had enough. Panting, pulling the paw away, or going rigid are all signs to pause — even if you’ve only done two nails. Pushing through rarely ends well.
Split the session across days if that’s what your dog needs. Front paws today, back paws tomorrow. There’s no rule that says all twenty nails have to happen at once, and honestly, your dog will thank you for it.
A note on the black dog nail quick:
In lighter nails, the quick shows up as a visible pink line running through the centre. In black nails, you simply can’t see it from the outside, which is why reading the cross-section matters so much. A small dark dot or a soft pale ring appearing in the centre after a snip is your signal to stop. That’s the quick beginning to surface, and going any further risks pain and bleeding.
The whole point of learning how to cut dog nails that are black is building confidence through small wins, not racing to finish. Three nails done calmly is genuinely better than twenty done with your dog stressed and wriggling. If your dog tends to find grooming difficult, it’s worth thinking about how you handle other anxious moments together — the same approach that helps keep dogs calm during stressful situations like fireworks applies just as well here.
What to Do if You Nick the Quick
Nicking the quick when you’re learning how to cut dog nails that are black happens to almost every pet parent at some point. It looks more dramatic than it is — a small dark red bleed from the tip of the nail — and it tends to startle you far more than it hurts your dog. Take a breath. You’ve got this.
Here’s exactly what to do:
Stop trimming and set the clippers down.
Apply styptic powder or cornstarch directly to the nail tip.
Hold gentle pressure with a clean cloth or your finger for 30 to 60 seconds.
Keep your dog calm and still with a quiet voice and a soft, steady touch.
Once the bleeding slows, check the nail before letting your dog wander off.
Styptic powder is a clotting agent that stops bleeding quickly — and it’s the single most useful thing to have nearby during any nail trim. Purdue University’s veterinary guidance specifically recommends that you keep styptic powder available when clipping a pet’s nails to stop bleeding if you clip too short. Pick some up before your next session if you don’t already have it.
For aftercare, keep the paw clean and dry for the rest of the day. Avoid rough-surface walks for 24 hours, and check back on the nail over the next day or so for any redness or swelling.
If the bleeding hasn’t slowed within 5 to 10 minutes, or your dog seems to be in genuine pain rather than just briefly unsettled, call your vet. That’s the sensible thing to do — not a sign that anything has gone seriously wrong.
How to Make Nail Trims Easier Next Time
The biggest dog nail trimming tip anyone can give you? Trim more often. It sounds almost too simple, but when you’re working out how to cut dog nails that are black, consistency matters just as much as technique. Dogs who seem completely impossible to trim can surprise you once a calm routine clicks into place.
Trim every 3 to 4 weeks. Regular sessions keep nails at a manageable length and make each one shorter and less stressful — for both of you.
Reward after every single nail. Use something your dog genuinely loves, like a small piece of cheese or chicken, and give it the moment you finish each nail rather than saving it until the end.
Handle paws between sessions. A minute or two of gentle paw touching while you’re watching TV or winding down costs nothing and builds real tolerance without any pressure attached.
Take a little, more often. Small snips every few weeks feel far less daunting than trying to tackle seriously overgrown nails after a long gap — and you’ll stay well clear of the quick.
Keep the setup consistent. Same spot, same time of day, same calm energy. Dogs read routine surprisingly well, and familiarity genuinely helps settle nerves.
Start puppies early. Even pretend trims with no cutting involved help young dogs learn that paw handling is completely normal.
Pro tip: Trimming a tiny amount every 2 to 3 weeks is far safer than waiting until nails are overgrown — especially when you’re navigating the black dog nail quick.
Think of each session as a training opportunity rather than a chore to get through. Dogs who once wriggled, whined, or flatly refused can absolutely learn to sit calmly for a trim. It just takes consistency, patience, and a well-stocked treat supply.
When to Ask a Groomer or Vet for Help
Sometimes, the most caring thing you can do is hand the clippers to someone else. If you have worked through how to cut dog nails that are black and still feel uncertain, that is completely fine. Some dogs have nails that are genuinely thick, curved, or difficult to read, even for owners who have been doing this for years. Others simply will not settle, no matter how many treats you offer or how carefully you have set the scene.
Professional groomers trim nails every single day. They know how to read the nail, position the dog, and work with a calm confidence that only comes with real experience. Booking a session or two is not admitting defeat. It is a smart way to watch someone skilled work up close, ask questions, and pick up the kind of practical knowledge that no article can fully replace.
Your vet is equally worth considering, especially if your dog has unusually thick nails, any history of paw injuries, or anxiety that makes handling genuinely difficult. They can trim safely and point you toward ways to make future sessions less stressful for your dog and for you.
The most important shift is this: professional help is a starting point, not a last resort. Once your dog has had a calm, positive experience with someone who knows exactly what they are doing, you will often find that the next trim at home feels a little easier too.
Frequently Asked Questions
How do you know where the quick is on black dog nails?
You find the quick on black dog nails by trimming tiny slivers and checking the cut surface each time. A chalky white or grey centre is usually safe; when you start to see a darker dot or change in the middle, stop. A torch underneath the nail can sometimes help too.
Can I trim my dog’s black nails?
Yes, you can trim your dog’s black nails if you go slowly and take very small amounts at a time. The safest approach is to remove the hooked tip first, check the cut surface after every snip, and stop as soon as you see a darker centre appearing.
How do you trim severely overgrown dog nails?
Trim severely overgrown dog nails by taking off only a little at a time and spreading the work over multiple sessions if needed. Tiny, regular trims every 2 to 4 weeks are safer than one big cut, especially with black nails, because they help you avoid catching the quick.
How to choose the best dog food: dry, wet, raw and fresh compared
Picking the best dog food in the UK feels simple until you’re standing in front of a wall of options wondering whether kibble, pouches, raw chunks or freshly cooked trays is the right call for your dog. This guide cuts through the noise and compares all four types honestly, covering what they actually cost, how they fit into a real daily routine, and what to look for beyond the marketing on the front of the pack. By the end, you’ll have a clear sense of what works for your dog and what works for your life.
What’s the difference between dry, wet, raw and fresh dog food — and why it matters
Walk into any pet shop or scroll through an online store, and the sheer range of dog food can feel genuinely overwhelming. Dry kibble, pouches, raw chunks, freshly prepared trays — it’s a lot to take in, especially when all you want is to feed your dog something they’ll love that’s actually good for them.
So here’s a plain-English breakdown of what each type really means.
Dry dog food (kibble) is the most widely used option in the UK. It’s shelf-stable, simple to portion, and usually the most budget-friendly. Most of the best dry dog food UK brands formulate it as a complete, everyday diet, so there’s nothing extra to add.
Wet dog food comes in tins, trays or pouches and has a much higher moisture content, which makes it more aromatic and palatable. If you have a fussy eater or a senior dog who’s lost some enthusiasm for mealtimes, wet food can be a game-changer — either on its own or mixed in with kibble. For a deeper look at how the two compare, this wet vs dry dog food guide is a good place to start.
Raw dog food means minimally processed meat, bone and offal — closer to what dogs would naturally eat. Many owners swear by the difference they see in coat condition and digestion, though raw does require careful handling and a bit more planning around storage.
Fresh dog food sits somewhere between raw and traditional wet food: gently cooked, made with whole ingredients you’d actually recognise, and usually sold refrigerated or frozen.
Every type has real strengths. The right fit depends on your dog’s age, size and health — but also on your budget, your fridge space, and honestly, how much headspace you have on a Tuesday morning.
Which type works best for your everyday routine?
The right food type often comes down to your actual daily life, not just what looks best on paper. Fridge space, work hours, travel habits, and whether you’re feeding one dog or four all shape what’s genuinely manageable long-term. There’s no single best dog food UK-wide, but there is one that fits your household better than the rest.
Food Type
Storage Needs
Prep Time
Travel-Friendly
Best for Fussy Eaters
Dry
Minimal
None
Yes
Sometimes
Wet
Needs fridge once open
None
Manageable
Often yes
Raw
Freezer space required
Defrost needed
Not ideal
Usually yes
Fresh
Needs fridge
None
Less convenient
Yes
A few practical things worth knowing before you decide:
Dry food suits busy households brilliantly. Measure, store in an airtight container, done. Good dog food storage keeps kibble fresh and pests out — something most people only think about after an incident with a chewed bag.
Wet food is a genuine win for fussy eaters or dogs who need extra hydration, though opened tins need refrigerating and using up within a day or two.
Raw feeding delivers real results for many dogs, but it asks something of you — freezer space, forward planning, and confident handling. Rewarding, not effortless.
Fresh food hits a sweet spot for palatability and ease, though it needs consistent fridge access and doesn’t travel as well as dry.
Mixed feeding — typically dry plus wet — suits dogs who thrive on variety without the full commitment of raw, and it’s more flexible for busy weeks.
Keep reading for honest picks across the best dry, wet, raw, and fresh dog food in the UK.
How much should you expect to spend on the best dog food in the UK?
When you’re comparing the best dog food in the UK, the price on the pack only tells part of the story. What really matters is cost per day, how much your dog actually needs to eat, and how practical that food is for your home and routine.
Food Type
Approx. Monthly Cost (Medium Dog)
Key Cost Factors
Value for Money
Dry food
£20–£50
Portion size, ingredient quality, calorie density
★★★★
Wet food
£40–£80
Higher cost per serving, more packaging
★★
Raw food
£50–£120
Sourcing, freezer space, prep time
★★★
Fresh food
£60–£150
Subscription cost, fridge space, short shelf life
★★★
Dry food is often the most budget-friendly starting point, especially if you choose a nutritionally dense recipe that feeds well in smaller portions. That’s why many pet parents looking for the best dry dog food UK options focus on feeding guidelines, not just bag price.
Wet food can be brilliant for fussy eaters, but it usually works out pricier per meal. Raw and fresh can feel more premium, and for some dogs they suit beautifully, but you do need to factor in storage space, defrosting, and waste if portions aren’t used quickly enough.
A few hidden costs are easy to miss:
freezer or fridge space for raw and fresh food
delivery fees on some fresh food subscriptions
larger portion sizes with less calorie-dense foods
extra packaging, especially with wet food
In real life, the best dog food for dogs UK isn’t always the cheapest or the most expensive. It’s the one that suits your dog, keeps mealtimes straightforward, and feels sustainable for your budget month after month. If you’re planning the wider costs of dog ownership too, our guide to the full cost of owning a dog is a useful next step.
What to look for on the label before you buy
Knowing how to read a dog food label makes choosing the best dog food UK options much less overwhelming. Whether you’re comparing kibble, tins, raw meals or fresh subscriptions, a few simple checks will help you separate genuinely good recipes from clever packaging.
Named animal protein first
Start with the first ingredient. You want something clear, like “chicken”, “turkey” or “salmon”, not vague phrases such as “meat and animal derivatives”. Specific ingredients give you a much better idea of what your dog is actually eating.
A sensible, transparent ingredient list
Don’t worry if you spot added vitamins, minerals or a few technical names, that’s completely normal in a balanced food. What matters more is that the list feels clear and honest, without lots of fuzzy wording or ingredients that make it hard to tell where the nutrition is really coming from.
Life-stage suitability is easy to spot
Check that the food is clearly labelled for your dog’s stage of life, such as puppy, adult or senior. A lively Labrador puppy and a slower-paced older dog need very different nutrition, so this is worth checking every time you switch foods.
A FEDIAF or AAFCO complete-and-balanced statement
This is one of the big ones. It tells you the recipe is formulated to meet recognised nutritional standards for that life stage, rather than just sounding healthy on the front of the pack.
Clear nutritional analysis
Protein, fat, fibre and moisture should all be listed as percentages. That makes it much easier to compare the best dry dog food UK picks with the best wet dog food UK choices on something more useful than marketing claims.
Be wary of product names
“With chicken” can legally mean as little as 4% chicken. So always turn the pack over.
If you’d like a deeper look, our guide to healthy dog food and sustainability is a helpful next read.
How to tell if your dog will actually enjoy and thrive on it
Choosing the best dog food for your dog isn’t just about what’s on the label — it’s about how they actually respond once they’re eating it. The good news? Signs of a good fit usually show up within two to four weeks of switching, so you won’t be waiting long to know if you’re heading in the right direction.
Here’s what to watch for:
Consistent energy levels — alert and lively, but not bouncing off the walls or crashing after meals
Firm, regular stools — not too loose, not too hard, and easy to pick up (yes, we’re going there, because it genuinely matters)
A shiny, low-shed coat — good nutrition tends to show up in the fur faster than you’d expect
Clear, bright eyes — no excessive discharge or dullness
Healthy, itch-free skin — fewer scratching sessions is always a win
Good hydration — worth keeping an eye on if you’re switching to a dry food, since wet, raw and fresh options naturally contain much more moisture
Enthusiastic mealtime behaviour — trotting over happily rather than sniffing and wandering off
Stable, healthy weight — no unexplained gain or loss
Worth remembering: The best dog food in the UK looks different for every dog. What works brilliantly for a small terrier may fall well short for a large, boisterous puppy or a sensitive older dog. It’s always worth reassessing as your dog moves through different life stages.
Keep a loose mental note of how your dog looks, feels and behaves over those first few weeks after any change. If you notice persistent digestive upsets, low energy or coat issues that don’t settle, it may be worth exploring vet-formulated support through the Lords & Labradors vet’s best dog wellbeing range before drawing any conclusions about the food itself.
So, which dog food is best for you?
There’s no single best dog food for every dog, and honestly, that’s a good thing. It means you get to choose what actually works for your life.
If you want simplicity and value, a quality dry food does the job well for most dogs. If your dog is a picky eater or struggles to stay hydrated, mixing in some wet food can make a real difference. Raw feeding suits owners who enjoy a bit of meal prep and have the freezer space to commit. Fresh food sits nicely in the middle — real ingredients, minimal faff.
And if none of those feel quite right on their own? Mix it up. Plenty of dog owners pair dry kibble with a wet or fresh topper, and their dogs are absolutely delighted about it.
The best dog food in the UK is the one your dog genuinely thrives on and that you can realistically keep up — week in, week out. A brilliant food you dread preparing isn’t going to last, and that’s okay to admit.
Start with what feels manageable. Watch how your dog responds over a few weeks: their energy, their coat, their digestion. Adjust from there. You know your dog better than any packaging ever will.
Browse the full range at Lords and Labradors and find something that suits you both.