This pointed-eared and small-sized dog breed is known for it's diminuative stature and big personality. Chihuahuas are characterized by their alert expression, large round eyes, and distinctive apple-shaped head. Despite their small size, they often project their confidence and spirituality. Their loyalty, affection and form strong bonds with their owners, making them botth companions and the ideal lap dog.
Chihuahua’s have a lot of character, and they are some of the sweetest dogs in the world. They may be small, but they are full of character and energy, which makes them perfect pets for anyone – including families.
Of course, before you bring your new addition home, you have to make sure you are properly prepared with everything that they will need. That’s where we come in with this quick and helpful guide to the ultimate Chihuahua starter pack.
Chihuahua Food and Water Dishes
Every dog needs food and water bowls, and you should always ensure that they are nice and robust so that they do not break easily if dropped. Their water bowls should be full at all times to keep them hydrated, and if they are a messy drinker, we recommend buying placemats to prevent damage to your floor.
A stainless steel bowl is a good option to go for if you are looking for a set of bowls that are sturdy and practical, but also won’t break the bank. Look for a non-slip, so they won’t slide around your kitchen floor, we'd recommend a smaller size bowl for your new Chihuahua.
Chihuahua Bedding
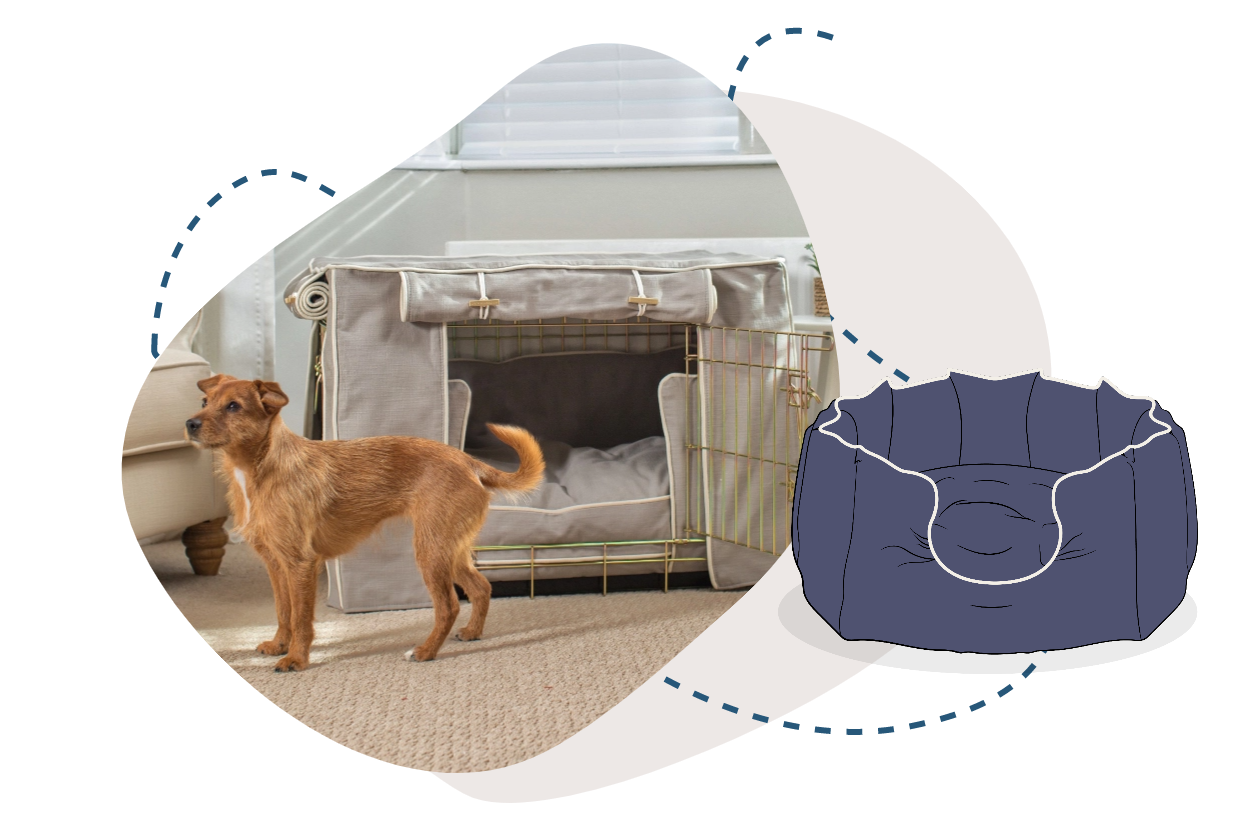
Every dog needs a comfortable place to sleep, and your Chihuahua is no exception. One of the beds that we recommend is our Cosy & Calming Crate Beds which, if you select the small size, is perfect for your Chihuahua pup. With soft faux fur, this is the perfect snuggle bed for your new addition to cuddle up and sleep the night (and most of the day) in.
If this isn’t quite what you are looking for, then you may want to consider a dog blanket instead. A very portable form of bedding, a blanket is perfect for placing on the floor, and even the furniture, so that your Chihuahua has a comfortable place to sleep. Fleecy and warm, your dog is guaranteed a comfortable and restful sleep when they snuggle up with this.
Chihuahua Toys
Every dog, regardless of age, needs a few toys to play with and chew on. It’s great mental and physical stimulation, but also allows them to develop a deeper bond with you. Firm favourites are small chew toys for teething pups as well as something snuggly to cuddle up to at bedtime!
Other things for Chihuahuas
Our booster seats are the ideal option for transporting your dog safely in the car. We know that many dogs love looking out of the window when you are driving, but for small breeds like Chihuahua’s, this is impossible when they are sat on the seats. Booster seats provide them with an elevated seat that they are safely secured into with a harness and buckle. They're not only deep and comfortable so that they can lay down, but it also lets them watch the world – which is what they love most.
Hopefully, this guide has given you a good idea of what you need to make your new Chihuahua really feel at home. With these basic essentials, you will be well on the way to providing your pooch with the best possible life. Dog ownership is so exciting, and your Chihuahua is sure to love its new life with you.
As a first-time dog owner, one of the essential items you'll need is a dog lead. It's important to choose the right type of dog lead for your furry friend, as well as understanding the laws and regulations that govern the use of dog leads in public spaces.
In this blog post, we'll cover everything you need to know about dog leads, including the different types of dog leads, UK dog laws and regulations, how to choose a dog lead, and training tips for using a dog lead effectively.
What Are The Best Dog Leashes?
There are several types of dog leads to choose from, each with its own advantages and disadvantages depending on your lifestyle and type of dog. Here are the most common types of dog leads and what we recommend each one for:
Extendable Dog Leads
These leads allow your dog to explore further while still remaining under your control. They have a retractable cord that can extend to several meters and are perfect for walks in open spaces. However, they’re not the best choice for training your dog to walk on the lead without pulling. Extendable leads usually have a metal clip on the bottom which you can attach on to either your dog’s harness or collar. We love the Flexi dog leads, they come in two lengths and have an ergonomically designed handle making them comfortable to hold. They come in 5 colours so there’s sure to be one that you and your pooch will love.
Short Dog Leads
[product]
These leads are typically 1-2 meters long and are suitable for walking in busy areas or when training your dog. They provide more control over your dog and can prevent them from pulling or running away. Short dog leads come in a range of materials from rope which is great for stronger dogs, leather which is a good durable option, as well as nylon which are often in stylish patterns and print. Short dog leads will usually have a looped handle to either hold or put round your wrist. Similarly to extendable leads, short dog leads will have either a metal clip or a carabiner on the end so they easily fasten on to your dog’s collar or harness. Our Essentials Walking Collection has a range of short leads in both our Twill and Herdwick fabrics. They are handcrafted in Italy using the finest leather for the handles and either a durable canvas or woven fabric for the strap, finished off with silver hardware - perfect for stylish walkies.
Slip Dog Leads
These leads are made of a loop of material that goes around your dog's neck and tightens when pulled. They’re great for if your dog walks off lead a lot because as the name suggests they’re easy to slip on and off as needed. Because slip leads tighten around the neck when the dog pulls, they may not be the most suitable option for training dogs, especially those that pull on the lead. The tightening of the lead round the dog’s neck can cause them to choke, leading to negative associations with being on the lead and increased anxiety. We recommend these for dogs who already walk well on the lead and if the dog will be off the lead for the majority of their walk. The slip lead we recommend is the Dogs & Horses Rolled Leather Slip Lead, the buttery soft leather is rolled which helps protect your dogs coat from knots. They’re made using cord which is designed for use by yachtsmen so they’re strong and won’t rot if they get wet, this is then wrapped in the softest Italian leather which is hand stitched in their cosy London workshop- these leads have been crafted to last. Available in almost every colour of the rainbow, there’s sure to be one of these gorgeous leads to suit every pup.
Training Line Leads
Training line leads, also known as long lines, are another type of dog lead. These leads are typically longer than standard leads, often 10 meters or more, and can be useful for training purposes, such as recall training or teaching your dog to walk off lead. They provide your dog with more freedom to roam, while still giving you control over their movements. When using a training line lead, it's important to ensure that the line is not too long, as this can lead to your dog getting tangled or running away. Always supervise your dog when using a training line lead, and use a sturdy and durable lead that can withstand the wear and tear of training activities. We love the Ancol Outside Training Line, it comes in two lengths and is perfect for allowing your dog freedom whilst still being in control.
Hands-Free Dog Leads
Hands-free dog leads are designed to allow you to walk your dog while keeping your hands free. These leads are a great choice if you’re planning to run or hike with your dogs. Hands-free leads typically have a waistband or belt that you can fasten around your waist, leaving your hands free to use poles or run without having to hold onto a lead. They can also be useful for people with mobility issues or for those who need to carry bags or other items, whilst being out with their dog. When using a hands-free lead, it's important to ensure that your dog is well-trained and obedient, as they will have more freedom to move around. We love the Ruffwear roamer leash, it can be looped round your waist or can be handheld if needed. The lead has a bungee strap which cushions and stretches as you and your dog speed up or slow down, helping to reduce any impact on both yours and your dog’s joints.
What Are The UK Laws and Regulations For Dog Leads?
In the UK, there are laws and regulations that govern the use of dog leads in public spaces. Section 27 of the Road Traffic Act requires that dogs must be on a lead on designated roads, and if not, the owner could face a fine. What is classed as a designated road is decided by your local authority, so it's always best to check with them.
Similarly, the Countryside Code recommends that dogs should always be under control in public spaces to prevent them from disturbing wildlife or livestock. They recommend keeping your dog on a lead or in sight to ensure they stay away from wildlife, livestock, horses and other people. If you're unsure there are usually signs with that areas rules in, so it's always best to check.
Some areas may also have Public Spaces Protection Orders (PSPOs) that require dogs to be on leads in certain places. It's important to be aware of these laws and regulations to avoid fines and keep your dog and others safe. We recommend checking with your local authority if you’re unsure of the rules in your area.
Choosing A Dog Lead
When choosing a dog lead, there are several factors to consider, including the size and breed of your dog, your dog's behaviour, and your lifestyle. Here are some tips to help you choose the right dog lead:
Consider the size and breed of your dog: Larger or stronger dogs may require a more robust lead, while smaller dogs may do well with a lighter lead.
Think about your dog's behaviour: If your dog pulls or is difficult to control, a shorter lead may be more suitable. If your dog is well-behaved and obedient, an extendable lead may be a good option.
Consider your lifestyle: If you're an active dog owner, a hands-free lead may be more convenient. If you mainly walk your dog in busy areas, a shorter lead may be more suitable.
How To Train A Dog On A Lead
Using a dog lead effectively requires training and patience. Here are out pet experts top tips on training a dog to walk on a lead:
Start with a short lead and a comfortable collar or harness for your dog, and slowly introduce them to the lead by letting them sniff it and rewarding them with treats.
Once they’re comfortable with the lead, attach it the collar or harness. You’ll want to start by walking your dog in a quiet, low-distraction environment to help them get used to the lead and build their confidence. This could even be round your garden or in your house before their vaccinations, to help make that first outside walk less daunting.
If your dog pulls on the lead, stop walking and wait for them to come back to you. Reward them with treats when they do.
To teach your dog to heel, start by walking them on your left side, holding some treats in your left hand. Hold the lead in your right hand and keep it short but loose.
Give your dog the "heel" command and start walking. If your dog starts to pull or veer off course, stop walking and bring them back to your left side.
Reward your dog with treats and praise when they walk calmly by your side, they will begin to associate walking next to you with getting treats and being a positive action. Gradually increase the length of your walks and the level of distraction. As they start walking by your side more consistently you can reduce how frequently you are giving them treats and just reward them with a ‘good boy’ or ‘good girl’ and fuss. Eventually, once the habit has formed, they will consistently walk by your side with no reassurance needed.
For dogs that have a strong tendency to pull, consider using a front-clip harness like the Ruffwear Front Range harness which allows you to clip the lead on to both the front and back of the harness.
Teaching your dog to heel can be a challenge, but with patience and consistency, it's a skill that can be learned by any dog. Heel training can help prevent your dog from pulling on the lead and make walks more enjoyable for both you and your dog. If your dog has recently started pulling we recommend going back to basics and stopping walking every time they pull and giving them a treat every time they walk by your side, even if you don’t get very far for your first few walks your dog will quickly learn to stop pulling on the lead and walk time will become more enjoyable. If your dog pulls a lot try wearing your dog out in the garden with a game of fetch or tug of war, it may help them to relax on the walk as they have less excess energy.
How To Teach A Dog To Walk Off The Lead
Once your dog is well-trained on the lead, you can start to teach them to walk off lead. You will likely have been practising recall with your puppy at home and this will come in handy when walking your dog off the lead. To teach your dog to walk off lead, start by practicing in a secure, enclosed area. There are now a lot of dedicated enclosed dog fields which you can book that are perfect for practising recall and off lead walking in a safe environment. Start by using a long line lead to give your dog some freedom, but still keep them under control. Use a consistent command, such as "free," to signal to your dog that they can walk off lead and using your ‘heel’ command and recall to get them to walk next to you. As your dog becomes more obedient, you can begin practicing off lead walks in open spaces. It's important to be aware of any potential hazards, such as roads or livestock, and always keep your dog under control.
In conclusion, choosing the right dog lead is essential for both your dog's safety and your own peace of mind. Consider your dog's breed, behaviour, and your lifestyle when choosing a lead, and be aware of UK dog laws and regulations.
Training your dog to walk on a lead requires patience and consistency, but with time, you and your furry friend can enjoy stress-free walks. Teach your dog to walk on a loose lead and use the heel command to prevent pulling. And remember to only walk your dog off lead in safe areas and when they are well-trained and obedient.
Bathing your dog is an essential part of their overall grooming routine. Not only does it keep their coat clean and shiny, but it also helps maintain their overall hygiene. However, as a dog owner, you may find yourself wondering, "How often should I bathe my dog?" and "What's the best way to bathe them?" Well, fear not! In this comprehensive guide, we'll answer all your questions and provide you with helpful tips to make bath time an easy experience for both you and your beloved canine companion.
How Often Should You Bathe a Dog?
One of the most common queries among dog owners is how frequently they should bathe their furry pals. The answer varies depending on several factors, such as your dog's breed, coat type, and lifestyle. In general, most dogs benefit from a bath every 4-6 weeks. However, certain breeds with specific coat types may require more frequent bathing, while others may need it less often. Our pet experts have written an in-depth guide on how often you should groom your breed of dog which is definitely worth checking out.
Can I Bathe My Dog Once a Week?
While regular bathing is important for maintaining cleanliness, it's generally not recommended to bathe your dog more than once a week. Frequent bathing can strip their coat of natural oils, leading to dry skin and irritation. However, certain situations, such as skin allergies or medical conditions, may require more frequent bathing depending on your vet’s advice.
What Do I Need To Bath My Dog At Home?
Dog Specific Shampoo - We recommend PetPlex, they have shampoos suitable for different coat types, ages and skin conditions so there’s sure to be something for your dog.
Dog Specific Conditioner - pamper your pooch with a conditioner, this will help keep their coat looking shiny and silky.
Detangling Spray - A Detangling Spray is good for curly haired or long haired dogs before their bath to help remove any knots or matts, this will help make the bathing process as easy as possible
A Brush or Comb - there are lots of different types of brushes and the best one for your dog will depend on their coat type. Explore our range of brushes to find the best one for your furry friend.
Drying Coat, mitts or towel - You’ll have a soggy doggy after a bath and having something you can dry your dog off with will come in handy. An old towel works or our favourite-fuss free way to dry your dog off is with a drying coat. They simply slip on over your dog’s head and fasten under their belly. Alternatively our drying mats are one size fits all and making drying your dog quick and easy
Treats or a licki mat - you want your dog to associate bath time as a fun positive experience and a rewards based training method is our favourite way to do this. Having plenty of treats to hand and praising your dog throughout the process will help them form positive associations with the process. The anti-anxiety bath ducks are great for distracting nervous dogs, they stick to the wall and you can put wet food or peanut butter on there for your dog to lick off whilst you bathe them. Licking is actually anxiety reducing for dogs as it releases calming hormones so is perfect for nervous dogs. If you do have a nervous pup on your hands why not check out our blog on how to desensitise your dog to grooming, it has our pet experts top tips and tricks on how to make grooming your dog a calmer experience for you both.
How To Bathe A Dog At Home:
Now that you know the ideal frequency and the essentials you’ll need, let's dive into the step-by-step process of how to bathe your dog:
Gather Your Supplies:
Have all the items we listed above to hand, making sure they’re in reaching distance will make bath time easier for you and your dog
Prep the Bathing Area:
Choose a suitable location for the bath, preferably a bathtub or a large wet room. You can place a non-slip mat at the bottom to provide your dog with a secure footing, this is a good idea if your dog doesn’t love bath time and likes to move around.
Brush Your Dog:
We recommend brushing your dog's coat thoroughly before bathing them to remove any loose fur or tangles, especially if they have a long or curly hair coat. This will prevent matting and will mean it’s easier to make sure your dog’s coat is fully clean.
Test The Temperature
You’ll want the water to be lukewarm, not too hot or cold. You can either run a bath or use the shower to wash your dog, whichever works best for you and your dog.
Rinse Your Dog’s Coat
Work from the neck down with either a jug of water or the shower head to pour water over your dog’s coat. You’ll want to make sure their coat is nice and wet
Shampooing Your Dog
You’ll want to either put a small amount of shampoo in your hand and massage it into your dog’s coat making sure it lathers up, or you can use a shampoo brush like this Rosewood brush, which allows you to put shampoo in the top and dispenses it as you brush your dog’s coat. Be careful of their eyes and ears and focus on their body and paws. Once you’ve shampooed your dog’s body you’ll want to rinse them off with lukewarm water to remove the suds, making sure no product remains in their coat.
Conditioning Your Dog
Once you’ve shampooed your dog, you’ll want to apply a conditioner. This will help keep their coats shiny by adding moisture back in after shampooing them. Massage into your dog’s coat and then leave for a couple of minutes before rinsing
Wash Your Dog’s Face
Whilst your conditioner is soaking into your dog’s coat it’s a good time to wash their face. We recommend using a cloth or a flannel with some clean water to wipe their face clean, you want to avoid getting any shampoo in their eyes or ears.
How To Dry A Dog After The Bath:
After rinsing, use a large towel, drying mitts or a drying coat to gently dry your dog's coat. If your dog is comfortable with a blow dryer on a low heat setting, you can use it to speed up the drying process. Make sure to keep it at a safe distance from their skin. Gradually dry their coat, keeping the dryer moving to avoid overheating any particular area.
Brushing Your Dog
Once your dog's coat is mostly dry, use a brush or comb appropriate for their coat type to remove any remaining tangles or mats.
Reward Your Pup
After bath time make sure to give your pup plenty of fuss and reward them for being a good boy or girl during bath time.
Our Pet Experts Tips To A Successful Bathing Experience:
To make bath time enjoyable for both you and your furry friend, our pet experts have put together their top tips:
Introduce Bathing Gradually: If your dog is not accustomed to baths, introduce the process gradually. Start by getting them comfortable with water by offering treats or toys near the bath area. Gradually progress to wetting their paws, then their entire body. This is a great thing to do with them right from the get-go as a puppy as it helps to desensitise them from a young age
Positive Reinforcement: Use positive reinforcement throughout the bathing process. Reward your dog with treats, praise, and gentle strokes to make them associate bath time with positive experiences.
Ear Care: During bathing, be cautious not to let water enter your dog's ears, as it can cause infection. Use cotton balls to plug their ears or consider using a specialised ear cleaning solution after the bath to keep their ears clean and dry.
Nail Trimming: Bath time can also be an opportunity to trim your dog's nails if needed. However, if you're unsure or uncomfortable doing so, it's best to consult a professional groomer or veterinarian. We’ve got a handy guide on cutting your dog’s claws.
Double Shampoo: Our pet experts recommend shampooing your dog twice, as long as they don’t have sensitive skin. This will help make sure they’re squeaky clean
Drying Your Dog: Avoid rubbing your dog when towel or mitt drying them, this could cause matts or tangles in their coat. Instead gently pat them dry.
Bathing your dog is an important part of their overall hygiene routine. By following the tips and guidelines provided in this guide, you can ensure a pleasant and effective bathing experience for your furry companion. Remember to consider your dog's breed, coat type, and lifestyle when determining the ideal bathing frequency. With patience, positive reinforcement, and proper care, bath time can become a bonding experience that leaves your dog feeling clean, healthy, and happy.
Few things throw off a walk quite like a dog who plants their paws and flatly refuses to go the direction you had in mind. If your dog refuses to walk certain directions, there’s nearly always a reason behind it, whether that’s fear, discomfort, or simply a strong opinion about where the good smells are. This guide covers how to tell those causes apart, what you can do to gently build confidence back up, and when it’s worth calling in a vet or behaviourist for extra support.
Why your dog suddenly refuses to walk one way
If your dog suddenly plants their paws and refuses to move in a certain direction, it can feel completely baffling — especially when they were perfectly happy heading that way last week. But this is rarely stubbornness. Most of the time, your dog is trying to tell you something.
Dogs build strong associations with the places they visit, and those associations can form faster than you might expect. A route that takes you past a noisy building site, a garden where a dog charges the fence, or even a spot where something once startled them can quickly become somewhere they’d rather avoid. When your dog stops walking or pulls back on the lead heading a particular way, that’s communication, not defiance.
It’s also worth taking seriously. The more often a dog is pushed through something that worries them, the stronger that negative association tends to become. Understanding what’s driving the behaviour, on the other hand, gives you a real chance to actually help.
The signals are usually there if you know what to look for: a tucked tail, flattened ears, a sudden reluctance to move forward, or frantic sniffing to avoid making eye contact with whatever’s ahead. These are all your dog’s way of saying “I’m not sure about this.” Our guide to understanding your dog’s body language is a great starting point if you’d like to get better at reading those cues before we dig into the causes.
The most common reasons dogs avoid certain routes
There’s almost always a reason when a dog refuses to walk certain directions, even if it isn’t immediately obvious. Dogs can’t tell us what’s wrong, so their behaviour on the lead is often the clearest signal we have. Pinning down the cause is the first step to making walks enjoyable again for both of you.
Fear or negative associations. A dog that freezes outside a particular house, digs their paws in near a certain gate, or turns back at the same point every time has often had a bad experience there. It might have been something that only happened once — a sudden loud noise or an unexpected run-in with another dog — but the memory sticks. That reluctance isn’t defiance. It’s self-protection.
Stubbornness or personal preference. Some dogs simply have opinions about where they want to go. One that consistently pulls toward home, or always steers for the park and resists anywhere else, is usually showing a preference rather than fear. It’s especially common in dogs who’ve settled into a comfortable routine and aren’t particularly interested in anything that disrupts it.
Overstimulation from busy environments. A dog that shuts down near traffic or crowded streets is often overwhelmed, not difficult. The noise, movement, and unpredictability can become genuinely too much to process. Dogs pushed past their threshold may also start barking on walks, which is worth paying attention to as another sign that they’re struggling.
Physical pain or discomfort. If your dog slows right down, starts labouring on a slope, or suddenly stops after turning a particular corner, pain could easily be the reason. Rough surfaces, uneven ground, or an underlying joint issue can all make certain routes feel uncomfortable in ways that are easy to miss until you know what to look for.
Each of these behaviours is your dog’s way of trying to tell you something. Recognising which pattern fits yours is where the real progress begins.
How to tell fear, pain, and simple preferences apart
When a dog refuses to walk certain directions, the behaviour usually falls into one of three categories: fear, physical discomfort, or a plain old preference. The good news? Your dog’s body language will often tell you which one you’re dealing with — you just need to know what to look for.
Signs it may be fear or anxiety
Ears flattened against the head
Tail tucked under the body
Panting without any physical exertion
Freezing mid-walk and refusing to budge
Whale eye (whites of the eyes showing)
Pulling back hard on the lead
Barking or lunging at a specific spot on the route
Signs it may be pain or physical discomfort
Stopping suddenly at the same point on a familiar route
Limping or favouring one leg
Reluctance to put weight on a paw
Slowing pace noticeably over time
Whimpering or vocalising when encouraged to move forward
Stiffness after resting, particularly in older dogs
Worth knowing: Fear responses are usually triggered by something your dog sees, hears, or smells. Pain responses tend to be consistent, progressive, or tied directly to movement.
Simple preferences are a different thing entirely. If your dog enthusiastically pulls toward their favourite sniff spot or drags you down a familiar street with their tail up and body relaxed, that’s not a red flag — that’s just a dog with opinions. But if you’re noticing persistent freezing, any hint of lameness, or a sudden shift in how your dog behaves on walks, it’s worth a vet visit to rule out anything physical before you do anything else.
Gentle training steps to rebuild confidence on tricky walks
If your dog refuses to walk certain directions, think of confidence-building as lots of tiny wins rather than one big breakthrough. The goal is to help them feel safe enough to choose forward movement again.
Keep early walks short and successful. Pick a route your dog already copes with and end before they feel overwhelmed. A calm five-minute outing is far more useful than a stressful twenty-minute one.
Reward the choice to move. If your dog stops walking on walks or pulls back on the lead, watch for the smallest brave decision: one step forward, a relaxed glance at the trigger, or choosing to sniff and re-engage. Mark that moment with a treat or warm praise.
Start farther away than you think. When a dog won’t walk in one direction, there is usually a point where they still feel okay. That is where training starts. If the post box, corner, or noisy road is too much, move back until their body softens, then build up gradually over several sessions.
Make things predictable. Familiar routes, similar walk times, and a steady pace help nervous dogs settle. Once they are moving happily again, you can gently add in new directions.
Use comfortable walking kit. A loose lead and a well-fitted harness can reduce pressure and help your dog feel more secure during desensitisation work. If you are reviewing your setup, a padded walking collection is a helpful example of softer, supportive kit.
Stay consistent and calm. Your dog does not need perfect walks. They just need regular, low-pressure practice.
Desensitisation means exposing your dog to the scary or tricky thing at a level they can cope with, then very slowly increasing the challenge as their confidence grows.
When to speak to a vet or behaviourist
Sometimes the kindest thing you can do is ask for help. If your dog refuses to walk certain directions and nothing you try seems to be making a difference, it’s a good sign that some expert guidance is in order.
Start with your vet, especially if the refusal came on suddenly or out of nowhere. If your dog is also limping, slowing down on walks, or seeming stiff and reluctant at home, pain could easily be the culprit. Conditions like arthritis, soft tissue injuries, or sore paws can be surprisingly easy to miss, and they can look a lot like stubbornness from the outside. A quick health check rules out anything physical before you turn your attention to behaviour.
If your vet gives the all-clear but your dog still pulls back on the leash, freezes, or refuses to go a certain way, a qualified behaviourist is your next call. This is particularly important when the avoidance feels emotional — rooted in fear or anxiety — because pushing through those moments without the right guidance can deepen the problem rather than resolve it.
Look for someone accredited by the ABTC or APBC who uses positive, reward-based methods. A good behaviourist will work at your dog’s pace, help you understand what’s really going on, and give you a practical plan to move forward. Most dogs do get there with the right support behind them.
Knowing what type of harness is best for a puppy feels like it should be simple, but between clip positions, harness styles, and sizing that actually fits a still-growing body, it quickly becomes a lot to take in. This guide cuts through the noise by comparing front-clip and back-clip designs, step-in and over-the-head styles, and the fit details that make the difference between a harness your puppy wears happily and one they escape from on the first walk. By the end, you’ll know exactly what to look for and feel confident picking a harness that suits your puppy right now.
What type of harness is best for a puppy, and why it matters now
If you’ve ever stared at a wall of harness options in a pet shop — or fallen down a rabbit hole of reviews online — you’re in good company. Most new puppy parents feel completely overwhelmed at this stage, and that’s understandable. There are a lot of choices. But it’s genuinely worth getting this right, because the harness you pick now will play a real role in how your puppy learns to walk on the lead.
Here’s the thing: puppies aren’t just small adult dogs. Their bodies are still growing, their confidence is easily knocked, and their lead manners at eight or twelve weeks are, let’s be honest, basically zero. A well-fitted harness does two important things during this stage — it keeps pressure away from the throat and neck when your puppy inevitably lunges at a leaf or another dog, and it gives you a calmer, safer way to guide them without causing discomfort or creating bad associations with walking.
The honest answer to what type of harness is best for a puppy is: it depends. Your puppy’s size, their temperament, how they feel about being handled, and where you are in training all influence the decision. A nervous, wriggly pup needs something different from a bold little Labrador who’s already trying to tow you down the street.
The three things you’ll need to compare before buying are clip position, harness style, and sizing. This guide walks you through all of them. And if you’re still pulling together the rest of your puppy kit, our everything for your puppy collection is worth a browse alongside this.
Front-clip or back-clip: which helps your puppy walk nicely?
One of the first things new puppy parents puzzle over is what type of harness is best for a puppy that’s still working out how to walk on a lead. The honest answer? It comes down to behaviour. Where the lead clips on has a real effect on how much control you have and how your puppy moves, so matching the clip position to where your puppy is right now makes a genuine difference from the very first walk.
Front-Clip Harness
Back-Clip Harness
Best for
Puppies who pull or lunge
Calm or settled walkers
How it works
Lead attaches at the chest, redirecting forward momentum
Lead attaches at the back, allowing natural movement
Walking benefit
Gives you gentle steering control
Comfortable and unrestrictive
Ideal puppy type
Energetic, easily distracted breeds
Smaller breeds or puppies already walking well
Front-clip harnesses work well when:
Your puppy charges ahead the moment they spot another dog, a leaf, anything
You want a puppy no-pull harness that gently discourages pulling without causing discomfort
You need a bit more steering control during early lead training
Back-clip harnesses are a good fit when:
Your puppy is already fairly calm and consistent on the lead
You have a smaller breed who feels more relaxed with less restriction across the chest
Walks are short, low-key, and close to home
Still in the pulling-everything stage? A front-clip style gives you more to work with. If your puppy is already walking reasonably well, back-clip is perfectly fine for everyday outings. This adjustable harness suits both walking styles and grows with your puppy, which makes it a solid starting point either way.
Step-in or over-the-head: choosing the style your puppy will actually tolerate
Choosing between a step-in and an over-the-head harness often comes down to one thing: how your puppy feels about getting dressed. Temperament and daily handling ease matter just as much as design features when you’re figuring out how to choose a harness for a puppy that actually works in real life.
Factor
Step-In Harness
Over-the-Head Harness
Ease of fitting
Simple for wriggly puppies
Quicker for calm, cooperative pups
Best suited temperament
Sensitive, anxious, or squirmy
Relaxed and comfortable being handled
Ideal puppy size
Works well for small breeds
Suits most sizes
Owner experience level
Great for first-time puppy parents
Suits confident handlers
Here’s where each style genuinely wins:
Step-in harnesses are a lifesaver for puppies who panic when anything passes over their head — a surprisingly common sensitivity in young dogs, especially in the early weeks at home.
They also work beautifully for small breed puppies, where threading legs through feels far more controlled than wrestling something over a tiny nose.
Over-the-head styles clip on faster once your puppy is used to them, which makes a real difference on busy mornings.
Puppies who’ve been well-handled from early on tend to settle into over-the-head designs without much fuss at all.
Neither style is universally better. The right one is simply the harness your puppy accepts calmly and that you can fit quickly and correctly every single time. If you’re still putting together your puppy’s full kit, our guide to choosing the right collar is well worth a read alongside this.
Getting the fit right: the sizing details that matter more than the label
Even the best puppy harness will let you down if it doesn’t fit properly. Too loose and it can rub, slip, or give a wriggly puppy the gap they need to back out entirely. Too tight and it restricts movement, causing discomfort on every single walk. Getting the measurements right before you buy makes a bigger difference than most people expect.
How to measure your puppy for a harness:
Measure the chest girth at its widest point, usually just behind the front legs.
Measure the neck circumference at the natural base, where the harness will actually sit rather than where a collar would.
Note your puppy’s current weight, as many harnesses use weight ranges alongside body measurements.
Check both figures against the brand’s specific size guide rather than relying on the general size label.
If your puppy falls between sizes, size down and check the fit on arrival. The larger size rarely “works itself out.”
The two-finger rule: Once the harness is on, you should be able to slide two fingers snugly under every strap. Secure enough to stay put, with just enough give that nothing pinches.
Common fit mistakes to avoid:
Buying a size up to “grow into” — a loose harness is an escape risk and can cause rubbing long before they fill it
Straps sitting across the shoulder blades, which limits your puppy’s natural stride
The harness creeping forward toward the neck when your puppy pulls
The chest plate pressing into the armpits rather than lying flat against the sternum
Puppies grow fast, so recheck the fit every few weeks and adjust straps as needed. If you’re still in the early stages of getting everything ready, our guide to bringing a new puppy home covers everything else worth thinking about before that first walk together.
Which harness works best for pullers, small breeds, and calm little walkers?
Not every puppy needs the same harness, and what type of harness is best for a puppy really comes down to two things: how they behave on a walk and how big they are.
Puppy Type
Best Harness Style
Key Reason
Puppies that pull hard
Front-clip no-pull harness
Redirects forward momentum gently without strain on the neck or shoulders
Small or toy breeds
Lightweight step-in or mesh harness
Sits comfortably on a tiny frame without adding bulk or restricting movement
Calm, easy walkers
Standard back-clip harness
Simple, fuss-free design that works well for pups who already walk nicely
Once you know which category fits your puppy, the decision gets much easier. A calm spaniel pottering around the park simply doesn’t need the same setup as a boisterous Labrador who treats every walk like a sprint. Matching features to real behaviour means you stop paying for extras that never get used.
Quick Tip: If your puppy pulls now but you’re confident training will settle things, a dual-clip harness gives you both options without buying twice. Use the front clip while you work on leash manners, then switch to the back clip once they find their rhythm.
How to pick the best puppy harness with confidence
Choosing the right harness really does come down to a handful of things you now know well. Before you buy, it helps to run through a quick mental checklist.
Start with how your puppy actually walks right now. Are they a puller, a nervous shuffler, or somewhere in between? That tells you a lot about clip position. A front-clip harness works well for puppies who charge ahead, gently steering them back towards you rather than letting momentum build. A back-clip suits calmer walkers who are already getting the hang of loose-lead walking.
Then think about your puppy’s patience levels. If they wriggle dramatically the moment something approaches their head, a step-in harness will make your morning routine far less of a battle.
From there, it is all about fit. Measure before you buy, check the sizing guide for your specific harness, and aim for that two-finger gap all the way around. A well-fitted harness is one your puppy barely notices, and that is exactly the goal.
The best puppy harness is not the most expensive one or the one with the longest list of features. It is the one your puppy wears happily, that you can get on quickly, and that makes every walk feel safe and relaxed for both of you. Browse the Lords & Labradors puppy harness range to find the right match for your pup’s size, breed, and walking stage.
Knowing how long puppies can walk is one of those questions that sounds simple until you are actually standing at the front door with an excitable eight-week-old and no idea how far to go. The answer depends on age, breed, size, and how well you learn to read your puppy’s cues along the way. This guide breaks it all down, from a handy age-by-age walking chart to practical tips for building up distance safely as your puppy grows.
How long can puppies walk? A simple guide for new puppy parents
One of the first things new puppy parents want to know is how long their puppy should be walking each day. It feels like it should have a simple answer. But watch a ten-week-old Labrador tear around the garden and you might assume he could handle anything — when in reality, how long puppies can walk safely has very little to do with how much energy they seem to have.
Age matters most, but breed, size, and overall fitness all shape the picture too. A four-month-old Cavalier King Charles Spaniel has very different needs to a four-month-old Golden Retriever, even if both are equally determined to sniff every blade of grass along the way.
The most widely used starting point is the five-minutes-per-month rule: five minutes of walking per month of age, up to twice a day. A three-month-old puppy, then, would walk for around 15 minutes at a time. It is not a rigid law, but it exists for good reason. Puppies have soft, still-developing growth plates in their bones, and too much repetitive exercise before those plates close can cause real, lasting joint damage. A puppy who seems full of energy is not necessarily a puppy whose body is ready for long walks.
This is especially worth keeping in mind in those early weeks, when everything is new and you are still finding your rhythm together. If you are just bringing your puppy home for the first time, walks are only one small part of what lies ahead — and there is absolutely no rush to do too much, too soon.
The five-minutes-per-month rule, plus a handy age-based walking guide
The five-minutes-per-month rule is one of the most widely shared pieces of puppy advice, and honestly, it’s earned its reputation. It gives you a simple, sensible starting point for figuring out how long puppies can walk at each stage of development. The idea is beautifully straightforward: allow five minutes of walking per month of age, up to twice a day. A three-month-old puppy gets around 15 minutes per session; by five months, you’re looking at closer to 25.
Puppy Age
Max Walk Duration (Per Session)
Notes
8 weeks
5 minutes
Short sniff-and-explore outings only. Very gentle to start.
3 months
15 minutes
Two short walks daily is plenty. Prioritise new sights and smells over distance.
4 months
20 minutes
Puppy walking distance starts to increase slowly. Watch for signs of tiring.
5 months
25 minutes
Confidence usually grows here. Keep surfaces soft where possible.
6 months
30 minutes
Still very much a puppy, whatever their size might suggest.
9 months
45 minutes
Larger breeds especially need restraint. Growth plates are still developing.
12 months
45–60 minutes
Smaller breeds may be ready for longer walks. Always assess individually.
Good to Know: This formula is a guide, not gospel. Breed size plays a big role. Giant breeds like Great Danes may actually need less than the formula suggests, because their growth plates take longer to close. And every puppy is different — some flag earlier than you’d expect, while others seem to have boundless energy regardless. Let your individual pup lead the way.
When puppies can go for long walks really depends on breed and development, but most are ready for more substantial exercise somewhere between 12 and 18 months. Worth noting too: conditions like cold weather can cut any walk short, whatever the age. Our guide to walking your dog in cold weather is worth bookmarking before the temperature drops.
No formula replaces actually watching your puppy. If they’re lagging behind, flopping down mid-pavement, or suddenly very interested in stopping — that’s your cue to turn for home.
Why some puppies need less — or more — walking than others
The five-minute rule gives you a brilliant starting point, but every puppy is different. Breed, body shape, and a handful of other factors all influence how long your puppy can safely walk — so it’s worth looking beyond age alone before you lace up your trainers.
Breed size and growth rate: Larger breeds like Labradors and Golden Retrievers grow faster and carry more weight through their joints, making them more vulnerable to overexertion than smaller breeds at the same age.
Flat-faced breeds: Bulldogs, Pugs, and French Bulldogs overheat and tire more quickly due to restricted airways, so their walks often need to be shorter and slower.
Short-legged breeds: Dachshunds and Basset Hounds have a different skeletal structure that puts extra pressure on their spines and limbs, especially on uneven ground.
Weather and heat: Puppies struggle to regulate their temperature, so on warmer days it’s worth keeping walks shorter and heading out earlier in the morning before the heat builds.
Terrain: Rough, hilly, or slippery surfaces demand far more effort than a flat pavement stroll, even if the distance looks the same on paper.
General health: Any illness, recent vaccination, or growth-related condition can change what your puppy can comfortably handle on a given day.
One thing that catches a lot of new puppy parents off guard: a puppy who seems full of energy isn’t necessarily a puppy whose body is ready for more. Growth plates — the soft areas of developing bone — remain vulnerable to stress injury well into adolescence, long after your puppy looks completely tireless. Bouncy behaviour isn’t a green light to go further.
Getting this balance right early really does pay off. Tailoring walks to your individual puppy’s needs protects their joints through the most critical window of development, and building a thoughtful routine now sets them up for a happy, active adult life. That investment in regular exercise only becomes more rewarding as they grow.
How to build up your puppy’s walks without overdoing it
Building up walks gradually is one of the kindest things you can do for a growing puppy. It takes a little patience, but the principle is simple: start small, add time slowly, and let your puppy’s body set the pace. Their joints and growth plates are still developing, and pushing too far too soon can cause real, lasting harm.
Start short and stay consistent. Begin with just 5 to 10 minutes per outing, even if your puppy looks ready to run a marathon.
Increase time gradually. Add a few minutes each week rather than making big jumps. Puppy exercise by age should always feel comfortable and well within their limits.
Build in rest breaks. Let your puppy sniff, sit, or simply take a breather. That is not wasted time — it is part of the walk.
Mix things up. A short training stop, a good sniff of the hedgerow, or a gentle play moment all count toward mental and physical enrichment. How much exercise a puppy needs goes well beyond steps.
Choose soft ground where you can. Grass and earth are much kinder on young joints than pavement, particularly for bigger breeds.
Signs your puppy has had enough
Lagging behind or pulling toward home
Sitting or lying down mid-walk
Heavy or laboured panting
Limping or favouring a leg
Reluctance to move forward
How far puppies can walk matters far less than how well they recover afterwards. Quality always beats distance. Long walks will come — you will know your puppy is ready when they bounce home looking like they could do it all again. If you have just welcomed a new puppy and want to get the basics right from the start, our bringing a new puppy home guide is a great place to begin.
Off-lead or on-lead: what’s best for puppy walks right now?
For young puppies, on-lead walking is almost always the safer choice — and not just for the obvious traffic reasons. Walking on the lead teaches your puppy to move calmly beside you, builds focus, and helps them take in the big, noisy world without getting completely overwhelmed. It also keeps distance in check. A puppy charging after every smell, stranger, or squirrel is covering far more ground than it looks, which can quietly tip into too much exercise for joints that are still developing.
That said, off-lead time absolutely has its place. Secure, enclosed spaces where your puppy can sniff freely and potter about at their own pace offer something a structured walk simply can’t — unstructured exploration that’s genuinely tiring in the best way. It’s mentally stimulating, physically gentle, and great for confidence. The catch is recall. A puppy who doesn’t come back reliably yet is better off on a long line than given full freedom in open spaces. Get that foundation solid first, then gradually extend the trust.
Whatever setup works for you right now, good gear makes the whole thing easier. A well-fitted harness spreads pressure across the chest rather than the neck, which matters a lot when your puppy is still figuring out how to walk on a lead without bouncing off it. Paired with a quality lead — like the Lords & Labradors Herdwick Dog Lead — even a short walk feels calm and in control. The right kit really does take the friction out of those early walks, for both of you.
Waking up to a puppy crying in their crate at night is one of those experiences that tests even the most prepared new dog parent, but it almost always has a perfectly simple explanation. In this guide, you will find out what to do if puppy cries in crate at night, from quick bedtime checks and calming routines through to knowing when the crying might be worth a closer look. A few nights of broken sleep does not mean you are doing it wrong, and with the right approach, things tend to improve faster than you might expect.
Why your puppy cries in the crate at night — and why it’s usually normal
If your puppy is crying in their crate at night, the first thing to know is this: you haven’t done anything wrong, and neither has your puppy.
Nighttime crying is one of the most common experiences for new puppy parents, and it almost always means your puppy is trying to tell you something — not that they’re being difficult. Think about it from their perspective. Just days ago, they were curled up with their mum and littermates, surrounded by warmth and familiar smells, never once spending a night alone. Now they’re in a new home, a new crate, a new room, with none of those comforts to anchor them. A little protest at bedtime makes complete sense.
There are a handful of reasons why puppies cry in the crate at night, and understanding them makes it much easier to respond with confidence rather than panic. The most common ones are:
They miss their littermates. Sleeping in a warm, wriggly pile is all they’ve ever known. That kind of closeness doesn’t disappear overnight, and the adjustment takes time.
They need the toilet. Young puppies genuinely can’t hold their bladder through the night. A cry at 2am is usually a real signal, not a bid for attention.
They’re cold or uncomfortable. A crate that feels too bare or exposed won’t feel like a safe haven — it’ll just feel lonely.
They’re overwhelmed. The first week in a new home is a lot for a small dog to process. By the time bedtime rolls around, many puppies are emotionally wrung out and finding it hard to wind down.
Once you understand what the crying is actually communicating, you can respond in a way that helps rather than guesses. If you’re still putting the building blocks of your puppy’s sleep setup together, our guide to creating the perfect puppy sleep routine is well worth a read before the lights go out.
First things to check before you settle in for the night
Before you rethink your whole approach to crate training, it’s worth pausing to check the basics. A surprising number of puppies crying in the crate at night are simply reacting to something small and fixable — things that are easy to miss when you’re exhausted and just want everyone to sleep. Running through this short checklist first can save you a lot of unnecessary stress.
Last toilet trip of the night. Take your puppy outside for a toilet break right before they go into the crate, even if they went out an hour ago. A full bladder won’t let them settle, and the discomfort will quickly turn into crying.
Crate size. The crate should feel snug and safe, not vast and exposed. Your puppy needs just enough room to stand up, turn around, and lie down comfortably. Too much space can actually make them feel less secure, not more.
Room temperature. Puppies feel the cold quickly, especially once the house cools down overnight. Make sure the crate is away from draughts, and tuck in a soft, washable blanket for warmth — just avoid anything that could cause overheating.
Enough wind-down time before bed. Putting a puppy straight into the crate after a play session is a bit like trying to put a toddler to bed mid-bounce. Aim for 20 to 30 minutes of calm before lights out so their energy has genuinely settled.
Is your puppy actually tired? A puppy who hasn’t had enough activity or gentle mental stimulation during the day will find it hard to switch off at night. Short, age-appropriate play sessions in the evening make a real difference. If you’re still in those early days of settling in, the advice on bringing a new puppy home is a great place to start.
More often than not, working through this list resolves things before you need to make any bigger changes. It’s always the right place to begin.
How to build a bedtime routine that helps your puppy settle
Consistency is one of the most powerful tools you have when it comes to puppy crying in the crate at night. Puppies feel safer when they can predict what’s coming next, and a calm, repeatable bedtime sequence tells their brain it’s time to switch off. Do it the same way every night and you’ll likely notice the difference sooner than you’d expect.
Final toilet break 45 to 60 minutes before crating. Take your puppy outside for a proper sniff around and a chance to go. A puppy with a full bladder won’t settle, no matter how cosy the crate is.
Wind down activity levels. Put the squeaky toys away at least 30 minutes before bed and switch to something calmer — a gentle chew, or a quiet cuddle on the sofa. An overtired but overstimulated puppy is a recipe for a difficult night.
Set up the crate with soft, inviting bedding. A plush blanket or well-padded crate mat makes a real difference. If it’s your puppy’s first night, tuck in a worn item of your clothing so your scent is there with them. Some owners also place a ticking clock nearby, which can mimic a mother’s heartbeat.
Cover the crate. Draping a breathable cover over three sides creates a den-like feel that genuinely helps puppies settle. It cuts out visual distractions and signals that the crate is for sleeping, not watching the room.
One last quick toilet trip right before crating. Even a two-minute garden visit is worth it to reduce the chances of a 2am wake-up.
Use a calm, consistent verbal cue. Something simple — “bedtime” or “in your bed” — repeated every night helps your puppy start connecting the word with winding down.
Lights out, minimal fuss. Keep your goodnight brief and warm, then leave. Lingering makes it harder for both of you.
Quick tip: A crate cover is one of the simplest things you can do when crate training a puppy at night. Reducing what your puppy can see lowers stimulation and makes the space feel genuinely enclosed and safe, much more den than cage.
Repeat this every night and you give your puppy something they genuinely need: predictability. Over time, that familiar sequence helps shorten the adjustment period, reduces how long your puppy cries in the crate, and builds quiet confidence in both of you.
What to do if your puppy cries after you’ve put them to bed
Knowing what to do if your puppy cries in the crate at night is one of those things nobody quite prepares you for. You’re tired, your heart is a little broken, and you just want everyone to sleep. The good news is that you don’t have to choose between leaving them to it completely and rushing straight in every time. A calm, considered response is almost always the right middle ground.
There are two situations genuinely worth getting up for. The first is a toilet trip — especially in the early weeks, when young puppies simply can’t hold their bladder through the night. If your puppy is under 12 weeks, or hasn’t been out recently, a quiet trip outside makes sense. The second is brief reassurance for a puppy still adjusting to sleeping alone. A soft word through the crate, or just a moment nearby, can help settle them without building a bigger habit around it.
The mistake worth avoiding: going to them every single time they cry.
Puppies are quick learners. If calling out reliably brings you back into the room, they’ll keep doing it — not out of stubbornness, but because it works. Even well-meaning responses can accidentally teach them that crying is the way to get your attention. You end up reinforcing the very thing you’re trying to stop.
When your puppy cries, try these calm responses instead:
Wait a minute or two before going in, to see if they settle on their own
If you do go to them, keep your voice low and calm with no excitement or fuss
Any toilet trips should be short, boring, and dimly lit
Avoid eye contact, play, or picking them up unless it’s truly necessary
Return them to the crate straightaway and leave without lingering
Most puppies start to find their rhythm within a few nights once they learn that bedtime is quiet, consistent, and uneventful. The calmer and more predictable you can be, the sooner they’ll get there. And if you want to set the foundations before that first night even arrives, these tips for bringing a new puppy home are a brilliant place to start.
When crying points to something more than a rough first night
Most puppies cry in the crate at night simply because everything feels new and a little overwhelming. That’s completely normal. But part of knowing what to do if your puppy cries in the crate at night is recognising when something beyond first-night nerves might be going on.
These are the signs worth paying closer attention to:
Crying that gets louder or more frantic after 30 to 60 minutes, rather than gradually fading
Repeated accidents in the crate despite a toilet break right before bed
Frantic pacing, spinning, or determined attempts to scratch or chew their way out
Refusing food, water, or treats anywhere near the crate
A sudden return to distressed crying in a puppy who had previously been settling well
Normal whining vs. genuine distress: what’s the difference?
Normal whining tends to be intermittent, softens over several nights, and doesn’t come with any physical symptoms. Genuine distress looks different. The crying escalates instead of easing, shows little improvement after a week, and may come alongside panting, drooling, or repetitive self-soothing behaviours like circling or excessive licking.
If your puppy is showing physical symptoms alongside the crying — vomiting, diarrhoea, lethargy, or anything that suggests pain or illness — contact your vet. Don’t wait to see if it passes. If the crate itself seems to be the source of real fear rather than just mild protest, a qualified trainer or behaviourist can help you work through it in a way that feels manageable.
It’s also worth thinking about timing. Introducing the crate too young or too abruptly can make the whole process harder than it needs to be. If you’re unsure whether your puppy is ready, our guide on how old you should be before crate training a puppy is a helpful starting point.
Catching these signs early makes a real difference — for your puppy, and for your sleep.
A calmer night starts with consistency, comfort, and a bit of patience
Crate training takes time, and the first few nights are almost always the hardest. But stick with a consistent bedtime routine, respond calmly when your puppy cries, and make their space feel genuinely cosy — and things really do get easier. Most puppies settle into a rhythm faster than their bleary-eyed owners expect.
The small things matter more than you might think. A right-sized crate, placed somewhere warm and familiar, with soft bedding your puppy actually wants to curl into, sets the tone for the whole night. Something like the Cosy Calming Puppy Crate Bed can genuinely help here — giving your puppy a snug, den-like space to settle into rather than somewhere bare and unfamiliar.
Your response matters just as much as the setup. Keeping bedtime predictable, staying consistent, and not rushing in at every whimper all help your puppy learn that the crate is safe and that you are close by. It takes repetition, but it builds real confidence over time.
If you have been lying awake wondering what to do if your puppy cries in the crate at night, here is the honest answer: check the basics, build a routine, and give it time. Progress is rarely dramatic, but it is steady. One night you will realise the crying has stopped, the whimpering has faded, and everyone in the house is finally getting some sleep. Those mornings feel very well earned.
Planning air travel with your large furry companion feels overwhelming at first, but understanding how big dogs travel on planes becomes much simpler once you know the essentials. From selecting the perfect travel crate and navigating airline policies to preparing your gentle giant for the journey ahead, this guide walks you through every step of making air travel a comfortable experience for both you and your beloved pet. With the right preparation and knowledge, you’ll transform what seems like a daunting process into a manageable adventure that gets your four-legged family member safely to your destination.
Understanding Airline Policies for Big Dogs
When you’re planning to fly with your gentle giant, understanding how big dogs travel on planes starts with accepting that most large breeds simply won’t squeeze into the cabin with you. While airlines typically welcome pets under 20 pounds in carriers beneath the seat, your Labrador, German Shepherd, or Golden Retriever will need to journey in the aircraft’s pressurized cargo hold.
Every airline writes its own rulebook for large dog travel, so dig into specific policies well before you book anything. British Airways accepts dogs up to 75kg including their crate, while Virgin Atlantic sets slightly different limits. Most major carriers require advance reservations for pet cargo—sometimes weeks ahead during peak travel times when everyone seems to be flying with their four-legged family members.
Here’s some reassuring news: cargo holds on passenger planes are pressurized and climate-controlled, just like where you’ll be sitting. Your dog won’t endure a cold, dark journey below. That said, airlines often impose seasonal restrictions during extreme weather to protect pets from temperature swings during ground handling—those tarmac waits can be brutal in July or January.
Size rules extend beyond simple weight calculations. Airlines measure your dog and travel crate together, making a well-fitted carrier crucial for meeting requirements. While some carriers restrict certain breeds due to breathing issues, this typically affects flat-faced dogs like bulldogs rather than most large breeds.
International travel brings extra layers of paperwork and planning. EU destinations require pet passports, while countries like Australia mandate lengthy quarantine periods. Contact your destination’s agricultural department months ahead—these requirements aren’t suggestions, and last-minute scrambling rarely ends well.
Here’s something learned through experience: always book directly with airlines when traveling with pets. Third-party booking sites often miss crucial details about pet reservations, leaving you stranded at check-in. Direct booking also lets you communicate special needs and ensures your dog’s spot is properly secured, which matters since many airlines limit pets per flight.
Budget carriers frequently don’t accept pets at all, while premium airlines usually offer more thoughtful pet services. When comparing options, consider the airline’s animal transport reputation alongside their pet fees—your dog’s comfort and safety are worth the extra research.
Choosing the Right Travel Crate for Your Big Dog
Your crate choice can make or break your big dog’s flying experience. Airlines will turn dogs away at check-in if their crate doesn’t meet strict safety standards, and even if you clear that hurdle, the wrong crate puts your furry friend at risk during the flight. Getting this decision right protects both your travel plans and your dog’s wellbeing.
When selecting a travel crate for your large dog, focus on these essential features:
IATA approval certification - Look for the official International Air Transport Association stamp, which ensures the crate meets global airline standards
Adequate ventilation on multiple sides - Your dog needs proper airflow during the journey, with ventilation openings covering at least 16% of the total wall space
Heavy-duty latching system - Secure metal latches and bolts prevent accidental opening during baggage handling
Proper sizing with room to move - Your dog should be able to stand, turn around, and lie down comfortably without the crate being oversized
Reinforced construction materials - Sturdy plastic or fiberglass construction that can withstand the rigors of cargo handling
Leak-proof bottom design - Prevents accidents from affecting other cargo and keeps your dog comfortable
Here’s what many pet parents don’t realize: your dog will likely spend hours in this crate, from check-in through baggage claim. That’s why comfort features matter just as much as safety requirements. Quality travel crates designed specifically for large breeds address both needs seamlessly. The Lords & Labradors Silver Deluxe Dog Crate collection exemplifies this balance, offering sizes up to XXL with airline-compliant features that give pet parents confidence when preparing big dogs for air travel.
Think of the right crate as more than just meeting airline requirements. It becomes your dog’s safe haven during the stressful airport experience, giving them a familiar, secure space when everything else feels overwhelming.
Preparing Your Big Dog for Air Travel
Getting your large dog ready for air travel takes patience and planning, but the effort pays off when you see your furry friend handle the journey with confidence. The key to understanding how big dogs travel on planes successfully lies in thorough preparation—it’s what transforms a potentially stressful ordeal into a manageable adventure for everyone involved.
Essential Preparation Steps:
Start crate training 4-6 weeks early - Begin with short periods in the travel crate during meal times, gradually increasing duration until your dog sees it as their cozy den, not a prison. My friend Sarah’s Golden Retriever initially whined for twenty minutes straight, but by week three, he was voluntarily napping in there.
Schedule a pre-travel vet visit - Most airlines require health certificates issued within 10 days of travel. Your vet can also recommend anxiety management strategies tailored to your dog’s personality—some dogs benefit from compression wraps, while others need prescription calming aids.
Practice airport sounds and scenarios - Play recordings of plane engines, airport announcements, and bustling crowds at home while your dog relaxes in their crate. YouTube has excellent “airport ambiance” videos that work perfectly for this desensitization training.
Introduce familiar comfort items - Pack a well-loved blanket or your old t-shirt in the crate. These familiar scents provide reassurance when everything else feels foreign and overwhelming.
Adjust feeding schedule gradually - Start feeding your dog 4-6 hours before departure time in the weeks leading up to travel. This prevents motion sickness and gives their digestive system time to adapt to the new routine.
Consider calming supplements - If your dog tends toward anxiety, discuss natural calming aids with your vet well before travel day. Testing effectiveness takes time—you don’t want to discover on departure morning that melatonin makes your pup drowsy instead of calm.
Practice car trips to simulate travel day - Load the crate in your car for progressively longer drives, mimicking the transport experience to the airport.
Planning Timeline: Start preparation 4-6 weeks before your departure date. This timeline gives your dog space to adjust gradually and lets you identify any issues early enough to address them properly.
Every dog adapts differently to new experiences, so watch for your pet’s individual responses and adjust accordingly. Those weeks you invest in preparing your large dog for air travel create the foundation for a calmer, more confident traveler—and a much less anxious pet parent.
Packing Essentials for Your Dog’s Flight
Understanding how big dogs travel on planes successfully starts with smart packing—the difference between a nerve-wracking journey and one where you can breathe easy knowing your pup has everything they need. Since your large dog will spend the flight in cargo, every item you pack becomes their lifeline to comfort and safety during those hours apart from you.
What to pack for your big dog’s flight:
Familiar bedding or blanket - That old throw from the couch that smells like home? Perfect. It’ll provide emotional comfort when everything else feels unfamiliar
Spill-proof water and food dishes - Attach these securely to the crate door so ground crew can refill them without opening the crate
24-hour food supply - Pack extra kibble in a clearly labeled bag attached to the crate—flight delays happen, and you want your dog fed on schedule
Favorite comfort toy - Choose something sturdy that won’t fall apart if they get anxious and give it extra attention
Complete health documentation - Vaccination records, health certificates, and your vet’s contact info, all in a waterproof pouch
Emergency contact card - Your phone number, destination details, and any special care instructions clearly written and attached to the crate
Absorbent bedding material - Layer puppy training pads or newspaper under their blanket for accidents during the long journey
Backup leash and collar with ID tags - Pack extras with current contact details—things can get misplaced during baggage handling
Important: Airlines require water and food dishes to be accessible from outside the crate without opening the door. This isn’t just bureaucracy—it’s how ground crew can care for your dog during layovers.
While products like our Ultimate Weekaway Bag work beautifully for small dogs traveling in-cabin, big dog parents need to pack everything directly into or onto the travel crate itself. Think of the crate as your dog’s temporary home—stock it like you would for an overnight stay.
Navigating the Airport with Your Big Dog
Airport procedures for large dogs require more time and coordination than flying with smaller pets, but with the right preparation, you can navigate the process smoothly. Unlike small dogs that travel in the cabin, your big dog will go through a specialized check-in process that involves multiple departments and additional paperwork.
Here’s the step-by-step airport process for flying with large dogs:
Arrive at least 3-4 hours early for domestic flights and 4-5 hours for international travel to allow extra time for paperwork and crate inspection
Complete check-in at the special services counter where airline staff will review your dog’s health certificates, verify crate requirements, and process cargo documentation
Proceed to the designated pet drop-off area where your dog’s crate will be inspected and your pup will be transferred to the cargo handling team
Complete your own security screening and head to your gate, knowing your dog is in professional hands
Board your flight with the peace of mind that your dog was loaded safely onto the same aircraft
Keep your large dog calm during airport hustle with these tried-and-true strategies:
Pack familiar items like their favorite blanket or toy in an organized travel bag to provide comfort during the check-in process
Take frequent potty breaks in designated pet relief areas before the final crate time
Speak in soothing tones and maintain your usual calm energy—our dogs are emotional mirrors, picking up on every bit of our stress
Bring high-value treats to reward good behavior during inspections and handling
Consider using calming supplements recommended by your vet if your dog is particularly anxious
I’ll be honest: patience is your secret weapon here. Airport staff handling large dogs know their stuff, but procedures naturally take longer than standard check-ins. When you build in that extra time buffer, you remove the pressure that makes both you and your dog tense. Your Golden Retriever doesn’t need to sense your panic about missing the flight on top of everything else they’re processing in that busy, unfamiliar environment.
Post-Flight Care for Your Big Dog
After touching down, your big dog will likely feel a mix of relief and disorientation. Just like we need a moment to collect ourselves after a long flight, your furry companion deserves some gentle care to help them transition back to solid ground.
Start with hydration. Offer small amounts of water every few minutes rather than letting them gulp down a whole bowl at once. Their stomach might be a bit unsettled from the journey, and you want to avoid any digestive upset on top of travel stress.
Once you’ve collected your luggage and found a quiet spot, give your dog a chance to stretch and relieve themselves. Airport pet relief areas are perfect for this, but if you’re already outside, any grassy area will do. Don’t be surprised if they seem a bit wobbly or clingy at first. My friend’s Golden Retriever, Max, practically glued himself to her side for the first hour after his cross-country flight.
Keep a close eye on their behavior over the next 24 hours. Some dogs bounce back immediately, while others might seem quieter than usual or have slightly different eating patterns. This is completely normal. Watch for excessive panting, lethargy that lasts more than a day, or any signs of illness that seem unusual for your dog.
Consider keeping their routine gentle for the first day or two. Short walks instead of long hikes, familiar foods, and plenty of rest will help them readjust. Remember, just like bringing home a new family member requires patience and care, helping your big dog recover from air travel is all about taking things slowly and following their lead.
Elevated Dog Bed vs Memory Foam: Which One is Better?
Choosing the right bed for your furry friend shouldn’t feel like a puzzle, but when you’re comparing elevated dog bed vs memory foam options, it’s easy to get overwhelmed by all the promises of better sleep and comfort. Your pup’s age, size, sleeping style, and temperature preferences all play a role in determining which bed will become their new favorite spot. We’ll walk you through the key differences in joint support, temperature control, and maintenance so you can make a confident choice that fits both your dog’s needs and your lifestyle.
Understanding Elevated Dog Beds and Memory Foam: What’s the Difference?
When you’re standing in the pet store aisle or scrolling through countless options online, the choice between elevated dog bed vs memory foam can feel overwhelming. Both types promise better sleep for your furry friend, but they work in completely different ways to achieve that goal.
Elevated dog beds feature a raised platform design that lifts your pup off the ground using a sturdy frame and breathable fabric or mesh surface. Think of it like a camping cot for dogs. These beds promote airflow underneath, which naturally helps regulate your dog’s body temperature. You’ll often see them recommended for outdoor use or hot climates because they prevent your dog from absorbing heat from warm floors.
Memory foam beds take a different approach, focusing on contouring support. They use dense foam that responds to your dog’s weight and body heat, creating a customized sleeping surface that cradles pressure points. If you’ve ever watched an older dog struggle to get comfortable on a thin bed, you’ll appreciate how memory foam can make a real difference for joint comfort.
The key distinction lies in their primary strengths: elevated beds excel at temperature control and cleanliness, while memory foam beds prioritize joint support and pressure relief. Many pet parents find themselves choosing based on their dog’s life stage. Elevated beds tend to be popular for active younger dogs who run hot, while memory foam often becomes the go-to choice for senior pups or dogs dealing with arthritis.
Understanding these fundamental differences helps you match your dog’s specific needs with the right bed type. If you’re curious about exploring the full spectrum of dog bed options and materials, it’s worth understanding how different styles work before diving deeper into this comparison.
Joint Support: Which Bed Offers Better Comfort for Your Pup?
When your furry friend starts taking a little longer to get up from their nap or hesitates when jumping onto the sofa, joint comfort becomes a priority. Whether you choose an elevated dog bed or memory foam, each offers unique benefits for joint support. Knowing these differences helps you make the best choice for your pup’s needs.
Elevated Dog Beds
Memory Foam Beds
Provides a firm, stable surface
Contours to the body, reducing joint pressure
Encourages better spinal alignment
Distributes weight evenly for comfort
Reduces pressure points by positioning joints well
Cradles arthritic joints, supporting natural body curves
Suited for dogs favoring firm surfaces
Ideal for those needing cushioning on sensitive spots
Retains shape and support over time
Adapts to body heat and weight for custom comfort
Several factors help decide between elevated dog beds and memory foam:
Sleeping Style: Dogs who love sleeping on their back might appreciate memory foam’s snug fit, while those who stretch out on their side could find an elevated bed’s firm support more beneficial.
Joint Issues: If your pup struggles with advanced arthritis, memory foam can offer the pressure relief they need. Dogs with less severe joint conditions might do well with the sturdy support of an elevated bed.
Size and Weight: A larger breed like a Labrador might compress memory foam too much, leading it to lose effectiveness over time. Elevated beds maintain their supportive structure regardless of your dog’s weight.
Temperature Preferences: If your dog tends to feel warm while sleeping, elevated beds can provide better airflow. On the other hand, memory foam retains warmth, which is helpful for dogs who sleep cold.
For pups with significant joint pain, memory foam often provides the comforting touch they need. Meanwhile, elevated beds are excellent for offering consistent, firm support, especially for larger breeds prone to hip dysplasia. If joint support is just one part of the decision, check out our dog bed buying guide for a complete overview of factors like size and materials to help find the perfect match for your four-legged family member.
Temperature Regulation: Keeping Your Dog Cool or Cozy
When your Golden Retriever pants all night in summer or your senior Labrador seeks out the warmest spot in winter, you realize how crucial temperature regulation is for your dog’s comfort and quality sleep. The elevated dog bed vs memory foam choice often comes down to whether your pup runs hot or cold, and understanding how each bed type manages temperature can help you make the right decision.
Feature
Elevated Dog Beds
Memory Foam Beds
Airflow
Excellent - mesh or fabric allows air circulation from all sides
Limited - dense foam can restrict air movement
Heat Retention
Minimal - elevated design prevents heat buildup
High - foam contours to body and retains warmth
Seasonal Suitability
Perfect for spring and summer months
Ideal for fall and winter comfort
Best Climate
Hot, humid environments or homes without air conditioning
Cool climates or well-climate-controlled homes
Your dog’s sleeping habits reveal everything about their temperature needs. If they sprawl across cool tile floors or seek out the bathroom’s ceramic surface, they’re telling you they run warm. But if you find them burrowed under blankets or pressed against heating vents, they crave cozy warmth.
Watch for these temperature clues throughout the day:
Excessive panting during sleep or restlessness on warmer nights
Coat thickness and breed tendencies (Huskies versus Greyhounds have very different needs)
Seasonal shifts in where they choose to nap
How they react to different surfaces around your home
Large dogs and thick-coated breeds typically thrive with elevated beds’ natural cooling airflow. Smaller pups, seniors, or thin-coated breeds often gravitate toward memory foam’s heat-retaining embrace. If your dog seems caught between needing support and temperature control, box bed options with breathable yet supportive designs can offer that sweet spot for year-round comfort.
Remember, the best bed works with your dog’s natural preferences, not against them.
Hygiene and Maintenance: Which Bed is Easier to Keep Clean?
When you’re weighing elevated dog bed vs memory foam options, cleaning convenience often becomes the deciding factor, especially if you’re dealing with a drooling Saint Bernard or a muddy Golden Retriever who loves puddle jumping. Dog beds take a real beating, and choosing one that fits your cleaning style can save you countless hours of scrubbing.
Elevated Dog Beds:
Mesh surfaces let dirt and debris fall straight through instead of getting trapped
Quick-drying materials mean you’re back in business faster after washing
Most frames can be hosed down or wiped clean in minutes
Excellent air circulation prevents that musty smell from taking hold
Replacement covers cost much less than buying new memory foam inserts
Memory Foam Beds:
Removable, washable covers make surface cleaning pretty straightforward
Quality options include waterproof liners that protect the foam core
Thick cushioning can trap odors if accidents seep through to the foam
Foam cores need longer drying times and careful handling to prevent mold
Premium models often have multiple cover layers for easier maintenance
Your lifestyle really matters here. If you’re constantly heading outdoors with an active pup, elevated beds tend to be more forgiving. But if you’re caring for a senior dog who has occasional accidents indoors, a memory foam bed with solid waterproof protection might work better for your situation.
Busy pet parents usually find elevated beds the clear winner for hassle-free maintenance. However, if your dog needs that extra comfort and joint support, the additional cleaning effort of memory foam beds often feels worth it. Think honestly about how often you want to tackle deep cleaning when making your choice—proper cleaning techniques can help either bed type last years longer.
Breed Suitability: Finding the Perfect Fit for Your Furry Friend
When it comes to deciding between an elevated dog bed vs memory foam for your furry friend, consider how your dog’s breed characteristics influence their comfort. Different breeds have varying sizes, weights, and sleeping habits, which can impact which bed type they’d prefer.
Small breeds, like Chihuahuas, Yorkies, and Pugs, often gravitate toward memory foam beds. These beds provide a snug, nest-like support that keeps them warm and secure. On the other hand, large breeds such as Great Danes, German Shepherds, and Labs might benefit from both bed types. While elevated beds offer joint relief and make it easier for big dogs to get on or off, memory foam beds deliver essential support for their heavier frames. Your choice could hinge on joint health or climate—cooling dog beds might make a significant difference in warmer environments.
For senior dogs, regardless of breed, memory foam beds frequently prove more beneficial. Their aging muscles and joints appreciate the contoured support these beds provide. Meanwhile, active breeds like Border Collies and Retrievers could thrive with elevated beds, as the airflow helps prevent overheating after they’ve been romping around.
Puppies’ needs shift as they mature, so a single bed might not cut it. Consider the Grow with Me Puppy Bed, which adapts to their changing size and preferences over time, eliminating the need for multiple purchases.
Remember your dog’s quirks. If your Greyhound seeks the coolest spot in the house, they might enjoy an elevated bed for its breezy airflow. If your Cavalier King Charles Spaniel loves snuggling under blankets, then a plush memory foam bed might be their ideal sanctuary. Weighing considerations like weight, coat thickness, and age will guide you to the best choice for your four-legged family member.
Making the Right Choice: Which Bed is Best for Your Dog?
Choosing between an elevated dog bed vs memory foam really comes down to knowing your dog and understanding what makes them comfortable. If you’re caring for a senior pup dealing with arthritis or hip issues, memory foam delivers that gentle, pressure-relieving support their joints crave. But if your four-legged friend tends to overheat or you live in a muggy climate, the natural airflow of an elevated bed could transform their sleep quality.
Take a moment to observe your dog’s habits. Does your pup sprawl out like they’re trying to cool their belly when it’s warm? That’s a strong signal they’d love the ventilation an elevated bed provides. On the flip side, if they curl into a tight ball and seem stiff come morning, the contouring embrace of memory foam might help them wake up feeling more limber.
Your lifestyle matters too. Heavy shedders and the occasional accident-prone pup make elevated beds appealing since they’re generally simpler to keep clean. But dogs who love to dig, nest, and burrow often gravitate toward the cozy give of memory foam.
For those wanting the best of both worlds, seek out beds that marry supportive materials with smart airflow design. The Nest Dog Bed combines memory foam comfort with a removable, machine-washable cover that keeps maintenance stress-free.
Here’s the truth: the perfect bed is whichever one your dog actually chooses to use. Watch where they naturally migrate for naps. If they’re always seeking out cool kitchen tiles, elevated beds are calling their name. If they keep trying to steal your spot on the memory foam mattress, consider that their vote for cushioned comfort.
Bringing home a new baby when you have a bouncy, high-energy dog can feel overwhelming, but with the right approach, your hyperactive pup can become your little one's most devoted protector. Learning how to introduce a hyper dog to a baby takes patience and strategy, but the reward is watching a beautiful friendship bloom between your furry family member and your newest addition. From creating calm environments to reading stress signals and building routines that work for everyone, this guide will help you navigate those crucial first weeks with confidence.
Understanding Your Dog's Energy Levels
Before you learn how to introduce a hyper dog to a baby, you need to understand what's driving your pup's bouncy behavior. High-energy dogs aren't just "excited" – they're often responding to specific triggers like anticipation, lack of mental stimulation, or even anxiety.
Watch for telltale signs: constant pacing, jumping on furniture or people, excessive barking, or that classic "zoomies" behavior where they race around the house. My neighbor's Golden Retriever does this every evening at 6 PM sharp – it's like clockwork! Some dogs also mouth or nip when overstimulated, which becomes especially important to consider with a newborn in the house.
Several factors fuel this hyperactivity. Young dogs naturally have surplus energy that needs an outlet. Certain breeds, like Border Collies or Jack Russell Terriers, were bred for high-intensity work and require significant mental and physical exercise. Even older dogs can become hyper if they're not getting enough stimulation throughout the day.
The arrival of a baby amplifies these energy levels because your dog senses change. New smells, different routines, and altered attention patterns can trigger excitement or stress responses. A dog who usually gets two long walks might suddenly receive shorter, rushed outings, leaving them with pent-up energy right when you need them calmest.
Understanding your dog's specific energy patterns helps you plan better. Does your pup get most wound up in the morning or evening? Do they settle after a good play session, or do they need mental puzzles to truly tire out? Recognizing these patterns – and learning to read your dog's body language – gives you the foundation for successful preparation. Once you know what triggers your dog's hyperactivity, you can start addressing it before baby arrives.
Creating a Safe and Calm Environment
Setting up the right environment is crucial when introducing a hyper dog to a baby. Your lively pup needs clear boundaries and calming influences to manage their energy, while your little one deserves a secure space free from overstimulation. Think of this preparation phase as setting the stage for years of wonderful friendship between your furry and human family members.
Essential Safety Setup Steps:
- Use baby gates to create separate areas where your dog can see and smell the baby without direct access.
- Remove high-energy toys and anything that might trigger excitement during the initial meetings.
- Arrange a cozy retreat area where your dog can relax when feeling overwhelmed; this could be their favorite spot with a comfy bed or a properly configured crate that feels like a sanctuary.
- Place baby items at heights your dog cannot reach, especially during those first weeks of curiosity.
- Establish clear walking paths to safely move around while carrying your baby.
- Lay non-slip rugs in areas where your dog might get too excited and lose their footing.
Scent Familiarization Process:
Unleash the magic of your dog’s incredible sense of smell. Start by bringing home a baby blanket or onesie from the hospital before your baby arrives. Let your dog explore these new scents at their own pace, praising and rewarding calm sniffing with treats.
Introduce baby lotions, powders, and other products you'll use often, as many dogs find these sweet scents intriguing rather than alarming. In the weeks leading up to the big day, practice carrying a baby doll occasionally—while it might feel a bit silly, it helps your dog get accustomed to seeing you handle something cherished.
Reinforce the "gentle" command while your dog investigates baby-scented items. This teaches them that these new smells are cues for calm behavior rather than playtime excitement.
Having a designated calm space is crucial in this transition period. Your dog needs a spot to retreat when the baby’s cries reach those high notes or when guests visit to meet the new addition. A well-set-up crate or a quiet corner offers them a refuge, helping to avoid overstimulation that might lead to problematic behaviors.
These environmental preparations lay the groundwork your family needs for lasting harmony. When your hyper dog feels secure and understands the household boundaries, they’re more likely to approach their new sibling with curiosity and gentleness, creating a loving and joyful home for all.
Step-by-Step Introduction Process
Learning how to introduce a hyper dog to a baby requires patience, consistency, and a thoughtful approach that prioritizes safety while building positive associations. The key is taking things slowly and allowing your energetic pup to adjust gradually to this life-changing addition to your family.
Step 1: Start with scent introduction before baby arrives
Begin preparing your dog weeks before baby comes home by bringing hospital blankets, clothing, or anything that carries the baby's scent. Let your dog sniff these items calmly while rewarding relaxed behavior with treats and praise. Think of it as giving your pup a gentle heads-up about the new family member coming their way.
Step 2: Practice calm greetings with a doll
Here's where things get a bit theatrical, but trust the process. Use a baby doll to rehearse proper behavior around babies. Carry it around, make those soft cooing sounds, and reward your dog for calm, gentle responses. Your neighbors might think you've lost it, but this step is gold when preparing your dog for a new baby because it sets expectations without the unpredictability of a real infant.
Step 3: Create controlled distance for the first meeting
When you first bring baby home, have another family member hold your dog on a loose leash across the room. Allow your dog to see and smell the baby from a safe distance while you stay calm and positive. Your dog will pick up on your energy, so keep things relaxed. Watch their body language like a hawk for signs of excitement or stress.
Step 4: Reward calm behavior consistently
Every single time your dog displays gentle, relaxed behavior around the baby, immediately reward with treats, praise, or their favorite squeaky toy. This positive reinforcement is your secret weapon for managing hyperactive dogs with infants—you're essentially teaching them that baby equals good things happening.
Step 5: Gradually decrease distance over several days
Only when your dog remains calm at a distance should you slowly allow closer interactions. Move incrementally closer during each session, always maintaining control and watching for overstimulation. Think baby steps here—literally. Never rush this process, especially with high-energy breeds.
Step 6: Supervise all interactions closely
Even after successful introductions, never leave your hyperactive dog alone with the baby. Dog behavior around babies can shift unexpectedly, and constant supervision keeps everyone safe while allowing their relationship to bloom naturally.
Step 7: Maintain your dog's routine and exercise needs
A tired dog is a calmer dog—this golden rule becomes even more important now. Keep up those regular walks, play sessions, and training to help your pup burn excess energy before baby time.
Remember that introducing dogs to newborns is a marathon, not a sprint. Some dogs need weeks or even months to fully adjust, and that's completely normal. Stay patient, stick to your routine, and celebrate those small wins along the way.
Recognizing Signs of Stress and Anxiety
When you're figuring out how to introduce a hyper dog to a baby, keeping an eye on stress signals is truly crucial. Your dog's body language can reveal exactly how they're coping with this significant change, and identifying these signs early can help you adjust before anxiety turns into challenging behavior.
Look for these physical signs of stress:
Heavy panting, especially if the room isn't warm
Shaking or trembling without a clear reason
Unusual drooling in a dog that doesn't usually drool
Enlarged pupils or that distinct "whale eye" look (when you can see the whites of their eyes)
Stiff posture or tense muscles
Shedding more than what's typical for the season
Pacing or finding it hard to relax
Reduced appetite or turning down favorite treats
Pay attention to behavioral changes indicating anxiety:
Hiding away under furniture or avoiding favorite spots
Chewing on things or digging destructively
Out-of-the-blue barking or whining
Setbacks in house training
Being overly attached, trailing you everywhere
Uncharacteristic aggression during regular interactions
When you spot these signs, here's what you can do right away:
Comfortably move your dog from the area without making a scene
Guide them to a cozy, familiar space with their usual toys and bedding
Use soothing techniques like gentle massaging or calm breathing exercises nearby
Stick to your regular routine as much as possible to give them a sense of steadiness
Consider trying the calming strategies that work well during fireworks season, as their stress signals are similar
It's helpful to remember that some initial unease is perfectly normal when preparing your dog for a new baby. Their whole world is evolving! But, if stress signals continue for more than a couple of weeks, slowing down the introduction process might be a good move. Sometimes, patience is the best support you can offer to both your furry companion and your expanding family. If needed, don't hesitate to reach out to a professional trainer well-versed in dog behavior around babies for additional guidance.
Building a Routine for Harmony
Creating a predictable daily rhythm is your secret weapon in how to introduce a hyper dog to a baby. A structured routine doesn't just help manage your dog's abundant energy; it also sets clear expectations for when it's time to play and when it's time to relax. It's about creating a household schedule that works for everyone, whether they have two legs or four.
Try these friendly strategies to build a routine that ensures everyone stays happy:
Exercise before the baby's day begins: Take your hyper dog for a brisk walk or have a fun play session before your baby wakes up. This can help your dog be naturally calmer during morning feeds and diaper changes.
Align nap times: When it's naptime for your baby, encourage your dog to head to their quiet space with a puzzle toy or chew. It's a great way to teach both that rest time is for everyone.
Keep consistent meal times: Feed your dog at regular intervals, ideally when you're not busy with the baby, to avoid any competition for attention during feeding.
Prioritize focused time for your dog: Dedicate 15-20 minutes to engaging with your pup when your baby is content or sleeping, so your furry friend doesn't feel left out.
Introduce 'calm zones' during baby care: Train your dog to sit on their mat while you're feeding, changing, or soothing your baby, rewarding them for calm behavior.
End the day peacefully: Enjoy a soothing end-of-day routine with calming activities for both your baby and dog before bedtime.
Dogs flourish with a consistent routine. By reducing stress-related behaviors, you can create a sense of calm and predictability in your household. Just like creating sleep routines for puppies helps them thrive, coordinating your family's rest and activity times fosters a peaceful environment. This will nurture strong bonds between your dog and baby, paving the way for a harmonious household.
When to Seek Professional Help
Sometimes, despite your best efforts to introduce a hyper dog to a baby, you might need backup from a professional dog trainer or animal behaviorist. Here's the thing: reaching out for help doesn't mean you've dropped the ball as a pet parent. It's actually one of the smartest moves you can make for your family's wellbeing.
Watch for warning signs that suggest it's time to call in the pros. If your dog shows persistent stress around your baby that doesn't improve after a few weeks of consistent work, don't wait it out. Red flags include excessive panting when baby's around, destructive episodes triggered by crying, or any resource guarding behavior around baby gear. When your hyperactive pup simply cannot settle during feeding times or refuses to respect nap schedules despite your best routine efforts, a professional can offer strategies tailored specifically to your situation.
You'll definitely want expert guidance if your dog has any history of anxiety or reactivity, even if it's never involved children. A certified positive reinforcement trainer can assess what's actually happening in your home and create a realistic plan for channeling your dog's energy in baby-friendly ways.
Think of professional help as an investment in everyone's happiness, not a white flag. Just like learning how different pets can peacefully coexist sometimes requires expert insight, successfully blending high-energy dogs with newborns often benefits from professional guidance that sets your whole family up for long-term success.
At Lords & Labradors, we specialise in dog crate bedding and accessories. Our dog crate cover and bed sets are available in a stylish choice of fabrics and come in a variety of sizes. These sets create the ultimate comfort spot for your puppy or adult dog. Luxury dog crates...
Read more
At Lords & Labradors, we specialise in dog crate bedding and accessories. Our dog crate cover and bed sets are available in a stylish choice of fabrics and come in a variety of sizes. These sets create the ultimate comfort spot for your puppy or adult dog.
Luxury dog crates
All our deluxe dog crates are made from pet-safe metal and feature removable trays to make them practical and super easy to clean. With sizes ranging from small to XXL, there’s a dog crate set to suit all breeds. Crates are essential when it comes to house training your new puppy. We always suggest buying a larger size dog crate and bed for your puppy so they can grow into it, saving you from having to purchase a new crate when they’re older.
Luxury crate bedding
Our luxury bedding is hand-crafted and designed to the highest quality, appearing both practical and stylish. Bumpers sit around the edge of the crate cushion to provide a super-soft wall of comfort for your pooch. All our bumpers and cushions feature waterproof linings in case of any accidents. It’s recommended to choose a dog crate with a cover – they’ll provide your draughty, bare cage with a fresh new look and offer some privacy for your dog too. They’re particularly great for helping young puppies settle into their night-time routines and offer nervous dogs an extra feeling of security.
Purchase your dog crate set online today
Treat your four-legged friend to one of our stylish dog crate, cover, bedding and bumper sets by browsing our online range today. If you’re struggling to decide which one would be perfect for your pooch, contact our team today who will be more than happy to help. You’ll have 28 days to return your product if you’re unhappy with it for any reason. Our Lords & Labradors items also come with a 365-day quality guarantee, so it’s easy to see why we’ve received so many positive reviews. We also offer free delivery on all orders over £75. Browse the range and order your dog crate set today.
Read less
Top
Choosing a selection results in a full page refresh.


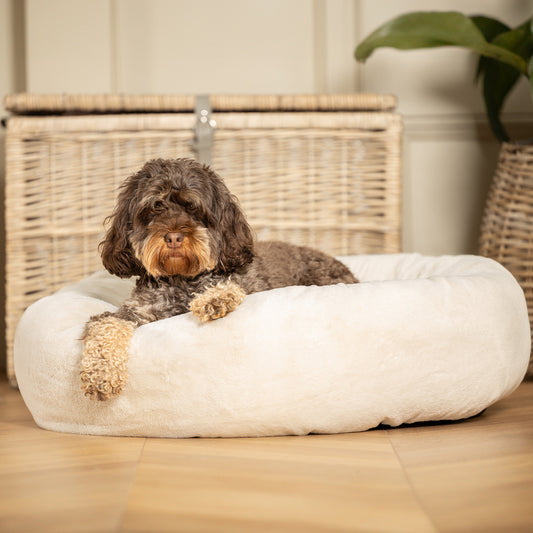


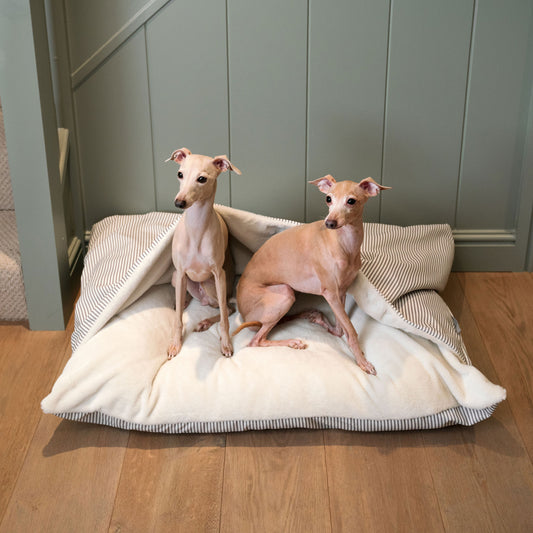


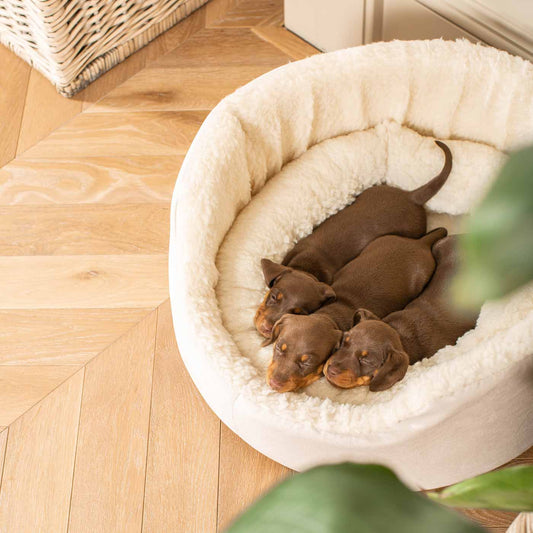


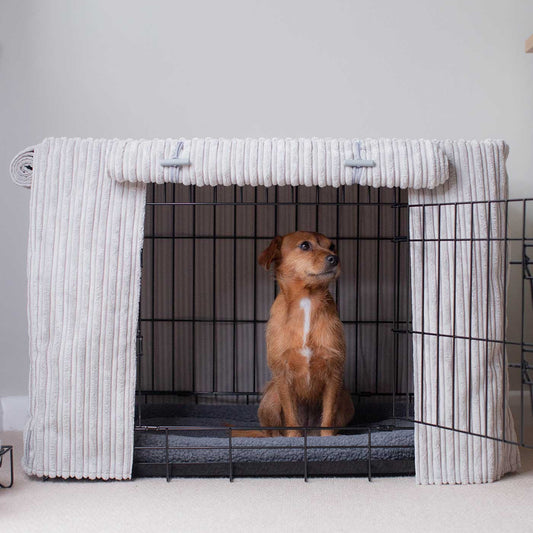


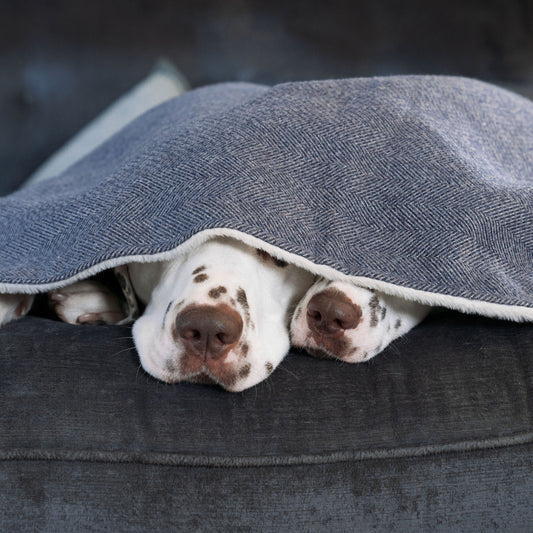
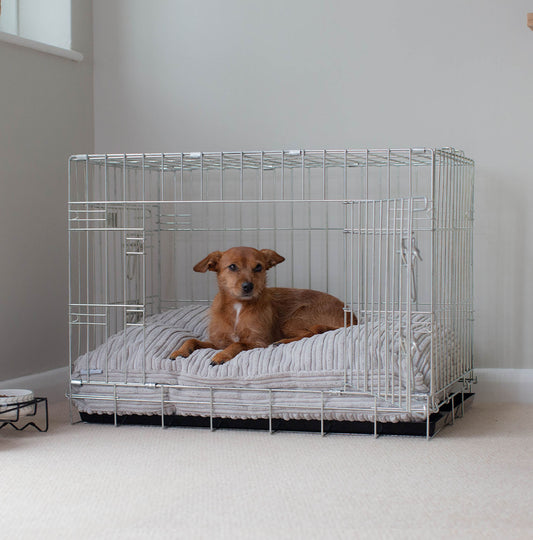


![[color:hh pink]](http://www.lordsandlabradors.co.uk/cdn/shop/files/Hugo-Hudson-Reversible-Puffer-Jacket-pink_eed0f83b-3d41-4b01-8c6a-1dcd57e38550.jpg?v=1705421785&width=533)