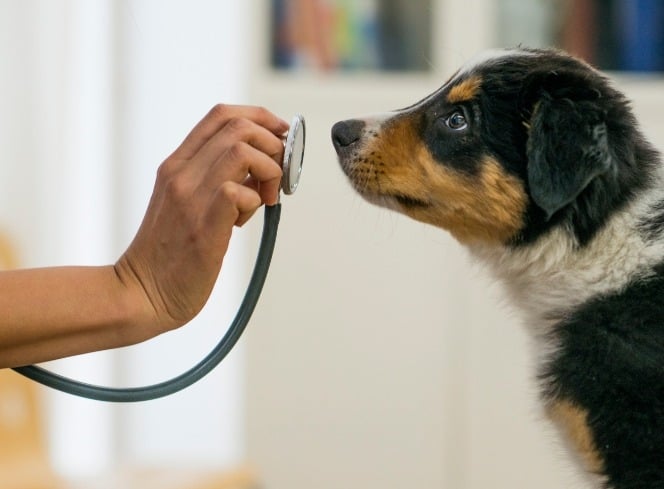


If you’re a dog owner, you know that our four-legged friends are more than just pets; they’re cherished members of the family. Just like any family member, our dogs can encounter cuts, scrapes, bites, or even more serious emergencies that require immediate attention. Having a solid grasp of dog first aid can make all the difference in helping your dog recover quickly and comfortably. In this guide, we’ll explore essential tips to help you stay prepared. We’ll also look at why having a dog first aid kit is a must for every responsible dog owner.
Why You Need a Dog First Aid Kit
A well-stocked dog first aid kit is the first step toward being fully prepared for emergencies. Having everything in one place allows you to respond quickly when accidents happen—whether it’s a small cut or something more serious like choking. Many injuries can be managed effectively at home if you have the right tools and knowledge, but even when professional vet care is needed, administering immediate first aid can help stabilise your pet’s condition.
Recommended Dog First Aid Kit
When putting together a pet first aid kit for dogs, it’s easy to get overwhelmed. That’s why we recommend choosing a comprehensive kit like the Charlie the Vet Pet First Aid Kit, available at Lords & Labradors. It’s designed by experts to include all the basics you need to tackle everyday emergencies, from bandages to antiseptic wipes.
Key Items in a Dog Medicine Kit

It’s not just about having a kit; it’s about having the right items in it. While every dog’s needs can differ, here are a few universally recommended staples:
- Bandages and Dressings – For covering wounds and stopping bleeding.
- Antiseptic Solution or Wipes – For cleaning and disinfecting minor cuts and scrapes.
- Tweezers or Forceps – Helpful for removing splinters, ticks, or small foreign objects.
- Gauze Pads and Rolls – Ideal for dressing larger wounds.
- Adhesive Tape – To secure bandages in place, ensuring they don’t shift.
- Disposable Gloves – To keep the area sterile and protect yourself while administering first aid.
- Scissors – Blunt-ended scissors can help you cut bandages or remove hair around a wound safely.
- Digital Thermometer – So you can accurately measure your dog’s temperature.
- Emergency Contact Numbers – Keep your vet’s number, along with any emergency helpline numbers, handy in your kit.
Additionally, if your dog has pre-existing conditions, consult your vet about including any special medication in your dog medicine kit.
How to Handle Common Canine Emergencies
Dogbite First Aid
A dog bite can vary from a minor nip to a serious wound. If your dog has been bitten—or if your dog bites another dog—the steps for immediate dogbite first aid are similar:
- Stay Calm – Approach the situation with a clear head. Panicking will only stress your dog more.
- Assess the Wound – Look for puncture marks, bleeding, or swelling.
- Stop the Bleeding – Use a clean cloth or gauze to apply gentle pressure if there’s active bleeding.
- Clean the Area – Gently wash the wound with mild soap and water, then apply an antiseptic solution.
- Apply a Sterile Dressing – Cover the wound with a clean dressing from your pet first aid kit for dogs.
- Seek Veterinary Advice – Even minor wounds can become infected, so it’s always wise to consult a vet after a bite incident.
Choking Dog First Aid
Choking in dogs can happen unexpectedly—dogs are curious creatures and might swallow inappropriate items. Knowing the basics of choking dog first aid can save your pet’s life:
- Look for Signs – Gagging, difficulty breathing, or pawing at the mouth can indicate choking.
- Check the Mouth – Carefully open your dog’s mouth to see if the object is visible. Use tweezers from your dog med kit to remove it if you can see it clearly.
- Perform the Heimlich Manoeuvre (If Necessary) – For smaller dogs, hold them with their back against your chest and apply gentle yet firm pressure just below their ribcage. For bigger dogs, place your arms around the dog’s waist (while they stand) and give a quick, upward thrust.
- Vet Check – Even if you manage to remove the obstruction, a follow-up exam is a good idea to ensure no harm was done to the airway.
Dog CPR: Life-Saving Techniques

In extreme cases—like severe accidents or near-drownings—you might need to perform dog cpr. This is a critical skill every dog owner should understand. Knowing how to do cpr on a puppy is particularly important because puppies are more vulnerable and can deteriorate quickly. It’s definitely worth looking if there are any pet first aid courses in your area or if your vet can help teach you this critical skill.
Preventing Emergencies
While knowing basic dog first aid is crucial, prevention is always better than cure. Here are a few tips to keep your dog safe and healthy:
- Supervise Playtime – This helps you prevent your dog from chewing or swallowing hazardous objects.
- Keep Toxic Substances Out of Reach – Household cleaners, certain plants, and human foods like chocolate or grapes can be dangerous if ingested.
- Maintain a Nutritious Diet – A well-balanced diet promotes a stronger immune system and overall health.
- Stay Up to Date on Vaccinations – Reducing the risk of infectious diseases will help limit the need for emergency treatments.
- Grooming and Regular Check-ups – This helps you catch any unusual lumps, bumps, or cuts early on.
Conclusion
Whether you’re a novice dog owner or an experienced handler, understanding the basics of dog first aid can make all the difference in an emergency. From assembling a reliable dog first aid kit—like the Charlie the Vet Pet First Aid Kit—to mastering techniques such as choking dog first aid or cpr on a puppy, being prepared and knowledgeable is the best way to protect your furry friend. Quick responses not only help your dog physically but also provide peace of mind, knowing you’ve done everything possible for your beloved companion.
As always, remember that first aid is not a substitute for professional veterinary care. If you have concerns about your dog’s health, or if the situation appears severe, don’t hesitate to contact your vet right away. In the meantime, having a dog med kit on hand and the know-how to use it ensures you’re ready to help at a moment’s notice.
Stay safe, stay prepared, and always keep your pet first aid kit for dogs within arm’s reach. After all, our dogs offer us unconditional love—being prepared to help them in an emergency is the least we can do.