













When Is It Too Cold To Walk Your Dog?
06.01.25 January 06, 2025 Health

When Is It Too Cold To Walk Your Dog?

Winter’s really starting to set in - the clocks have gone back, resulting in darker nights and we’ve all rushed to get the heating on. But once Jack Frost has made his appearance, you may start wondering whether it’s too cold to walk your dog. You might be all set with a coat, hat, gloves and scarf, however your dog is less protected from the elements than you are. Their fur helps to keep them warm to a degree, and you can always put them in a winter coat or woolly jumper to protect them from the cold even more. But at which temperature do you decide that it’s too cold to walk them?    Should You Walk Your Dog In Winter?  You absolutely should walk your dog in winter. Walking is an excellent source of exercise for your dog, but also a way for them to experience the wonderful smells of the world around them. They get to socialise with other dogs, have some bonding time with their owner and wear themselves out ready for a cosy night by the fire.     However, before you take your dog out, you should take a look at what the weather’s doing before making a decision. If it’s a beautiful, crisp sunny day, for example, with very little breeze, a walk would be welcome. But if it’s looking a bit windy and stormy, you may decide that it’s best not to go. The walk should be enjoyable, and it’s likely that neither of you will enjoy it if it’s like this. You may also want to assess whether it’s safe to take your beloved pet out. Low fog or mist and hail can be dangerous, for example, so in these conditions it may be safer to skip the trip out.  If you do decide to venture out in the rain or snow, be sure to take a route that’s well paved and well lit.     Can Dogs Be Walked In The Cold?  Dogs definitely can be walked in the cold, and you shouldn’t let the dropping temperatures be a reason to stop giving them their daily exercise. A walk is likely one of the highlights of your dog’s day (besides dinner time) so if they’re happy to go out in the cold, you should be happy to take them.  There are some things that you may want to take into consideration before you leave the house, though.   First, you should try to walk during the day - it will be much colder early in the morning and in the evening, so stick to mid-morning or early afternoon, between 10 and 2 is ideal. Plus if salt has been put on the pavements and roads, it’s more likely to have been pushed off the surfaces by other people that have come and gone over the course of the day. Salt can cause irritation of the skin on the paw’s underside and can become painful for your dog.   You should go prepared with a coat for your dog that is sized correctly, making it comfortable for them and easy to walk in. Check out our best winter dog coats blog to see our favourites this winter. As already mentioned, you should stick to well-lit paths or routes that you and your dog know well. If they get anxious about the rain or cold weather, knowing where they are going could help them to feel a bit more at ease.       At what temperature does a dog need a coat? This will vary from dog to dog, typically smaller dogs, short haired breeds and puppies will get colder easier than their larger & long haired counter parts. There isn't an exact temperature that your dog will need a coat, but we recommend watching your dog's behaviour and judging from that, remember you know them best! If they don't like wearing a coat don't force them, the stress isn't worth it for you or them! Even with all these things in place, your dog may not be that keen to go out. Always be sure to listen to what your best friend is telling you. If they’re refusing to walk, shivering, standing in a hunched position or whining, then you should take them home.   [product]  If your dog doesn't fancy a walk but still has lots of energy to burn, why not try some indoor enrichment activities with them? 15 minutes of sniffing is equivalent to an hour's dog walk, so snuffle mats will be your best friends when your dog doesn't fancy a wintery walk. Alternatively, the Nina Ottosson interactive dog toys are great for keeping your dog's mind busy.   What Temperature Is Too Cold For A Dog To Walk Outside?  Now we’ve discussed certain weather conditions and how to prepare for a chilly walk. But how do you know when it’s time to skip walkies altogether? and what temperature should you not walk your dog? Use our table below to work it out!  Dog Walking Temperature Chart As you can see, small dogs are more vulnerable in the cold, whereas bigger dogs can withstand lower temperatures. Do keep this in mind when taking your furry friend for a walk, and avoid walking any dog when temperatures drop below -10℃, even if they’re wearing a coat.  For puppies and older dogs, it’s better to exercise a little bit more caution, as they could be more vulnerable to the cold too. If you’re at all unsure, it’s probably best to keep them in.     Can I walk my dog in -4℃? As you can see from the chart above -4℃ is either potentially unsafe or dangerous depending on what size dog you have. If you have a small or medium sized dog, or a puppy we recommend staying home and using enrichment activities to keep them busy. However, if you have a large dog, walk them with caution or stay home. If you do decide to walk a larger dog, we recommend keeping their walk shorter and properly dry them off once you're home.    How Long Should You Walk Your Dog In Cold Weather?  Generally, it’s best to cut your walks short when it’s really cold outside. The longer your pup is outside, the lower their body temperature will go, so it’s best to give them a few shorter walks instead of giving them one long walk.  For temperatures above -4℃, medium to large dogs can walk for around half an hour, whereas smaller dogs should be limited to around 20 minutes. However, do keep in mind that other factors can make it feel colder outside than it actually is. For instance, a strong wind can take a relatively mild day to a freezing cold one. Walking in the snow can be fun too, when it’s a lovely sunny day, but if you’re walking in wet sleet or through sludgy snow, your dog’s body temperature can drop quite quickly, even when they’re moving. You should stop your dog from eating snow, as this can bring their temperature down too.  You should be able to walk your dog in winter, when it’s perfectly sunny or when it’s a little bit rainy. Just do take into account other weather factors and how long you’re outside for.      Do Dog's Paws Get Cold? Just like our hands and feet, your dog's paws can get cold too! However, over time their paws have adapted to help them from freezing. Their arteries bring warm blood from their body to their paws and back up their legs, rather than loosing the heat through their skin, this is known as a countercurrent heat exchange. To help keep your dog's paws warm, make sure to dry in between their paw pads after a walk and wash off any salt and grit they may have walked through. You can even use some paw balm after to help stop their paw pads from cracking. 

By Zac Girdlestone

Read more

Winter’s really starting to set in - the clocks have gone back, resulting in darker nights and we’ve all rushed to get the heating on. But once Jack Frost has made his appearance, you may start wondering whether it’s too cold to walk your dog. You might be all set with a coat, hat, gloves and scarf, however your dog is less protected from the elements than you are. Their fur helps to keep them warm to a degree, and you can always put them in a winter coat or woolly jumper to protect them from the cold even more. But at which temperature do you decide that it’s too cold to walk them? 


Should You Walk Your Dog In Winter? 

You absolutely should walk your dog in winter. Walking is an excellent source of exercise for your dog, but also a way for them to experience the wonderful smells of the world around them. They get to socialise with other dogs, have some bonding time with their owner and wear themselves out ready for a cosy night by the fire.  

Labrador on a winter walk Labrador in a puddle with a wellie boot toy

However, before you take your dog out, you should take a look at what the weather’s doing before making a decision. If it’s a beautiful, crisp sunny day, for example, with very little breeze, a walk would be welcome. But if it’s looking a bit windy and stormy, you may decide that it’s best not to go. The walk should be enjoyable, and it’s likely that neither of you will enjoy it if it’s like this. You may also want to assess whether it’s safe to take your beloved pet out. Low fog or mist and hail can be dangerous, for example, so in these conditions it may be safer to skip the trip out. 

If you do decide to venture out in the rain or snow, be sure to take a route that’s well paved and well lit.  


Can Dogs Be Walked In The Cold? 

Dogs definitely can be walked in the cold, and you shouldn’t let the dropping temperatures be a reason to stop giving them their daily exercise. A walk is likely one of the highlights of your dog’s day (besides dinner time) so if they’re happy to go out in the cold, you should be happy to take them. 

There are some things that you may want to take into consideration before you leave the house, though.  

First, you should try to walk during the day - it will be much colder early in the morning and in the evening, so stick to mid-morning or early afternoon, between 10 and 2 is ideal. Plus if salt has been put on the pavements and roads, it’s more likely to have been pushed off the surfaces by other people that have come and gone over the course of the day. Salt can cause irritation of the skin on the paw’s underside and can become painful for your dog.  

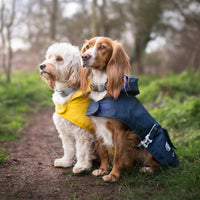
You should go prepared with a coat for your dog that is sized correctly, making it comfortable for them and easy to walk in. Check out our best winter dog coats blog to see our favourites this winter. As already mentioned, you should stick to well-lit paths or routes that you and your dog know well. If they get anxious about the rain or cold weather, knowing where they are going could help them to feel a bit more at ease.  

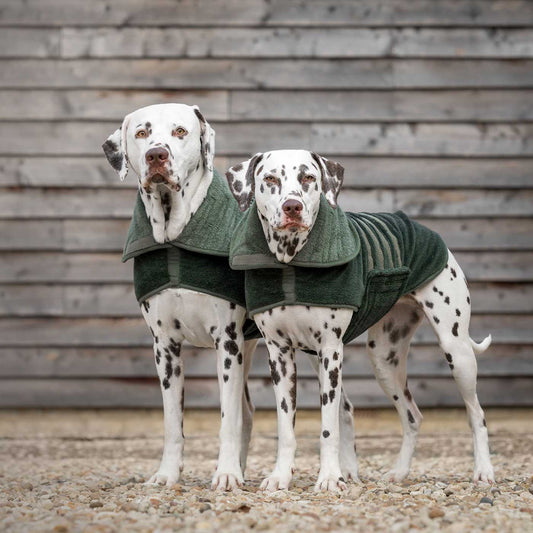
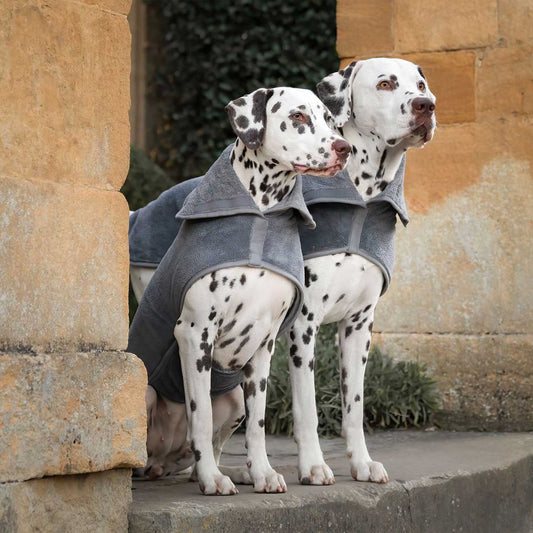
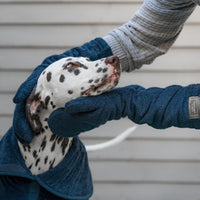
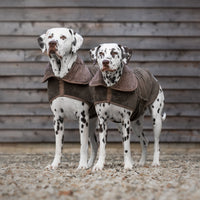
Labrador in a green quilted dog coat Dalmatians in green towel drying coats


At what temperature does a dog need a coat?

This will vary from dog to dog, typically smaller dogs, short haired breeds and puppies will get colder easier than their larger & long haired counter parts. There isn't an exact temperature that your dog will need a coat, but we recommend watching your dog's behaviour and judging from that, remember you know them best! If they don't like wearing a coat don't force them, the stress isn't worth it for you or them!

Even with all these things in place, your dog may not be that keen to go out. Always be sure to listen to what your best friend is telling you. If they’re refusing to walk, shivering, standing in a hunched position or whining, then you should take them home.  


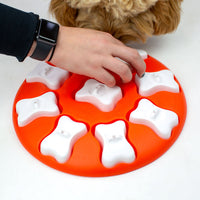
If your dog doesn't fancy a walk but still has lots of energy to burn, why not try some indoor enrichment activities with them? 15 minutes of sniffing is equivalent to an hour's dog walk, so snuffle mats will be your best friends when your dog doesn't fancy a wintery walk. Alternatively, the Nina Ottosson interactive dog toys are great for keeping your dog's mind busy.


What Temperature Is Too Cold For A Dog To Walk Outside? 

Now we’ve discussed certain weather conditions and how to prepare for a chilly walk. But how do you know when it’s time to skip walkies altogether? and what temperature should you not walk your dog? Use our table below to work it out! 

Dog Walking Temperature Chart

How cold is too cold to walk your dog

As you can see, small dogs are more vulnerable in the cold, whereas bigger dogs can withstand lower temperatures. Do keep this in mind when taking your furry friend for a walk, and avoid walking any dog when temperatures drop below -10℃, even if they’re wearing a coat. 

For puppies and older dogs, it’s better to exercise a little bit more caution, as they could be more vulnerable to the cold too. If you’re at all unsure, it’s probably best to keep them in.  


Can I walk my dog in -4℃?

As you can see from the chart above -4℃ is either potentially unsafe or dangerous depending on what size dog you have. If you have a small or medium sized dog, or a puppy we recommend staying home and using enrichment activities to keep them busy. However, if you have a large dog, walk them with caution or stay home. If you do decide to walk a larger dog, we recommend keeping their walk shorter and properly dry them off once you're home. 


How Long Should You Walk Your Dog In Cold Weather? 

Generally, it’s best to cut your walks short when it’s really cold outside. The longer your pup is outside, the lower their body temperature will go, so it’s best to give them a few shorter walks instead of giving them one long walk. 

For temperatures above -4℃, medium to large dogs can walk for around half an hour, whereas smaller dogs should be limited to around 20 minutes. However, do keep in mind that other factors can make it feel colder outside than it actually is. For instance, a strong wind can take a relatively mild day to a freezing cold one. Walking in the snow can be fun too, when it’s a lovely sunny day, but if you’re walking in wet sleet or through sludgy snow, your dog’s body temperature can drop quite quickly, even when they’re moving. You should stop your dog from eating snow, as this can bring their temperature down too. 

You should be able to walk your dog in winter, when it’s perfectly sunny or when it’s a little bit rainy. Just do take into account other weather factors and how long you’re outside for. 

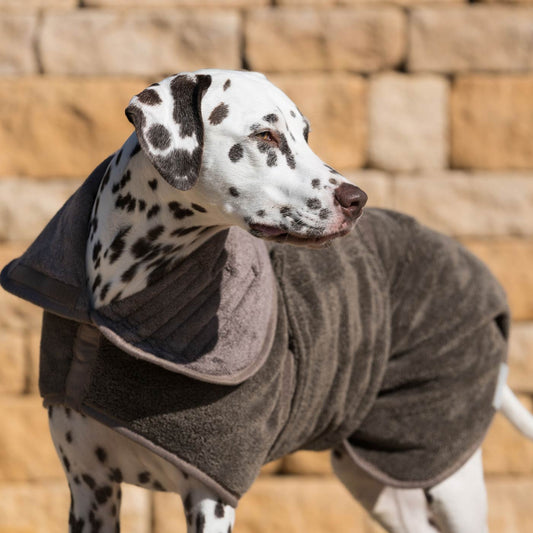
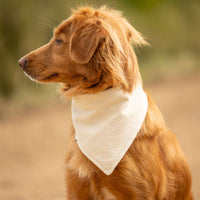
Labrador in quilted coat Labrador in green personalised dog drying coat


Do Dog's Paws Get Cold?

Just like our hands and feet, your dog's paws can get cold too! However, over time their paws have adapted to help them from freezing. Their arteries bring warm blood from their body to their paws and back up their legs, rather than loosing the heat through their skin, this is known as a countercurrent heat exchange. To help keep your dog's paws warm, make sure to dry in between their paw pads after a walk and wash off any salt and grit they may have walked through. You can even use some paw balm after to help stop their paw pads from cracking. 

Related Products

Related Collections

Designer Dog Coats

Explore our collection of designer dog coats at Lords & Labradors. Both... 

Dog Walking Equipment and Accessories

It’s no secret that walkies are your four-legged friend’s favourite time of... 

Next Article
Should My Cat Stay Indoors?

Related Articles

  • What to Do When Your Dog is Reverse Sneezing
    24.08.26 August 24, 2026 Health

    What to Do When Your Dog is Reverse Sneezing

    That sudden honking, snorting sound your dog makes out of nowhere is enough to stop any pet parent’s heart, but knowing what to do when your dog is reverse sneezing makes all the difference. In this guide, we’ll walk you through why it happens, how to keep both of you calm in the moment, and which signs are worth a call to the vet. We’ll also share some simple changes you can make at home to reduce how often it happens in the first place. What reverse sneezing looks and sounds like in dogs If you’ve ever watched your dog suddenly freeze, stretch their neck forward, and let out a loud, honking snort like they’re trying to inhale and sneeze at the same time, you’ve almost certainly witnessed a reverse sneeze. It sounds alarming. It looks alarming. And if you had no idea what you were watching, panicking is a completely natural response. The reassuring news? Reverse sneezing is usually harmless. It’s not a cough, not a seizure, and not a sign that something is lodged in their throat. Think of it as a reflex, much like a regular sneeze, just working in reverse. Instead of air rushing outward, your dog rapidly pulls air in through their nose, producing that distinctive snorting or honking sound that tends to stop everyone in the room. During an episode, most dogs stand still with their elbows splayed, neck outstretched, and eyes wide open. Some look genuinely distressed, which is hard to watch even when you know what’s happening. The episode itself usually lasts anywhere from a few seconds to around a minute, and the vast majority of dogs bounce back to their normal selves almost immediately. Paying attention to how your dog behaves before and after can tell you a lot. A dog that’s relaxed and happy on either side of the episode is generally nothing to worry about. Our guide to understanding your dog’s body language can help you get better at reading those subtle signals. Recognising what reverse sneezing looks and sounds like is honestly half the battle — because once you know, it’s so much easier to stay calm when it happens. Why dogs reverse sneeze in the first place Reverse sneezing is an involuntary reflex, and it usually comes down to something irritating the soft palate, throat, or nasal passages. Think of it like a sneeze in reverse — the body trying to clear an irritant rather than signal that something is seriously wrong. Most dogs will experience it at some point, and for the vast majority, it’s completely normal. Common triggers include: Nasal or throat irritation from dust, pollen, or mould Excitement or over-stimulation, like bounding over to greet you at the door Pulling on the lead, which puts pressure on the throat Eating or drinking too fast Strong scents, household sprays, or air fresheners Sudden changes in temperature or air quality Being a flat-faced (brachycephalic) breed, such as a Pug, French Bulldog, or Cavalier King Charles Spaniel — their shorter airways make them anatomically more prone to episodes Understanding the dog reverse sneezing causes behind an episode really does help in the moment. Once you recognise that the body is simply doing what it needs to do — the same way we might need to cough or clear our throat — it’s much easier to stay calm rather than panic. And calm is exactly what your dog needs from you. The good news is that most episodes pass within seconds to about a minute. One moment your dog is honking away, and the next they’re trotting off like nothing happened. That’s usually all there is to it. What to do in the moment when your dog is reverse sneezing If you’re wondering what to do when your dog is reverse sneezing, the first thing is simple: try not to panic. It can sound dramatic, especially the first time you hear it, but many episodes are brief and pass within 30 seconds to a minute. Your calm really helps. In the moment, focus on gentle comfort: Stay relaxed and speak softly. Your dog will pick up on your energy. A quiet, reassuring voice can help them settle while the episode passes. Gently stroke their throat or chest. Slow, light strokes may encourage a swallow, which can help the spasm ease naturally. Offer a tiny sip of water if they’re settled enough to take it. Not a full bowl, and don’t force it. Sometimes a small swallow is all that’s needed. Move them away from obvious triggers. If they’ve been sniffing dust, pulling on the lead, or sitting near strong smells like candles or cleaning sprays, guide them to a calmer spot with fresher air. A good rule of thumb with reverse sneezing in dogs treatment at home is to keep things quiet, gentle, and low-stress. Most of the time, your job is simply to comfort rather than intervene. What not to do: Don’t put your fingers in your dog’s mouth Don’t hold them down or restrain them forcefully Don’t fuss loudly or crowd them, even if you feel worried Once it’s over, many dogs go straight back to normal as if nothing happened. If your dog’s reverse sneezing symptoms seem to happen often, last longer than usual, or leave them distressed, that’s when it’s sensible to think about dog reverse sneezing causes and whether a vet check is the right next step. When reverse sneezing is worth a vet call Most of the time, reverse sneezing in dogs is completely harmless and passes within seconds. But if you start noticing that episodes are happening more often, or that your dog seems off afterwards, it’s worth paying closer attention. You know your dog better than anyone, so trust that instinct. These are the signs that deserve a vet conversation: Episodes happening multiple times a day, or lasting longer than a minute Your dog seeming distressed, panicked, or wiped out afterwards Nasal discharge, whether clear, cloudy, or discoloured A new cough appearing alongside the reverse sneezing Laboured or noisy breathing between episodes Gums that look pale or slightly blue Lethargy, low energy, or a noticeable dip in appetite An occasional isolated episode is rarely cause for concern. A recurring or worsening pattern is always worth getting checked. When to worry about dog reverse sneezing really comes down to that shift in pattern. A vet can look into common culprits like allergies, a low-grade infection, a foreign body in the nasal passage, or a structural issue affecting the airway. None of these are things you’d pick up at home, but all of them are very treatable when caught early. Even if everything turns out to be fine, you’ll come away with peace of mind, and that’s never wasted. How to reduce reverse sneezing triggers at home Once you understand what sets your dog off, a few small tweaks at home can make a real difference. If your dog tends to pull on the lead and reverse sneezes regularly, switching to a well-fitted harness is one of the easiest wins. Collar pressure on the throat is a surprisingly common trigger, and a harness removes it entirely. Inside, it’s worth thinking about air quality too. Dust little and often, skip the heavily scented candles or plug-in air fresheners, and if you use cleaning sprays, let the room air out before your dog wanders back in. Small habits, but they stack up. Fast eaters are also worth a closer look. Gulping food can irritate the throat and kick off an episode, so a slow feeder bowl or snuffle mat at mealtimes can genuinely help. Beyond that, it’s worth keeping a loose mental note of when episodes happen. After a walk during high pollen season? After a boisterous play session? Spotting a pattern gives you something real to work with, whether that’s adjusting walk times or winding down play more gradually. The reassuring truth is that most dogs live completely happily alongside the occasional reverse sneeze. Now that you know what it looks like, why it happens, and what to do in the moment, you’re already better placed to handle it calmly when it comes. Frequently Asked Questions How to calm down reverse sneezing in dogs? The best way to calm reverse sneezing is to stay relaxed and gently comfort your dog while it passes. Speak softly, stroke their throat or chest, offer a tiny sip of water if they’re settled enough, and move them away from dust, strong smells, or other obvious triggers. When to worry about reverse sneezing? Reverse sneezing is worth worrying about if it becomes frequent, lasts longer than a minute, or your dog seems unwell afterwards. Signs that need a vet call include distress, nasal discharge, a new cough, noisy breathing between episodes, pale or blue gums, lethargy, or a drop in appetite. What triggers reverse sneezing in dogs? Reverse sneezing is usually triggered by irritation in the throat or nasal passages. Common causes include dust, pollen, mould, strong household scents, excitement, pulling on the lead, eating or drinking too fast, temperature changes, and being a flat-faced breed with shorter airways. How long is too long for a dog to reverse a sneeze? Anything lasting longer than about a minute is a sensible point to call your vet. Most reverse sneezing episodes pass within a few seconds to around a minute, and dogs usually seem completely normal again straight afterwards.

    By Adele Busby

    Read more
  • How to Cut Dog Nails That Are Black
    19.08.26 August 19, 2026 Health

    How to Cut Dog Nails That Are Black

    Trimming black dog nails can feel like a guessing game, but it really does not have to be. This guide walks you through how to cut dog nails that are black with confidence, covering everything from spotting the quick before you snip to choosing the right tools, handling the odd nick along the way, and building a calmer routine over time. Whether you are starting from scratch or just looking to feel less uncertain with the clippers, there is something here to help you and your dog get through nail day in one piece. How to Tell Where the Quick Is on Black Dog Nails The quick is the living core of your dog’s nail. It contains blood vessels and nerves, so if you catch it with the clippers, it bleeds and stings — not ideal for anyone involved. With light-coloured nails, you can usually spot it as a soft pink shadow running through the centre, which makes the whole job much more straightforward. With black nails, that shadow disappears completely, and that’s exactly why so many pet parents feel stuck before they’ve even picked up the clippers. The good news? You don’t have to guess. You just need to slow down and read a few reliable clues. Start by shining a small torch or your phone’s flashlight through the nail from underneath. On finer nails, this can reveal the quick as a darker oval shape within the nail. It won’t work for every dog, but it takes about three seconds to try and it’s genuinely useful when it does. If the light doesn’t show much, nail texture becomes your next guide. Trim a tiny sliver from the tip and look at the cut surface. At first it’ll appear solid and chalky, white or grey all the way through. That’s safe ground. Keep taking small slivers, checking each time, and eventually the centre will shift. It might look darker, almost black, or you’ll notice a small grey dot appearing in the middle. That dot is your cue to stop. You’re getting close to the quick. Nail shape tells you something before you even make a cut, too. Most dog nails curve downward and taper toward the tip, and the quick follows that same curve. It typically sits further back than you’d expect, so if the nail has a definite hook at the end, trimming just that hooked portion is usually where you want to start. One last thing: a calm dog makes all of this much easier. When they’re tense and pulling away, it’s harder to look closely and work carefully. Keeping an eye on your dog’s body language throughout the trim helps you spot early signs of stress before things unravel. The Tools That Make Black Nail Trims Safer and Calmer Having the right tools ready before you start makes a real difference when you’re working with black nails. They help you make smaller, more controlled cuts, reduce the chance of catching the quick off guard, and keep the whole experience calmer for your dog from the very first snip. Sharp scissor-style or guillotine clippers. Blunt clippers crush rather than cut cleanly, which is uncomfortable for your dog and makes it much harder to read the cut surface. Sharp blades give you a clean edge — exactly what you need when taking black nails back little by little. A nail grinder. If clippers feel a bit too all-or-nothing, a grinder lets you remove nail gradually and gives you much finer control over how much you take off. Many dogs also find the sensation less startling than a sudden snap. A small flashlight or phone torch. Holding a light against the top of the nail can help you spot the quick’s shadow before you cut. It doesn’t work on every dog, but it takes seconds to try and is well worth doing. Styptic powder. Have this within arm’s reach before you begin. If you nick the quick, it works fast — and knowing it’s right there helps you stay calm rather than scrambling. High-value treats. Something your dog doesn’t get at any other time, like a small cube of cheese or a bit of cooked chicken, makes the session feel worthwhile for them and keeps their focus in the right place. A non-slip mat or towel. This gives your dog something to grip, helps them feel a little more settled, and means less wriggling for you to work around. What is styptic powder? It stops minor bleeding almost instantly if you nick the quick. It’s a staple in any dog nail trimming kit, so always have it to hand before you start. None of these are hard to find, and together they genuinely change how confident you feel tackling black nails at home. If you’re building out your grooming kit, you’ll find plenty of dog care essentials over at Lords and Labradors. Good preparation really is the best dog nail trimming tip there is — have everything ready before your dog sits down, and you’re already off to a better start. A Step-by-Step Way to Cut Black Dog Nails Without Hitting the Quick Once you understand how to read the nail, the actual cutting becomes far less daunting. Trimming black dog nails safely is really about slowing down, taking tiny slices, and trusting what you see rather than guessing where to stop. Settle your dog before you pick up the clippers. Sit on the floor together, offer a few treats, and let them sniff the clippers. A calm start makes everything that follows easier. Find a comfortable position for you both. Some dogs are happy lying on their side while you kneel beside them. Others prefer sitting upright with a paw gently lifted. Work with your dog rather than forcing a hold that makes them tense. Press the toe pad gently to extend one nail at a time. This gives you a clear view and keeps the paw steady without gripping so tight that your dog pulls away. Start with a small snip at a slight angle. Take just the very tip off. You’re not trying to do it all in one go — you’re just getting started. Check the cut surface before you snip again. Hold the nail up to the light and look at the cross-section. A chalky white or grey centre means you’re well away from the quick and safe to continue. Keep going in tiny increments, checking every time. As you get closer, the centre of the nail will start to shift. The moment you see a darker grey or black dot beginning to appear in the middle, stop on that nail. That dot is the quick showing itself, and one slice further could cause real discomfort. Reward your dog between nails, not just at the end. A treat after each one keeps things positive and gives your dog a natural moment to breathe and reset. Stop if your dog tells you they’ve had enough. Panting, pulling the paw away, or going rigid are all signs to pause — even if you’ve only done two nails. Pushing through rarely ends well. Split the session across days if that’s what your dog needs. Front paws today, back paws tomorrow. There’s no rule that says all twenty nails have to happen at once, and honestly, your dog will thank you for it. A note on the black dog nail quick: In lighter nails, the quick shows up as a visible pink line running through the centre. In black nails, you simply can’t see it from the outside, which is why reading the cross-section matters so much. A small dark dot or a soft pale ring appearing in the centre after a snip is your signal to stop. That’s the quick beginning to surface, and going any further risks pain and bleeding. The whole point of learning how to cut dog nails that are black is building confidence through small wins, not racing to finish. Three nails done calmly is genuinely better than twenty done with your dog stressed and wriggling. If your dog tends to find grooming difficult, it’s worth thinking about how you handle other anxious moments together — the same approach that helps keep dogs calm during stressful situations like fireworks applies just as well here. What to Do if You Nick the Quick Nicking the quick when you’re learning how to cut dog nails that are black happens to almost every pet parent at some point. It looks more dramatic than it is — a small dark red bleed from the tip of the nail — and it tends to startle you far more than it hurts your dog. Take a breath. You’ve got this. Here’s exactly what to do: Stop trimming and set the clippers down. Apply styptic powder or cornstarch directly to the nail tip. Hold gentle pressure with a clean cloth or your finger for 30 to 60 seconds. Keep your dog calm and still with a quiet voice and a soft, steady touch. Once the bleeding slows, check the nail before letting your dog wander off. Styptic powder is a clotting agent that stops bleeding quickly — and it’s the single most useful thing to have nearby during any nail trim. Purdue University’s veterinary guidance specifically recommends that you keep styptic powder available when clipping a pet’s nails to stop bleeding if you clip too short. Pick some up before your next session if you don’t already have it. For aftercare, keep the paw clean and dry for the rest of the day. Avoid rough-surface walks for 24 hours, and check back on the nail over the next day or so for any redness or swelling. If the bleeding hasn’t slowed within 5 to 10 minutes, or your dog seems to be in genuine pain rather than just briefly unsettled, call your vet. That’s the sensible thing to do — not a sign that anything has gone seriously wrong. How to Make Nail Trims Easier Next Time The biggest dog nail trimming tip anyone can give you? Trim more often. It sounds almost too simple, but when you’re working out how to cut dog nails that are black, consistency matters just as much as technique. Dogs who seem completely impossible to trim can surprise you once a calm routine clicks into place. Trim every 3 to 4 weeks. Regular sessions keep nails at a manageable length and make each one shorter and less stressful — for both of you. Reward after every single nail. Use something your dog genuinely loves, like a small piece of cheese or chicken, and give it the moment you finish each nail rather than saving it until the end. Handle paws between sessions. A minute or two of gentle paw touching while you’re watching TV or winding down costs nothing and builds real tolerance without any pressure attached. Take a little, more often. Small snips every few weeks feel far less daunting than trying to tackle seriously overgrown nails after a long gap — and you’ll stay well clear of the quick. Keep the setup consistent. Same spot, same time of day, same calm energy. Dogs read routine surprisingly well, and familiarity genuinely helps settle nerves. Start puppies early. Even pretend trims with no cutting involved help young dogs learn that paw handling is completely normal. Pro tip: Trimming a tiny amount every 2 to 3 weeks is far safer than waiting until nails are overgrown — especially when you’re navigating the black dog nail quick. Think of each session as a training opportunity rather than a chore to get through. Dogs who once wriggled, whined, or flatly refused can absolutely learn to sit calmly for a trim. It just takes consistency, patience, and a well-stocked treat supply. When to Ask a Groomer or Vet for Help Sometimes, the most caring thing you can do is hand the clippers to someone else. If you have worked through how to cut dog nails that are black and still feel uncertain, that is completely fine. Some dogs have nails that are genuinely thick, curved, or difficult to read, even for owners who have been doing this for years. Others simply will not settle, no matter how many treats you offer or how carefully you have set the scene. Professional groomers trim nails every single day. They know how to read the nail, position the dog, and work with a calm confidence that only comes with real experience. Booking a session or two is not admitting defeat. It is a smart way to watch someone skilled work up close, ask questions, and pick up the kind of practical knowledge that no article can fully replace. Your vet is equally worth considering, especially if your dog has unusually thick nails, any history of paw injuries, or anxiety that makes handling genuinely difficult. They can trim safely and point you toward ways to make future sessions less stressful for your dog and for you. The most important shift is this: professional help is a starting point, not a last resort. Once your dog has had a calm, positive experience with someone who knows exactly what they are doing, you will often find that the next trim at home feels a little easier too. Frequently Asked Questions How do you know where the quick is on black dog nails? You find the quick on black dog nails by trimming tiny slivers and checking the cut surface each time. A chalky white or grey centre is usually safe; when you start to see a darker dot or change in the middle, stop. A torch underneath the nail can sometimes help too. Can I trim my dog’s black nails? Yes, you can trim your dog’s black nails if you go slowly and take very small amounts at a time. The safest approach is to remove the hooked tip first, check the cut surface after every snip, and stop as soon as you see a darker centre appearing. How do you trim severely overgrown dog nails? Trim severely overgrown dog nails by taking off only a little at a time and spreading the work over multiple sessions if needed. Tiny, regular trims every 2 to 4 weeks are safer than one big cut, especially with black nails, because they help you avoid catching the quick.

    By Adele Busby

    Read more
  • What Is The 7 Second Rule For Dogs?
    28.04.26 April 28, 2026 Health

    What Is The 7 Second Rule For Dogs?

    To understand why the 7 second rule matters so much, it helps to know what is actually happening beneath your dog's paws on a warm day. Most of us instinctively judge the temperature by the air around us, but the ground tells a very different story. Surfaces that feel perfectly walkable to us can reach temperatures that cause real damage to paw pads within seconds, and the gap between the two can be startling. Here is why hot ground is a bigger problem than it might look. What is the 7 second rule for dogs why it is important The 7 second rule for dogs is a simple test that helps you decide whether pavements, tarmac, or artificial grass are too hot for your dog's paws. Here's how it works: place the back of your hand flat against the surface where you plan to walk. If you can't keep it there comfortably for a full seven seconds, the ground is too hot for your dog. This quick check has become a go-to for pet parents because it gives you an instant answer without needing thermometers or guesswork. If the surface feels uncomfortably hot against the sensitive skin on the back of your hand, your dog's paw pads will feel it even more intensely. Those paw pads might look tough, but they're actually more delicate than many people realise. The rule works particularly well for checking pavements, car park surfaces, and artificial grass, which can heat up surprisingly quickly on sunny days. You know those mornings when the air feels lovely and mild, but the pavement is already scorching? That's exactly when this test saves the day. Now, this isn't a perfect scientific measurement. It's more like a practical safeguard that helps you make smarter decisions in the moment. Some dogs have more sensitive paws than others, and factors like your dog's size and the humidity can affect how they cope with warm surfaces. Think of the 7 second rule as your first line of defence during summer walks. Just like checking if it's too wet to venture out (much like deciding whether you can walk your dog in the rain), a quick hand test becomes second nature once you start using it regularly. Why hot ground can be harder on paws than many people realise One of the biggest surprises for many pet parents is discovering just how much hotter surfaces can be compared to the air temperature around us. While it might feel like a pleasant 25°C day, the pavement beneath your feet could easily be reaching 50°C or more. Hard surfaces absorb and store heat throughout the day, creating conditions that can genuinely damage your dog's paws within seconds. The surfaces that pose the biggest risks to our dogs include: Tarmac and asphalt - These dark surfaces are notorious heat absorbers and can become scorching even on moderately warm days Concrete paving stones - Whether it's pavements, patios, or car parks, concrete retains heat long after the sun starts to fade Wooden decking - Particularly darker woods that can become almost untouchable by mid-afternoon Beach sand - Fine sand heats up quickly and can be deceptively hot, especially in direct sunlight Artificial grass - Modern synthetic surfaces can reach surprisingly high temperatures Metal surfaces - Manhole covers, drain covers, and metal fixtures become genuine hazards in warm weather Here's what makes this particularly tricky for our dogs: they can't slip on a pair of trainers like we can. Your pup relies entirely on you to make the right call about ground safety. They trust us to protect their precious paw pads, which are more delicate than they appear and can suffer burns, blisters, dryness, and painful cracking when exposed to excessive heat. Think of it this way - if the ground is too hot for your bare feet, it's definitely too hot for theirs. Just as we consider temperature extremes in colder weather for our dogs' comfort and safety, hot surfaces deserve the same thoughtful approach to keep our four-legged family members happy and healthy. Signs your dog’s paws may be too hot, sore, or damaged When your dog suddenly starts acting differently on a warm walk, they're usually telling you something important about their comfort. Many pet parents assume their dog is being stubborn when they stop mid-walk or refuse to keep going, but these behaviors are actually valuable signals that hot pavement might be affecting their paws. Recognizing these warning signs helps you respond quickly before minor discomfort turns into serious damage: Limping or favoring one paw - especially if it starts suddenly during the walk Stopping abruptly or refusing to move forward on pavement or concrete Excessive paw licking or chewing during or immediately after walks Visibly darkened, reddened, or swollen paw pads when you check them Small blisters, cuts, or rough patches on the paw surface Reluctance to walk on certain surfaces while seeming fine on grass or dirt Seeking shade or cooler ground repeatedly during your usual route High-stepping or "dancing" movements, as if trying to minimize ground contact Quick tip: Any sudden change in your dog's walking behavior on warm surfaces deserves immediate attention. Move to grass, carry them to shade, or head home straight away. I've learned that dogs who normally love their walks but suddenly become "difficult" on hot days are often just trying to protect themselves. Understanding what the 7 second rule for dogs teaches us means staying alert to these signals and treating them as important communication rather than defiance. Your dog can't tell you their paws are burning, so these physical cues become their way of asking for help before real harm occurs. How to use the 7 second rule alongside other common-sense checks The 7 second rule for dogs works brilliantly as your first check, but pairing it with other practical safety measures gives you the complete picture for protecting your pup's paws on warm days. Time your walks strategically - Early morning or evening walks avoid the hottest part of the day when pavement reaches peak temperatures. You'll often find a comfortable window even when midday conditions would fail the hand test completely. Choose cooler walking routes - Grass, tree-lined streets, and woodland paths stay significantly cooler than exposed concrete or asphalt. Your dog will thank you for seeking out those naturally shaded spots. Bring water for both of you - A portable water bowl becomes essential when temperatures climb. If your dog starts panting more heavily or seems less enthusiastic than usual, frequent drink breaks can make all the difference. Shorten walks on borderline days - Even if the ground passes the 7 second test, consider cutting your usual 45-minute adventure down to 15-20 minutes when it's particularly warm outside. Watch for early warning signs - Dogs lifting paws, seeking shade, or lagging behind often show these signals before serious damage occurs. Trust these cues and head home or find a cooler spot. These common-sense approaches work hand-in-hand with the dog 7 second rule to create a complete safety strategy. Rather than relying on temperature alone, this layered approach helps you make confident decisions about when to venture out, which route to take, and when it's simply better to save the adventure for a cooler day. Your dog's comfort and safety are worth that extra bit of planning. When to skip the walk and what to do if paws get burned Sometimes the smartest choice is staying home. When the ground fails the 7 second rule test, indoor enrichment becomes your best friend. Puzzle toys, training sessions, or a good sniff-and-find game can tire out even the most energetic dog without risking burnt paw pads. If you have a garden, early morning or late evening might offer cooler grass for a quick outdoor break. Just remember to test any surface your dog will walk on—decking and patio stones can be surprisingly brutal heat traps, even when they look innocent. Despite your best efforts, if you suspect your dog's paws have been burned, act quickly but stay calm. Get to shade immediately and gently rinse those paws with lukewarm water. Skip the ice or freezing water, which actually makes burns worse. Pat dry with a soft towel and discourage any frantic licking. Call your vet if you spot blistering, ongoing limping, or if your dog seems genuinely distressed. Most minor paw irritation heals beautifully with proper care, but when in doubt, professional guidance beats guesswork every time. The beauty of understanding what the 7 second rule for dogs really means lies in its simplicity. This quick palm test gives you the confidence to make smart decisions that keep summer adventures joyful rather than painful. Your dog counts on you to make these judgment calls, and this straightforward rule makes protecting those precious paws so much easier.  

    By Adele Busby

    Read more
  • How to Keep Cats Cool in Summer Without AC
    02.09.26 September 02, 2026 Seasonal

    How to Keep Cats Cool in Summer Without AC

    Summer can feel relentless when you’re trying to keep a cat comfortable and you don’t have air conditioning to fall back on. This guide covers everything from cooling your home and encouraging your cat to drink more, to the comfort items worth trying and the signs that tell you your cat needs a little extra help. Learning how to keep cats cool in summer without AC turns out to be more straightforward than most people expect, and a few small changes can make a genuine difference to how your cat feels through the warmest months. Why summer heat hits cats harder than you might think Cats are remarkably good at finding a cool corner to curl up in, but when temperatures climb and your home starts to hold onto that heat, even the most laid-back cat can begin to struggle. Unlike dogs, cats rarely pant to cool themselves down, and they can’t sweat the way we do. Their main tools are grooming and seeking out cooler surfaces — which works well enough on a mild day, but can fall short fast during a proper heatwave, especially in a flat or a south-facing home without air conditioning. It’s also worth knowing that some cats feel the heat more than others. Flat-faced breeds like Persians and British Shorthairs have a harder time breathing in warm air at the best of times, so hot days can be genuinely uncomfortable for them. Older cats, overweight cats, and young kittens are more vulnerable too. If your cat falls into any of those categories, paying closer attention through the summer months isn’t being overprotective — it’s just sensible cat parenting. The reassuring part? Keeping cats cool in summer without AC is far more manageable than it might seem. You don’t need specialist equipment or a complicated routine. A few thoughtful tweaks, a shaded spot they’ll actually use, and a bit of awareness around the hottest parts of the day can make a surprising difference to how your cat feels and behaves. If you’d like a broader look at warm-weather care, our essential summer tips for pet owners pairs well with this guide. Easy ways to keep your home cooler for your cat You don’t need a specialist setup or expensive equipment to make a real difference to how your cat feels on a hot day. Small, consistent changes to your home environment can reduce heat build-up significantly — and help your cat stay comfortable through even the warmest spells. Open windows safely with a screen or security latch. Fresh airflow matters, but cats will treat any gap as an open invitation. A fitted window screen or a latch that limits how far a window opens lets the breeze in while keeping your cat safely inside. Position fans to create cross-ventilation. Place a fan at one end of a room and open a window at the other. Moving air feels cooler than still air even at the same temperature, and cats will usually find a comfortable spot in the flow on their own. Close blinds on south-facing windows during the afternoon. Sunlight through glass heats a room faster than you’d expect. Drawing the blinds between midday and 4pm can keep things noticeably cooler with almost no effort. Find the coolest room and make it accessible. Rooms with tiled floors, north-facing windows, or less direct sun stay cooler for longer. Leave the door open so your cat can move there whenever they need to. Lay a cool, damp towel on a tile floor. It sounds almost too simple, but many cats will happily stretch out on a slightly damp surface without any coaxing at all. Skip the oven during peak heat hours. Cooking generates a surprising amount of warmth. Cold meals or stovetop options keep your kitchen much more comfortable for everyone. Once these steps become part of your morning routine, they stop feeling like effort. Keeping cats cool in summer without AC is really about working with your home rather than against it. If your cat lives indoors full-time, environment management matters even more — our indoor cat care guide has plenty more ideas to help them thrive at home throughout the year. How to help your cat stay hydrated when it’s hot Water plays a bigger role in keeping cats comfortable through summer than most people realise. Cats are naturally low-thirst drinkers, which means mild dehydration can creep in before any obvious signs appear. If you want to know what to look out for, our guide to cat dehydration symptoms is a handy read before the warmer months arrive. The good news is that encouraging more drinking doesn’t have to be complicated. A few small changes around the house can make a real difference: Spread water bowls around the home. One in the kitchen, one near a favourite napping spot, one by a sunny windowsill. The easier it is to find water, the more likely your cat is to actually drink it. Keep water and food bowls separate. Cats instinctively prefer their water source away from where they eat. Moving them apart is a simple change that often prompts more drinking. Top up bowls with fresh, cool water regularly. Cats notice stale water and will often walk straight past it. A quick refresh a couple of times a day goes a long way. Try a cat water fountain. For fussy drinkers, moving water is often far more appealing. It stays cooler, stays oxygenated, and many cats who ignore a static bowl will drink happily from a fountain. Switch to wet food during hot spells. It can contain up to 80% water, making it one of the easiest hydration boosts going — even if you usually feed dry. Drop a few ice cubes into the bowl on very hot days. Some cats are curious enough to investigate, and it keeps the water cooler for longer. Every cat has their own quirks around water, and that’s completely normal. If your cat is ignoring their bowl, it’s usually worth experimenting with placement, temperature, or switching to a fountain before assuming they’re just not thirsty. Cooling mats, shaded spots, and other comfort helpers cats actually use The most effective heat relief for cats is usually the kind they find for themselves. You can’t place a cat somewhere and expect them to stay, so the best approach is simply to set up options and let them decide. Here are a few comfort helpers worth trying: Cooling mats — designed to absorb body heat without needing to be chilled, they give cats a cool surface to sprawl on whenever they need it Elevated beds — raising your cat off the floor improves airflow underneath them, which helps dissipate heat more efficiently than lying flat Ceramic tiles — cats often seek these out naturally because the surface stays cool even when the rest of the room doesn’t A lightly dampened towel — laid flat on a cool floor, it gives a similar effect and costs nothing to set up Shaded hiding spots — a cardboard box tucked in a cool corner, or the space under a bed, gives cats somewhere dark and sheltered to retreat to A fan angled toward a wall — this keeps air circulating without blasting directly at your cat, which most of them hate Placement matters more than you might expect. Put a cooling mat somewhere your cat already gravitates toward rather than somewhere convenient for you. A favourite corner of the sofa or a shady patch of floor they already use in the afternoons is a much better bet than somewhere new. If your cat is on the cautious side, try placing a worn item of clothing nearby or dropping a few treats on the mat so they can investigate at their own pace. Not sure whether a cooling mat is right for your cat? The Lords and Labradors guide to cooling mats for cats is a good place to start before you buy, covering how they work and what to look for. The best setup is always the one your cat discovers and quietly claims as their own. That is really the whole point. What to watch for: signs your cat may be too hot Cats do love a sunny windowsill, so a warm, sleepy cat is not always a cause for concern. The key with keeping cats cool in summer is knowing when “just relaxing” starts to look more like heat stress. A cat who feels too hot may show a few clear signs: Panting: cats do not usually pant like dogs, so this is one of the biggest red flags Excessive drooling: more saliva than normal can mean their body is struggling to cool down Lethargy or unusual stillness: if your cat will not get up, seems flat, or ignores things they would normally react to, pay attention Rapid or laboured breathing: check for breathing that looks faster, heavier, or more effortful than usual Wobbliness or loss of balance: seeming weak, shaky, or unsteady is never something to brush off Seeking unusual cool spots: lying on bathroom tiles, stretching out by the back door, or hiding behind the toilet can be your cat’s way of saying the house feels too warm It can help to think about what is normal for your own cat. A lazy nap after lunch is one thing. Panting, drooling, or looking disoriented is something else entirely. When to call your vet If your cat is vomiting, seems confused, loses coordination, or becomes unresponsive, contact your vet straight away. These can be signs of heatstroke in cats, and it is always better to act early. While you arrange help, move them somewhere cool and quiet, offer water, and avoid forcing them to drink. If you are working out how to keep cats cool in summer without AC, trust that small changes really do help. Most cats stay comfortable with a bit of extra care, a cooler place to rest, and close observation on hot days. If you need extra support, the Lords & Labradors cat wellbeing collection has practical options that can make summer cat care easier. A simple summer routine that keeps your cat comfortable day to day Keeping cats cool in summer without AC doesn’t need to be complicated. A loose daily rhythm is all it really takes, and once it becomes habit, you’ll barely think about it. Start each morning by opening windows on opposite sides of the house to draw cooler air through before the temperature climbs. If your cat has a favourite windowsill, make sure there’s a shaded spot nearby for when the sun shifts. Cats are naturally good at finding cool corners, but they appreciate a little help getting there. Through the afternoon, check that their water bowl is full and fresh. If they’ve been ignoring it, try moving it somewhere quieter, or add a second bowl in another room. Some cats simply drink more when their water isn’t sitting right next to their food. A cooling mat placed in their usual nap spot can also make a real difference during the warmest hours, with very little effort on anyone’s part. In the evening, take a minute before bed to refresh the water, crack a window if it’s cooled down outside, and notice how your cat seems. Are they settled, or still restless? A calm end to the day is usually a good sign the routine is working. None of this needs to be perfect. Some mornings you’ll forget the windows, or your cat will completely ignore the cooling mat. That’s fine. The consistency is what counts, not getting every detail right every single time. For more ways to support your pets through the warmer months, our summer survival guide for pets is well worth a read. Frequently Asked Questions Are cats ok in a house without AC? Yes, many cats can be comfortable in a house without AC if you help keep the space cool and give them choices. Improve airflow, close blinds during the hottest part of the day, offer fresh water in several spots, and make sure they can reach the coolest room or a shaded resting place. How do I keep my cat cool in 100 degree weather? Keep your cat indoors, focus on the coolest room, and make cooling options easy to find. Use safe airflow with open windows and fans, shut blinds on sunny windows, refresh cool water often, add extra bowls or wet food, and watch closely for panting, drooling, or unusual lethargy. Will my cat be ok in 90 degree weather? Maybe, but it depends on your cat and how hot your home gets. Older cats, kittens, overweight cats, and flat-faced breeds can struggle more, so keep rooms shaded, water fresh, and cool resting spots available. If you notice panting, drooling, or weakness, contact your vet straight away.



    By Adele Busby

    Read more

loyal customer in 17 countries

Why Shop With Us?

  • Free Delivery

    Orders over £75 qualify for free standard UK delivery. Orders under £75 will be calculated at the checkout.

  • Shopping Made Easy

    Gain exclusive access to sales and shop all your pets favourites on the go by downloading our app.

  • Designed in the UK

    Our own brand products are lovingly designed in our specialist UK workshop to our exacting standards.

  • We're Here For You

    Contact our Pet Experts on Chat or by email at sales@lordsandlabradors.co.uk