How To Keep Dogs Warm in Winter
13.03.23 March 13, 2023 Health

How To Keep Dogs Warm in Winter

When it’s cold outside it’s easy for us to flick the heating on, find another layer and cuddle up under the blanket on the sofa, but how do you keep your dog warm in colder months? Some dogs love to roll in the snow whereas others shiver after being outside for a minute, every dog is different when it comes to the cold.They can’t tell us if they’re too cold so here’s the things to look out for and our top ways of keeping them snuggly this winter   How To Keep A Dog Warm In Winter Whether winter means snow and ice or slightly milder temperatures, there’s a few steps you can take to keep your dog warm in winter. Even though dogs have furry coats, which do act as a layer of warmth and protection, they can still suffer in the cold.   Do Dogs Get Cold?  Despite descending from wolves, dogs do feel the cold just like us - they aren’t capable of staying in the cold for long periods of time like their wolf ancestors. Smaller dogs and short haired dogs are much more likely to feel the cold than larger or long haired dogs. Similarly puppies and senior dogs are likely to feel the cold much more than adult dogs as they regulate their body temperatures quite as well.   How Do Dogs Keep Warm The number one way dogs keep themselves warm is with their fur, as we mentioned this is more the case with longer haired dogs but all dog coats provide a level of insulation.  In cold weather, your dog’s hair will stand up to help trap the heat and act like a blanket to help insulate them. Another way your dog keeps themselves warm in the winter is through the paws. When we as humans are cold, our body shuts off the blood supply to our hands and feet to protect our vital organs. With dogs, however, the warm blood supply to dogs paws keeps going in the cold. This helps to keep their paws warm and in turn them warm.   How Cold Is Too Cold For A Dog The answer to this question hugely depends on your dog's breed, if they have a long shaggy coat this will act as an extra layer of insulation to help the cold better than their short-haired counterparts. Long-haired dog breeds that fit this category include: Siberian Husky Chow Chow Bernese Mountain Dog Collie New Foundland Saint Bernard Alaskan Malamute Irish Wolfhound Golden Retriever Old English Sheepdog  Does your dog have a short coat of hair? They might not be able to handle the cold quite as well, examples of short-haired dogs include: Bulldog Yorkshire Terrier Boxer Great Dane Shih Tzu Boston Terrier Chihuahua Beagle Pug We’ve put in our handy table to help you work out when it’s too cold to walk your dog outside   What Can I Use To Keep Dogs Warm In Winter? Warm Cosy Place to sleep  - Try moving your dog's bed to the warmest place in the house away from any drafts windows or doors. Then you can add an extra cosy blanket, like our luxury faux fur blankets, for your dog to snuggle up in to help keep them warm this winter. Coat or a jumper - For shorter-haired breeds as we listed above you could try a snuggly jacket or a coat. These will help add another layer of insulation to your dogs when you’re out for your winter walks. However, not every dog loves wearing a coat, they may need a little time to get used to wearing one but if they don’t love it that’s okay! Simply keep their trips outside short and sweet. Protect their paws - Dogs paws, ears and nose are much more exposed to the cold than the rest of their body and can be much more sensitive. Chemicals and grit that has been put down to help prevent the ice can actually be an irritant to your dog. If you have walked your dog on an icy or frosty day make sure to check their paws for cracks or bleeding both before and after your walk, if they look irritated why not try Be:loved paw balm? Shorter Walks - Although your dogs will still need exercising in winter, so we recommend little and often when it comes to walks. Our recent blog ‘Things To Dog With Your Dog At Home’ has some great enrichment activities to help them burn off that excess energy, as does The Blue Cross Guide to Indoor Dog Games   Winter Safety Tips Whilst you’re doing everything you can to keep your dog warm this winter, there are a few hazards to watch out for to help your pup safe Watch out for fire places - If you’re anything like us you’ll love curling up in front of a cosy fire with your dog, however, we recommend never leaving your pet unattended whilst you have the fire burning. Also, putting up a safety screen is a great idea to help keep your pets safe from the flames, soot and embers of the fire. Plug-In Heaters - Similarly to fireplaces you need to be really careful with plug-in heaters around your pets. If your dog or cat gets too close they can get burned or if they happen to knock it over they could start a fire Keep anti-freeze out of reach and sight - Anti-freeze actually tastes sweet to most dogs however it is highly toxic so make sure you keep it well out of paws-reach. If you suspect they have swallowed some anti-freeze make sure to contact your vet so they can instruct you on what to do next Don’t leave them alone in the car - Similarly to summer, we advise not leaving your dog on their own in your car in winter when the weather is particularly cold.    How To Keep A Dog Warm At Night  At night is when the temperatures really drop and you’ll want to make sure your dog has a snug and cosy nights sleep. We recommend adding some extra cosy bedding to your dog’s bed to help keep them warm through the winter as well as moving their bed away from any draughty areas of your house. If your dog is a chewer or you have a young puppy, be careful that they don’t chew any extra bedding that you give them!   How To Keep A Dog Warm In A Crate At Night We designed our crate sets especially with keeping your dog warm and cosy in mind. Our crate sets consist of a crate, cushion, bumper and cover - all designed to keep your dog warm in their crate at night. The thick cushion is not only comfy to lay on but is thick enough to raise your dog off the ground to help keep them warm The bumper stops any drafts from coming in the side of your dog's crates as well as provides them with a cosy place to rest their head Our crate covers have doors which can be rolled down to keep your dog’s crate insulated as well as block any light out   Do Blankets Keep Dogs Warm? Blankets not only keep your dogs warm but also provide a great deal of comfort to your dog. Adding a new cosy blanket to your dog’s bed in the winter is a great way to keep them warm on a cold night.   We hope these tips for keeping your dog warm in the colder months help to keep you snug and cosy all winter long. And remember - cuddles will help to keep both you and your pup warm this winter as well as strengthen your bond!

By Megan Willis

Read more

When it’s cold outside it’s easy for us to flick the heating on, find another layer and cuddle up under the blanket on the sofa, but how do you keep your dog warm in colder months?

Some dogs love to roll in the snow whereas others shiver after being outside for a minute, every dog is different when it comes to the cold.They can’t tell us if they’re too cold so here’s the things to look out for and our top ways of keeping them snuggly this winter


How To Keep A Dog Warm In Winter

Black and brown dog laid underneath a blanket

Whether winter means snow and ice or slightly milder temperatures, there’s a few steps you can take to keep your dog warm in winter. Even though dogs have furry coats, which do act as a layer of warmth and protection, they can still suffer in the cold.


Do Dogs Get Cold? 

Despite descending from wolves, dogs do feel the cold just like us - they aren’t capable of staying in the cold for long periods of time like their wolf ancestors.

Smaller dogs and short haired dogs are much more likely to feel the cold than larger or long haired dogs. Similarly puppies and senior dogs are likely to feel the cold much more than adult dogs as they regulate their body temperatures quite as well.


How Do Dogs Keep Warm

Black labrador laid in a faux fur blanket

The number one way dogs keep themselves warm is with their fur, as we mentioned this is more the case with longer haired dogs but all dog coats provide a level of insulation. 

In cold weather, your dog’s hair will stand up to help trap the heat and act like a blanket to help insulate them.

Another way your dog keeps themselves warm in the winter is through the paws. When we as humans are cold, our body shuts off the blood supply to our hands and feet to protect our vital organs. With dogs, however, the warm blood supply to dogs paws keeps going in the cold. This helps to keep their paws warm and in turn them warm.


How Cold Is Too Cold For A Dog

The answer to this question hugely depends on your dog's breed, if they have a long shaggy coat this will act as an extra layer of insulation to help the cold better than their short-haired counterparts. Long-haired dog breeds that fit this category include:

  • Siberian Husky
  • Chow Chow
  • Bernese Mountain Dog
  • Collie
  • New Foundland
  • Saint Bernard
  • Alaskan Malamute
  • Irish Wolfhound
  • Golden Retriever
  • Old English Sheepdog 

Does your dog have a short coat of hair? They might not be able to handle the cold quite as well, examples of short-haired dogs include:

  • Bulldog
  • Yorkshire Terrier
  • Boxer
  • Great Dane
  • Shih Tzu
  • Boston Terrier
  • Chihuahua
  • Beagle
  • Pug

We’ve put in our handy table to help you work out when it’s too cold to walk your dog outside

How cold is too cold to walk your dog 

What Can I Use To Keep Dogs Warm In Winter?

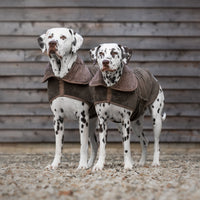
Dalmatian in a red coat

  1. Warm Cosy Place to sleep  - Try moving your dog's bed to the warmest place in the house away from any drafts windows or doors. Then you can add an extra cosy blanket, like our luxury faux fur blankets, for your dog to snuggle up in to help keep them warm this winter.
  2. Coat or a jumper - For shorter-haired breeds as we listed above you could try a snuggly jacket or a coat. These will help add another layer of insulation to your dogs when you’re out for your winter walks. However, not every dog loves wearing a coat, they may need a little time to get used to wearing one but if they don’t love it that’s okay! Simply keep their trips outside short and sweet.
  3. Protect their paws - Dogs paws, ears and nose are much more exposed to the cold than the rest of their body and can be much more sensitive. Chemicals and grit that has been put down to help prevent the ice can actually be an irritant to your dog. If you have walked your dog on an icy or frosty day make sure to check their paws for cracks or bleeding both before and after your walk, if they look irritated why not try Be:loved paw balm?
  4. Shorter Walks - Although your dogs will still need exercising in winter, so we recommend little and often when it comes to walks. Our recent blog ‘Things To Dog With Your Dog At Home’ has some great enrichment activities to help them burn off that excess energy, as does The Blue Cross Guide to Indoor Dog Games


Winter Safety Tips

Whilst you’re doing everything you can to keep your dog warm this winter, there are a few hazards to watch out for to help your pup safe

  1. Watch out for fire places - If you’re anything like us you’ll love curling up in front of a cosy fire with your dog, however, we recommend never leaving your pet unattended whilst you have the fire burning. Also, putting up a safety screen is a great idea to help keep your pets safe from the flames, soot and embers of the fire.
  2. Plug-In Heaters - Similarly to fireplaces you need to be really careful with plug-in heaters around your pets. If your dog or cat gets too close they can get burned or if they happen to knock it over they could start a fire
  3. Keep anti-freeze out of reach and sight - Anti-freeze actually tastes sweet to most dogs however it is highly toxic so make sure you keep it well out of paws-reach. If you suspect they have swallowed some anti-freeze make sure to contact your vet so they can instruct you on what to do next
  4. Don’t leave them alone in the car - Similarly to summer, we advise not leaving your dog on their own in your car in winter when the weather is particularly cold. 


How To Keep A Dog Warm At Night 

Norjack terrier burrowed underneath a dog blanket

At night is when the temperatures really drop and you’ll want to make sure your dog has a snug and cosy nights sleep. We recommend adding some extra cosy bedding to your dog’s bed to help keep them warm through the winter as well as moving their bed away from any draughty areas of your house. If your dog is a chewer or you have a young puppy, be careful that they don’t chew any extra bedding that you give them!


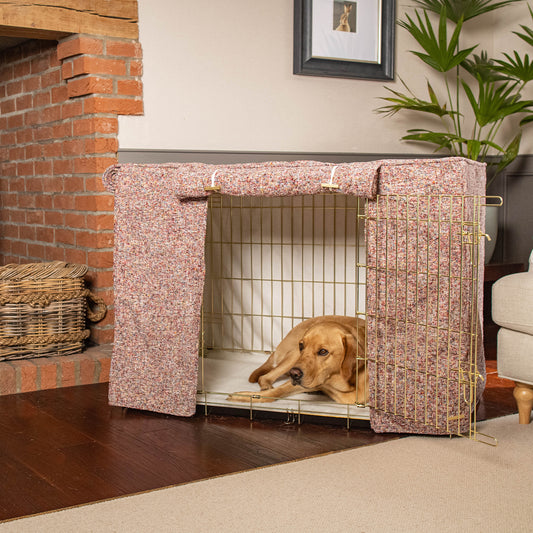
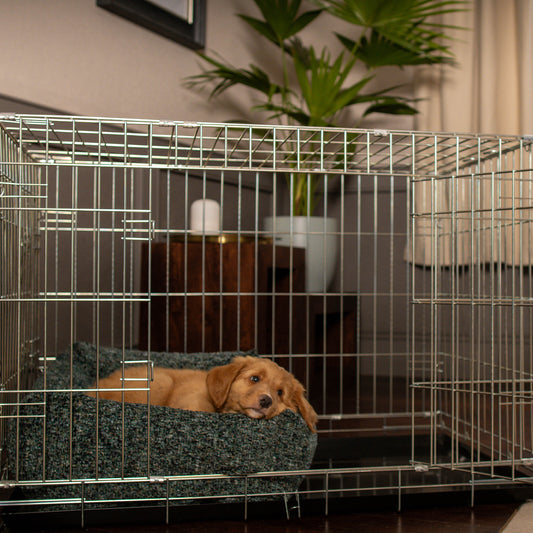
How To Keep A Dog Warm In A Crate At Night

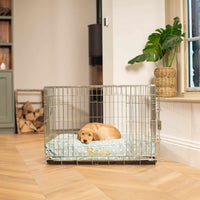
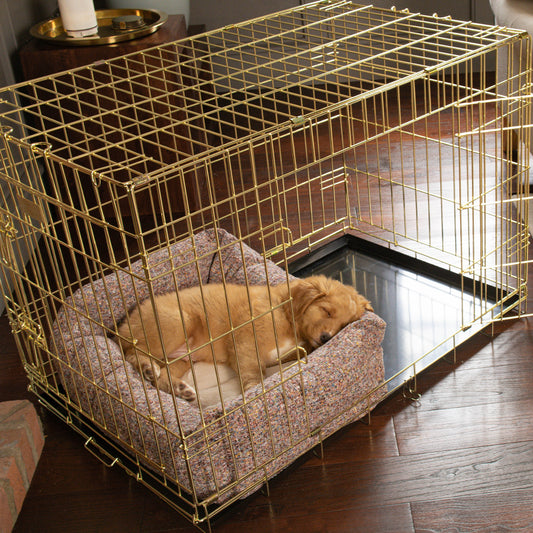
Labrador puppy sleeping in a grey and white spot dog crate

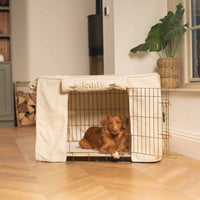
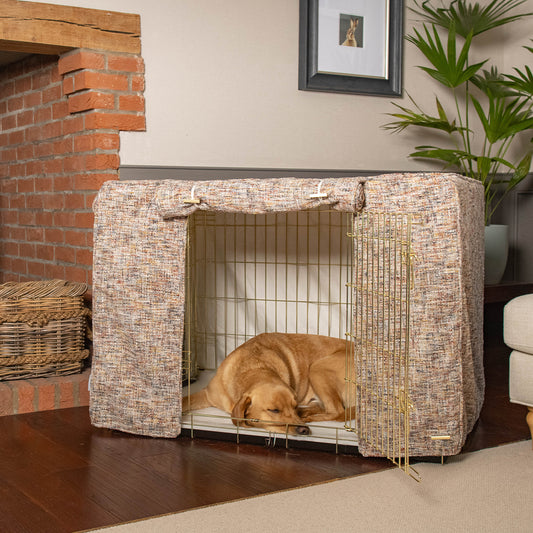
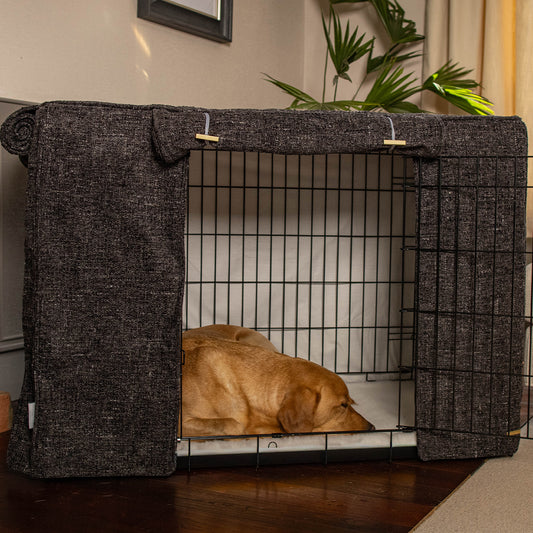
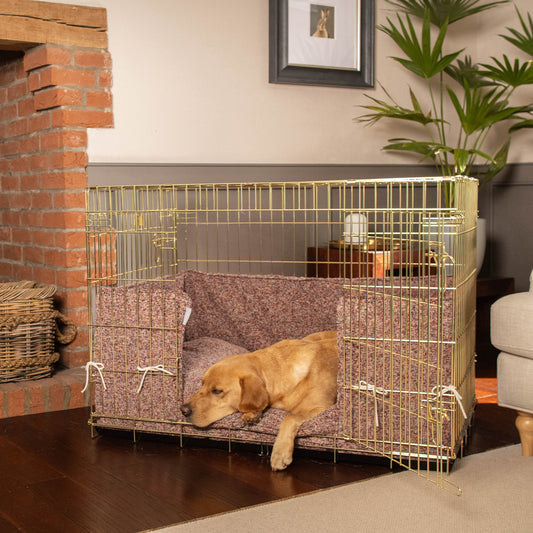
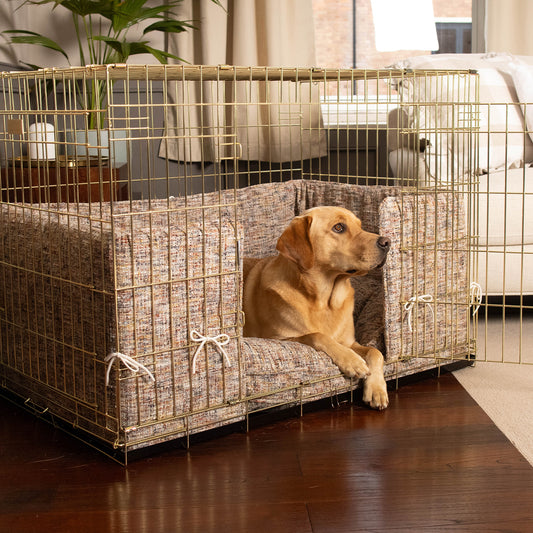
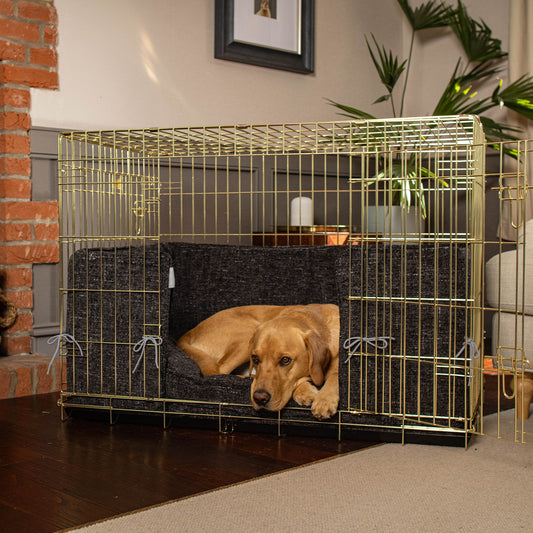
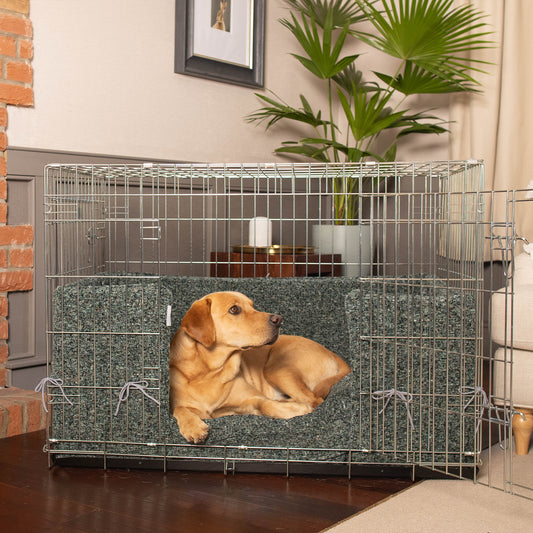
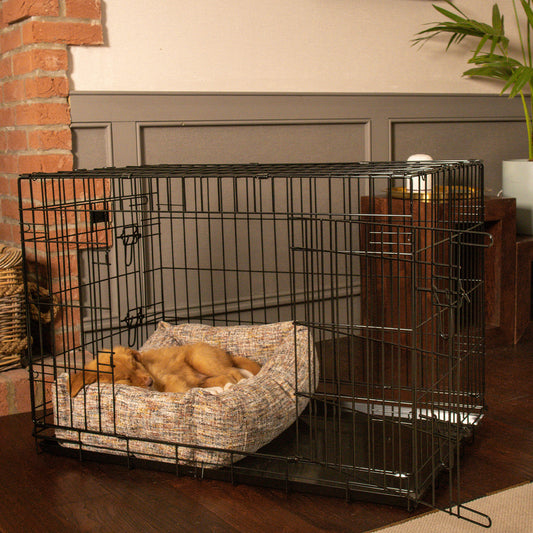
We designed our crate sets especially with keeping your dog warm and cosy in mind. Our crate sets consist of a crate, cushion, bumper and cover - all designed to keep your dog warm in their crate at night.

  • The thick cushion is not only comfy to lay on but is thick enough to raise your dog off the ground to help keep them warm
  • The bumper stops any drafts from coming in the side of your dog's crates as well as provides them with a cosy place to rest their head
  • Our crate covers have doors which can be rolled down to keep your dog’s crate insulated as well as block any light out


Do Blankets Keep Dogs Warm?

Blankets not only keep your dogs warm but also provide a great deal of comfort to your dog. Adding a new cosy blanket to your dog’s bed in the winter is a great way to keep them warm on a cold night.


We hope these tips for keeping your dog warm in the colder months help to keep you snug and cosy all winter long. And remember - cuddles will help to keep both you and your pup warm this winter as well as strengthen your bond!
Related Products

Related Collections

Luxury Blankets For Dogs

All dogs love a snuggle and a cuddle at bedtime. Make your... 

Luxury Dog Beds

Discover a delightful range of luxury dog beds from Lords & Labradors.... 

Next Article
Top 10 Tips First Time Dog Owners Wish They'd Known

Related Articles

  • How To Care For Your Cat's Teeth
    04.09.24 September 04, 2024 Health

    How To Care For Your Cat's Teeth

    Caring for your cat's teeth is an essential aspect of their overall health and well-being. Many pet owners are unaware that dental problems in cats can lead to serious health issues, including infections and even organ damage if left untreated. Below, we explore the best ways to maintain your cat's dental hygiene, including how to clean your cat’s teeth and how to keep your cat’s teeth clean without brushing, which is particularly useful for cats that may resist traditional dental care methods. Why Dental Care Is Important for Cats Your cat’s dental health plays a crucial role in their overall wellness. Cats, like humans, can suffer from dental problems such as gum disease, tooth decay, and tartar buildup. These issues can cause discomfort and pain and may lead to more serious conditions, such as infections that can spread to the kidneys, liver, or heart. Common signs of dental problems in cats include: Bad breath (halitosis) Drooling Red or swollen gums Difficulty eating Loose or missing teeth Yellow or brown buildup on teeth Addressing dental care early and regularly can prevent these issues from escalating and ensure your cat enjoys a healthy, comfortable life. How to Clean Cats' Teeth: Best Practices for Brushing Brushing your cat's teeth is one of the most effective ways to prevent dental issues. However, not all cats will tolerate having their teeth brushed, so it’s important to introduce this practice slowly and gently. Start Early and Be Patient: The earlier you start brushing your cat’s teeth, the more likely they are to accept the process. If you have a kitten, begin handling their mouth gently to get them accustomed to you touching their teeth and gums. If your cat is older, start by getting them used to the sensation by touching their mouth and teeth with your finger. Use Cat-Specific Toothpaste and Toothbrush: Never use human toothpaste on your cat, as it can be harmful if ingested. Instead, choose a toothpaste formulated specifically for cats, which often comes in flavours like poultry or fish to make the experience more pleasant for them. You’ll also need a toothbrush designed for cats, which typically has soft bristles and is smaller to fit comfortably in their mouth.Alternatively, you can use a finger brush that slips over your finger, which may be easier to manoeuvre in your cat's mouth, especially for beginners. Introduce Brushing Gradually: Take it slow when introducing brushing. Start by letting your cat lick the toothpaste off your finger, so they get used to the taste. Then, gradually progress to touching the toothbrush to their teeth. Once your cat is comfortable with the toothbrush, gently brush in small circular motions, focusing on the outer surfaces of the teeth where plaque tends to accumulate.Aim to brush your cat's teeth two to three times per week, if possible. Consistency is key, but even brushing once a week can make a difference. Positive Reinforcement: Make the experience as positive as possible by rewarding your cat with treats or praise after each session. This will help them associate tooth brushing with something enjoyable, reducing their resistance over time. How to Keep Cats' Teeth Clean Without Brushing If brushing your cat’s teeth proves too difficult or stressful, there are alternative methods to help maintain their dental health. Here are some effective ways to keep your cat's teeth clean without brushing: Dental Treats: There are specially formulated dental treats available that can help reduce plaque and tartar buildup on your cat’s teeth. These treats are designed to have a texture that scrapes away plaque as your cat chews, promoting better oral hygiene.  Dental Diets: Certain cat foods are designed to promote dental health by reducing plaque and tartar. These foods typically have larger kibble sizes, which encourage cats to chew more, and contain ingredients that help to clean the teeth as they eat.  Chew Toys: Providing your cat with chew toys can help keep their teeth clean naturally. Chewing on toys helps to remove plaque and tartar from the teeth, much like dental treats. Choose toys that are specifically designed for dental care, as they are made to withstand your cat’s chewing and have textures that promote tooth cleaning. Water Additives: Water additives are another way to keep your cat’s teeth clean without brushing. These products are added to your cat’s water bowl and contain ingredients that help reduce plaque buildup and freshen breath. They are easy to use and can be particularly beneficial for cats who won’t tolerate other forms of dental care. Dental Wipes: If brushing isn’t an option, dental wipes can provide a less invasive way to clean your cat’s teeth. These wipes are designed to be rubbed along your cat’s teeth and gums to help remove plaque and bacteria. While not as effective as brushing, dental wipes are a great alternative for cats that refuse a toothbrush. Recognising When Your Cat Needs Professional Dental Care Even with regular at-home dental care, some cats may still develop dental issues that require professional attention. Your veterinarian will assess your cat’s dental health during routine check-ups and may recommend a professional cleaning if needed. Here are some signs that indicate your cat might need professional dental care: Persistent bad breath Visible plaque or tartar buildup Red, swollen, or bleeding gums Drooling or pawing at the mouth Difficulty eating or refusal to eat Loose or missing teeth If you notice any of these symptoms, it’s important to consult your veterinarian. Professional dental cleanings under anaesthetic allow your vet to thoroughly clean below the gum line and address any dental issues before they worsen. Preventing Dental Issues in Cats In addition to regular dental care, there are other steps you can take to prevent dental problems in your cat: Routine Vet Visits: Schedule regular check-ups with your vet to monitor your cat’s dental health. Your vet can identify any potential issues early and recommend treatments. Monitor Diet: Ensure your cat is eating a balanced diet that supports dental health. High-quality dry food can help scrape plaque off the teeth, while certain wet foods are formulated to support oral hygiene. Hydration: Keeping your cat hydrated is important for their overall health, including their dental health. Make sure they have access to fresh water at all times.   Caring for your cat’s teeth is essential for maintaining their overall health and comfort. Whether you choose to brush their teeth regularly or opt for alternative methods like dental treats, toys, or water additives, there are plenty of ways to keep your cat’s teeth clean and prevent dental problems. By being proactive and consistent with your cat’s dental care, you’ll help them avoid painful dental conditions and enjoy a happy, healthy life.    

    By Laura Rudd

    Read more
  • How To Remove Cat Fleas From Your Home
    02.09.24 September 02, 2024 Health

    How To Remove Cat Fleas From Your Home

    Dealing with a flea infestation in your home can be a daunting task. These tiny pests are not only a nuisance but can also cause significant discomfort for your cat and everyone in your household. If you've noticed cat fleas on your bed, furniture, or other areas of your home, it's essential to act quickly to eliminate them. In our guide, we'll explore how to get rid of cat fleas effectively and provide step-by-step instructions on how to reclaim your home from these pesky invaders. Understanding the Flea Life Cycle Before diving into the process of eliminating fleas, it's important to understand their life cycle. Fleas go through four stages: egg, larva, pupa, and adult. The adult fleas live on your cat, feeding on their blood and laying eggs. These eggs fall off into the environment, including your bed, carpets, and furniture. Once hatched, the larvae and pupae can remain dormant for weeks or even months until they find a host, such as your cat, to feed on. This life cycle makes fleas particularly challenging to eradicate, as you must address not only the adult fleas but also their eggs and larvae hidden throughout your home. How to Get Rid of Cat Fleas: Step-by-Step Guide 1. Treat Your Cat First:  The first step in getting rid of cat fleas in your home is to treat your cat. Fleas typically originate from your pet, and without addressing the source, any efforts to clean your home will be in vain. Here’s how to treat your cat effectively: Use a Flea Treatment: Choose a high-quality flea treatment for cats, such as a topical treatment, oral medication, or flea collar. Ensure that the product is appropriate for your cat's age, weight, and health status. Apply the treatment as directed, typically once a month, to kill any existing fleas and prevent new ones from latching on. Flea Comb: In addition to using a flea treatment, comb your cat daily with a fine-toothed flea comb to remove any adult fleas and flea dirt. This step helps reduce the flea population on your cat and provides some immediate relief. Bathing: If your cat tolerates it, consider giving them a bath with a flea shampoo specifically designed for cats. This can help remove fleas and soothe irritated skin. 2. Clean and Vacuum Your Home Thoroughly:  Once your cat is treated, the next step is to tackle your home environment. Flea eggs, larvae, and pupae can be hiding in your carpets, furniture, and bedding, so it's crucial to clean these areas thoroughly. Vacuum Regularly: Vacuuming is one of the most effective ways to remove fleas at all stages of their life cycle. Vacuum all carpets, rugs, upholstered furniture, and any other areas where your cat spends time. Pay special attention to cracks and crevices where fleas might hide. Be sure to empty the vacuum bag or canister immediately after each use, sealing the contents in a plastic bag and disposing of it outside your home to prevent fleas from re-infesting. Wash Bedding and Fabrics: Wash your cat’s bedding, as well as any blankets, pillows, and other fabric items your cat frequently uses, in hot water. High temperatures will kill fleas and their eggs. Dry these items on the highest heat setting to ensure any remaining fleas are eliminated. Steam Cleaning: Consider using a steam cleaner on your carpets and upholstery. The heat from steam cleaning can kill fleas at all life stages, including eggs and larvae, which are often more resistant to other forms of cleaning. 3. Treat Your Home with Flea Control Products:  In addition to cleaning, applying flea control products in your home can help eliminate any remaining fleas and prevent future infestations. Flea Sprays: Use a flea spray designed for home use on carpets, furniture, and other areas where fleas may be present. Look for sprays that contain insect growth regulators (IGRs), which prevent flea eggs from hatching and larvae from developing into adult fleas. Be sure to follow the product’s instructions carefully, and keep pets and children away from treated areas until they are dry. Flea Foggers: Flea foggers, or flea bombs, can be used to treat an entire room. These products release a fine mist of insecticide that penetrates hard-to-reach areas, killing fleas on contact. However, they require you to vacate the room or house during the treatment and for a few hours afterward. It’s important to read and follow all safety instructions when using flea foggers. 4. Prevent Future Infestations:  Once you’ve successfully removed the fleas from your home, it’s important to take steps to prevent them from returning. Regular Flea Treatment for Your Cat: Continue to treat your cat with a flea prevention product regularly, even after the fleas are gone. This will help protect your cat from re-infestation and keep your home flea-free. Maintain a Clean Environment: Keep your home clean by vacuuming regularly, washing bedding, and maintaining good hygiene practices. This will help reduce the likelihood of fleas taking hold again. Outdoor Control: If your cat goes outdoors, consider treating your yard with a flea control product. Fleas can live in grassy, shaded areas, so keep your lawn trimmed and remove any debris where fleas might thrive. 5. Monitor for Recurrence:  After treating your home, continue to monitor your cat and living environment for any signs of fleas. It can take several weeks to completely eliminate a flea infestation, so be vigilant and ready to re-treat if necessary. If you notice any signs of fleas returning, act quickly to address the issue before it becomes a full-blown infestation again. Dealing with Cat Fleas on Bed: Special Considerations Finding cat fleas on your bed can be particularly distressing, as this is where you curl up to get comfortable and sleep. To address this issue specifically: Strip and Wash Bedding: Immediately strip your bed and wash all linens, blankets, and pillows in hot water. Dry them on the highest heat setting. Fleas cannot survive the high temperatures of washing and drying. Vacuum the Mattress: Use a vacuum to thoroughly clean your mattress and box spring, paying attention to seams and crevices where fleas might hide. Consider using a mattress cover to create a barrier against any future flea infestations. Treat Your Bed Area: If needed, apply a flea spray to your mattress and surrounding area, making sure the product is safe for use on bedding. Allow it to dry completely before making your bed again. Removing cat fleas from your home requires a comprehensive approach that addresses both your pet and the environment. By treating your cat with effective flea control products, thoroughly cleaning your home, and taking steps to prevent future infestations, you can eliminate these pesky pests and keep your home flea-free. Here at Lords & Labradors, we offer a range of premium flea treatments and home care products designed to help you tackle flea infestations with confidence, and ensure your home remains a safe and comfortable haven for you and your feline friend.  

    By Laura Rudd

    Read more
  • How To Care For A Cat With Fleas
    29.08.24 August 29, 2024 Health

    How To Care For A Cat With Fleas

    Fleas are one of the most common external parasites that can affect cats, causing discomfort, irritation, and potentially leading to more serious health issues if left untreated. If you’ve noticed your cat scratching excessively or noticed small, dark specks in their fur, it’s time to consider flea treatment. In this guide, we explore how to get rid of fleas on cats, the best flea treatment for cats, and essential tips for flea removal for kittens. By following these expert recommendations, you can ensure your cat is flea-free and comfortable. Understanding Fleas and Their Impact on Cats Fleas are tiny, wingless insects that survive by feeding on the blood of animals. For cats, a flea infestation can lead to a range of issues, from mild irritation to severe allergic reactions. Common signs of fleas on cats include: Excessive scratching and grooming: Cats with fleas often scratch themselves more than usual, particularly around the head, neck, and base of the tail. Red, irritated skin: Flea bites can cause red, inflamed patches on your cat’s skin. Hair loss: Persistent scratching can lead to bald spots and hair loss. Presence of flea dirt: Flea dirt, which looks like tiny black specks, is actually flea excrement and can be found on your cat’s skin and fur. Pale gums: In severe cases, fleas can cause anemia in cats, leading to pale gums and lethargy. Fleas can also transmit tapeworms and other diseases, making it crucial to address an infestation promptly. How to Get Rid of Fleas on Cats: Step-by-Step Guide Identify the Infestation: The first step in getting rid of fleas is identifying whether your cat has an infestation. Use a fine-toothed flea comb to check your cat’s fur, especially around the neck and tail base. The comb will help you catch fleas and flea dirt. If you find evidence of fleas, it’s time to begin treatment. Choose the Right Flea Treatment for Cats:  There are several types of flea treatments available for cats, including topical treatments, oral medications, and flea collars. The right choice will depend on your cat’s age, health, and lifestyle. Here’s a breakdown of the most common options: Topical Treatments: These are usually applied to the back of your cat’s neck and provide protection for up to a month. These treatments are effective at killing fleas on contact and can also prevent future infestations. Oral Medications: Oral flea medications are given by mouth and work systemically to kill fleas. They start working quickly and can be particularly effective for severe infestations. Flea Collars: Flea collars, offer long-lasting protection against fleas and can be a convenient option for cats that don’t tolerate topical treatments well. Flea Shampoos: Flea shampoos can help kill fleas on contact and provide temporary relief, but they may not prevent future infestations. Shampoos are often best used in conjunction with other treatments. Flea Sprays: Flea sprays can be applied directly to your cat’s fur and provide immediate relief. They are particularly useful for treating areas of your home where fleas may be hiding. Flea Removal for Kittens Kittens are more sensitive to flea treatments than adult cats, so it’s important to use products that are specifically designed for their age and weight. Here are some tips for flea removal for kittens: Manual Removal: For very young kittens (under 8 weeks old), it’s often safest to remove fleas manually using a flea comb. Gently comb through the kitten’s fur, dipping the comb in soapy water to kill any fleas you catch. Mild Flea Shampoos: If your kitten is old enough (usually over 8 weeks), you can use a mild flea shampoo that is safe for kittens. Be sure to follow the product’s instructions carefully and rinse thoroughly. Consult Your Veterinarian: Always consult your veterinarian before using any flea treatments on kittens. They can recommend the safest and most effective products for your kitten’s specific needs. Treat Your Home Environment Fleas don’t just live on your cat—they can infest your home as well. To prevent re-infestation, it’s important to treat your home environment: Vacuum Regularly: Vacuum your carpets, rugs, furniture, and pet bedding frequently to remove fleas, eggs, and larvae. Be sure to empty the vacuum bag or canister immediately after use to prevent fleas from escaping. Wash Bedding: Wash your cat’s bedding, as well as any other fabric items your cat frequently uses, in hot water to kill fleas and their eggs. Use Household Flea Sprays: Apply flea sprays to carpets, rugs, and upholstery to kill any remaining fleas and prevent them from returning. Consider Flea Foggers: In severe infestations, you may need to use a flea fogger (or “flea bomb”) to treat your entire home. These products release an insecticide that kills fleas throughout the house, but be sure to follow the instructions carefully and remove pets from the area during treatment. Monitor and Re-Treat as Needed After treating your cat and home, it’s important to monitor the situation closely. Fleas can be persistent, and it may take a few weeks to completely eliminate them. Continue to check your cat for fleas regularly and be prepared to re-treat if necessary. Most flea treatments for cats should be applied monthly to provide ongoing protection. Preventing Future Flea Infestations Once you’ve successfully gotten rid of fleas, taking steps to prevent future infestations is crucial: Regular Flea Treatment: Keep your cat on a regular flea treatment regimen, especially during warmer months when fleas are more active. Regular Grooming: Brush your cat regularly and check for any signs of fleas or flea dirt. Maintain a Clean Home: Continue to vacuum and wash bedding regularly to keep your home flea-free. Caring for a cat with fleas can be challenging, but with the right approach, you can quickly and effectively eliminate the infestation and prevent it from returning. By choosing the best flea treatment for cats, following a thorough flea removal process for kittens, and maintaining a clean environment, you’ll ensure your cat stays comfortable and flea-free. At Lords & Labradors, we offer a range of premium flea treatments and grooming products designed to keep your cat healthy and happy. Explore our collection today to find the perfect solution for your pet’s needs.  

    By Laura Rudd

    Read more
  • Bathing Your Dog at Home
    29.08.24 August 29, 2024 Health

    Bathing Your Dog at Home

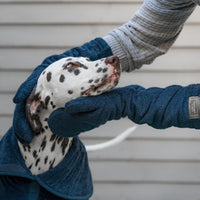
    Bathing your dog at home can be a rewarding experience that strengthens the bond between you and your furry friend. However, it can also be a daunting task if you’re unsure about the best approach. Ensuring that your dog’s coat and skin are clean and healthy is essential for their health & well-being. In this guide, we explore everything you need to know about bathing for dogs, including how to bathe a dog effectively, the best techniques, and tips for choosing the right shampoo for your dog’s specific needs. Why is Regular Bathing Important? Regular bathing is not just about keeping your dog looking and smelling fresh. It’s also vital for maintaining healthy skin and coat. Bathing removes dirt, debris, and excess oils that can accumulate on your dog’s skin, preventing issues such as irritation, infections, and matting. Additionally, regular baths can help you spot any unusual lumps, bumps, or skin conditions that may require veterinary attention. How Often Should You Bathe Your Dog? The frequency of bathing depends on several factors, including your dog’s breed, coat type, lifestyle, and any underlying skin conditions. Generally, most dogs should be bathed every 4 to 6 weeks. However, dogs with oily coats, such as Basset Hounds, may need more frequent baths, while breeds with water-resistant coats, such as Golden Retrievers, can go longer between baths. If your dog has a specific skin condition, your veterinarian may recommend a more tailored bathing schedule. It’s important to avoid over-bathing, as this can strip the skin of natural oils and lead to dryness or irritation. How to Bathe a Dog: Step-by-Step Guide Bathing a dog at home doesn’t have to be a stressful experience. With the right preparation and approach, you can make bath time enjoyable for both you and your pet. Gather Your Supplies Before you begin, make sure you have all the necessary supplies on hand: Dog-specific shampoo: Choose a shampoo that is appropriate for your dog’s coat type and skin condition. Avoid using human shampoos, as they are not formulated for a dog’s pH balance and can cause irritation. Conditioner: If your dog has a long or thick coat, a conditioner can help detangle and soften their fur. Brush: A good brushing before the bath will help remove loose fur, dirt, and tangles, making the bathing process easier. Non-slip mat: Place a non-slip mat in the bath or shower to prevent your dog from slipping and feeling insecure. Towels: Have several towels on hand for drying your dog. Our bamboo drying mitts and coats are particularly effective at absorbing moisture. Cup or shower head: Use a cup or detachable shower head to rinse your dog thoroughly. Treats: Keep some treats nearby to reward your dog for good behaviour during the bath. Brush Your Dog’s Coat Before getting your dog wet, give them a thorough brushing. This helps to remove any loose hair, dirt, and mats. Brushing is especially important for long-haired breeds, as it prevents tangles from becoming worse when wet. Mats can trap moisture and lead to skin infections, so it’s important to address them before bathing. Prepare the Bath Fill the bath or sink with lukewarm water. The water should be comfortably warm—not too hot or cold—as dogs have sensitive skin. Make sure the water level is not too high; it should reach just below your dog’s chest. If you’re bathing a small dog, a sink may be more manageable than a full bath. Wet Your Dog Thoroughly Start by gently wetting your dog’s coat with water. Use a cup or a handheld shower head to wet the fur, starting from the neck and working your way down to the tail. Avoid getting water in your dog’s ears, eyes, and nose, as this can cause discomfort and potential infections. If necessary, you can place a cotton ball in each ear to prevent water from entering. Shampoo Your Dog Apply the dog shampoo by lathering it in your hands first, then gently massaging it into your dog’s coat. Focus on areas that tend to get dirty, such as the paws, tummy, and under the tail. Be sure to work the shampoo into a rich lather, but avoid scrubbing too harshly, as this can irritate the skin. When choosing a shampoo, opt for one that is specifically designed for dogs. There are many types available, including shampoos for sensitive skin, flea control, and coat conditioning. If your dog has a skin condition, your vet may recommend a medicated shampoo. Rinse Thoroughly Rinsing is one of the most important steps in the bathing process. Any leftover shampoo residue can cause skin irritation, so it’s crucial to rinse your dog thoroughly. Use lukewarm water and continue rinsing until the water runs clear. Pay special attention to areas where soap tends to accumulate, such as under the arms and around the neck. Condition (Optional) If your dog has a long or thick coat, you may want to use a conditioner to help detangle and soften the fur. Apply the conditioner as directed on the bottle, then rinse it out thoroughly. As with shampoo, it’s important to ensure all the product is removed to avoid irritation. Dry Your Dog After rinsing, gently squeeze out excess water from your dog’s coat. Use towels or drying mitts to pat your dog dry, starting with the head and working your way down the body. For dogs with long hair, you may need to use a drying coat to get them as dry as possible. Some dogs may benefit from a blow dryer on a low, cool setting, but be sure to keep the dryer at a safe distance to avoid overheating. Reward Your Dog Bathing can be a stressful experience for some dogs, so it’s important to reward them afterward. Offer treats, praise, and playtime to reinforce positive behaviour and help your dog associate bath time with good things. Choosing the Right Shampoo for Your Dog Selecting the right shampoo is crucial for maintaining your dog’s coat and skin health. Here are a few tips for choosing the best shampoo for your dog: Skin Type: If your dog has sensitive skin, choose a hypoallergenic or oatmeal-based shampoo. For dogs with dry skin, look for moisturising shampoos with ingredients like aloe vera or coconut oil. Coat Type: Some shampoos are formulated specifically for certain coat types, such as curly, long, or short coats. Choose a shampoo that enhances the natural texture and shine of your dog’s fur. Medicated Shampoos: If your dog has a skin condition such as dermatitis or allergies, your vet may recommend a medicated shampoo. These shampoos contain active ingredients that help treat specific skin issues. Bathing your dog at home can be a straightforward and enjoyable process when done correctly. By following the steps outlined above and choosing the right products, you can keep your dog’s coat and skin healthy, clean, and free of irritants. Regular bathing not only improves your dog’s hygiene but also strengthens the bond between you and your pet. At Lords & Labradors, we offer a range of premium dog grooming products, including shampoos, conditioners, and grooming tools, to make bath time a breeze. Explore our collection today to find everything you need to keep your dog looking and feeling their best.  

    By Laura Rudd

    Read more