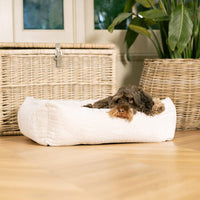
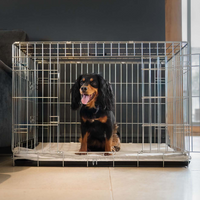
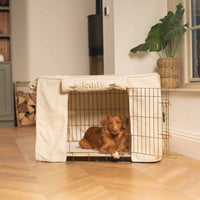
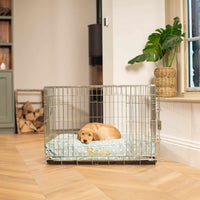
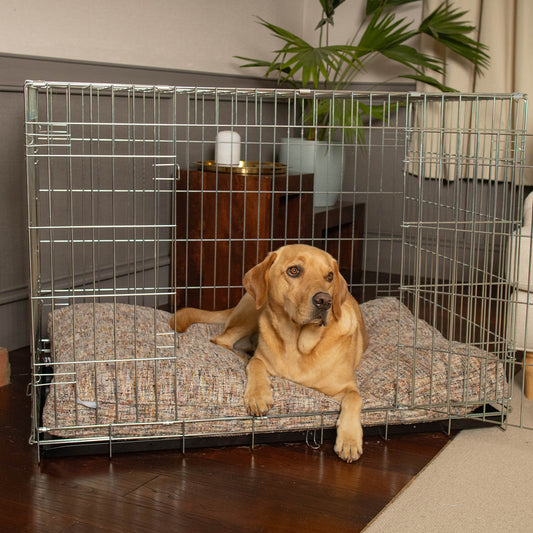
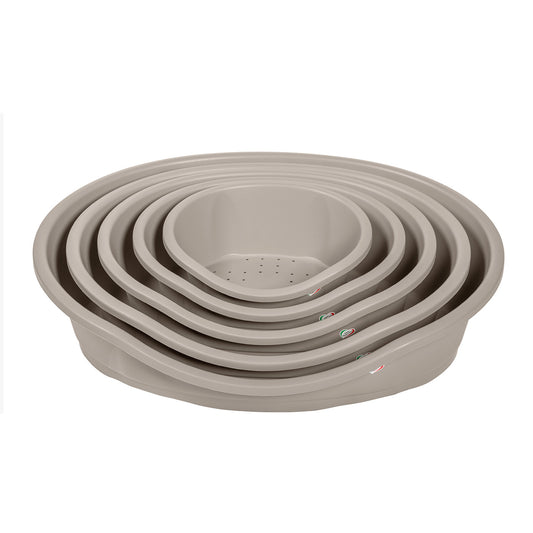
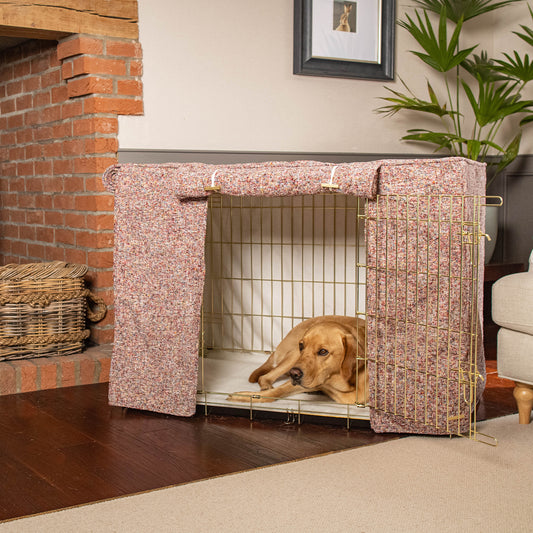
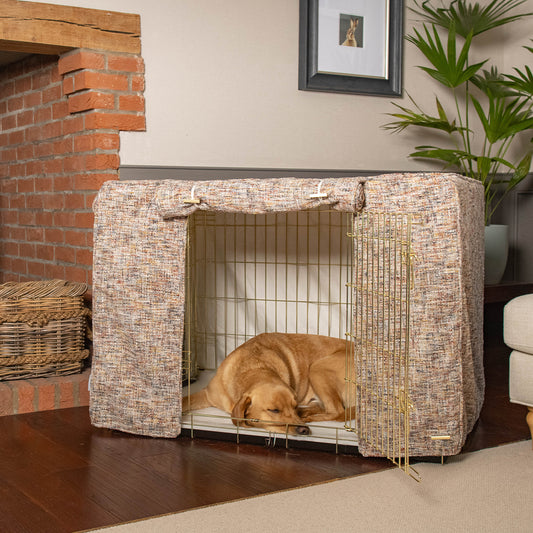
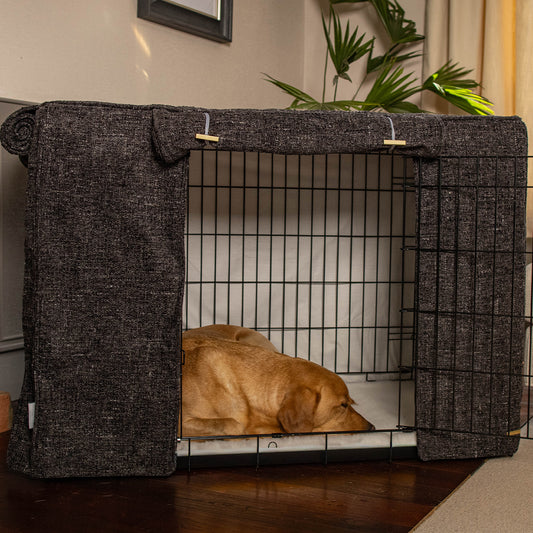
Did you know dogs spend 12 to 14 hours a day sleeping? That's a lot of time in bed so it's no surprise that their bed might be looking a little worse for wear. Dogs are creatures of comfort so making sure they have a a clean and supportive bed is essential for their overall well-being. In this guide, our Pet Experts explore the signs that indicate it's time to change your dog's bed and share expert tips on how to care for your canine's cherished sleeping spot.
How Often Should You Replace Your Dog’s Bed?
Determining how often to replace your dog's bed depends on several factors including the quality of the bed, your dog's size and activity level, and any specific health considerations. As a general guideline, it's advisable to replace your dog's bed every 1 to 3 years, or sooner if signs of wear and tear become noticeable.
Signs It's Time to Change Your Dog's Bed:
Visible Wear and Tear: Over time, your dog's bed may start showing signs of wear and tear, such as flattened cushions, lumps, or torn fabric. If you notice any significant damage, it's a clear indication that it's time to consider a replacement.
Lingering Odours: Despite regular cleaning, dog beds can accumulate odours over time, especially if your furry friend enjoys outdoor adventures or has accidents indoors. Lingering smells that persist even after washing could signal the need for a new bed.
Loss of Support: Just like humans, dogs require proper support for their joints and muscles, especially as they age or if they have existing health conditions. If your dog's bed no longer provides adequate support or has become too soft, it's time to invest in a new one to ensure their comfort and well-being. It might be worth investing in an orthopaedic dog bed if your dog’s breed is prone to joint issues.
Allergies and Skin Irritations: Dogs can develop allergies or skin irritations from prolonged exposure to dust mites, pet dander, or other allergens that accumulate in their beds over time. If you notice your dog scratching more than usual or experiencing skin issues, a new bed with hypoallergenic materials may offer relief.
Preference for Alternative Sleeping Spots: Dogs are creatures of habit, and if you notice your furry friend opting for alternative sleeping spots around the house instead of their bed, it could indicate that they're no longer comfortable or satisfied with their current sleeping arrangements. It’s worth looking at how your dog likes to sleep so you can get the best bed shape to suit their sleeping style, our Information Hub has a guide on how to choose the perfect dog bed for your dog.
Top Ways to Care for Your Dog's Bed:
Regular Washing: Establish a routine for washing your dog's bed to remove dirt, hair, and odour-causing bacteria. Most of our Lords & Labradors dog beds are machine washable, we have a handy guide on how to wash your dog’s bed here.
Use a Removable Cover: Opt for dog beds with removable, machine-washable covers for easy cleaning. Having a spare cover on hand allows you to swap them out while one is being laundered, ensuring your pup always has a fresh and clean place to sleep. We also sell bamboo bed covers which are great for popping over your dog’s bed to help keep them clean especially after a muddy dog walk, they will act as an additional layer of defence against moisture and stains, extending the life of the bed!
Vacuum and Spot Clean: In between washings, use a handheld vacuum or lint roller to remove hair and debris from the surface of the bed. Spot clean any stains or spills promptly to prevent them from setting into the fabric.
Rotate and Fluff: Just like flipping a mattress, periodically rotate your dog's bed to distribute wear evenly and prevent premature sagging. Fluffing the bed's filling helps maintain its loft and support over time.
Sun and Air Dry: On sunny days, take advantage of natural sunlight by airing out your dog's bed outdoors. Sunlight helps eliminate odours and kills bacteria, leaving the bed feeling fresh and revitalised.
Inspect Regularly: Take time to inspect your dog's bed for any signs of damage, loose seams, or worn-out stuffing. Promptly address any issues to prevent further deterioration and ensure your pup's safety and comfort.
By recognising the signs that it's time to change your dog's bed and implementing proper care and maintenance techniques, you can provide your furry friend with a clean, comfortable, and supportive sleeping environment. Remember, a happy and well-rested pup makes for a happier pet parent too!
If you’re looking to upgrade your dog’s bed why not check out our collection of luxury dog beds? Bedding is our speciality, we design and craft all of our bedding here in our Lincolnshire workshop so you can be sure your dog will be getting the best sleep possible in one of our luxury dog beds.
The Importance Of Correct Nutrition For Dogs And Cats!
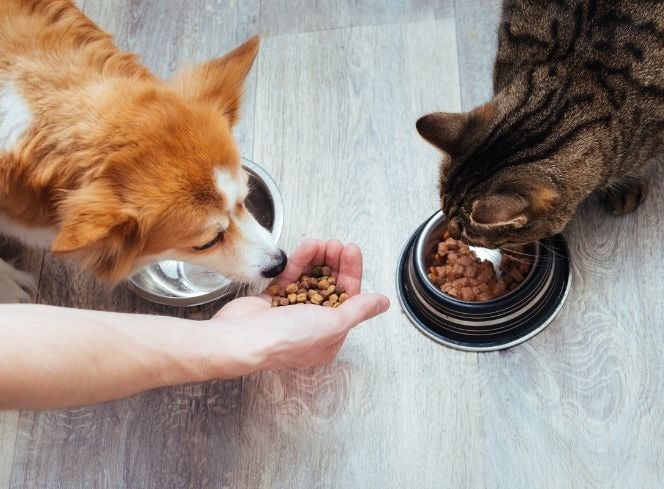
Ensuring optimal nutrition for our beloved pets is paramount for their overall health and well-being. As responsible pet owners, it is crucial to understand the significance of providing nutritionally complete and balanced meals to our furry friends. In this comprehensive guide, we will delve into the world of dog and cat nutrition, exploring the importance of the right food choices, nutritionally complete homemade recipes, and the best commercial options available.
Understanding Dog and Cat Nutrition
Your pet's nutrition plays a pivotal role in their vitality and longevity. Just like humans, dogs and cats require a balanced diet that fulfils their specific dietary needs. A well-rounded diet supports their immune system, maintains a healthy weight, and promotes optimal organ function. Pet food ranges from being more processed to being raw and rich in natural ingredients, finding the right fit for your pet is important!
Dog Food Nutrition
Choosing the right dog food is a key aspect of canine care. With an abundance of options available, it's essential to prioritise nutritionally complete choices. To make an informed decision, consider using a dog food nutrition calculator and comparing different products. Look for the best nutritional dog food that meets your pet's unique requirements, taking into account factors such as breed, size, and age. Our favourite nutritionally rich dog foods are Orijen, Carnilove and Acana, they are all designed with your dogs nutrition in mind.
Dog Nutrition Facts and Guide
Understanding dog nutrition facts is imperative for providing the best care. Refer to a dog food nutrition guide to navigate through the plethora of choices available in the market. Learn about your dog's daily nutritional requirements and make informed decisions that contribute to their overall health and happiness.
Cat Food Nutrition
Cats, being obligate carnivores, have unique nutritional requirements. The best cat food for nutrition considers their need for high-quality protein and essential nutrients. Explore dry cat food nutrition labels to ensure your feline friend receives a balanced diet that supports their specific dietary needs. For a cat food which is high in protein and great for fussy felines we love Carnilove, they all have at least 80% wild origin meat content and contain No grains, potatoes, GMO, soy, sugar, preservatives or colourants.
Daily Nutritional Requirements for Cats
Cats require a carefully balanced diet to thrive. Knowing the daily nutritional requirements for cats is essential for choosing the right cat food. Consult with your vet to understand the specific needs of your cat, such as the importance of taurine and other essential nutrients crucial for their health.
In conclusion, the importance of correct nutrition for dogs and cats cannot be overstated. Whether choosing commercial options or crafting homemade recipes, prioritising nutritionally complete meals is key to ensuring your pet's health and happiness. Stay informed about dog and cat nutrition, consult with professionals, and make choices that align with your pet's unique requirements. By providing the best nutritional dog food or cat food, you contribute to a longer, healthier life for your furry companions. Here at Lords & Labradors we have a large range of both cat and dog food so you can pick the best option for you and your pet
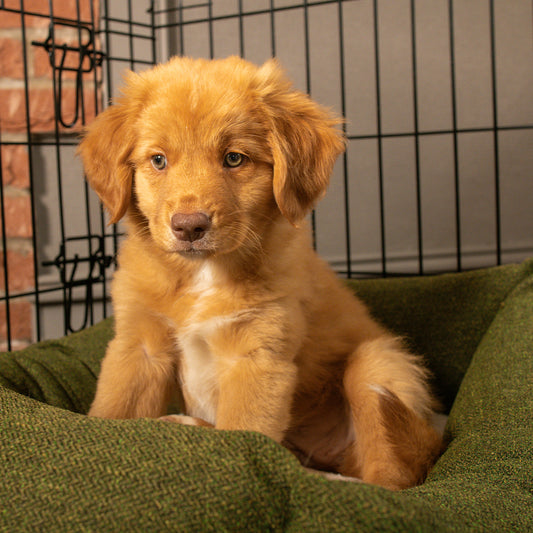
Crate training is an important part of settling in a new puppy. A crate provides a safe, quiet space for your pup and will help them to get used to their nighttime routine and with toilet training. A dog crate can be made into a cosy den that will be loved by your new four-legged friend for a lifetime. In this article we will explain the best crate set-up for puppies, how to change the set-up as they grow up and also how to look after your crate and crate bedding.
How To Make The Perfect Crate Set-Up For A Puppy
Crate training your puppy will have lots of advantages, helping them to settle and feel safe in their home as well getting them into a consistent bedtime routine. The perfect crate for a puppy will feel safe, warm and cosy. It’s important that it’s inviting so that they feel compelled to use it.
With this in mind we’d suggest the following items:
Crate Cover
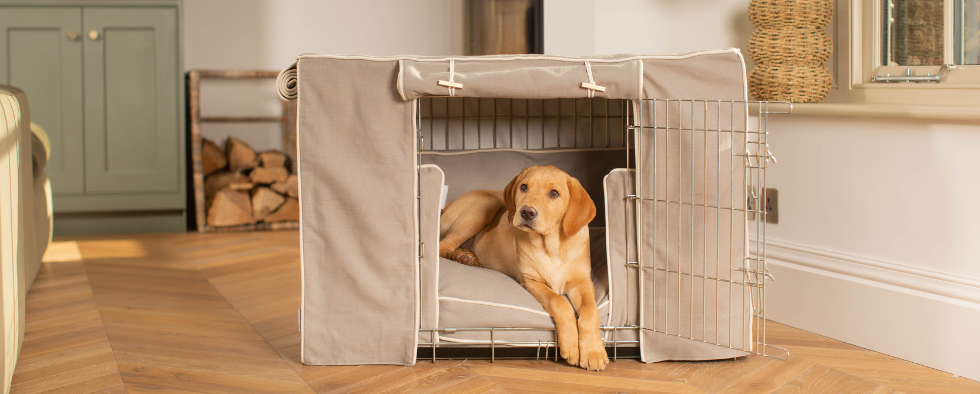
[product]Crates in their basic form can be rather draughty and a little bit unsightly! A crate cover will not only make the crate look stylish, but it will make the crate feel cosy inside. Our crate covers feature roll down doors which can be lowered when it’s time for bed. Puppy will soon learn when they should be sleeping (doors rolled down) and when it’s time to get up (doors rolled up). Our crate covers come in a range of fabrics which have been designed to match your home and they're all machine washable, making them brilliant for puppies!
Cosy & Calming Puppy Crate Bed
[product]
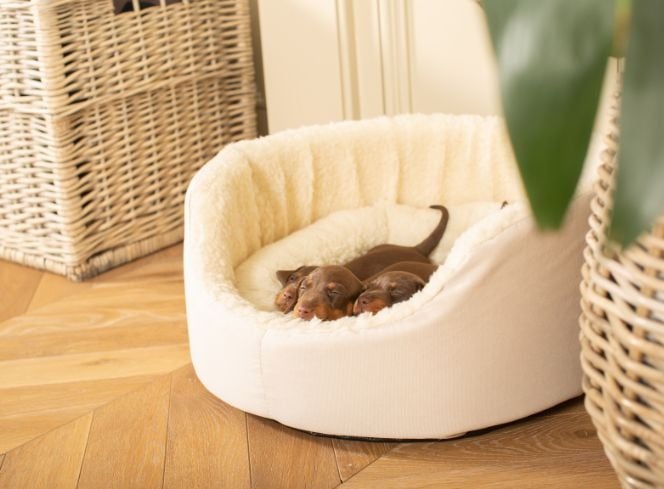
Our cosy and calming beds have been designed with crate training in mind. Each size is made to fill exactly one half of the corresponding crate size. So if you have a small crate for a Chihuahua for example, the small bed will fit in exactly one half of the crate. This then leaves room for a puppy pad in the other half along with a bowl for water. They come in a range of our printed cotton fabrics and feature a reversible cushion pad inside - one side covered in super plush sherpa!
Puppy Pads
Whilst we don’t want to encourage puppies to pee in the crate, it’s also important to note that they can’t hold themselves for very long at all. Whilst you will be able to take them outside at regular intervals during the day, this may not be the case at night. When you put them to bed, putting a puppy pad in one half of the crate will help to stop any accidents from dirtying their bed or crate tray.
Crate Bowls
Puppies will need access to water at all times and a crate bowl is a brilliant accessory as it can be fastened to the crate walls. This will ensure it doesn’t get tipped over or knocked like a standard bowl might.
The Perfect Crate Set-Up For An Adult Dog
As your dog becomes toilet trained and they begin to need the full space of the crate for their bed, you will need to consider swapping out the puppy accessories for their proper adult bed. At Lords & Labradors we specialise in crate bedding that will make your dog’s den look stunning as well as super comfortable inside.
Crate Cushion
Our crate cushions are designed to fit our crates perfectly. They come in a range of fabulous fabric designs from luxurious tweeds to printed cottons. There really is something to suit every taste and home.
Crate Bumper
Crate walls aren’t the most comfortable things to snuggle up to, and if your dog likes to curl in the corner of their bed, they will need something other than metal bars! That’s where our fabulous bumpers come in. They sit around the edge of the crate cushion and create a spongey layer of warmth around the walls. Perfect for snuggling up in the corner when nap time calls!
Crate Cover
Our crate covers are perfect for setting a routine with your dog, when the doors are rolled down it will signal to them it's time to sleep. Our crate covers are fully lined to help keep light out and come in matching fabrics to our bumpers and cushions to you can be sure crate will look stylish!
Crate Set Aftercare and How To Clean A Crate
With a little love and care your crate set will last a long time. Here we detail how to look after your crate set:
The Crate - The crate is made of sturdy metal and is really easy to keep clean. Our crates are easy to wipe clean and the tray is removable so you can get into the corners properly. It’s really important to make sure the crate is completely dry before setting back up and allowing your pet back in, we recommend drying your crate to avoid any rusting.
Lords & Labradors Cushion & Bumper Covers - For our bedding from our core collection you will be able to remove the covers on the cushions and bumpers. Turn the cover inside out and machine wash on a 20 degree gentle cycle. Allow the covers to air dry (do not tumble dry). Once dry return the inner cushion to the cover.
Essentials Plush Collection Bumpers & Cushions - Our bumpers and cushions from the Essentials Plush Collection don't have removable covers, we recommend spot washing your essentials plush bumpers and cushions.
Lords & Labradors Crate Covers - Our crate covers are all machine washable on a 20 degree gentle cycle, apart from our oil cloth crate covers. After washing, we recommend air drying your crate cover over your crate to help keep it in shape and to make sure it doesn't shrink. A cool iron on the reverse of the cotton fabrics is fine if necessary, but often they won’t even need that. Our tweeds and Savanna fabrics are super fast drying and they will come out of the spin almost dry. Just give them an air and they’ll be ready to use again in no time at all!
Cushion and bumper inners - The cushion and bumper inners are protected by waterproof interlinings, so won’t need washing. This will preserve the inner fillings. The waterproof liners are wipe clean. If they become soiled, simply wipe down with a mild pet-safe detergent and they’ll be as good as new again.
Cosy and Calm Puppy Bed - Our puppy beds are fully machine washable. You can put the whole bed in the machine and wash on a 20° cycle. When removed, simply shake and plump the cushion back into shape and leave to air dry.
Follow these simple steps and your crate sets will last and look stunning for years to come!
We’re getting to that time of year again where we’re travelling more with our pets to the beach, staycations and even trips to a different location for a long walk. No matter how long the journey - even if it’s a trip to the local vets - you should ensure your dog is properly restrained and safe to travel. Here in the UK it’s the law when travelling by car your dog needs to be restrained. In this blog, we breakdown how to travel safely with your pet.
What Is The Law With Dogs In Cars?
The Highway Code states in their Rules about Animals, when in a vehicle, dogs are to be suitably restrained so they cannot distract you while you’re driving or injure you, or themselves, if you should need to stop quickly. If you were in an accident caused by your dog distracting you whilst you were driving, this could be considered as ‘dangerous driving’. It’s also good to check your insurance policy, as car insurance providers may require you to restrain your pet.
Is It The Law To Restrain A Dog In A Car?
It is the law to restrain your dog when travelling in your car. So as fun as it is for your pooch to sit with their head out of the window, they must be suitably restrained so they cannot distract you and potentially hurt either you or themselves. When it comes to where your dog should be when travelling, although there are no laws against your dog travelling in the footwell of the car, unfortunately they would not be properly restrained and if you did have an accident, you may be prosecuted for ‘dangerous driving’.
When choosing where your dog should be properly restrained, no matter what method you choose, your dog should not sit in the front seat - securing them in the boot or back seat behind a front seat is considered a safer option.
How To Secure A Dog In The Car
There are many safety products you can choose from, which can help with travelling safely in the car. It’s most important you choose a solution that’s suitable and comfortable for your pooch, and it has been installed and executed correctly to ensure the safety of your pet. Here at Lords & Labradors, we’d recommend the following for safe travel.
Dog Carriers
Our pet carriers come in different sizes and weights which will vary for the suitability for you and your dog. It’s a lighter option to our metal crates and are easily packed away if you’re staying away from home. Carriers are great when travelling by car and when taking your dog from the car into a safe place to let them out and stretch their legs. They keep your pooch safe and settled whilst travelling.
Travel Harnesses
Our pet-friendly harnesses come in a variety of sizes, suitable to your dogs breed and size. Travel harnesses are easy to fit onto your dog and it’s quick to clip them into place. They’re specially designed to prevent your dog from moving around whilst in the car, all whilst keeping your pet safe and comfortably restrained.
Travel Crates
Crating your dog keeps them safe & secure - using a crate to transport your pet has the added benefit if they’re already used to being crated at home. If your dog is used to being crated, often when travelling they’ll feel safer and their surroundings will reduce any anxiety your dog may have around travelling.
How Long Can A Dog Travel In A Car
Being stuck in the car can be hard for your dog! Not only will your dog need regular toilet breaks, they’ll also need to stretch their legs and get some of their energy out. When stopping for your dog to toilet and stretch their legs, you could also give them some food and water to avoid any spillages whilst travelling. Ideally you should try to keep to your dogs routine where possible (even when travelling) - every 2 to 4 hours for about 15 to 30 minutes is a good guide to follow, however you’ll know what is best for your dog and how they travel. If you’re planning a lengthy trip, try to go on few shorter journeys to see how your dog is likely to react.
You may be preparing for the all important ‘Gotcha Day’, the day celebrated by all dog parents as the day you brought your pup home. Taking your puppy home for the first time is exciting, especially if you have prepared for their arrival. Puppy shopping can be so much fun, but also overwhelming if you’re a new pet parent, or if you’ve not had a puppy for a few years. There will be some things you do need to buy for necessity and some things that are worth buying for your new pup. Here at Lords & Labradors we’ve put together the 10 puppy essentials you’ll need to get your new puppy settled.
Our Top 10 Items To Buy For Your New Puppy
1) What crate to buy?
Firstly, if you’ve decided to crate train your puppy, you’ll need a crate that will see you through from puppyhood to adulthood. You’ll need a crate the appropriate size so you can fit a puppy bed at one end and a puppy training pad the other incase they need to toilet when left in their crate. It also gives your pup enough room to stretch, play and sleep if crated during the daytime. Depending on your training methods, you may want to place the crate somewhere the puppy can be near to you, but also not directly in a high traffic area of your home. Remember the crate is your puppy’s den, so discourage any children from climbing inside.
2) Where should my puppy sleep?
We recommend a puppy bed that’s easy for your pup to get in and gives them enough support and comfort whilst they sleep. Our Cosy & Calm Puppy Box Beds have been carefully designed with your puppy in mind. The beds are super squishy and soft, and have the most comfortable sides for your pup to snuggle right into. If you have chosen to crate train your pup, our vet bed is really popular, as it’s cosy, comfortable, robust and relatively puppy proof - it’s easily washed and dried too. It can be used with or without our Cosy & Calm puppy box bed.
3) What will my new puppy eat?
It’s recommended you initially use the same food that your puppy comes home with, in order to avoid any tummy upset during their first few days with you. Once your puppy has settled, you can gradually introduce a new food to their diet. It’s good to check the food guidelines of the food you choose to feed your pup, as often they’ll give you the correct guidelines on how to introduce the new food to your pup.
Make sure you have a clean bowl for water and a clean bowl for food, you can opt for a slanted water bowl if you have a spaniel breed to reduce your dogs ears from getting soaked in their water.
4) Puppy Toilet Training
Top of your list should be a reliable pack of puppy training pads, not only are they great for training your young pup, but they are invaluable when travelling (pop in the bottom of their carrier/crate to catch any travel sickness or accidental toilet trips). You can also use them to absorb muddy, wet paws after your pup has had a play in puddles!
5) How to settle my new puppy at night
When settling your new puppy at night, our heart beat sheep will be your puppy's new best friend. The heart beat sheep features a beating heart inside that mimics the beat of Mum's heart. They're designed to offer comfort and calm to new puppies who may feel nervous in their new home; they help to stop separation anxiety too. Alongside the heart beat sheep, you could pop in a heat pad under your dogs bed/cushion to keep them warm and to mimic the feeling of having siblings/mum near. Both the heat and the heart beat sheep will provide comfort for your puppy, especially whilst they are settling in and adjusting overnight.
6) How to keep your new puppy entertained
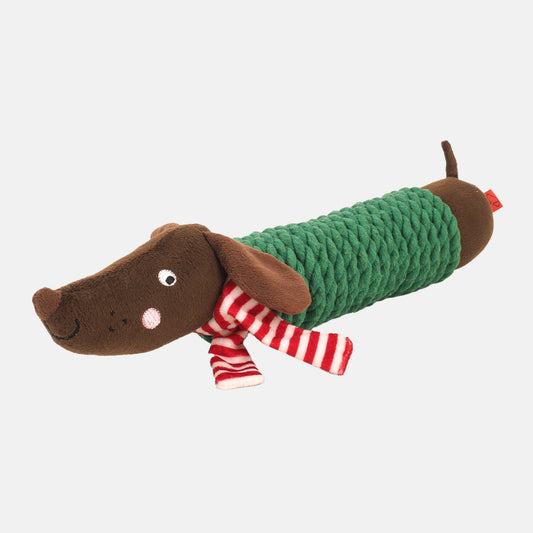
Toys will provide something to chew on for your pup, which you’ll find are essential if you want to avoid your puppy chewing on your furniture. Choose a variety of textures, styles and sizes to keep your puppy engaged and interested. You may want to keep a toy box so your pup can choose what they’d like to play with, or keep a few toys in rotation so your puppy doesn’t get bored with them.
You can also buy toys you can fill with treats or their food. If you want/need to leave your puppy - remember to build this up slowly, and don’t leave your new puppy for a long period of time - you could try freezing a peanut butter filled KONG (remember to use doggy/puppy friendly peanut butter). Freezing the toy will take them longer to work through and will give some relief to their sore teething gums and teeth.
7) Does my new puppy need a collar?
You may want to purchase your dogs collar before they arrive home with you, however it’s advised to purchase the correct size collar for your puppy, which you may have to wait until they’re here to measure them properly. It is a legal requirement to have a tag with your details on incase your puppy gets lost or strays away, but it’s advised not to add your puppy’s name to the tag.
8) How will I get my new puppy home?
Collecting your puppy to take them home is really exciting, but it’s best to be prepared. Make sure you have a suitable carrier/crate to store them in safely for the journey. It’s important your dog is restrained as it is the law to keep your puppy properly restrained whilst driving. In your carrier, you may want to pop in a blanket that smells like home and a scent blanket that smells like their mum and litter mates. It’s also good to have some puppy training pads to hand incase of any car sickness or accidental toilet trips.
9) When to start training my new puppy?
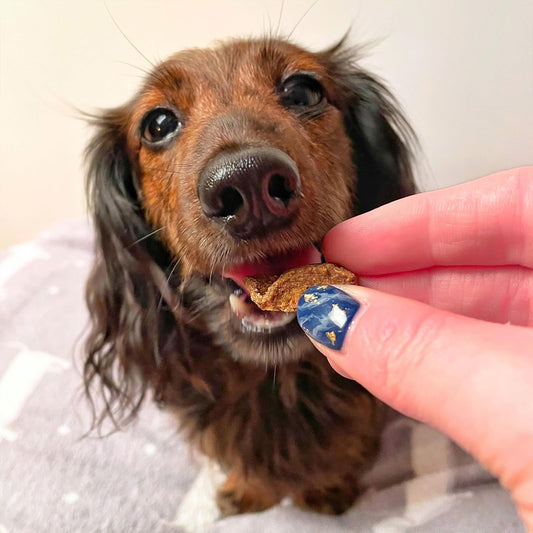
You can start with bonding and training your puppy almost straight away, get some high quality, puppy training treats (make sure to check the guidelines), and enjoy teaching them new tricks - you’ll be amazed at how quick they learn!
10) When do I start grooming my puppy?
It’s recommend that even if your pup won’t require grooming at first, you should regularly brush them to get them used to being groomed and handled. Choose a simple, soft brush and/or comb for the first couple of months. There will be a time you will need to wash your puppy, make sure you’re not using human shampoo as this will upset your puppy's PH levels and may not be compatible with your puppy flea treatment. It’s best to invest in a puppy shampoo that you can use when and if you need to bathe your puppy. We have our own puppy grooming set in our Petplex collection called the 'Puppy Purifier' it has a shampoo and a cologne to help keep your puppy smelling fresh.
Bringing home a Border Collie for the first time is one of the most exciting decisions you can make — but it comes with a learning curve that’s worth getting ahead of. This border collie first time owner guide covers everything you actually need to know: whether the breed suits your life right now, how to set up your home before they arrive, how to train and exercise them without burning out, and the everyday care habits that make the biggest difference. Think of it as the honest, practical rundown a fellow dog-mad friend would give you over a cup of tea.
Border Collies at a Glance: What First-Time Owners Should Know
Border Collies are one of those breeds that genuinely stop people in their tracks. They’re sharp, beautiful, endlessly engaged with the world, and capable of learning things that will honestly surprise you. But they’re also a lot — and knowing that upfront makes all the difference.
Originally bred to herd sheep across miles of open hillside, Border Collies were built to work alongside a human all day, every day. That heritage hasn’t softened much over the generations. Your Border Collie isn’t going to be content pottering around the house waiting for a short walk and a cuddle on the sofa. They need purpose, mental challenges, and consistent engagement — and they’ll let you know, often quite loudly, when they’re not getting it.
Day to day, life with a Border Collie tends to look something like this: a structured morning routine, a proper exercise session (think long walks or a run, not a quick lap of the garden), training that keeps their brain occupied, and ideally some kind of activity that gives them a genuine focus. Without that structure, bored Border Collies have a habit of inventing their own entertainment — which usually involves chewing, herding the children, or taking a creative interest in your skirting boards.
The good news is that their intelligence works in your favour too. They pick up training quickly, they thrive on routine, and once you understand how they think, the relationship becomes genuinely rewarding.
As a breed, Border Collies tend to suit active households, people who love outdoor life, and owners who want to be genuinely involved with their dog rather than just sharing a living space. If you’re still weighing up whether this is the right fit for where you are right now, our guide to the best dog breeds for first-time owners is a great place to start.
Is a Border Collie a Good Fit for a First-Time Owner?
Border Collies can make truly extraordinary companions — but if you’ve done any reading on the breed, you’ve probably noticed the same honest disclaimer popping up everywhere: this is a lot of dog. Not impossible, not even impractical in the right hands, but they genuinely ask more of their owners than most breeds. Going in with clear eyes makes all the difference.
Border Collies thrive with owners who can offer:
1–2+ hours of daily exercise — not a gentle potter around the block, but purposeful movement like running, fetch, or proper off-lead time in open space
Daily mental stimulation — puzzle feeders, training games, scent work, anything that gives that busy brain a real job to do
Consistent, positive training from day one — because a Border Collie without structure will absolutely invent their own, and it rarely ends well for your sofa
Plenty of time at home — they bond deeply with their people and don’t do well with long stretches alone
Regular access to outdoor space — a garden is a bonus, but what really matters is getting out into open spaces often
A calm, predictable routine — they read household energy remarkably well, and chaos tends to tip them into anxiety or overstimulation
That list might feel daunting, but it’s not meant to put you off. Plenty of first-time owners build a genuinely brilliant life with a Border Collie. What usually separates the ones who thrive from the ones who struggle isn’t experience — it’s preparation. Knowing what you’re committing to before your puppy comes home, rather than scrambling to catch up a few weeks in, is most of the battle. That’s exactly what this guide is here to help with.
If you’re still deciding whether the timing is right at all, Am I Ready for a Puppy? is a good place to start before you read any further.
How to Set Up Your Home for Success Before Your Border Collie Arrives
Getting your home ready before your Border Collie arrives is one of the best investments you can make as a first-time owner. This breed is sharp, curious, and remarkably quick to find trouble when boredom or overstimulation kicks in. A calm, organised setup from day one genuinely makes those early weeks feel less like survival mode.
Here’s what to work through before they come home:
Puppy-proof the key areas. Tuck away cables, block off stairs if needed, and clear anything fragile or potentially harmful from nose height. Border Collies investigate everything — thoroughly.
Pick a quiet, dedicated rest spot. High-traffic areas rarely work. A calm corner of the living room or a tucked-away hallway alcove is ideal. Consistency is what helps dogs settle.
Choose a well-sized crate. A good crate gives your puppy somewhere to decompress, not just sleep. Lords & Labradors wooden crates are worth considering here — they feel like part of your home rather than a clinical add-on, which makes a real difference in how your puppy takes to them.
Get a supportive, washable bed. Border Collies are active dogs who need genuinely good rest. A durable, easy-clean bed holds up to daily use and the inevitable muddy paws.
Stock up on mentally stimulating toys. Puzzle feeders, snuffle mats, and treat-dispensing toys do serious work with this breed. They keep a busy brain occupied without requiring you to be constantly “on.”
Sort a well-fitted harness before your first walk. You’ll be walking this dog a lot. A secure, comfortable harness that doesn’t restrict movement is something to buy now, not scramble for on day one.
Set up a consistent feeding station. Same spot, same bowls, same time. It sounds minor, but routine is something Border Collies latch onto quickly — and that works in your favour.
For a full pre-arrival checklist, the Lords & Labradors new puppy prep guide pulls everything together in one place.
Nail the environment early and you’ll spend far less time firefighting in those first few weeks — and far more time actually enjoying your dog.
Training a Border Collie Without Losing Your Mind
Border Collies are one of the most trainable breeds around, but that intelligence cuts both ways. They pick up new skills fast, which is brilliant when you’re consistent — and a little chaotic when you’re not. The good news is that training a Border Collie is genuinely manageable, especially if you build a few solid habits early. Get those right and it becomes one of the most rewarding parts of life with the breed.
One thing that catches a lot of first-time Border Collie owners off guard is just how much mental stimulation these dogs need. Physical exercise matters, of course, but a dog that’s physically tired and mentally bored will absolutely find ways to entertain itself — and those ways tend to involve your furniture, your shoes, or an obsessive fixation with shadows on the wall. Keeping their mind engaged isn’t a bonus; it’s a basic need.
Here are the training priorities worth focusing on from day one:
Early socialisation. Introduce your puppy to different people, dogs, sounds, and environments in those first few months. The more positive experiences they have early, the more confident and settled they’ll be as they grow.
Recall training. A solid recall is non-negotiable with a breed this fast and this driven. Start in low-distraction spaces and build gradually — don’t wait until you’re in a busy park to find out how good it really is.
Loose-lead walking. Border Collies can pull with real determination. Short, calm sessions practised regularly will get you much further than one long, frustrating walk.
Short training sessions. Five to ten minutes at a time is plenty. They learn quickly and tend to switch off if sessions drag on, so keeping things brief and upbeat works in your favour.
Positive reinforcement. Treats, praise, and play all work brilliantly with this breed. Keep the energy light and reward generously when they get it right.
Impulse control. Teaching your dog to wait, pause, and check in with you before reacting is one of the best early investments you can make — and it pays off for years.
Puzzle feeders and enrichment toys. Swapping part of their daily meals into a puzzle feeder gives their brain something to work on and takes the edge off that restless Border Collie energy between walks.
Start simple, stay consistent, and don’t put pressure on yourself to be perfect. Small daily wins genuinely add up. If you’re looking for a practical starting point, our puppy training guide walks you through the foundations in a way that’s easy to follow from the very beginning.
Exercise, Enrichment, and Daily Routine for a Happier Border Collie
Border Collies need both physical exercise and mental stimulation every single day, and one without the other rarely cuts it. A dog who’s run five miles but had no brain-work is still very much a dog looking for something to do — and that something is often your sofa cushions. Getting this balance right early on is one of the most important things you can do as a first-time Border Collie owner.
A Sample Daily Routine for a Border Collie
Morning walk (30–45 minutes) — A brisk off-lead walk or run to burn physical energy and let your dog sniff freely before the day gets going.
Short training session (10–15 minutes) — Recalls, heel work, or a new trick while their mind is fresh. Keep it fun and focused.
Midday enrichment (15–20 minutes) — A puzzle feeder or scatter feed in the garden keeps their brain ticking over during quieter hours.
Afternoon sniff walk (20–30 minutes) — A slower, nose-led walk where they set the pace. It sounds relaxed, but it’s genuinely tiring in the best way.
Evening activity (20–30 minutes) — Hide-and-seek, fetch with rules, or a short agility session in the garden all work well here.
Wind-down time — A chew or snuffle mat to help them settle and switch off before bed.
Enrichment ideas worth rotating in:
Puzzle feeders and slow bowls at mealtimes
Scatter feeding in long grass
Hide-and-seek with toys or treats around the house
Sniff walks where they lead and you follow
A new trick or task to work on each week
If your Border Collie still seems restless or destructive after a full day, mental under-stimulation is usually the culprit. It’s worth knowing the signs your dog might be bored and how to fix it before any habits take hold.
Consistency matters more than intensity here. A structured, varied routine built around your actual life is what helps Border Collies genuinely settle — and it doesn’t need to be complicated to work.
Feeding, Grooming, and the Little Habits That Make Life Easier
Getting the everyday care routine right makes a surprising difference to how settled your Border Collie feels — and honestly, how relaxed you feel too.
Start with feeding. Border Collies do well on a high-quality diet suited to their age and activity level. Puppies generally need three smaller meals a day, while adults settle comfortably into two. Feeding at consistent times each day helps regulate energy and digestion, and when your dog is young, it makes house training noticeably easier as well.
Coat care tends to be simpler than new owners expect. Both rough and smooth coat varieties need regular brushing to manage shedding and prevent tangles, but a couple of sessions a week covers most of the year. During heavier shedding seasons, daily brushing becomes part of the routine pretty quickly. Pay extra attention behind the ears and around the collar — knots love to hide there. If you want to put together a solid grooming kit from the start, the Lords and Labradors grooming and healthcare collection is a good place to browse.
Beyond the coat, keep nails trimmed every few weeks, check ears for any redness or build-up, and get into the habit of brushing teeth regularly. These things are much easier to keep on top of when you start early, while your dog still accepts them as a normal part of life rather than something to wriggle away from.
It’s also worth knowing that Border Collies can be predisposed to certain health conditions, including epilepsy. Cornell University’s Riney Canine Health Center advises that the first time your dog has a seizure, you should stay calm, time the seizure, and schedule a veterinary exam as soon as possible after recovery. Having that knowledge beforehand means you can respond clearly instead of panic.
Build your routine steadily, lean on your vet when questions come up, and trust that the small daily habits genuinely add up.
Frequently Asked Questions
Is a Border Collie a good choice for a first-time owner?
Yes, a Border Collie can be a good choice for a first-time owner if you’re well prepared and genuinely active. They need 1–2+ hours of daily exercise, mental stimulation, positive training, time with their people, and a calm routine. Preparation matters more than previous dog-owning experience.
How difficult is it to own a Border Collie?
Owning a Border Collie can be challenging because they need far more than basic walks and cuddles. They thrive on structure, daily exercise, brain-work, and consistent training. If those needs aren’t met, they often become restless, noisy, destructive, or start herding children and chewing around the house.
The Complete Cocker Spaniel Puppy Guide: What New Owners Need To Know
Bringing home a Cocker Spaniel puppy is one of those experiences that somehow manages to be even more full-on and even more wonderful than you imagined. This cocker spaniel puppy guide covers everything you actually need to know, from building a calm first routine and getting to grips with that gorgeous high-maintenance coat, to feeding, training, and the kit worth having before collection day. Think of it as the practical, honest companion for those early weeks with your new dog.
What to know before bringing home a Cocker Spaniel puppy
Cocker Spaniels have a way of making you feel like the most important person in the room — and that quality alone tells you a lot about what life with one of these dogs is actually like.
It’s no surprise they’re one of the UK’s most beloved breeds. Cockers are affectionate, playful, and genuinely invested in whatever you’re doing, whether that’s a long walk through the woods or a quiet evening on the sofa. They bond deeply with their families and thrive on closeness, which makes them wonderful companions — but it also means they do best in homes that can offer real time and attention.
What catches a lot of new owners off guard is just how sensitive Cockers can be. They pick up on moods, they can find loud or chaotic environments unsettling, and they respond best to calm, consistent handling. Harsh correction rarely lands well with them. Patience and positive training, though? That gets you very far. If you enjoy the process of building a relationship through teaching, a Cocker will reward you for it every single day.
Energy levels are worth thinking about honestly, too. Cocker Spaniel puppies are lively and curious, and they need both physical activity and mental stimulation to settle well at home. A bored Cocker will absolutely find their own entertainment — and it usually involves something you’d rather they left alone.
What this all points to is a dog that suits hands-on, engaged owners who enjoy routine, companionship, and the rewards of good training. Get that balance right from the start, and a Cocker puppy will slot into your life in the most brilliant way.
For a deeper look at the breed’s history and personality, our Cocker Spaniel ultimate guide is a great place to start. Otherwise, read on — this Cocker Spaniel puppy guide covers everything from exercise and training to grooming, feeding, and the kit worth having from day one.
How to manage Cocker Spaniel puppy exercise, training, and socialisation
Getting the balance right between activity and rest is one of the most important things you can do for a young Cocker Spaniel. The good news? At this age, short and consistent beats long and exhausting every single time.
A useful rule of thumb for puppy exercise: 5 minutes per month of age, twice daily. So a 12-week-old pup needs just 15 minutes, twice a day. It sounds almost too little, but their joints and growth plates are still developing. Overdoing it early can cause real problems down the line, and no one wants that.
Training works on the same principle. Five to ten minutes at a time is far more effective than a marathon session that leaves your puppy too frazzled to focus. Cocker Spaniels are bright, willing little dogs, and reward-based training genuinely suits them well. Start simple: recall with a high-value treat or a favourite toy, calm lead walking, and toilet training built around a consistent outdoor routine. The key is to reward the right behaviour the moment it happens, every time, without exception.
A few things that tend to make a real difference in these early weeks:
Manage the bitey phase calmly. Redirect straight onto a chew toy and stay consistent. Reacting dramatically usually makes it worse, not better.
Build in rest between activity. Puppies need far more downtime than you might expect. A calm crate nap after a play session prevents the overtiredness that turns even sweet puppies into little goblins.
Keep socialisation low-pressure. New sounds, surfaces, and gentle experiences are brilliant at this age. Busy, overwhelming environments are not.
Introduce the lead at home first. Let them get used to wearing a collar and lead indoors before you venture outside.
Reward the behaviours you want more of. Sitting quietly, settling on their bed, coming when called — all worth marking with genuine praise.
A well-socialised Cocker grows into a confident, adaptable dog, and those early weeks of gentle exposure lay the groundwork for that. Our guide to socialising a puppy goes into much more detail if you want a step-by-step approach to getting it right.
Cocker Spaniel grooming: the coat care routine new owners need
Cocker Spaniel grooming tends to catch new owners off guard, and honestly, that’s completely understandable. Those gorgeous silky ears, feathered legs, and flowing coat look beautiful in photos, but in real life they collect mud, twigs, and tangles at a remarkable rate. Getting a consistent grooming routine in place early is one of the most practical things you can do for your puppy — and your sanity.
Weekly Grooming Routine
Brush the full coat using a slicker brush, working section by section from the back legs forward. Be gentle around the ears and belly, where the fur is finer and more prone to matting.
Check ears and feathering for mats and debris. Cocker ears are especially good at hiding grass seeds and knots, so run a wide-tooth comb through carefully and peek inside the ear flap after every walk.
Use a detangling spray on any stubborn areas before working through them with a comb. Yanking at knots makes the whole experience unpleasant — for both of you.
Bathe your puppy every four to six weeks, or sooner after a particularly muddy adventure. Use a puppy-safe shampoo and rinse thoroughly to avoid any skin irritation.
Do a quick post-walk check every time you come home. Muddy legs, damp ears, and anything caught in the feathering all deserve a once-over before your puppy gets comfortable on the sofa.
Essential Grooming Tools
Tool
Purpose
Slicker brush
Removes loose fur and surface tangles
Wide-tooth comb
Works through knots and checks for mats
Ear cleaner
Keeps ears clean and reduces infection risk
Detangling spray
Loosens stubborn tangles before brushing
Puppy-safe shampoo
Gentle cleansing without irritating the skin
Top tip: Start grooming sessions early and keep them short and calm. A few minutes with treats and quiet handling goes a long way. Puppies who learn that grooming is safe tend to become dogs who genuinely don’t mind it — which makes life considerably easier as the coat grows.
Once grooming becomes part of your weekly rhythm, it stops feeling like a chore and starts feeling like decent one-on-one time with your dog. Most Cocker owners find their puppies settle into it quite happily once the routine clicks. If you’re building your kit from scratch, the Lords and Labradors puppy grooming collection has everything you need, with tools chosen to suit younger, more sensitive coats.
Feeding, health checks, and the little things that keep a Cocker puppy thriving
Getting the small, everyday things right is what good Cocker Spaniel puppy care is really built on. Not the big, dramatic moments — the quiet routines that tick along in the background and make more difference than you’d expect. Here are the core areas to stay on top of:
Feeding portions: Follow your breeder or vet’s guidance on quantities, and revisit them as your puppy grows. Cockers will happily eat past full, so it’s worth being consistent rather than generous.
Treats: Keep them small and factor them into the day’s food allowance. Cocker Spaniel puppy training works best when treats feel like a genuine reward, not just a habit — so save them for moments that earn them.
Ear checks: Those gorgeous floppy ears trap warmth and moisture, which makes them a prime spot for infection. Lift and check them a few times a week, and clean gently with a vet-approved solution when needed. It’s one of the most overlooked parts of Cocker Spaniel puppy grooming, and one of the most important.
Teething: Puppies chew because they need to, not because they’re being difficult. A good chew toy redirects that instinct away from your furniture and supports healthy teeth and gums at the same time.
Reading your puppy’s signals: Sniffing around, sudden restlessness, or a dip in energy are your puppy’s way of saying they need a toilet break, a nap, or both. The sooner you learn to spot these cues, the easier your days become.
When to call the vet: Lethargy, vomiting, loose stools lasting more than 24 hours, or a reluctance to eat are all worth a prompt call to your vet. Early is always better.
These habits seem small in isolation, but together they lay the groundwork for a healthy, settled dog. If you’re still pulling your kit together, the Lords and Labradors puppy essentials collection is a good place to find food bowls, chews, and grooming tools that will actually get used.
The essential Cocker Spaniel puppy kit: what you actually need
Before your puppy arrives, it’s easy to fill your basket with things that look adorable. In reality, a good cocker spaniel puppy guide always comes back to the same idea: buy the basics first, then add extras once you know your puppy’s habits and preferences. This simple cocker spaniel puppy checklist will cover what you’ll actually use from day one.
Sleeping and containment
A cosy, washable bed or crate mat, ideally with supportive sides for a puppy who loves to curl up
A crate or puppy pen to create a calm little den and help with toilet training
A blanket that smells like their mum or littermates, which can be a real comfort during those first unsettled nights
Feeding and hydration
Sturdy food and water bowls that won’t tip over easily
A supply of the same food your breeder has been feeding, as sudden changes can upset a puppy’s tummy
Walking and training
A soft harness and lightweight lead for early practice and short outings once your puppy is ready
Grooming
A soft slicker brush and wide-tooth comb, because cocker spaniel puppy grooming is much easier when you start gently and consistently
Ear cleaning solution and cotton pads for regular checks around those lovely floppy ears
Play and enrichment
A few safe chew toys for teething, especially if you’d rather save your table legs and slippers
A snuffle mat or simple puzzle toy to keep a bright little Cocker busy in a healthy way
Comfort items
A puppy-safe comforter toy for naps and bedtime
If you have these essentials ready before collection day, settling in feels much calmer for both of you. And if you want an easy starting point, the Lords and Labradors puppy starter packs are a helpful way to pull together the pieces you’re most likely to need.
How to settle in and build a happy routine from day one
The first few weeks with a Cocker Spaniel puppy can feel like a blur of accidents, ear-flapping zoomies, and wondering if you’ll ever sleep past 6am again. The good news is that routine is your best friend right now, and it really doesn’t need to be complicated.
Start simple. Wake up at the same time each morning, take your puppy straight outside, then move into breakfast, a short play session, and a nap. Cocker Spaniels are sociable and clever, but they genuinely thrive on predictability. Knowing what’s coming next helps them feel secure, which means less whining, less chewing, and a noticeably calmer dog overall.
Keep mealtimes consistent and calm. If you have other pets at home, Ohio State University’s guidance on introducing a new dog recommends feeding your new puppy in a separate room at first, so your existing dog doesn’t have to worry about mealtimes. It’s a small thing that makes a real difference to how settled everyone feels. Once they’ve found their rhythm together, sharing spaces becomes much easier.
Expect setbacks. There will be days when your puppy seems to have forgotten everything, or when toilet training feels like it’s going backwards. That’s completely normal, and consistency on your end is what carries you through it.
Getting the right habits in place early — a simple grooming routine, a reliable nap schedule, a crate your puppy sees as their own calm corner — makes cocker spaniel puppy care feel far less overwhelming after those first couple of weeks. For a detailed look at exactly what to expect, our guide to bringing home a puppy walks you through the first week in full.
The chaos does settle. And the joy? That only grows.
Frequently Asked Questions
Are cocker spaniels difficult puppies?
Cocker Spaniel puppies can feel full-on, but they are not impossible when you understand what they need. They are lively, sensitive, and clever, so they do best with calm handling, short training sessions, gentle socialisation, plenty of rest, and enough mental stimulation to stop boredom turning into mischief.
What should I do in the first week with a new Cocker Spaniel puppy?
Keep the first week simple and predictable. Focus on a steady routine of toilet breaks, meals, short play sessions, naps, and calm bonding time. Set up a cosy sleeping space, introduce the crate gently, start brief grooming and lead practice at home, and avoid overwhelming your puppy with too much too soon.
Summer can feel relentless when you’re trying to keep a cat comfortable and you don’t have air conditioning to fall back on. This guide covers everything from cooling your home and encouraging your cat to drink more, to the comfort items worth trying and the signs that tell you your cat needs a little extra help. Learning how to keep cats cool in summer without AC turns out to be more straightforward than most people expect, and a few small changes can make a genuine difference to how your cat feels through the warmest months.
Why summer heat hits cats harder than you might think
Cats are remarkably good at finding a cool corner to curl up in, but when temperatures climb and your home starts to hold onto that heat, even the most laid-back cat can begin to struggle.
Unlike dogs, cats rarely pant to cool themselves down, and they can’t sweat the way we do. Their main tools are grooming and seeking out cooler surfaces — which works well enough on a mild day, but can fall short fast during a proper heatwave, especially in a flat or a south-facing home without air conditioning.
It’s also worth knowing that some cats feel the heat more than others. Flat-faced breeds like Persians and British Shorthairs have a harder time breathing in warm air at the best of times, so hot days can be genuinely uncomfortable for them. Older cats, overweight cats, and young kittens are more vulnerable too. If your cat falls into any of those categories, paying closer attention through the summer months isn’t being overprotective — it’s just sensible cat parenting.
The reassuring part? Keeping cats cool in summer without AC is far more manageable than it might seem. You don’t need specialist equipment or a complicated routine. A few thoughtful tweaks, a shaded spot they’ll actually use, and a bit of awareness around the hottest parts of the day can make a surprising difference to how your cat feels and behaves.
If you’d like a broader look at warm-weather care, our essential summer tips for pet owners pairs well with this guide.
Easy ways to keep your home cooler for your cat
You don’t need a specialist setup or expensive equipment to make a real difference to how your cat feels on a hot day. Small, consistent changes to your home environment can reduce heat build-up significantly — and help your cat stay comfortable through even the warmest spells.
Open windows safely with a screen or security latch. Fresh airflow matters, but cats will treat any gap as an open invitation. A fitted window screen or a latch that limits how far a window opens lets the breeze in while keeping your cat safely inside.
Position fans to create cross-ventilation. Place a fan at one end of a room and open a window at the other. Moving air feels cooler than still air even at the same temperature, and cats will usually find a comfortable spot in the flow on their own.
Close blinds on south-facing windows during the afternoon. Sunlight through glass heats a room faster than you’d expect. Drawing the blinds between midday and 4pm can keep things noticeably cooler with almost no effort.
Find the coolest room and make it accessible. Rooms with tiled floors, north-facing windows, or less direct sun stay cooler for longer. Leave the door open so your cat can move there whenever they need to.
Lay a cool, damp towel on a tile floor. It sounds almost too simple, but many cats will happily stretch out on a slightly damp surface without any coaxing at all.
Skip the oven during peak heat hours. Cooking generates a surprising amount of warmth. Cold meals or stovetop options keep your kitchen much more comfortable for everyone.
Once these steps become part of your morning routine, they stop feeling like effort. Keeping cats cool in summer without AC is really about working with your home rather than against it. If your cat lives indoors full-time, environment management matters even more — our indoor cat care guide has plenty more ideas to help them thrive at home throughout the year.
How to help your cat stay hydrated when it’s hot
Water plays a bigger role in keeping cats comfortable through summer than most people realise. Cats are naturally low-thirst drinkers, which means mild dehydration can creep in before any obvious signs appear. If you want to know what to look out for, our guide to cat dehydration symptoms is a handy read before the warmer months arrive.
The good news is that encouraging more drinking doesn’t have to be complicated. A few small changes around the house can make a real difference:
Spread water bowls around the home. One in the kitchen, one near a favourite napping spot, one by a sunny windowsill. The easier it is to find water, the more likely your cat is to actually drink it.
Keep water and food bowls separate. Cats instinctively prefer their water source away from where they eat. Moving them apart is a simple change that often prompts more drinking.
Top up bowls with fresh, cool water regularly. Cats notice stale water and will often walk straight past it. A quick refresh a couple of times a day goes a long way.
Try a cat water fountain. For fussy drinkers, moving water is often far more appealing. It stays cooler, stays oxygenated, and many cats who ignore a static bowl will drink happily from a fountain.
Switch to wet food during hot spells. It can contain up to 80% water, making it one of the easiest hydration boosts going — even if you usually feed dry.
Drop a few ice cubes into the bowl on very hot days. Some cats are curious enough to investigate, and it keeps the water cooler for longer.
Every cat has their own quirks around water, and that’s completely normal. If your cat is ignoring their bowl, it’s usually worth experimenting with placement, temperature, or switching to a fountain before assuming they’re just not thirsty.
Cooling mats, shaded spots, and other comfort helpers cats actually use
The most effective heat relief for cats is usually the kind they find for themselves. You can’t place a cat somewhere and expect them to stay, so the best approach is simply to set up options and let them decide.
Here are a few comfort helpers worth trying:
Cooling mats — designed to absorb body heat without needing to be chilled, they give cats a cool surface to sprawl on whenever they need it
Elevated beds — raising your cat off the floor improves airflow underneath them, which helps dissipate heat more efficiently than lying flat
Ceramic tiles — cats often seek these out naturally because the surface stays cool even when the rest of the room doesn’t
A lightly dampened towel — laid flat on a cool floor, it gives a similar effect and costs nothing to set up
Shaded hiding spots — a cardboard box tucked in a cool corner, or the space under a bed, gives cats somewhere dark and sheltered to retreat to
A fan angled toward a wall — this keeps air circulating without blasting directly at your cat, which most of them hate
Placement matters more than you might expect. Put a cooling mat somewhere your cat already gravitates toward rather than somewhere convenient for you. A favourite corner of the sofa or a shady patch of floor they already use in the afternoons is a much better bet than somewhere new. If your cat is on the cautious side, try placing a worn item of clothing nearby or dropping a few treats on the mat so they can investigate at their own pace.
Not sure whether a cooling mat is right for your cat? The Lords and Labradors guide to cooling mats for cats is a good place to start before you buy, covering how they work and what to look for.
The best setup is always the one your cat discovers and quietly claims as their own. That is really the whole point.
What to watch for: signs your cat may be too hot
Cats do love a sunny windowsill, so a warm, sleepy cat is not always a cause for concern. The key with keeping cats cool in summer is knowing when “just relaxing” starts to look more like heat stress.
A cat who feels too hot may show a few clear signs:
Panting: cats do not usually pant like dogs, so this is one of the biggest red flags
Excessive drooling: more saliva than normal can mean their body is struggling to cool down
Lethargy or unusual stillness: if your cat will not get up, seems flat, or ignores things they would normally react to, pay attention
Rapid or laboured breathing: check for breathing that looks faster, heavier, or more effortful than usual
Wobbliness or loss of balance: seeming weak, shaky, or unsteady is never something to brush off
Seeking unusual cool spots: lying on bathroom tiles, stretching out by the back door, or hiding behind the toilet can be your cat’s way of saying the house feels too warm
It can help to think about what is normal for your own cat. A lazy nap after lunch is one thing. Panting, drooling, or looking disoriented is something else entirely.
When to call your vet
If your cat is vomiting, seems confused, loses coordination, or becomes unresponsive, contact your vet straight away. These can be signs of heatstroke in cats, and it is always better to act early. While you arrange help, move them somewhere cool and quiet, offer water, and avoid forcing them to drink.
If you are working out how to keep cats cool in summer without AC, trust that small changes really do help. Most cats stay comfortable with a bit of extra care, a cooler place to rest, and close observation on hot days. If you need extra support, the Lords & Labradors cat wellbeing collection has practical options that can make summer cat care easier.
A simple summer routine that keeps your cat comfortable day to day
Keeping cats cool in summer without AC doesn’t need to be complicated. A loose daily rhythm is all it really takes, and once it becomes habit, you’ll barely think about it.
Start each morning by opening windows on opposite sides of the house to draw cooler air through before the temperature climbs. If your cat has a favourite windowsill, make sure there’s a shaded spot nearby for when the sun shifts. Cats are naturally good at finding cool corners, but they appreciate a little help getting there.
Through the afternoon, check that their water bowl is full and fresh. If they’ve been ignoring it, try moving it somewhere quieter, or add a second bowl in another room. Some cats simply drink more when their water isn’t sitting right next to their food. A cooling mat placed in their usual nap spot can also make a real difference during the warmest hours, with very little effort on anyone’s part.
In the evening, take a minute before bed to refresh the water, crack a window if it’s cooled down outside, and notice how your cat seems. Are they settled, or still restless? A calm end to the day is usually a good sign the routine is working.
None of this needs to be perfect. Some mornings you’ll forget the windows, or your cat will completely ignore the cooling mat. That’s fine. The consistency is what counts, not getting every detail right every single time. For more ways to support your pets through the warmer months, our summer survival guide for pets is well worth a read.
Frequently Asked Questions
Are cats ok in a house without AC?
Yes, many cats can be comfortable in a house without AC if you help keep the space cool and give them choices. Improve airflow, close blinds during the hottest part of the day, offer fresh water in several spots, and make sure they can reach the coolest room or a shaded resting place.
How do I keep my cat cool in 100 degree weather?
Keep your cat indoors, focus on the coolest room, and make cooling options easy to find. Use safe airflow with open windows and fans, shut blinds on sunny windows, refresh cool water often, add extra bowls or wet food, and watch closely for panting, drooling, or unusual lethargy.
Will my cat be ok in 90 degree weather?
Maybe, but it depends on your cat and how hot your home gets. Older cats, kittens, overweight cats, and flat-faced breeds can struggle more, so keep rooms shaded, water fresh, and cool resting spots available. If you notice panting, drooling, or weakness, contact your vet straight away.
If you have ever watched a cat bypass a brand new bed to squeeze into a battered delivery box, you already know that cardboard holds a very particular power over them. This article gets into the real reasons why cats like to go in boxes, from the deep-rooted instincts behind it to the surprising science that explains why boxes can actually make cats feel calmer and more secure. You will also find practical tips for making box time safer at home, plus some cosy alternatives worth knowing about.
Why do cats like to go in boxes? The short answer
If you have ever set down an empty delivery box and watched your cat claim it within seconds, you already know that cats and cardboard share a very special relationship. But why do cats like to go in boxes so reliably — regardless of age, personality, or how many perfectly good beds they have completely ignored?
The honest answer comes down to instinct. Cats are both predators and prey, which means they are hardwired to seek out small, enclosed spaces where they feel hidden, secure, and in control. A box delivers all of that at once. It is basically the feline version of a perfect afternoon.
But there is more to it than simple survival instinct. Cardboard retains warmth, which cats are naturally drawn to. Boxes offer novelty, which keeps curious, intelligent animals happily occupied. And research has actually shown that access to a box can meaningfully lower stress levels in cats, especially when they are adjusting to a new or unsettling environment.
So if your cat has commandeered every online delivery since you started shopping from home, they are not just being theatrical. They are following a deeply rooted urge that feels safe, satisfying, and entirely natural to them.
This article unpacks all of it — from the science behind why cats are attracted to boxes to practical ways you can lean into the behaviour at home. And if you want to go a step further, you can explore our full range of cat essentials for even more ways to keep your cat comfortable and content.
How boxes make cats feel safe, hidden, and in control
One of the clearest answers to why cats like to go in boxes lies in how perfectly a box suits their dual nature as both predator and prey. Inside a box, a cat can watch everything happening in the room while staying completely hidden. That combination of visibility and cover is deeply wired into how cats experience the world.
Reduced sensory overwhelm: Enclosed spaces filter out visual noise and movement, helping cats feel calmer in busier households.
Monitoring without exposure: A cat in a box can track people, other pets, and sounds without putting itself in a vulnerable position.
Ambush readiness: Even the most pampered indoor cat still carries those hunting instincts. A box keeps them poised and ready, even if the “prey” turns out to be a passing sock.
A sense of boundary and control: Cats feel safest when they can define their own space. A box creates a clear perimeter that feels entirely theirs.
Instinct, not stubbornness: That moment when your cat bypasses a plush bed to squeeze into the tiniest cardboard box in the room? That’s not cheek. That’s instinct telling them that smaller means safer.
Enclosed spaces give cats something open rooms simply cannot: a genuine sense of control over their environment. If your cat gravitates toward boxes and tight corners, they’re not being awkward — they’re following instincts that go back thousands of years. Our High Wall Bouclé Cat Bed is built with exactly that in mind, with raised, defined sides that recreate the sheltered, secure feeling cats love about boxes — just a little more comfortable for everyone involved.
What the Leiden University stress study found about boxes and feline stress
There is some genuine science behind why cats like to go in boxes. A well-known study from Leiden University looked at newly arrived shelter cats and found that simple hiding boxes seemed to help them cope better with the stress of a big change.
That matters because shelters are full of unfamiliar smells, sounds, and routines. For a cat, that can feel overwhelming. In the study, cats with access to a box generally showed lower stress scores and appeared to settle more quickly than cats without one. In other words, the box was not just somewhere to sit. It gave the cat a safe, contained space to retreat to while taking in a new environment.
A few easy takeaways from the research:
Cats with a hiding box appeared to adapt more quickly in a stressful setting
A small, enclosed space may help cats feel safer and more in control
Hiding can be a normal coping behaviour, not something “bad” that needs stopping
The idea is useful beyond shelters too, especially for new kittens, house moves, or changes in routine
The big lesson is simple: when cats can choose to tuck themselves away, they often feel more secure. That helps explain why cats like boxes so much in the first place.
At home, that does not have to mean leaving delivery boxes all over the hallway, although many cats would be thrilled with that. A cardboard box, covered bed, or snug hideaway can all offer a similar sense of comfort. If your cat likes cosy places to curl up out of sight, our cat beds collection is a helpful place to start.
Why cardboard boxes are so irresistible: texture, warmth, and novelty
Part of understanding why cats like to go in boxes comes down to the material itself. Cardboard ticks several boxes at once (pun very much intended), offering a mix of sensory rewards that are genuinely hard to resist. It’s rarely just one thing pulling them in.
Natural insulation: Cardboard traps body heat surprisingly well, creating a snug little pocket of warmth that feels immediately comforting to a cat settling in for a nap.
Scratch-friendly texture: The surface is satisfying to knead and scratch, giving cats a natural outlet for an instinct they act on every single day.
Novelty and mental stimulation: A new box arriving in the house is basically an event. Exploring it engages their curiosity and gives their brain a small but meaningful workout.
Muffled acoustics: The walls absorb surrounding sound, softening the environment and helping cats feel calmer and less overstimulated.
Familiar, neutral scent: Cardboard carries no strong or threatening smells, which makes it feel safe and approachable from the very first sniff.
Put all of that together and it’s easy to see why cat behaviour in boxes makes so much sense. Warm, tactile, quiet, and interesting all at once — it’s a pretty compelling combination. If you want to make a box even more inviting, try tucking in one of our soft cat blankets to layer up the warmth and comfort your cat is already searching for.
How to use boxes safely and keep the fun going at home
Giving your cat a cardboard box to explore is one of the easiest wins in pet parenting, but a little prep goes a long way. Before you set one down, check it over properly. Remove any staples, packing tape, or sharp folded edges that could catch a paw or scratch a nose, and give it a quick sniff while you’re at it. Boxes that have held cleaning products or heavily scented goods are best left in the recycling.
Once it passes the check, placement matters more than you might expect. Tuck it somewhere quiet, away from busy hallways or noisy appliances. Cats are drawn to boxes because they feel hidden and in control, so dropping one in the middle of a well-trafficked room rather misses the point.
It’s also worth keeping an eye on chewing. Most cats will sniff, knead, and generally make themselves at home without much drama, but if yours is tearing off chunks and swallowing them, it’s time to swap things out for something safer.
When you want a longer-lasting version of the same comfort, cat tunnels, enclosed hideaway beds, and soft-sided dens deliver everything a cardboard box does: warmth, shelter, and that deeply satisfying tucked-in feeling. They’re washable, sturdier, and far tidier to have around the house. The instinct behind why cats like to go in boxes stays exactly the same. You’re just giving it a proper home.
Pros and Cons of Sending Your Dog Away for Training
Weighing up the pros and cons of sending your dog away for training is one of those decisions that feels bigger the longer you sit with it, especially if you’re already exhausted by problem behaviours and running low on ideas. This article walks you through what board and train actually involves, the real benefits and the genuine limitations, and how to tell whether it suits your dog and your life. You’ll also find practical guidance on choosing a reputable trainer and what to try if a residential programme isn’t the right fit.
What sending your dog away for training actually means
Board and train, residential training, dog training camp — there are plenty of names for it, but the idea is essentially the same. Your dog goes to live with a professional trainer for a set period, usually somewhere between one and four weeks, and they work through specific behaviours together during that time.
If you’re in the thick of it with a dog who pulls on every walk, bounces off every visitor, or simply cannot seem to settle, the whole concept can sound almost too good to be true. And for some dogs and some families, it genuinely does make a real difference.
During a typical stay, your dog will live in the trainer’s home or a dedicated facility and receive structured sessions throughout the day. The focus might be basic obedience, loose lead walking, recall, or working through reactivity and anxiety. The better programmes also build in time for everyday life skills — including learning to settle calmly in a crate. If that’s something you want your dog to get comfortable with, our introduction to dog crates is a helpful place to start.
Sending your dog away for training tends to suit a few types of dogs in particular: puppies getting their foundations right, adolescents going through a chaotic phase, or adult dogs with deeply ingrained habits their owners haven’t been able to shift at home.
What it isn’t, though, is a hands-off permanent fix. The trainer does the groundwork, but you’re still very much part of the equation once your dog comes home. Knowing what to expect from the outset makes the whole experience far more useful — and far less likely to end in frustration. That’s exactly what the rest of this article is here to help with.
The upsides: when a training stay can really help
There are real, meaningful advantages in the pros and cons of sending your dog away for training discussion. For the right dog, and with the right trainer, a board and train stay can give you a stronger starting point than trying to fit training around school runs, late meetings, and a dog who is already overexcited by teatime.
Here are some of the biggest upsides:
Intensive daily repetition: Dogs learn through practice. In a residential programme, your dog may get several short, focused sessions each day, which often helps new habits settle in faster than a weekly class or the odd five minutes at home.
Faster progress on specific behaviours: If lead pulling, poor recall, barking at visitors, or jumping up has become an everyday frustration, that extra consistency can help shift things. It is not magic, but it can move you out of the stuck stage.
Professional handling for dogs that need more structure: Some dogs are wonderfully clever but a bit all over the place. Others become reactive, overstimulated, or hard to settle. A skilled trainer can spot patterns early, manage triggers carefully, and keep sessions clear and calm.
A simpler learning environment: Home is full of distractions. The post arrives, the children race through the hallway, the neighbour’s cat appears, and your training plan vanishes. A well-run training stay can strip some of that back so your dog can focus.
A helpful reset for overwhelmed owners: Real life happens. A new baby, illness, moving house, or a rough patch at work can make consistency really hard. Sending dog away for training can help lay groundwork while you get back on track.
Humane, reward-based work in experienced hands: This paper explains the wider conversation around training methods and notes that reward-based training methods are effective for helping manage or prevent behavioral problems in companion dogs. What matters in practice is choosing a trainer who is transparent, kind, and consistent in how they handle dogs day to day.
That said, the board and train pros and cons are never one-size-fits-all. These benefits are strongest when the trainer is genuinely skilled and your dog suits the format. A sociable, adaptable dog may settle in beautifully. A very anxious or separation-sensitive dog may find the whole experience harder than helpful.
Before you book anything, it is worth brushing up on your dog’s body language. It can help you judge whether your dog is coping confidently or quietly feeling overwhelmed, which is a big part of deciding whether dog board and train training is truly the right fit.
The downsides: cost, stress, and why results can fade at home
Board and train programmes can be genuinely transformative, but they come with real limitations worth understanding before you commit. Knowing the drawbacks isn’t about talking yourself out of it. It’s about going in with clear expectations so you can choose the right programme and actually get the most from it.
The three main drawbacks to consider:
The cost can be significant. Residential programmes typically run anywhere from £1,500 to £3,500 or more, depending on the trainer, location, and length of stay. That’s a serious investment, and it doesn’t always include follow-up sessions or owner coaching once your dog is back home.
Some dogs find the separation genuinely hard. Not every dog settles easily into a new environment away from their family. Anxious breeds, dogs with attachment sensitivities, or those who haven’t spent much time away from home can find the experience stressful, regardless of how good the facility is. It’s worth being honest about your dog’s temperament before you book.
Results can fade quickly without proper follow-through. This is probably the most overlooked downside of sending your dog away for training. If the programme doesn’t include structured handover coaching for you as the owner, the progress can unravel within weeks. Dogs learn behaviour in context, and a professional training environment is a world away from your living room, your routine, and the particular chaos of daily life with your family.
Worth knowing: A dog can learn to sit reliably in a training facility and then appear to forget it completely once they’re home. That’s not a failure on the dog’s part. It’s what happens when the environment and the reinforcement change overnight.
None of these drawbacks are reasons to rule out a board and train programme entirely. They’re reasons to ask better questions before you sign up. A reputable programme will include meaningful owner coaching at the end, not just a handover sheet and a wave goodbye. Because however well your dog has done, the training only sticks if you’re equipped to carry it forward once they’re back on the sofa with you.
How to know if a board and train programme is the right fit
Board and train isn’t a one-size-fits-all solution, and what works brilliantly for one dog can feel completely overwhelming for another. Age, temperament, the severity of the behaviour, and what your home life actually looks like all play a part when you’re weighing up the pros and cons of sending your dog away for training.
Board and train may be a good fit if…
Your dog has severe leash reactivity that needs consistent, immersive work beyond what weekly classes can offer
Your schedule is genuinely hectic and daily training practice is hard to sustain
Your dog is confident, sociable, and settles easily in new environments
You’re dealing with a specific, complex behaviour that needs expert input quickly
Your dog is a young adult with established problem behaviours that feel unmanageable at home
It may not be the right choice if…
Your dog is very young and still building trust and attachment with you
You have a shy or anxious dog who finds being away from home deeply distressing
The issue is rooted in your household dynamic, which a trainer working remotely simply can’t address
Your dog has a history of trauma or multiple rehoming experiences
You’re unlikely to follow through with the trainer’s plan once your dog is back home
Worth knowing: A dog’s background shapes how they respond to intensive away-from-home training more than most people realise. Whether your dog came from a breeder or a rescue can influence their confidence, attachment style, and ability to adapt. Our guide to breeders vs. rescues is a useful starting point for understanding how your dog’s origins might shape their training needs.
When in doubt, speak with a qualified trainer before committing. Advice tailored to your specific dog is always worth getting.
What to look for in a trainer or training facility
Choosing the right trainer matters just as much as choosing the right programme. A well-run facility with experienced, ethical trainers can make all the difference between lasting results and a stressful experience for everyone involved — so when you’re weighing up the pros and cons of sending your dog away for training, this part of the decision deserves just as much thought as the programme itself. Knowing what to look for puts you firmly in the driving seat.
Here’s what to check before you commit:
Recognised qualifications or accreditations. Look for trainers affiliated with bodies like the Animal Behaviour and Training Council (ABTC) or the Association of Pet Dog Trainers (APDT). These aren’t just letters after a name — they signal real accountability.
Force-free, positive reinforcement methods. Any reputable trainer should be able to explain their approach clearly and confidently. Reward-based training is not only kinder, it tends to stick far better long-term.
Transparent daily routines. Ask exactly how your dog will spend their day. Meal times, training sessions, rest periods, socialisation — a good facility will answer without hesitation.
Safe, clean kennel environments. Your dog needs a comfortable, secure space to rest and decompress between sessions. If you’re unsure what a well-set-up kennel should look like, Lords & Labradors’ expert guide to dog cages is a genuinely useful reference.
Regular updates throughout the stay. Photos, short videos, written progress notes — these aren’t extras, they’re a reasonable expectation. A good trainer wants you in the loop.
A proper handover plan. Without one, results fade quickly. The best programmes include dedicated time to coach you on maintaining behaviours once your dog is home.
The option to visit or ask questions before booking. A pre-visit or introductory call should always be available.
Red flag: Any trainer who won’t let you see the facility or observe a session beforehand is worth walking away from.
A reputable trainer will welcome your questions and invite your scrutiny — that openness is itself a mark of quality. Taking the time to vet your options properly is what separates a board and train experience worth every penny from one you’ll later wish you’d skipped.
Safer alternatives: in-home training and what you can do next
For many families, sending a dog away for training simply isn’t the right fit, and that’s completely fine. Private in-home training is often a far better match, especially when the behaviours you’re tackling happen at home: jumping on guests, counter-surfing, ignoring recall in the garden. Working with a trainer in your actual space means the lessons are built around your routines, your layout, and your dog’s real triggers, not a kennel environment that looks nothing like your living room.
A good in-home trainer will observe how your dog behaves around you, spot the patterns you might not even notice, and show you exactly what to do in the moments that matter. You’re involved from day one, which means the skills are far more likely to stick. There’s no transfer gap to navigate, no trying to recreate what happened somewhere else.
If you’re not quite ready to book a trainer, there’s still plenty you can do right now. Getting the basics in place, like a consistent daily routine, clear boundaries, and a comfortable space your dog genuinely wants to settle in, makes every training effort more effective. If crate training is part of that foundation, our guide to crate training instructions walks you through it in a way that feels kind and manageable rather than stressful.
Small changes to your home setup can make a real difference too. A well-placed, cosy crate or a calm corner your dog can call their own gives them somewhere predictable to rest and decompress. That sense of security matters more than most people realise, especially when you’re building new habits together.
Whether you go for board and train, in-home sessions, or a blend of both, the best next step is simply the one you’ll actually follow through on. Start there.
SIGN UP FOR USEFUL TIPS & GUIDES STRAIGHT TO YOUR INBOX
26.08.26August 26, 2026Owning a CatFeatured
Why Do Cats Lick Each Other
Watching two cats curl up and wash each other is one of those small, lovely moments that makes a multi-cat home feel just right. This guide looks at why do cats lick each other, from the social bonds and shared scents behind allogrooming to the times when one-sided licking might be worth a closer look. You’ll also find practical tips on setting up your home so your cats can feel calm, comfortable, and genuinely at ease together.
Why do cats lick each other? A quick look at cat grooming
If you’ve ever caught your cats curled up together, giving each other a careful wash, it’s natural to wonder why do cats lick each other when they can groom themselves just fine. In most cases, it’s a lovely, normal part of cat grooming behavior called social grooming.
When cats groom each other, they’re not just tidying up. They’re building trust, sharing comfort, and showing that they feel relaxed enough to be close. You’ll often notice them licking around the head, ears, or neck, which are tricky spots to clean alone. So yes, there’s a practical side, but the bigger message is usually affection and bonding.
This starts early. Mother cats lick their kittens to clean them, soothe them, and help them feel secure. As cats grow, that same behaviour can carry into adult relationships, which helps explain why cats lick each other’s fur when they’ve formed a strong bond at home.
So if your two cats take turns grooming on the sofa or after a nap in their favourite bed, it’s usually a reassuring sign. They likely see each other as part of the same social group. If you’re also helping cats and dogs live happily together, our guide on how to get your dog and cat to get along may help.
What allogrooming means in a cat household
If you’ve ever caught one cat carefully washing another’s ears and wondered why do cats lick each other so intently, you’re looking at allogrooming. It’s simply the name for one cat grooming another, and it’s a very normal part of life in many multi-cat homes.
So, why do cats groom each other in the first place? Usually, it comes down to familiarity, comfort, and living closely together.
It helps build bonds. Grooming can be a calming, rewarding social interaction for cats, so doing it regularly may help strengthen their connection over time.
It creates a shared scent. When cats lick each other’s fur, they mix their scents together. That shared smell helps them recognise one another as part of the same social group.
It helps with hard-to-reach areas. The top of the head, around the ears, and the neck are awkward spots for a cat to clean alone, so a friendly housemate can step in.
It can keep the peace. In some pairs or groups, grooming seems to help smooth over small tensions and make everyone feel more settled.
It shows trust. Cats are vulnerable when they’re being groomed, so allowing another cat close in that way is often one of the loveliest cat affection signs to spot at home.
In a happy cat household, allogrooming often becomes part of the daily rhythm. It’s one of those little cat grooming behavior clues that can tell you your cats feel safe, familiar, and comfortable with each other.
Is it about love, hierarchy, or both?
The honest answer is that cat grooming behavior is rarely just one thing. When cats lick each other, it can absolutely be about affection, but it can also reflect who feels more confident, settled, or socially comfortable in the pair. So if you’ve ever wondered why do cats lick each other, the answer is often both love and social structure.
Cats may groom one another to:
strengthen a bond they already feel secure in
calm things down after a brief wobble or disagreement
share scent and reinforce a familiar group feeling at home
show social confidence, especially when one cat usually starts the grooming
comfort a companion they know well, including a sibling or long-time housemate
That’s why cat grooming behavior can look very sweet on the surface while still telling you something about the relationship underneath. One cat licking the other’s head or neck, for example, may be gentle and affectionate, but it can also show which cat tends to take the lead socially.
Worth knowing: one study on close-contact inter-cat interactions found that cats can show both affiliative and agonistic behaviors, so grooming may sit alongside tension rather than always meaning pure affection.
In other words, why do cats groom each other is not always a simple romance story. In a calm, well-set-up home, with enough space and resources like a cat scratch post, you’re more likely to see the relaxed, easy kind of grooming most pet parents hope for.
When one cat does all the licking: signs it may be stress, not just affection
Mutual grooming is usually a lovely sign that your cats feel safe and bonded together. But it’s worth paying attention when one cat is always doing the licking and the other is simply putting up with it. That kind of one-sided pattern can sometimes point to stress, anxiety, or an uneven social dynamic rather than pure affection.
Here are a few signs to watch for:
The cat being groomed flattens their ears or pulls their head away
They walk off mid-session looking relieved, not relaxed
One cat always initiates grooming, never the other way around
You notice thinning fur in certain spots from repeated, concentrated licking
The licking looks frantic or repetitive rather than slow and settled
The recipient shows tension during grooming — tail flicking, a low grumble, or a stiff body
Compulsive grooming can be a response to environmental stress. Giving cats a positive outlet for restless energy really does help, and something like a wall climber or activity centre can make a surprising difference to anxious behaviour at home.
A little one-sidedness is perfectly normal and nothing to worry about on its own. Most cats settle into their own grooming rhythms over time. But if you’re consistently noticing avoidance, tension, or licking that looks more compulsive than caring, it’s worth keeping a closer eye on things. A chat with your vet or a cat behaviourist can help you figure out what’s going on and how best to support both cats.
How to support calm, comfortable cat relationships at home
The good news is that most cats in the same household find their own rhythm over time. But there are things you can do to smooth the process along, especially if you have a newer pairing or a cat who seems a little unsettled.
Start with space. Cats feel safest when they have somewhere to retreat to that is entirely their own. If your cats share every bed, bowl, and sunny windowsill, tension can quietly build even when everything looks fine on the surface. Giving each cat a dedicated resting spot makes a real difference — not just for their comfort, but for the overall mood of the household. A cosy, enclosed bed works especially well as a personal sanctuary, somewhere a cat can decompress without another wandering in uninvited. If you are looking for something that suits each cat’s individual personality, the Lords & Labradors cat bed collection is well worth a browse.
Scratching posts are another simple win. Place them in a few different spots around the home and cats can mark their territory in a way that feels natural and low-conflict, which quietly helps keep the peace without anyone having to step in.
When it comes to encouraging closeness, let the cats lead. Grooming and licking will happen on their terms, and that is exactly how it should be. Moving them together when they seem settled apart, or hovering over interactions, can create friction rather than ease it. Step back and trust them.
Watching your cats groom each other and genuinely seem at ease together is one of the quiet joys of a multi-cat home. A little support from you goes a long way in helping them get there.
Frequently Asked Questions
What does it mean if cats lick each other?
It usually means they feel comfortable and familiar with each other. Cats often lick one another as part of social grooming, or allogrooming, which helps with bonding, shared scent, and cleaning hard-to-reach spots like the head, ears, and neck. It can also reflect social confidence within the pair.
Does the dominant cat groom the other?
Sometimes, yes. When one cat regularly starts the grooming, it can show social confidence or that they tend to take the lead in the relationship, not just affection. The bigger picture matters though, as relaxed body language and calm, mutual interactions usually suggest the grooming is comfortable and positive.
Is it good when a cat licks another cat?
Yes, in most cases it’s a good sign. Cats licking each other is often a normal, reassuring part of social grooming that shows trust, comfort, and bonding. It’s only worth watching more closely if the licking looks frantic, one-sided, or seems to make the other cat tense or uneasy.
There is something genuinely lovely about watching a dog move freely, nose down, tail up, doing exactly what they were built to do. Learning how to walk your dog without a leash takes more than just unclipping the lead, though, and this guide covers everything from checking local rules and assessing your dog’s recall to choosing the right places and building confidence one step at a time. Whether you are just starting out or looking to make off-leash walks feel easier and more reliable, there is plenty here to help you get it right.
Can you walk your dog without a leash? Start with the rules and the real-world check
The idea of walking your dog without a leash sounds wonderfully freeing — and for the right dog in the right place, it genuinely is. But before you unclip that lead, two things are worth sorting out: what the rules say, and whether your dog is actually ready for that freedom.
Start with your local leash laws, because they vary more than most people expect. Some parks allow leash-free dog walking in designated zones only, others require dogs to be on a lead at all times, and some areas have seasonal restrictions in place to protect wildlife. A quick search for your local council or park authority guidelines takes five minutes and could save you a fine or a very awkward conversation with a park warden.
Once you know what’s legally allowed, shift your focus to the practical reality. Even in a fully off-leash area, not every dog is ready for that kind of walk. A dog who reliably comes back when called in a quiet garden might completely lose the plot the moment a squirrel, a cyclist, or another dog enters the picture. That is not a failure — it is just where they are in their training right now.
A useful gut-check: if your dog spotted something exciting across a field and bolted toward it, would they come back when you called? If the answer is anything other than a confident yes, open-space off-leash walking is probably a step too soon.
It also helps to tune into how your dog is feeling before the walk even starts. A dog who is already overstimulated or on edge needs more structure, not less. Getting good at reading those early signals makes a real difference, and our dog body language guide is a great place to start.
Is your dog actually ready? The recall basics that matter most
Before you even think about how to walk your dog without a leash, it’s worth asking a more honest question: has your dog actually earned that freedom? Most dogs are ready later than their owners assume, and the gap between “mostly listens” and “genuinely reliable off lead” is bigger than it looks on a quiet Sunday morning stroll.
A solid recall means your dog comes back every single time — not just in the garden when nothing interesting is happening. It means they respond in an unfamiliar park, near other dogs, when a squirrel bolts across the path, and when a child drops a sandwich three metres away. In recall training for dogs, this is called “proofing”: practising the same cue across different places, distractions, and energy levels until the response becomes instinct rather than coincidence.
Here’s how to tell whether your dog is genuinely there yet:
Recalls reliably in at least three different outdoor environments, not just your usual route
Returns to you even when distracted by other dogs, wildlife, or an irresistible smell
Checks back in with you naturally during walks, without being prompted
Disengages from other dogs or fast-moving distractions on a single calm cue
Holds a sit or a wait briefly, even when the world around them is interesting
Responds to cues outdoors at the same level they would indoors
A clear word of caution: If your dog is reactive to other dogs, people, or traffic, has a prey drive that shuts out everything else once you’re outside, or regularly ignores cues the moment the lead comes off, they are not ready for leash-free walking yet. That is not a failure on anyone’s part. It simply means there’s more groundwork to do first, and doing it properly will make all the difference.
Once your dog clears those checkpoints, the next step is finding the right environment to start practising. And if your dog tends to bark or react on walks, it’s worth reading why dogs bark when out walking before going any further — reactivity is one of the clearest signs that a dog needs more time on the lead before earning that extra freedom.
Where off-leash walking makes sense — and where it doesn’t
Knowing how to walk your dog without a leash is only half the picture. The environment you choose matters just as much as the training itself. Even a dog with a rock-solid recall can be caught off guard by an unexpected noise, an unfamiliar dog bounding over, or a squirrel appearing from nowhere. Getting the location right gives you both the best possible chance of a good experience.
Good locations for off-leash walking
Securely fenced fields hired specifically for dog exercise
Quiet rural footpaths and bridleways where off-leash access is permitted
Designated dog exercise areas within parks
Large open spaces with good sightlines and low foot traffic
Private land where you have the owner’s permission
Places to avoid
Busy pavements, roads, or anywhere near fast-moving traffic
Crowded parks where your dog might bolt or become reactive
Wildlife-heavy areas, especially during nesting or lambing season
Beaches or open countryside with no natural boundaries
Any space where signage requires dogs to be kept on a lead
Always check local bylaws and any posted signs before letting your dog off the lead somewhere new. Rules vary a lot between locations, and what’s fine in one park may not be in the next.
Starting in quiet, low-distraction spaces gives your dog room to make good choices and helps you build confidence as a handler too. Once those early sessions feel easy, you can begin introducing slightly busier environments. Choosing the right spaces also ties into your dog’s broader health and happiness — our guide on keeping your dog physically and mentally stimulated is a great place to explore that further.
How to build confidence with gradual off-leash practice
Building off-leash confidence is a gradual process, and rushing it is the most common mistake dog owners make. If you want to learn how to walk your dog without a leash in a way that genuinely sticks, the key is earning that freedom in small, deliberate steps rather than crossing your fingers in a wide-open field.
Start with a long line. Attach a 20 to 50-foot long line and let your dog explore with real freedom while you keep a safety net in place. Government guidance on recall training recommends using a 20–50-foot long line, not a retractable leash, to work on prompt recall — and it genuinely makes a difference. Retractable leads create constant tension; long lines teach your dog to move freely and still tune in to you.
Reward spontaneous check-ins. Every time your dog glances back at you or trots over without being called, mark it with a cheerful “yes” and a treat. You’re teaching them that keeping an eye on you is always worth their while — and that lesson carries a long way.
Practise recall in low-distraction environments. An empty car park, a quiet garden, or a familiar field all work well. Keep sessions short, and always make coming back feel like the best decision your dog has made all day.
Introduce distractions gradually. Once recall feels solid in calm spaces, add one layer of difficulty at a time — another dog in the distance, a jogger passing by, an interesting smell along the hedgerow. Off-leash dog training at this stage is about building reliability, not testing limits.
Try short off-leash moments in safe, enclosed spaces. Drop the long line and give your dog a few minutes of genuine freedom. Watch their body language, and notice how quickly they respond when you call.
Extend freedom only when responsiveness stays consistent. Teaching a dog to walk without a leash takes real patience. If focus starts to slip, step back without frustration — it’s not a setback, it’s just part of the process.
Practical tip: Only move to the next stage when your dog is succeeding around 8 out of 10 times at the current one. That ratio is your green light, not the calendar.
The progression mindset is everything here. A quality training lead is your best companion in those early stages, giving your dog room to roam while keeping you connected — and the patience you put in now is exactly what makes leash-free walking genuinely enjoyable for both of you later.
What to bring for safer, happier leash-free walks
Being prepared makes a real difference when you’re figuring out how to walk your dog without a leash. A little forward planning means fewer stressful moments and more time actually enjoying the freedom together — and honestly, it just becomes second nature once you’re in the habit.
Here’s what’s worth bringing on every leash-free outing:
An ID tag with current contact details — even the most reliable dog can have an off day, so make sure the tag is readable and your number is still correct
A well-fitted collar or harness — something secure that won’t slip, even if your dog decides to roll in something deeply unpleasant
High-value training treats — the good stuff, like small pieces of chicken or cheese, that your dog will actually work for
A portable water bottle and travel bowl — longer, more relaxed walks mean your dog needs to stay hydrated, especially when the weather warms up
A whistle — useful for recall training because the sound carries further than your voice and stays consistent whatever mood you’re in
A long line as a safety backup — for dogs still building reliability, a longer lead lets them roam while keeping you connected. The Lords & Labradors Essentials Twill Dog Lead works well here, doubling up as a training lead for practising recall before you make the leap to fully off-leash
Having the right kit genuinely helps you feel more confident out there, and dogs pick up on that energy. Even experienced off-leash walkers keep a lead tucked away. That’s not being overcautious — that’s just knowing your dog.
Knowing when to keep the lead on
Even the most committed off-leash walkers have days where the lead just stays on. And honestly? That is completely fine.
Learning how to walk your dog without a leash is not about achieving some permanent state of freedom. It is about reading your dog honestly and making good calls in the moment. If they had a restless night, spent the morning losing their mind at squirrels through the window, or just are not tuning in to you today, that is useful information. The recall that holds beautifully on a quiet Tuesday morning may not be there on a busy Saturday afternoon near a packed farmers market, and that is worth knowing before you unclip.
Watch for the signs. A dog drifting further than usual, ignoring their name, or locking onto something in the distance is communicating clearly. They need more support right now. That is not failure. It is just an honest moment in the process, and noticing it is part of good recall training for dogs.
The same thinking applies when your environment shifts unexpectedly. A new location, a sudden crowd, or an unfamiliar dog appearing out of nowhere can change everything in seconds. Clipping the lead back on is not a step backwards. It is exactly what responsible leash-free dog walking looks like in practice.
It is always worth keeping a reliable lead on you, even on your most confident off-leash days. Our Essentials Twill Dog Lead is a solid everyday choice — sturdy when you need it, comfortable enough to forget it is in your hand.
The more honest your judgment calls, the more freedom your dog earns over time.
Frequently Asked Questions
How do I get my dog to walk without a leash?
You build up to it gradually, starting with a long line rather than unclipping straight away. Practise recall in quiet places, reward check-ins, add distractions slowly, and only give more freedom when your dog responds reliably in different environments and around real-world temptations.
Is it okay to walk your dog without a leash?
Yes, if it’s legal where you are and your dog is genuinely ready for it. Check local leash rules first, then be honest about recall, reactivity, and the environment. If your dog won’t reliably come back or the setting feels unsafe, keep the lead on.
That sudden honking, snorting sound your dog makes out of nowhere is enough to stop any pet parent’s heart, but knowing what to do when your dog is reverse sneezing makes all the difference. In this guide, we’ll walk you through why it happens, how to keep both of you calm in the moment, and which signs are worth a call to the vet. We’ll also share some simple changes you can make at home to reduce how often it happens in the first place.
What reverse sneezing looks and sounds like in dogs
If you’ve ever watched your dog suddenly freeze, stretch their neck forward, and let out a loud, honking snort like they’re trying to inhale and sneeze at the same time, you’ve almost certainly witnessed a reverse sneeze. It sounds alarming. It looks alarming. And if you had no idea what you were watching, panicking is a completely natural response.
The reassuring news? Reverse sneezing is usually harmless. It’s not a cough, not a seizure, and not a sign that something is lodged in their throat. Think of it as a reflex, much like a regular sneeze, just working in reverse. Instead of air rushing outward, your dog rapidly pulls air in through their nose, producing that distinctive snorting or honking sound that tends to stop everyone in the room.
During an episode, most dogs stand still with their elbows splayed, neck outstretched, and eyes wide open. Some look genuinely distressed, which is hard to watch even when you know what’s happening. The episode itself usually lasts anywhere from a few seconds to around a minute, and the vast majority of dogs bounce back to their normal selves almost immediately.
Paying attention to how your dog behaves before and after can tell you a lot. A dog that’s relaxed and happy on either side of the episode is generally nothing to worry about. Our guide to understanding your dog’s body language can help you get better at reading those subtle signals.
Recognising what reverse sneezing looks and sounds like is honestly half the battle — because once you know, it’s so much easier to stay calm when it happens.
Why dogs reverse sneeze in the first place
Reverse sneezing is an involuntary reflex, and it usually comes down to something irritating the soft palate, throat, or nasal passages. Think of it like a sneeze in reverse — the body trying to clear an irritant rather than signal that something is seriously wrong. Most dogs will experience it at some point, and for the vast majority, it’s completely normal.
Common triggers include:
Nasal or throat irritation from dust, pollen, or mould
Excitement or over-stimulation, like bounding over to greet you at the door
Pulling on the lead, which puts pressure on the throat
Eating or drinking too fast
Strong scents, household sprays, or air fresheners
Sudden changes in temperature or air quality
Being a flat-faced (brachycephalic) breed, such as a Pug, French Bulldog, or Cavalier King Charles Spaniel — their shorter airways make them anatomically more prone to episodes
Understanding the dog reverse sneezing causes behind an episode really does help in the moment. Once you recognise that the body is simply doing what it needs to do — the same way we might need to cough or clear our throat — it’s much easier to stay calm rather than panic. And calm is exactly what your dog needs from you.
The good news is that most episodes pass within seconds to about a minute. One moment your dog is honking away, and the next they’re trotting off like nothing happened. That’s usually all there is to it.
What to do in the moment when your dog is reverse sneezing
If you’re wondering what to do when your dog is reverse sneezing, the first thing is simple: try not to panic. It can sound dramatic, especially the first time you hear it, but many episodes are brief and pass within 30 seconds to a minute. Your calm really helps.
In the moment, focus on gentle comfort:
Stay relaxed and speak softly. Your dog will pick up on your energy. A quiet, reassuring voice can help them settle while the episode passes.
Gently stroke their throat or chest. Slow, light strokes may encourage a swallow, which can help the spasm ease naturally.
Offer a tiny sip of water if they’re settled enough to take it. Not a full bowl, and don’t force it. Sometimes a small swallow is all that’s needed.
Move them away from obvious triggers. If they’ve been sniffing dust, pulling on the lead, or sitting near strong smells like candles or cleaning sprays, guide them to a calmer spot with fresher air.
A good rule of thumb with reverse sneezing in dogs treatment at home is to keep things quiet, gentle, and low-stress. Most of the time, your job is simply to comfort rather than intervene.
What not to do:
Don’t put your fingers in your dog’s mouth
Don’t hold them down or restrain them forcefully
Don’t fuss loudly or crowd them, even if you feel worried
Once it’s over, many dogs go straight back to normal as if nothing happened. If your dog’s reverse sneezing symptoms seem to happen often, last longer than usual, or leave them distressed, that’s when it’s sensible to think about dog reverse sneezing causes and whether a vet check is the right next step.
When reverse sneezing is worth a vet call
Most of the time, reverse sneezing in dogs is completely harmless and passes within seconds. But if you start noticing that episodes are happening more often, or that your dog seems off afterwards, it’s worth paying closer attention. You know your dog better than anyone, so trust that instinct.
These are the signs that deserve a vet conversation:
Episodes happening multiple times a day, or lasting longer than a minute
Your dog seeming distressed, panicked, or wiped out afterwards
Nasal discharge, whether clear, cloudy, or discoloured
A new cough appearing alongside the reverse sneezing
Laboured or noisy breathing between episodes
Gums that look pale or slightly blue
Lethargy, low energy, or a noticeable dip in appetite
An occasional isolated episode is rarely cause for concern. A recurring or worsening pattern is always worth getting checked.
When to worry about dog reverse sneezing really comes down to that shift in pattern. A vet can look into common culprits like allergies, a low-grade infection, a foreign body in the nasal passage, or a structural issue affecting the airway. None of these are things you’d pick up at home, but all of them are very treatable when caught early. Even if everything turns out to be fine, you’ll come away with peace of mind, and that’s never wasted.
How to reduce reverse sneezing triggers at home
Once you understand what sets your dog off, a few small tweaks at home can make a real difference. If your dog tends to pull on the lead and reverse sneezes regularly, switching to a well-fitted harness is one of the easiest wins. Collar pressure on the throat is a surprisingly common trigger, and a harness removes it entirely.
Inside, it’s worth thinking about air quality too. Dust little and often, skip the heavily scented candles or plug-in air fresheners, and if you use cleaning sprays, let the room air out before your dog wanders back in. Small habits, but they stack up.
Fast eaters are also worth a closer look. Gulping food can irritate the throat and kick off an episode, so a slow feeder bowl or snuffle mat at mealtimes can genuinely help.
Beyond that, it’s worth keeping a loose mental note of when episodes happen. After a walk during high pollen season? After a boisterous play session? Spotting a pattern gives you something real to work with, whether that’s adjusting walk times or winding down play more gradually.
The reassuring truth is that most dogs live completely happily alongside the occasional reverse sneeze. Now that you know what it looks like, why it happens, and what to do in the moment, you’re already better placed to handle it calmly when it comes.
Frequently Asked Questions
How to calm down reverse sneezing in dogs?
The best way to calm reverse sneezing is to stay relaxed and gently comfort your dog while it passes. Speak softly, stroke their throat or chest, offer a tiny sip of water if they’re settled enough, and move them away from dust, strong smells, or other obvious triggers.
When to worry about reverse sneezing?
Reverse sneezing is worth worrying about if it becomes frequent, lasts longer than a minute, or your dog seems unwell afterwards. Signs that need a vet call include distress, nasal discharge, a new cough, noisy breathing between episodes, pale or blue gums, lethargy, or a drop in appetite.
What triggers reverse sneezing in dogs?
Reverse sneezing is usually triggered by irritation in the throat or nasal passages. Common causes include dust, pollen, mould, strong household scents, excitement, pulling on the lead, eating or drinking too fast, temperature changes, and being a flat-faced breed with shorter airways.
How long is too long for a dog to reverse a sneeze?
Anything lasting longer than about a minute is a sensible point to call your vet. Most reverse sneezing episodes pass within a few seconds to around a minute, and dogs usually seem completely normal again straight afterwards.
That strange stuttering sound your cat makes when a bird lands outside is one of those small, delightful mysteries that comes with sharing your home with a cat. In this article, we look at why cats chirp at birds, what the main theories behind the behaviour actually mean, and what your cat’s body language is quietly telling you while it happens. We also cover when to relax and when to pay closer attention, plus some simple ways to make life a little richer for a cat who lives for the windowsill.
What does it mean when a cat chirps at birds?
If you’ve ever caught your cat glued to the windowsill, eyes locked on a bird outside, making a strange stuttering sound you’ve never quite heard before — you already know what chirping is. It’s one of those moments that stops you mid-cup-of-tea and makes you wonder what on earth is going on in that little head.
Cat chirping is a short, rapid, high-pitched sound that sits somewhere between a trill and a stutter. It’s nothing like a meow, which cats tend to save for communicating with us, and it’s worlds away from a yowl or a hiss. You’ll often see it described as chattering too, and the two are closely related. Chattering usually involves that rapid jaw movement — almost like teeth clicking — while chirping is a touch softer and more tonal. Plenty of cats do both at the same time.
It tends to happen in a very specific moment: a bird lands on a nearby branch, hops across the garden, or flutters past a favourite window. Your cat spots it, freezes, and out comes that curious little sound. It’s almost always directed outward, at something they can see but can’t reach.
So why do cats chirp at birds? It’s worth digging into, because the answer says a lot about how your cat thinks and experiences the world. And if you’re already thinking about ways to keep your bird-obsessed cat happy indoors, we’ve got plenty of ideas to explore.
Why do cats chirp at birds? The main theories
There’s no single agreed-upon answer to why cats chirp at birds, which makes cat chattering behaviour one of the more intriguing puzzles in feline research. Several compelling theories exist, and honestly, each one tells us something a little different about how cats are wired. Scientists haven’t landed on a definitive explanation yet, so this is very much an open question — and a genuinely fascinating one.
Leading theories behind the chirp:
Predatory excitement and overstimulation. The moment your cat spots a bird outside, their hunting instincts kick in almost instantly. Cat chattering behaviour is thought to be a physical expression of that intense arousal — a kind of involuntary release when excitement builds faster than it has anywhere to go.
Frustration at not being able to reach prey. Sometimes the cat chirping at birds meaning might be surprisingly straightforward: frustration. Your cat can see exactly what they want, but the glass is in the way. That clicking, stuttering sound could be how they process the tension between wanting something and not being able to get it.
Instinctive mimicry or prey-luring behaviour. Some researchers suggest cats may imitate bird calls to draw prey closer. It’s an idea supported by observations of wild cats mimicking tamarin monkey calls in the Amazon — compelling, though still unproven in domestic cats.
Anticipation mixed with hunting instinct. Why do cats chatter at birds? It may simply be excitement and readiness colliding — your cat mentally rehearsing a hunt they can’t actually go on.
Quick insight: This behaviour tends to show up most in indoor cats watching birds through windows. If your cat has a favourite spot to lounge near the glass, they’re probably chirping there regularly. A dedicated cat bed positioned near a window gives them a comfortable perch to watch, chirp, and daydream to their heart’s content.
It’s also worth noting that research into cat vocalisation is still evolving. One peer-reviewed study found that domestic cats have a wide vocal repertoire, with up to 21 different vocalizations described in the literature — a reminder that we’re still learning a great deal about how cats communicate.
Understanding why cats make chirping noises is reassuring in itself: this behaviour is completely normal and rooted in deep instinct. Keep reading to find out what your cat’s body language is telling you when the chirping starts.
What your cat’s body language can tell you
Chirping rarely happens on its own. If you’ve ever wondered why do cats chirp at birds, the sound is only one piece of the puzzle. Your cat’s body usually tells you just as much, especially during those long garden-watching sessions from the windowsill.
Body language signals to watch for:
Tail flicking or lashing – quick flicks often mean intense focus and rising excitement
Crouching low – this classic hunting posture shows your cat is fully tuned in
Ears forward – a good sign they’re alert and engaged; ears flattening can mean frustration or overstimulation is creeping in
Fixed stare – when your cat barely blinks, they’re tracking every flutter and hop
Rapid chirping bursts – short, excited sounds often happen when the bird moves suddenly
Harmless excitement
Signs of overstimulation
Soft, steady chirping
Loud, frantic chattering
Relaxed crouch
Stiff, tense posture
Gentle tail flicks
Fast, forceful tail lashing
Taken together, these clues help explain cat chirping at birds meaning a little more clearly. A focused, excited cat is usually just enjoying the thrill of the “hunt” from a safe spot indoors. If the body gets tense and the sounds get more urgent, it may be time for a gentle distraction, like a toy or a quick play session. If you’d like to get better at spotting these cues in pets generally, our guide to reading body language cues in dogs and other animals is a helpful next read.
Should you worry if your cat chirps at birds?
For most cat owners, chirping at birds is one of those endearing little quirks that makes life with a cat so entertaining. And reassuringly, cat chirping at birds is almost always completely normal — it simply means your cat has clocked something exciting outside and their inner hunter has woken up. Nothing to worry about there.
That said, it’s worth knowing what to keep an eye on. Pay a little closer attention if you notice:
A sudden change in the sound, especially if it seems more strained or distressed than usual
Chirping paired with pacing, hiding, or visible anxiety
Repetitive vocalisation with no obvious trigger nearby, like a bird or movement at the window
Other changes alongside it, such as a shift in appetite, energy levels, or general mood
The short version: occasional chirping is healthy self-expression. Most cats genuinely enjoy the stimulation of watching birds — think of it as their version of a gripping nature documentary.
If your cat seems happy, curious, and otherwise completely themselves, there’s very little cause for concern. What matters most is that their day-to-day environment feels calm and enriching. A well-thought-out home setup — including a dedicated cat washroom space where they can retreat and feel settled — can make a real difference to an otherwise content, bird-obsessed cat.
How to support a chirpy, bird-watching cat at home
If your cat loves nothing more than pressing their nose to the glass and chattering away at every robin and pigeon that dares to land in the garden, the best thing you can do is lean into it. Bird-watching is genuinely enriching for cats, and a few simple tweaks at home can make the whole experience even better for them.
Start with a good window spot. Cats want a clear, comfortable view, ideally at height, so they can properly survey their kingdom. A wall-mounted perch like the Lords and Labradors Malmo Viewing Pod gives them a dedicated vantage point to settle in for as long as they like, without monopolising the sofa arm or teetering on a wobbly windowsill.
You can also bring a little of the outside in. A bird feeder positioned within sight of a favourite window turns an ordinary afternoon into something genuinely absorbing. Pair that with a cat-safe herb planter on the sill, some rustling foliage nearby, or even a nature documentary playing quietly in the background, and you have got a surprisingly rich little sensory world for them to enjoy.
Interactive play is worth building in too. Wand toys with feather attachments are brilliant for letting your cat act on all that pent-up predatory energy from a long chattering session. A short burst of play afterwards can leave them feeling satisfied rather than quietly wound up.
Cat chirping at birds is your cat being fully, brilliantly themselves. Your job is simply to give them the best possible seat for the show.
Frequently Asked Questions
Why does my cat make a chirping sound at birds?
Cats usually chirp at birds because seeing prey triggers a burst of hunting excitement. It can also reflect frustration when they can see a bird but cannot reach it through the window. In most cases, it is a completely normal instinctive behaviour, often paired with focused staring, crouching, and tail flicking.
Why does my cat make a chirping sound like a bird?
Cats often make a bird-like chirping sound when they spot birds or other fast-moving prey outside. The sound is linked to hunting instinct, excitement, anticipation, and sometimes frustration if the prey is out of reach. It is generally a normal feline behaviour, especially during intense window watching.
Trimming black dog nails can feel like a guessing game, but it really does not have to be. This guide walks you through how to cut dog nails that are black with confidence, covering everything from spotting the quick before you snip to choosing the right tools, handling the odd nick along the way, and building a calmer routine over time. Whether you are starting from scratch or just looking to feel less uncertain with the clippers, there is something here to help you and your dog get through nail day in one piece.
How to Tell Where the Quick Is on Black Dog Nails
The quick is the living core of your dog’s nail. It contains blood vessels and nerves, so if you catch it with the clippers, it bleeds and stings — not ideal for anyone involved. With light-coloured nails, you can usually spot it as a soft pink shadow running through the centre, which makes the whole job much more straightforward. With black nails, that shadow disappears completely, and that’s exactly why so many pet parents feel stuck before they’ve even picked up the clippers.
The good news? You don’t have to guess. You just need to slow down and read a few reliable clues.
Start by shining a small torch or your phone’s flashlight through the nail from underneath. On finer nails, this can reveal the quick as a darker oval shape within the nail. It won’t work for every dog, but it takes about three seconds to try and it’s genuinely useful when it does.
If the light doesn’t show much, nail texture becomes your next guide. Trim a tiny sliver from the tip and look at the cut surface. At first it’ll appear solid and chalky, white or grey all the way through. That’s safe ground. Keep taking small slivers, checking each time, and eventually the centre will shift. It might look darker, almost black, or you’ll notice a small grey dot appearing in the middle. That dot is your cue to stop. You’re getting close to the quick.
Nail shape tells you something before you even make a cut, too. Most dog nails curve downward and taper toward the tip, and the quick follows that same curve. It typically sits further back than you’d expect, so if the nail has a definite hook at the end, trimming just that hooked portion is usually where you want to start.
One last thing: a calm dog makes all of this much easier. When they’re tense and pulling away, it’s harder to look closely and work carefully. Keeping an eye on your dog’s body language throughout the trim helps you spot early signs of stress before things unravel.
The Tools That Make Black Nail Trims Safer and Calmer
Having the right tools ready before you start makes a real difference when you’re working with black nails. They help you make smaller, more controlled cuts, reduce the chance of catching the quick off guard, and keep the whole experience calmer for your dog from the very first snip.
Sharp scissor-style or guillotine clippers. Blunt clippers crush rather than cut cleanly, which is uncomfortable for your dog and makes it much harder to read the cut surface. Sharp blades give you a clean edge — exactly what you need when taking black nails back little by little.
A nail grinder. If clippers feel a bit too all-or-nothing, a grinder lets you remove nail gradually and gives you much finer control over how much you take off. Many dogs also find the sensation less startling than a sudden snap.
A small flashlight or phone torch. Holding a light against the top of the nail can help you spot the quick’s shadow before you cut. It doesn’t work on every dog, but it takes seconds to try and is well worth doing.
Styptic powder. Have this within arm’s reach before you begin. If you nick the quick, it works fast — and knowing it’s right there helps you stay calm rather than scrambling.
High-value treats. Something your dog doesn’t get at any other time, like a small cube of cheese or a bit of cooked chicken, makes the session feel worthwhile for them and keeps their focus in the right place.
A non-slip mat or towel. This gives your dog something to grip, helps them feel a little more settled, and means less wriggling for you to work around.
What is styptic powder? It stops minor bleeding almost instantly if you nick the quick. It’s a staple in any dog nail trimming kit, so always have it to hand before you start.
None of these are hard to find, and together they genuinely change how confident you feel tackling black nails at home. If you’re building out your grooming kit, you’ll find plenty of dog care essentials over at Lords and Labradors. Good preparation really is the best dog nail trimming tip there is — have everything ready before your dog sits down, and you’re already off to a better start.
A Step-by-Step Way to Cut Black Dog Nails Without Hitting the Quick
Once you understand how to read the nail, the actual cutting becomes far less daunting. Trimming black dog nails safely is really about slowing down, taking tiny slices, and trusting what you see rather than guessing where to stop.
Settle your dog before you pick up the clippers. Sit on the floor together, offer a few treats, and let them sniff the clippers. A calm start makes everything that follows easier.
Find a comfortable position for you both. Some dogs are happy lying on their side while you kneel beside them. Others prefer sitting upright with a paw gently lifted. Work with your dog rather than forcing a hold that makes them tense.
Press the toe pad gently to extend one nail at a time. This gives you a clear view and keeps the paw steady without gripping so tight that your dog pulls away.
Start with a small snip at a slight angle. Take just the very tip off. You’re not trying to do it all in one go — you’re just getting started.
Check the cut surface before you snip again. Hold the nail up to the light and look at the cross-section. A chalky white or grey centre means you’re well away from the quick and safe to continue.
Keep going in tiny increments, checking every time. As you get closer, the centre of the nail will start to shift. The moment you see a darker grey or black dot beginning to appear in the middle, stop on that nail. That dot is the quick showing itself, and one slice further could cause real discomfort.
Reward your dog between nails, not just at the end. A treat after each one keeps things positive and gives your dog a natural moment to breathe and reset.
Stop if your dog tells you they’ve had enough. Panting, pulling the paw away, or going rigid are all signs to pause — even if you’ve only done two nails. Pushing through rarely ends well.
Split the session across days if that’s what your dog needs. Front paws today, back paws tomorrow. There’s no rule that says all twenty nails have to happen at once, and honestly, your dog will thank you for it.
A note on the black dog nail quick:
In lighter nails, the quick shows up as a visible pink line running through the centre. In black nails, you simply can’t see it from the outside, which is why reading the cross-section matters so much. A small dark dot or a soft pale ring appearing in the centre after a snip is your signal to stop. That’s the quick beginning to surface, and going any further risks pain and bleeding.
The whole point of learning how to cut dog nails that are black is building confidence through small wins, not racing to finish. Three nails done calmly is genuinely better than twenty done with your dog stressed and wriggling. If your dog tends to find grooming difficult, it’s worth thinking about how you handle other anxious moments together — the same approach that helps keep dogs calm during stressful situations like fireworks applies just as well here.
What to Do if You Nick the Quick
Nicking the quick when you’re learning how to cut dog nails that are black happens to almost every pet parent at some point. It looks more dramatic than it is — a small dark red bleed from the tip of the nail — and it tends to startle you far more than it hurts your dog. Take a breath. You’ve got this.
Here’s exactly what to do:
Stop trimming and set the clippers down.
Apply styptic powder or cornstarch directly to the nail tip.
Hold gentle pressure with a clean cloth or your finger for 30 to 60 seconds.
Keep your dog calm and still with a quiet voice and a soft, steady touch.
Once the bleeding slows, check the nail before letting your dog wander off.
Styptic powder is a clotting agent that stops bleeding quickly — and it’s the single most useful thing to have nearby during any nail trim. Purdue University’s veterinary guidance specifically recommends that you keep styptic powder available when clipping a pet’s nails to stop bleeding if you clip too short. Pick some up before your next session if you don’t already have it.
For aftercare, keep the paw clean and dry for the rest of the day. Avoid rough-surface walks for 24 hours, and check back on the nail over the next day or so for any redness or swelling.
If the bleeding hasn’t slowed within 5 to 10 minutes, or your dog seems to be in genuine pain rather than just briefly unsettled, call your vet. That’s the sensible thing to do — not a sign that anything has gone seriously wrong.
How to Make Nail Trims Easier Next Time
The biggest dog nail trimming tip anyone can give you? Trim more often. It sounds almost too simple, but when you’re working out how to cut dog nails that are black, consistency matters just as much as technique. Dogs who seem completely impossible to trim can surprise you once a calm routine clicks into place.
Trim every 3 to 4 weeks. Regular sessions keep nails at a manageable length and make each one shorter and less stressful — for both of you.
Reward after every single nail. Use something your dog genuinely loves, like a small piece of cheese or chicken, and give it the moment you finish each nail rather than saving it until the end.
Handle paws between sessions. A minute or two of gentle paw touching while you’re watching TV or winding down costs nothing and builds real tolerance without any pressure attached.
Take a little, more often. Small snips every few weeks feel far less daunting than trying to tackle seriously overgrown nails after a long gap — and you’ll stay well clear of the quick.
Keep the setup consistent. Same spot, same time of day, same calm energy. Dogs read routine surprisingly well, and familiarity genuinely helps settle nerves.
Start puppies early. Even pretend trims with no cutting involved help young dogs learn that paw handling is completely normal.
Pro tip: Trimming a tiny amount every 2 to 3 weeks is far safer than waiting until nails are overgrown — especially when you’re navigating the black dog nail quick.
Think of each session as a training opportunity rather than a chore to get through. Dogs who once wriggled, whined, or flatly refused can absolutely learn to sit calmly for a trim. It just takes consistency, patience, and a well-stocked treat supply.
When to Ask a Groomer or Vet for Help
Sometimes, the most caring thing you can do is hand the clippers to someone else. If you have worked through how to cut dog nails that are black and still feel uncertain, that is completely fine. Some dogs have nails that are genuinely thick, curved, or difficult to read, even for owners who have been doing this for years. Others simply will not settle, no matter how many treats you offer or how carefully you have set the scene.
Professional groomers trim nails every single day. They know how to read the nail, position the dog, and work with a calm confidence that only comes with real experience. Booking a session or two is not admitting defeat. It is a smart way to watch someone skilled work up close, ask questions, and pick up the kind of practical knowledge that no article can fully replace.
Your vet is equally worth considering, especially if your dog has unusually thick nails, any history of paw injuries, or anxiety that makes handling genuinely difficult. They can trim safely and point you toward ways to make future sessions less stressful for your dog and for you.
The most important shift is this: professional help is a starting point, not a last resort. Once your dog has had a calm, positive experience with someone who knows exactly what they are doing, you will often find that the next trim at home feels a little easier too.
Frequently Asked Questions
How do you know where the quick is on black dog nails?
You find the quick on black dog nails by trimming tiny slivers and checking the cut surface each time. A chalky white or grey centre is usually safe; when you start to see a darker dot or change in the middle, stop. A torch underneath the nail can sometimes help too.
Can I trim my dog’s black nails?
Yes, you can trim your dog’s black nails if you go slowly and take very small amounts at a time. The safest approach is to remove the hooked tip first, check the cut surface after every snip, and stop as soon as you see a darker centre appearing.
How do you trim severely overgrown dog nails?
Trim severely overgrown dog nails by taking off only a little at a time and spreading the work over multiple sessions if needed. Tiny, regular trims every 2 to 4 weeks are safer than one big cut, especially with black nails, because they help you avoid catching the quick.